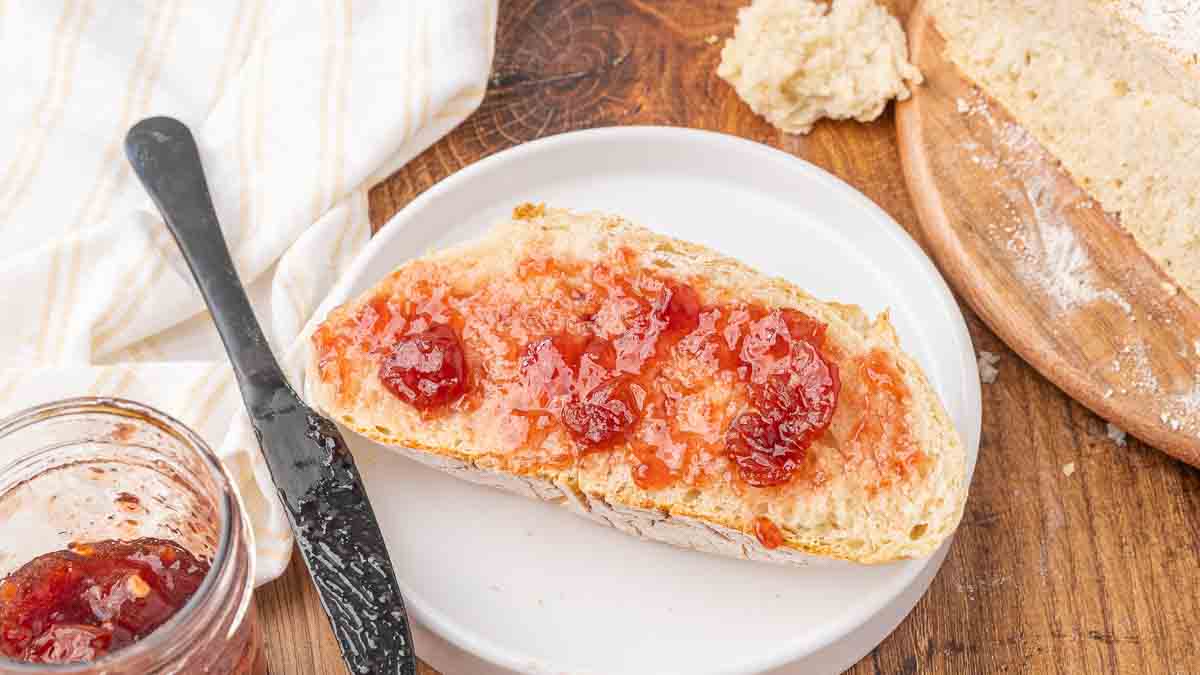
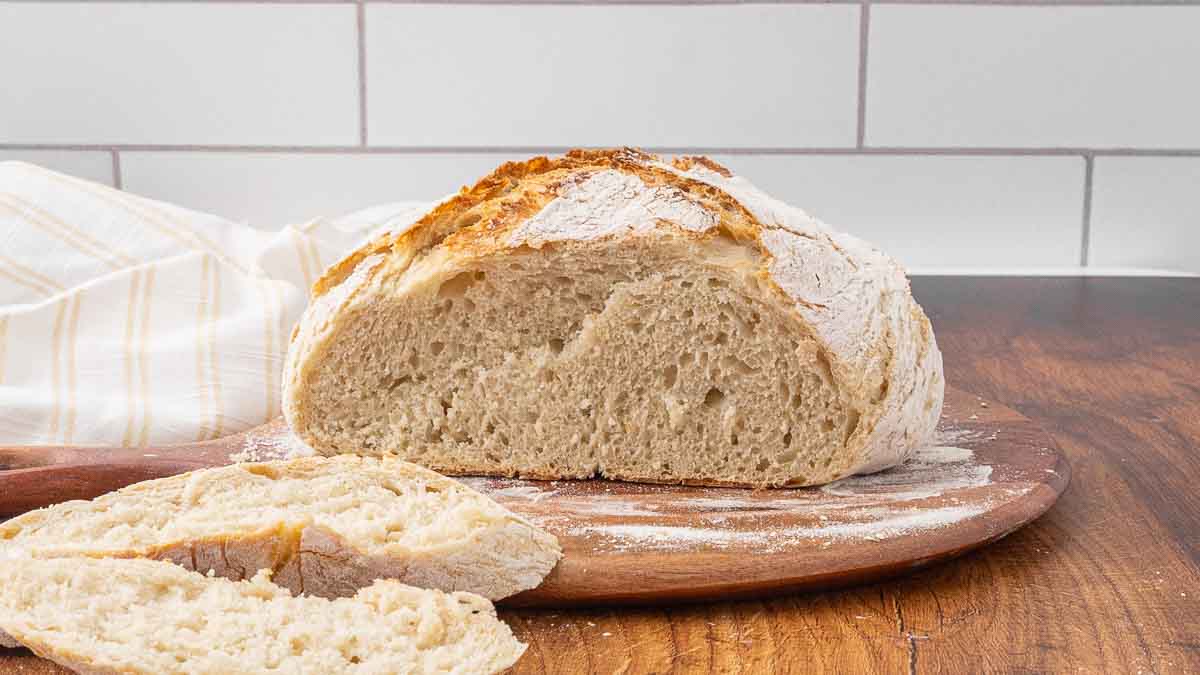
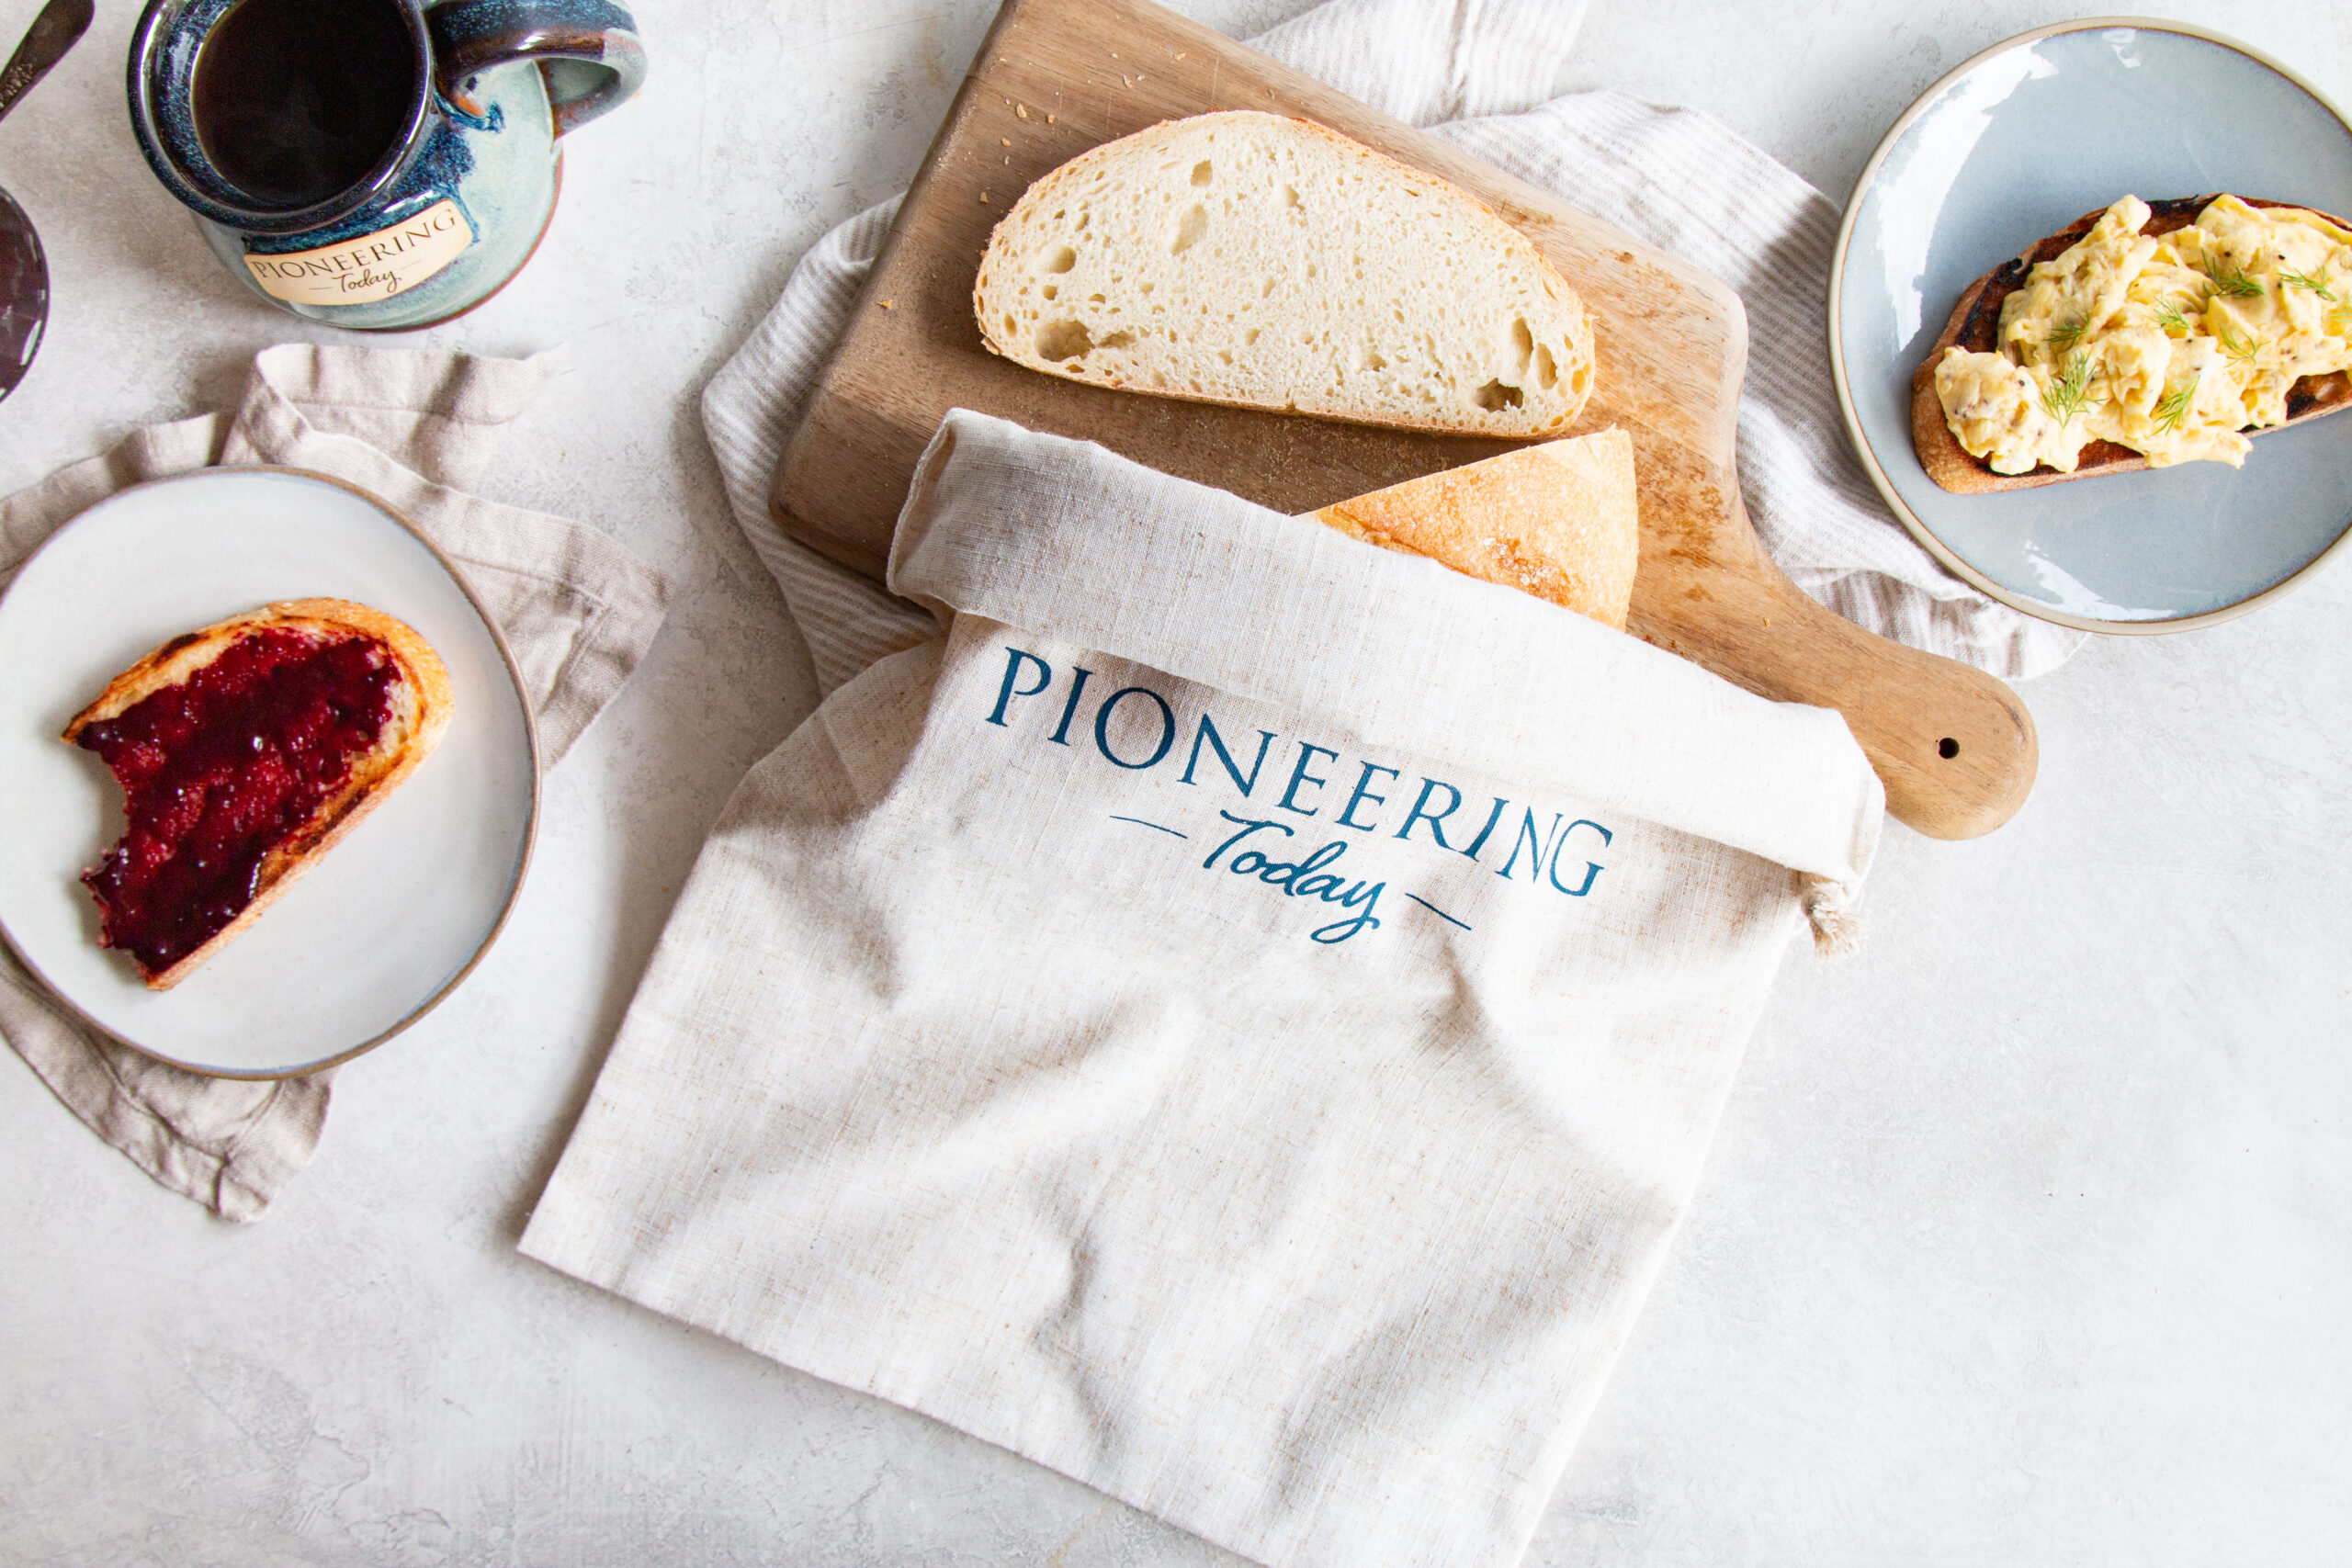
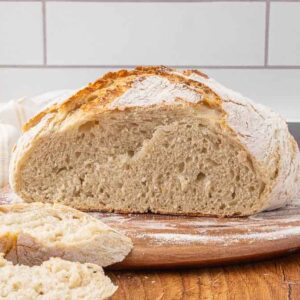
Golden, crackly crust on the outside. Soft, chewy crumb on the inside. This no-knead artisan bread delivers bakery-style results with almost no hands-on work.
With a simple mix-and-rest method, you can bake a rustic loaf at home that tastes as if it came straight from an old-fashioned bread oven. It makes the best avocado toast and sandwiches, serve it with cream of broccoli soup with cheese, or simply slather it with butter while still warm.
Quick Look at This Recipe
- ✅ Recipe Name: No Knead Artisan Bread
- 🕒 Ready In: 14 to 18 hours (mostly resting time)
- 🍞 Method: Dutch oven baked
- 👪 Yield: 1 loaf (10 to 12 slices)
- 🍽 Calories: Approx. 160 per slice
- 🥄 Tools: Bowl, spoon, Dutch oven, parchment paper
- ❄️ Freezer Friendly: Yes
- 📖 Dietary Info: Vegetarian, dairy-free
- ⭐ Why You'll Love It: Easy homemade bread with bakery texture and flavor
- 👩🍳 Tip: Let the loaf cool fully before slicing for the best crumb texture
✅ Summarize this recipe, or ask for recipe substitutions and dietary information with AI.
Watch Me Make This Recipe
What Makes This Recipe Unique?
- Simple - While I love my Grandma's whole wheat dinner rolls, I love the simplicity of this recipe. No mixer or bread machine is needed, and no kneading is required. It takes just 5 minutes a day and uses only 5 ingredients.
- Impressive Results - Tastes far better than store-bought bread, showcasing a crispy artisan crust with tender interior. Everything bread should be, without all the work!
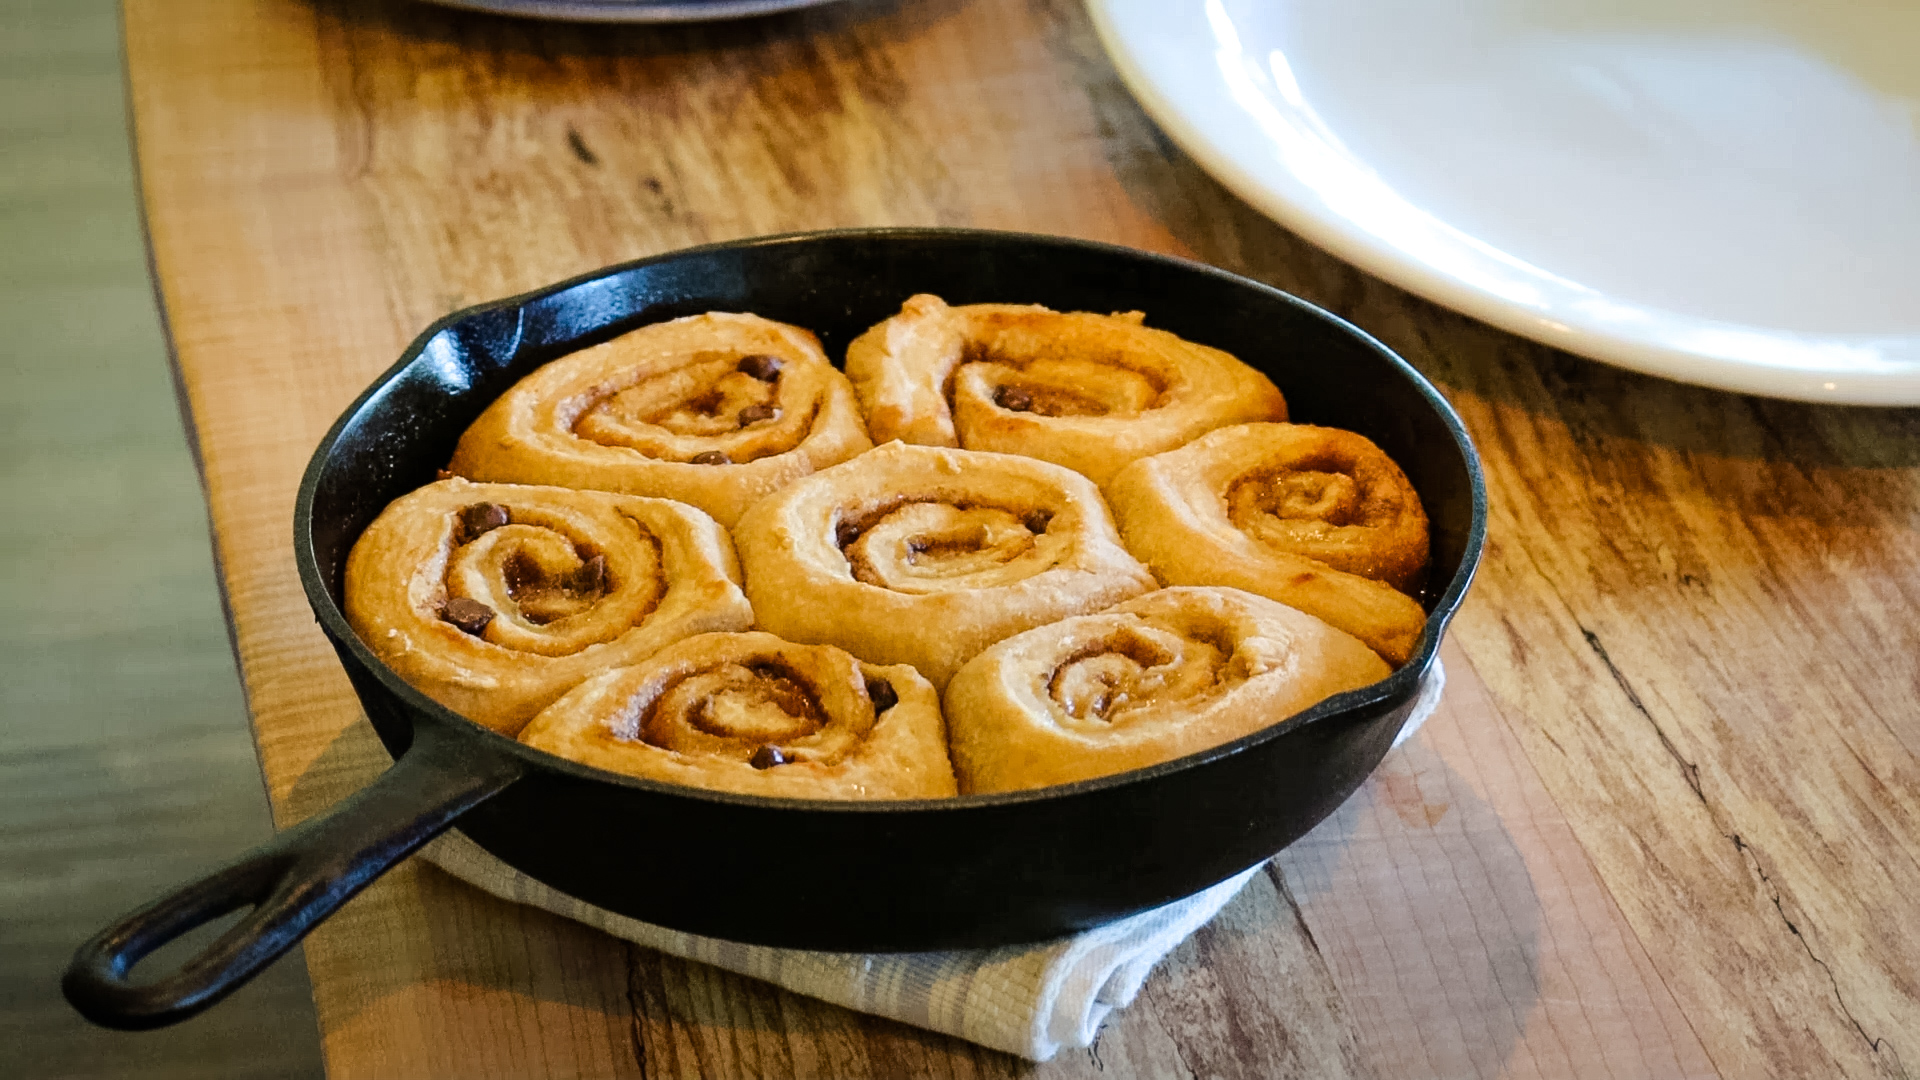
- Versatile - If you have my book Hand Made: the Modern Guide to Made-from-Scratch Living, you’ll recognize this from page 44 as my Master Dough Recipe. The dough can be used for rolls, breadsticks, focaccia, as a pizza crust for this chicken Alfredo pizza recipe, this steamed bao bun recipe, or even these chocolate cinnamon rolls.
- Gift Idea - A freshly baked loaf of bread with homemade no-pectin strawberry jam makes a thoughtful gift. But, don’t gatekeep this bread recipe. Add this bread mix in a jar so the receiver can make more. I guarantee the first loaf won’t last them long!
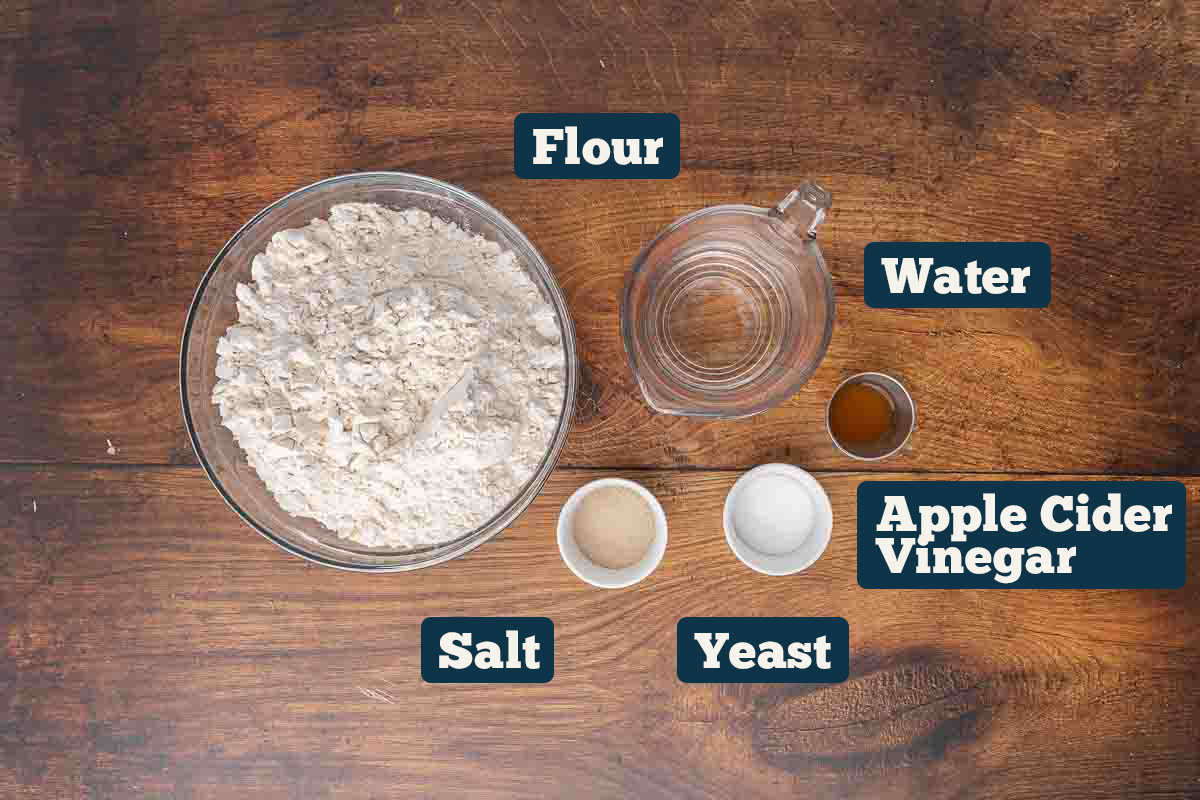
Key Ingredients:
A full ingredients list, including measurements, can be found in the recipe card below.
- Flour - This basic recipe calls for all-purpose flour, but you can refer to the recipe substitutions below for other options. To avoid measuring errors, spoon flour into the measuring cup and then level.
- Water - Make sure water is warm enough to activate yeast, but not so hot that it kills it. If using a thermometer about 115°F or warm to the inside of your wrist. You’ll also want to be sure your water is free of chlorine or other contaminants, as this can affect baking.
- Vinegar - I use my homemade apple cider vinegar, but any vinegar will do; it helps create a better texture in no-knead bread recipes.
- Yeast - I use active dry yeast but instant will work too. Store your yeast in the fridge to help prolong shelf life.
Recipe Substitutions and Variations
One of the best things about cooking from scratch is the flexibility it offers. Check out my full list of ingredient substitutions for all your baking and cooking needs.
- Bread Flour - Use in place of all-purpose flour for a chewier loaf.
- Whole Wheat Flour - You can use whole wheat or freshly milled flour, but reduce flour to 5 1/2 cups and increase only if the dough is too wet and won’t hold any type of shape. I’ve successfully done half whole wheat and half all-purpose at the full 6 and 1/2 cups.
- Optional Add-Ins - One tablespoon of honey can be added for browning and slight sweetness. One tablespoon of olive oil can be used for a softer crumb. For a customized flavor, add herbs such as dried rosemary or thyme, roasted garlic, or shredded cheese.
Recipe Instructions
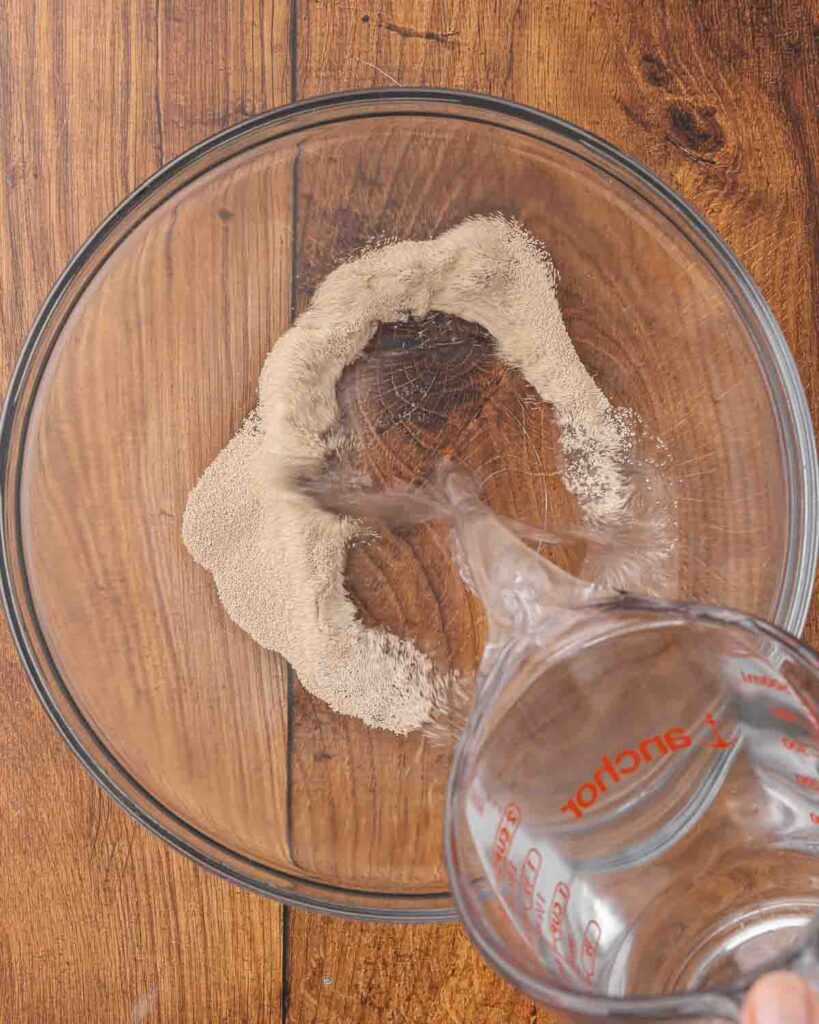
Step 1: Mix together yeast and water in a large bowl. Allow yeast to turn bubbly (about 3 to 6 minutes).
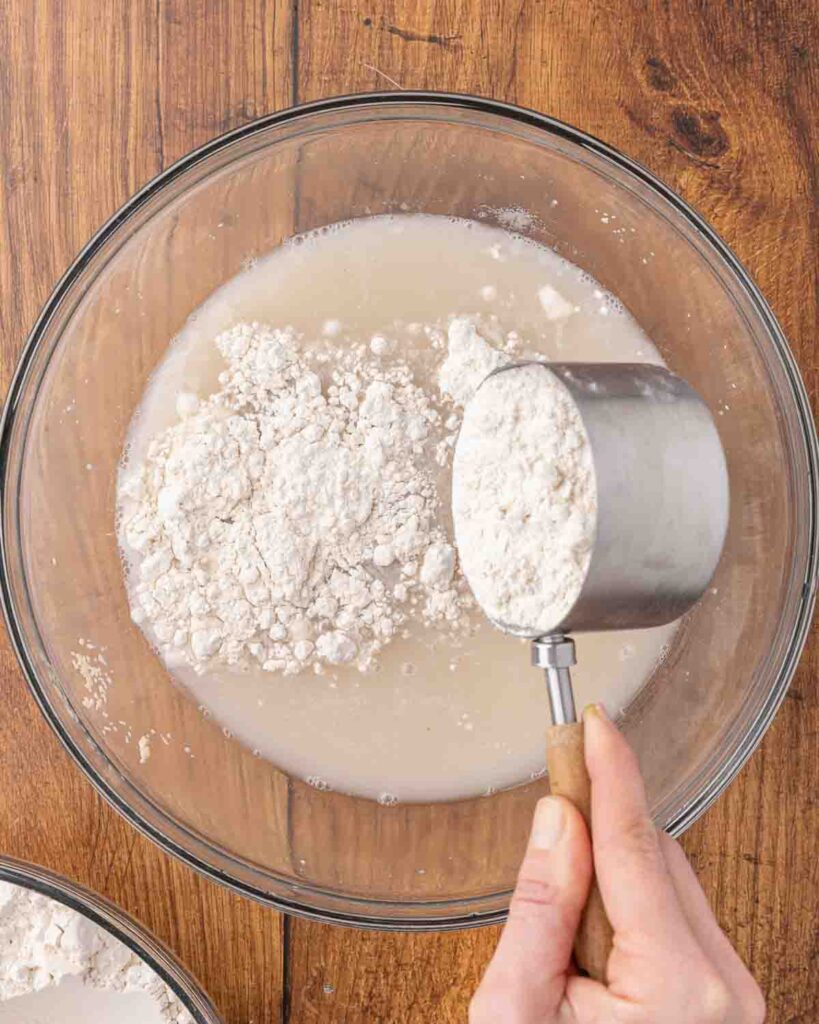
Step 2: Stir in vinegar, salt, and three cups of flour.
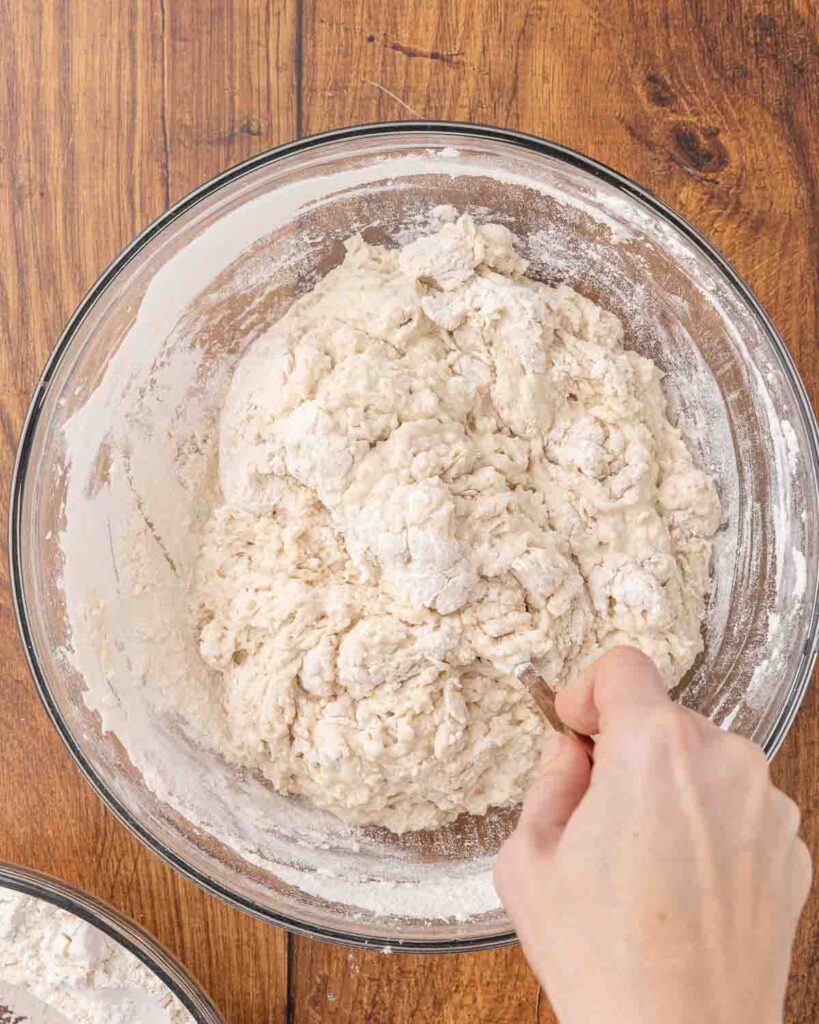
Step 3: Incorporate the remaining flour one cup at a time. Only add the extra 1/2 cup if your dough doesn’t seem to be holding together (see video for a demonstration).
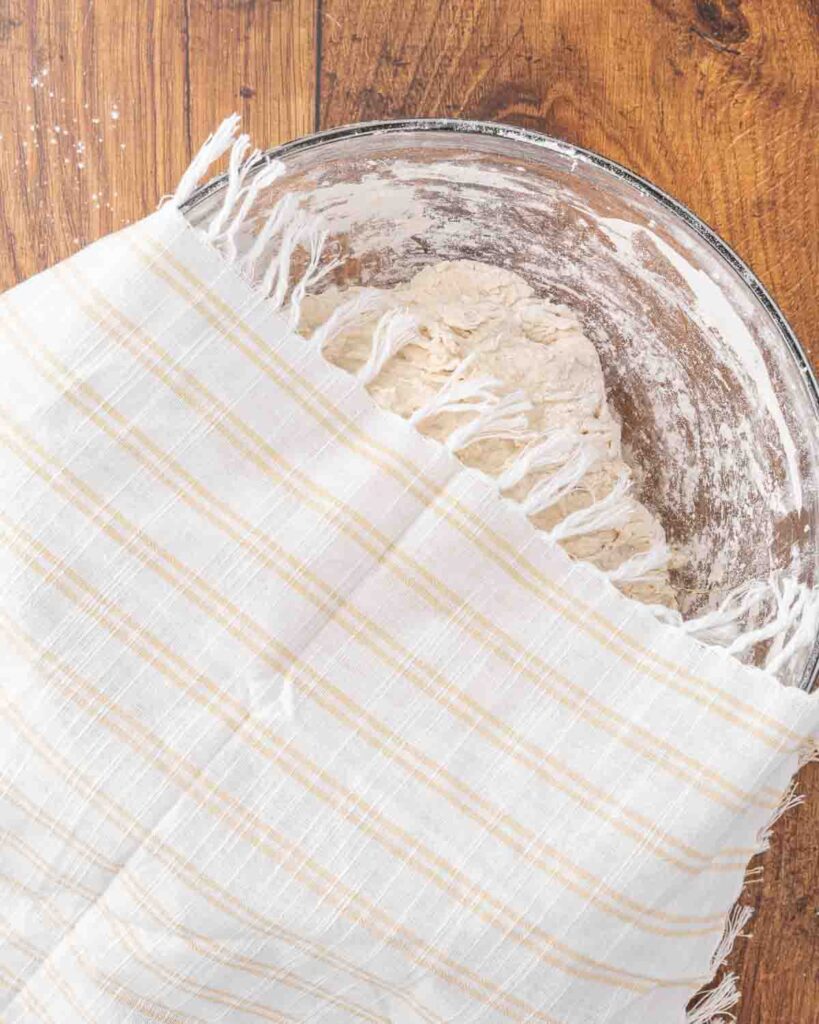
Step 4: Allow the dough to rise for 2 to 3 hours until it has at least doubled in size. Cover bowl, don’t seal completely and place in the fridge for at least 8 hours before use.
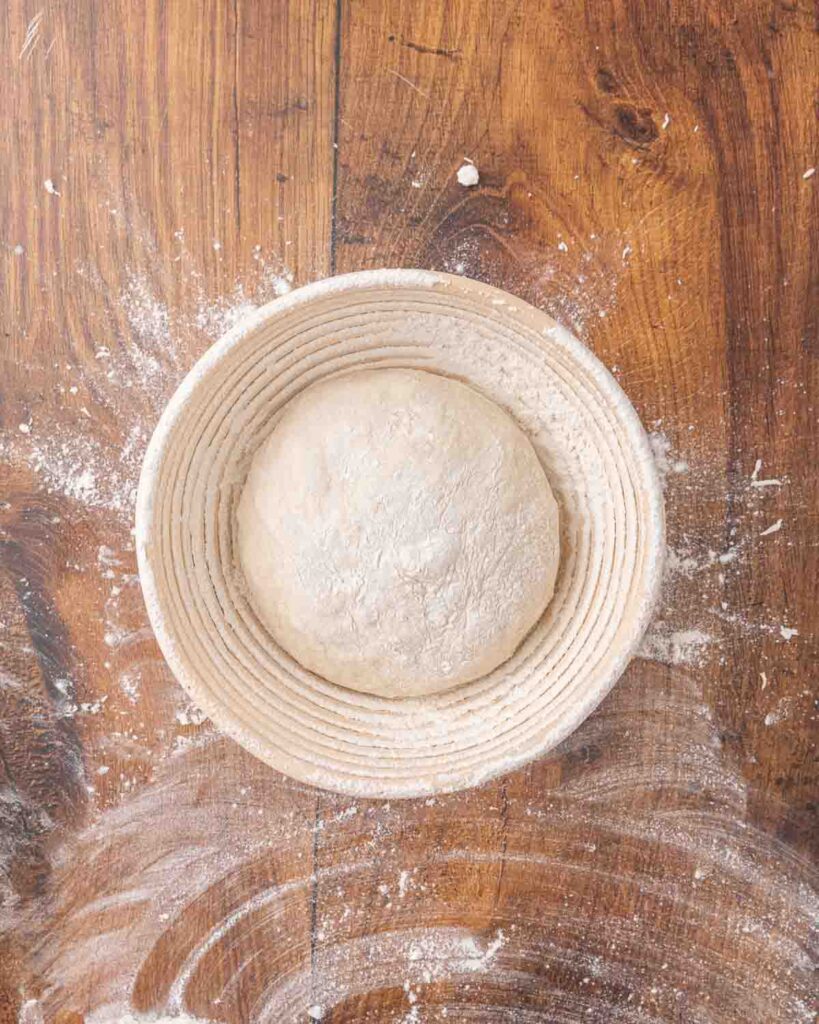
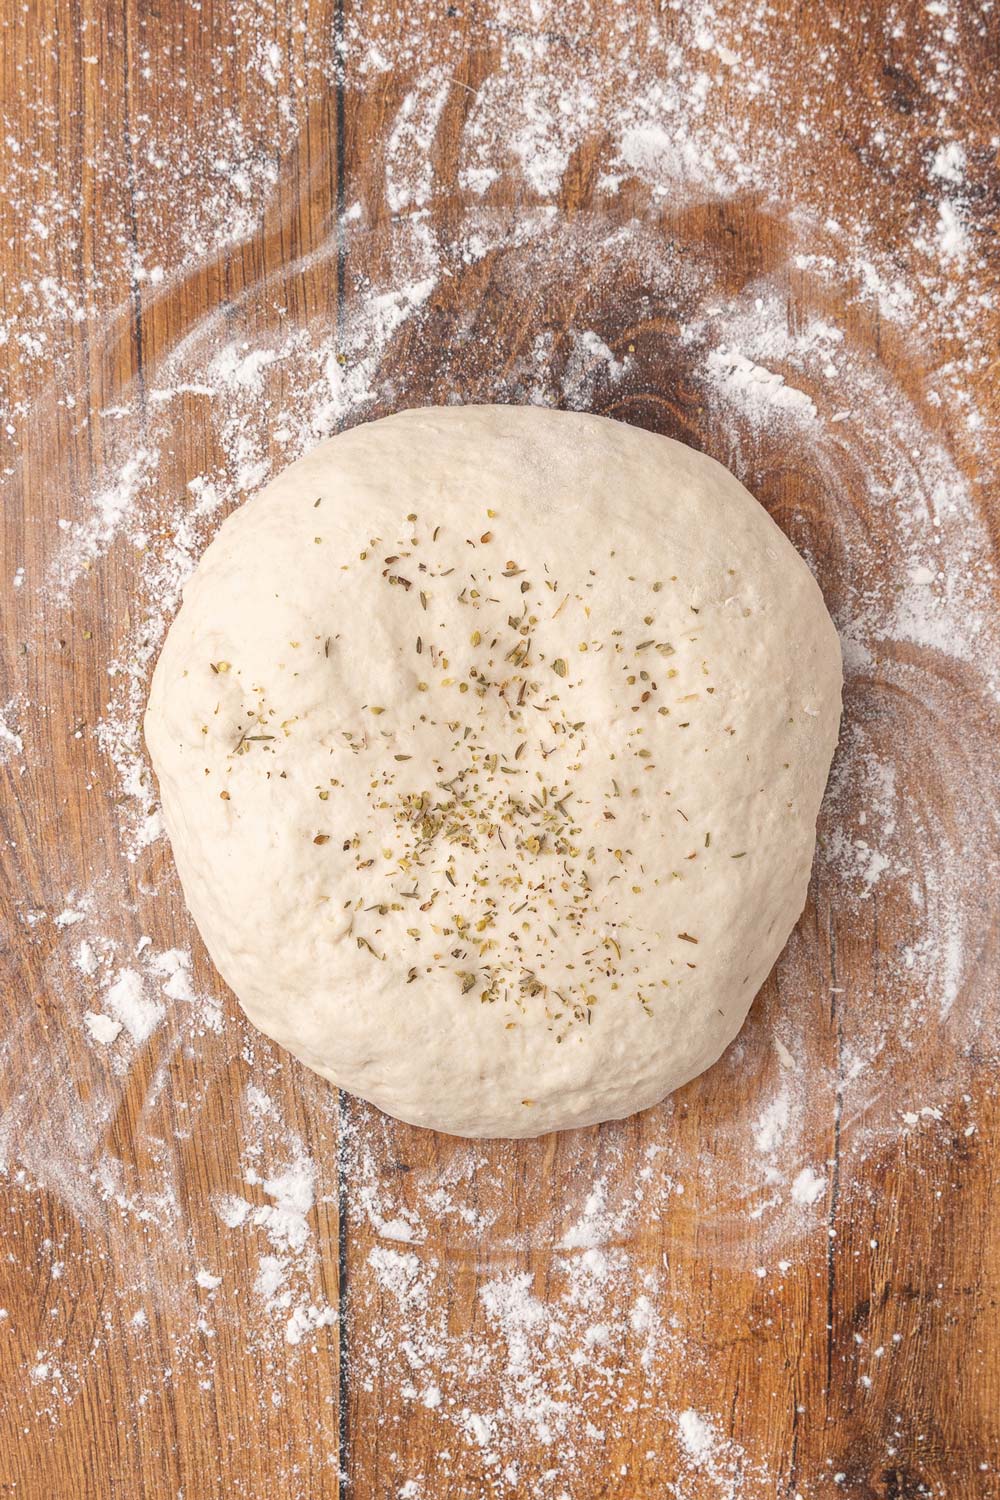
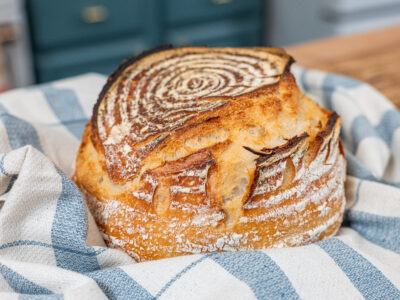
Step 5: Use 1/2 of the dough (just pull it out with your hands) and form a round loaf on parchment paper or a well-floured banneton. Let the dough rise for 40 minutes (rise time may vary depending on the temperature and humidity of your kitchen). Note: The banneton isn’t necessary; I use it whenever I want a pretty swirl on the top of my loaf.
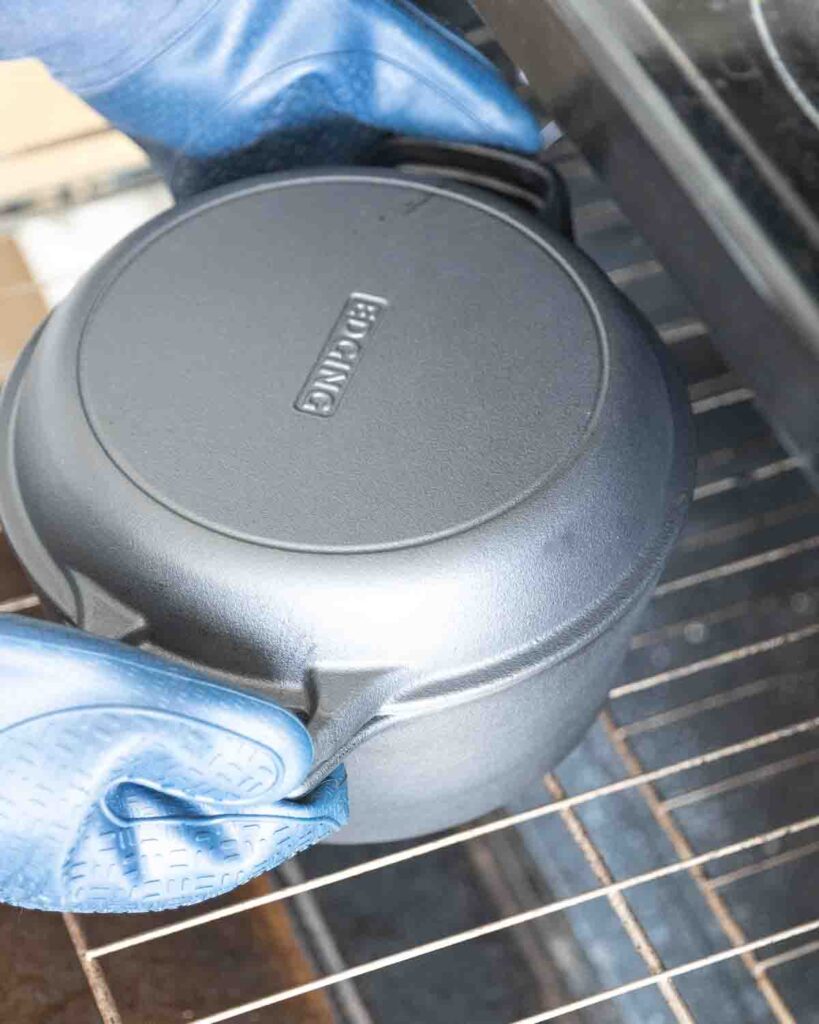
Step 6: Preheat the oven with cast iron Dutch oven inside to 450°F.
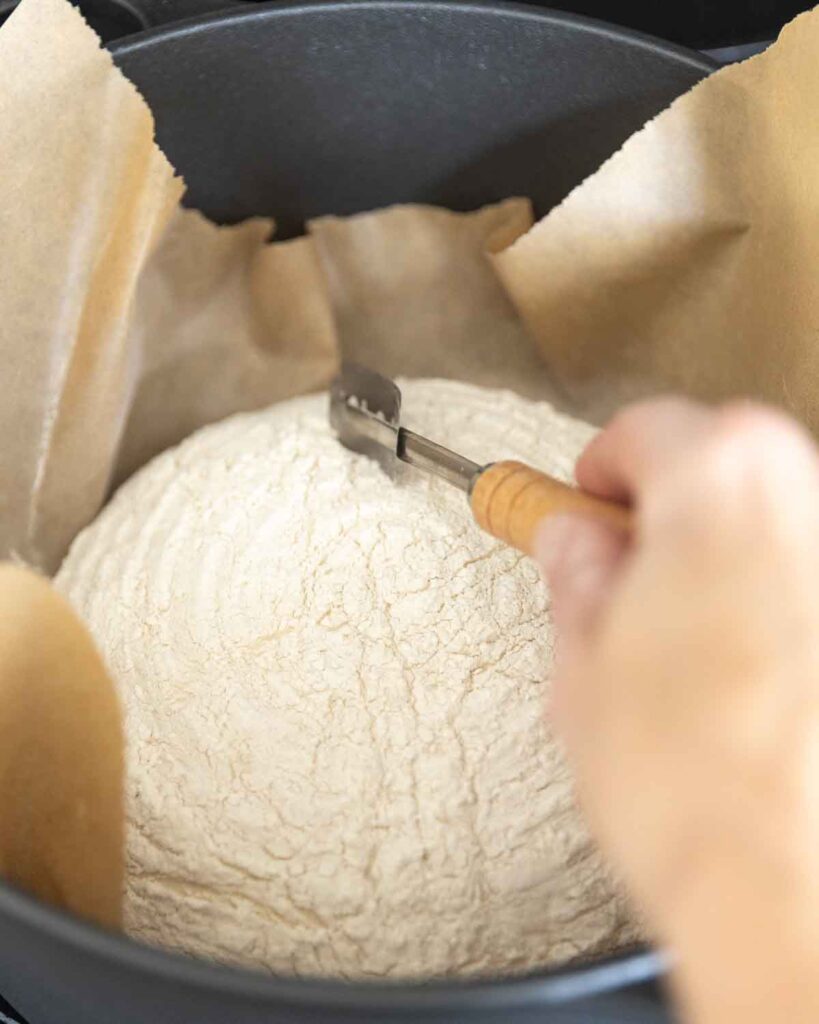
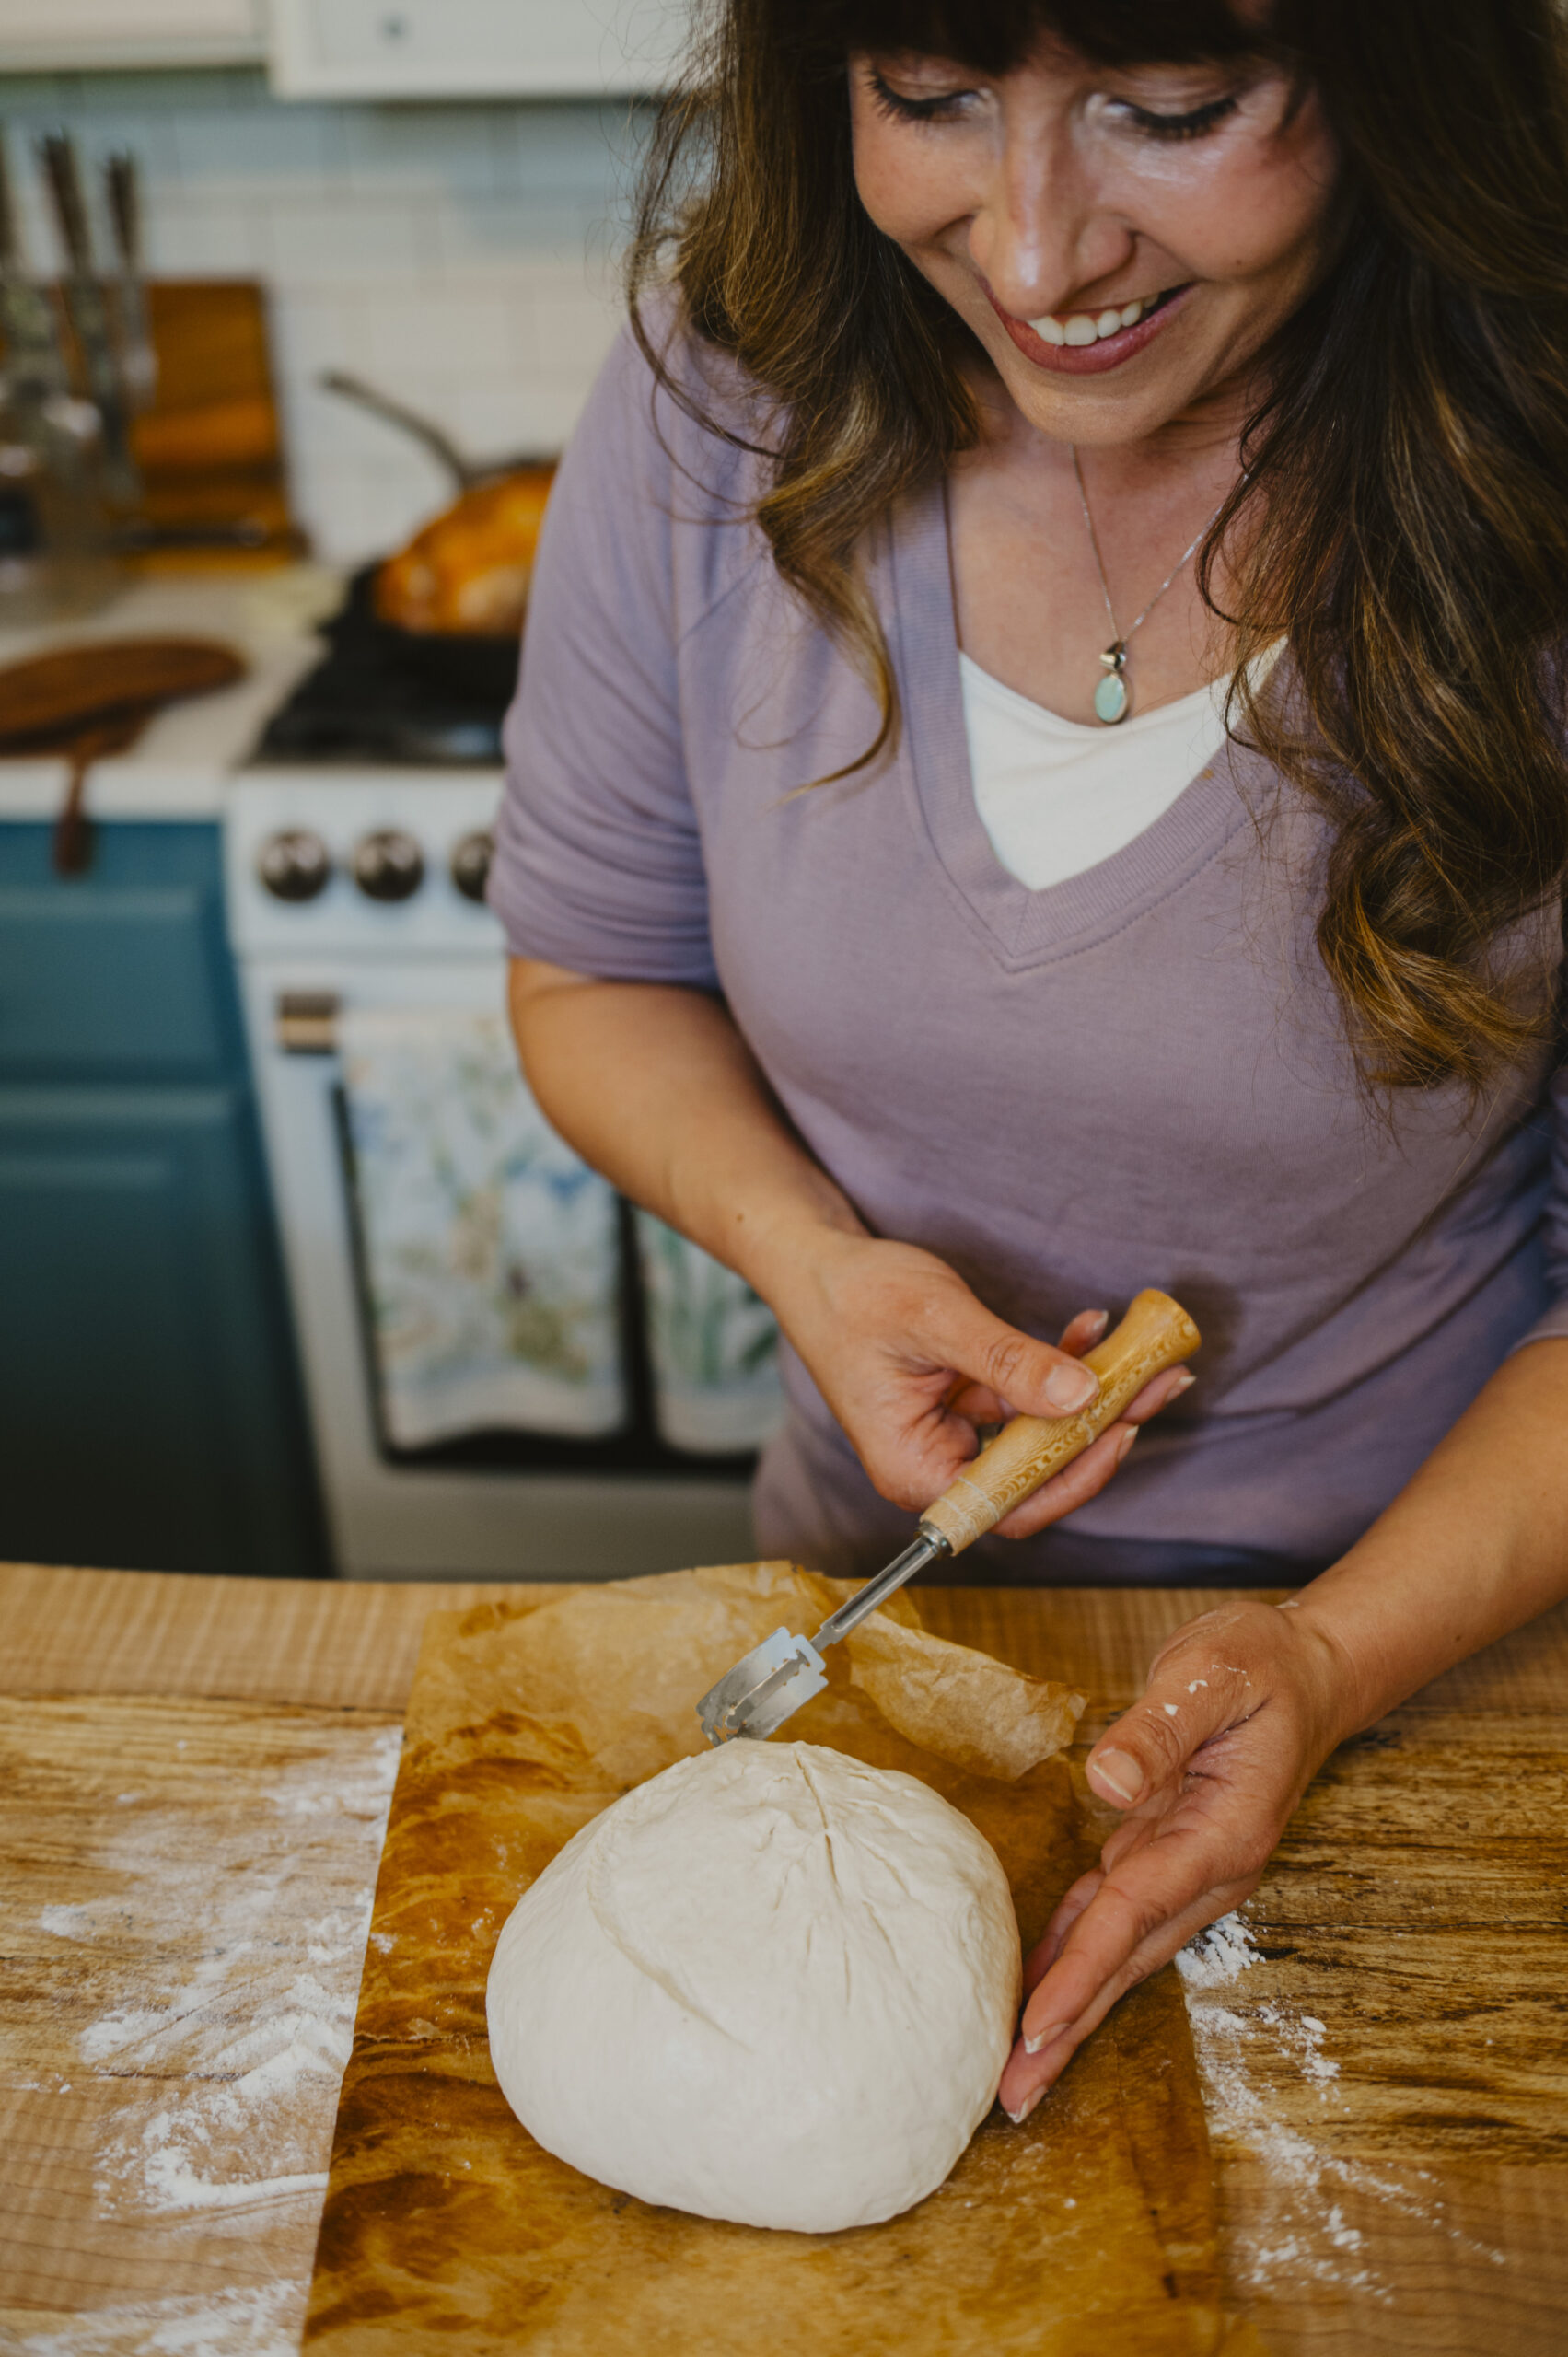
Step 7: Transfer the loaf to the preheated Dutch oven (it’s hot, use oven mitts) and score the top with a sharp knife or bread lame.
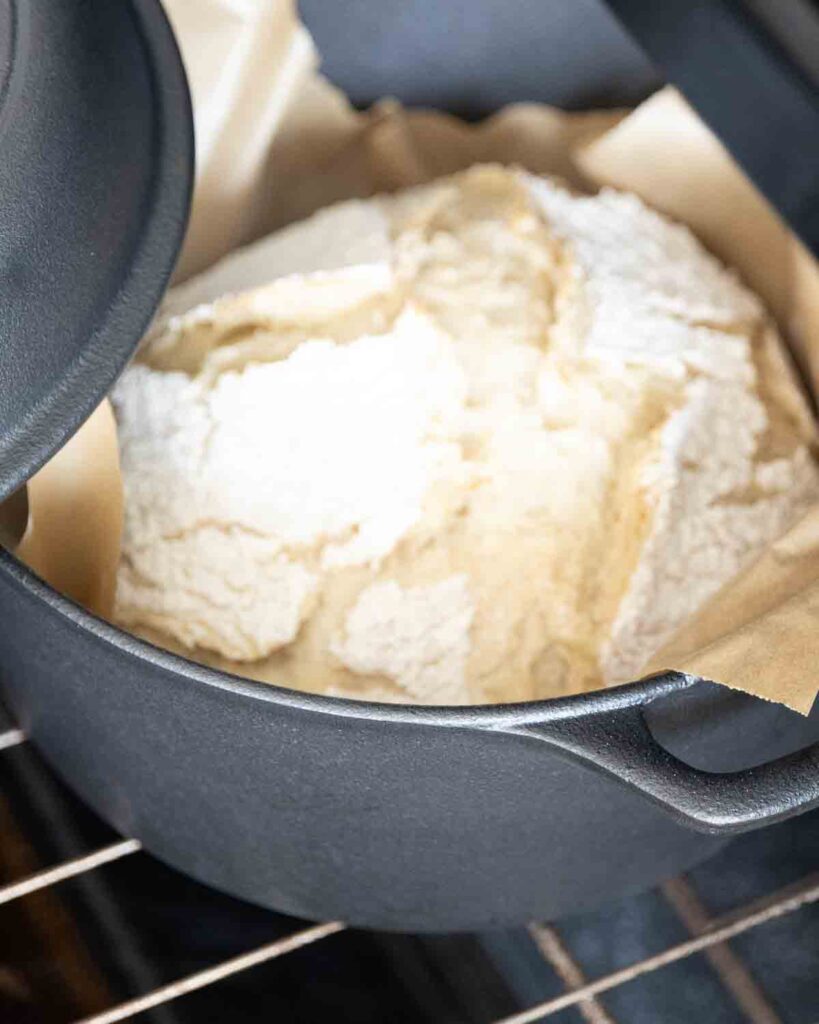
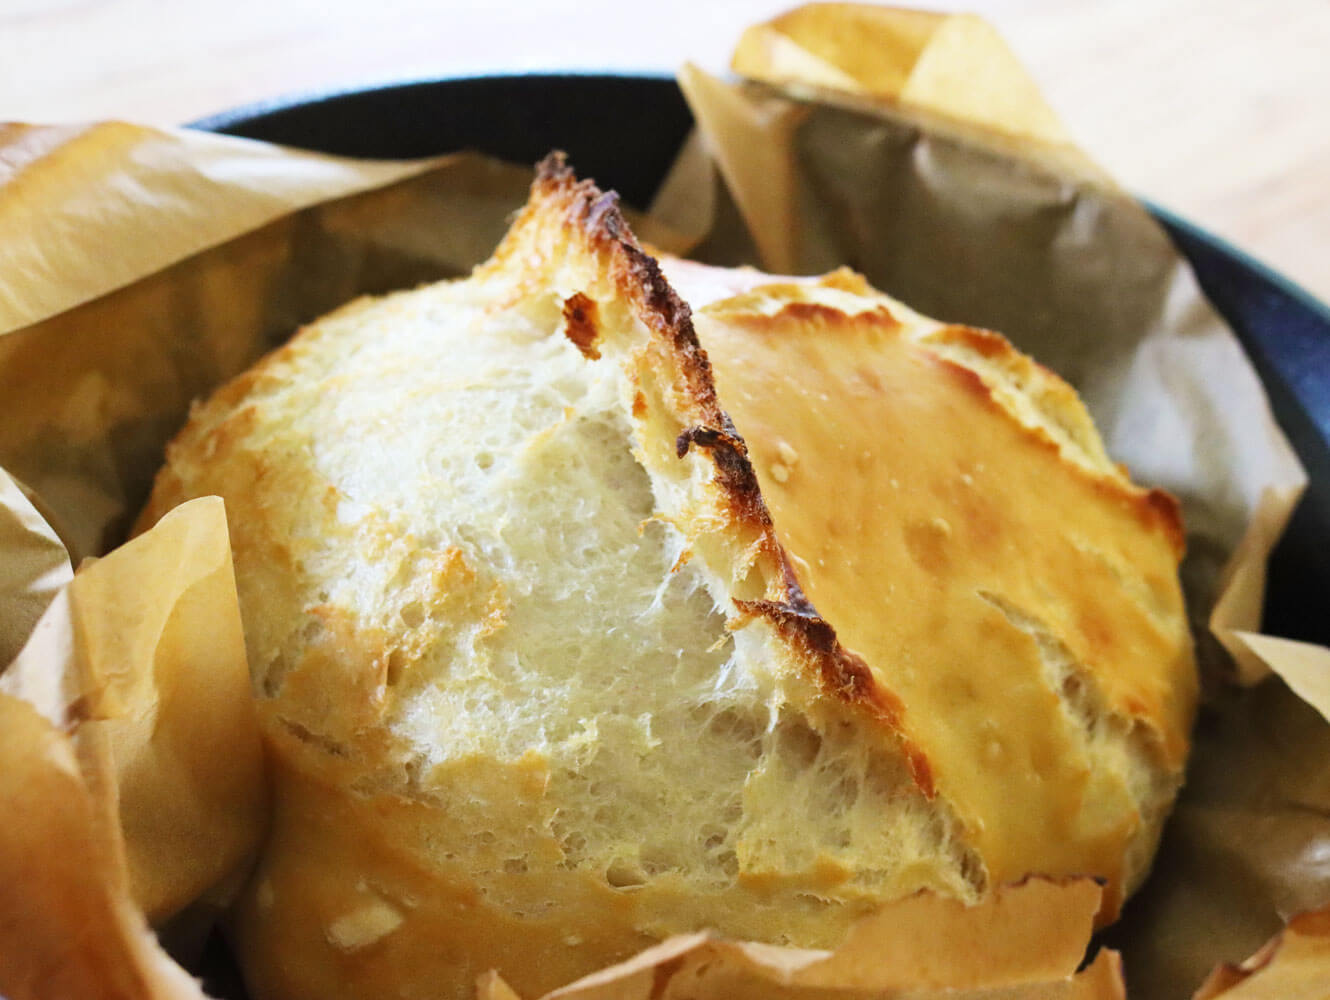
Step 8: Bake with lid on for 25 minutes. Your bread should just be starting to brown at this point. Remove the lid and bake for another 10 minutes or until perfectly golden brown on top and starting to get very crunchy. Carefully remove from oven, move bread to a cooling rack and allow to cool for 1 hour before slicing (or at least 20 minutes if you’re in a rush!).
Serving Suggestions
This no-knead artisan bread is delicious served with:
- Butter and no-pectin strawberry jam
- This homemade peanut butter recipe
- Cream of broccoli soup with cheese or old-fashioned beef stew
- Garlic-infused olive oil and balsamic vinegar
- Sandwiches and paninis
- The best avocado toast
- French toast
- Eggs and breakfast sausage
- Cheese boards and charcuterie
- This hot spinach and artichoke dip recipe
Storage Instructions
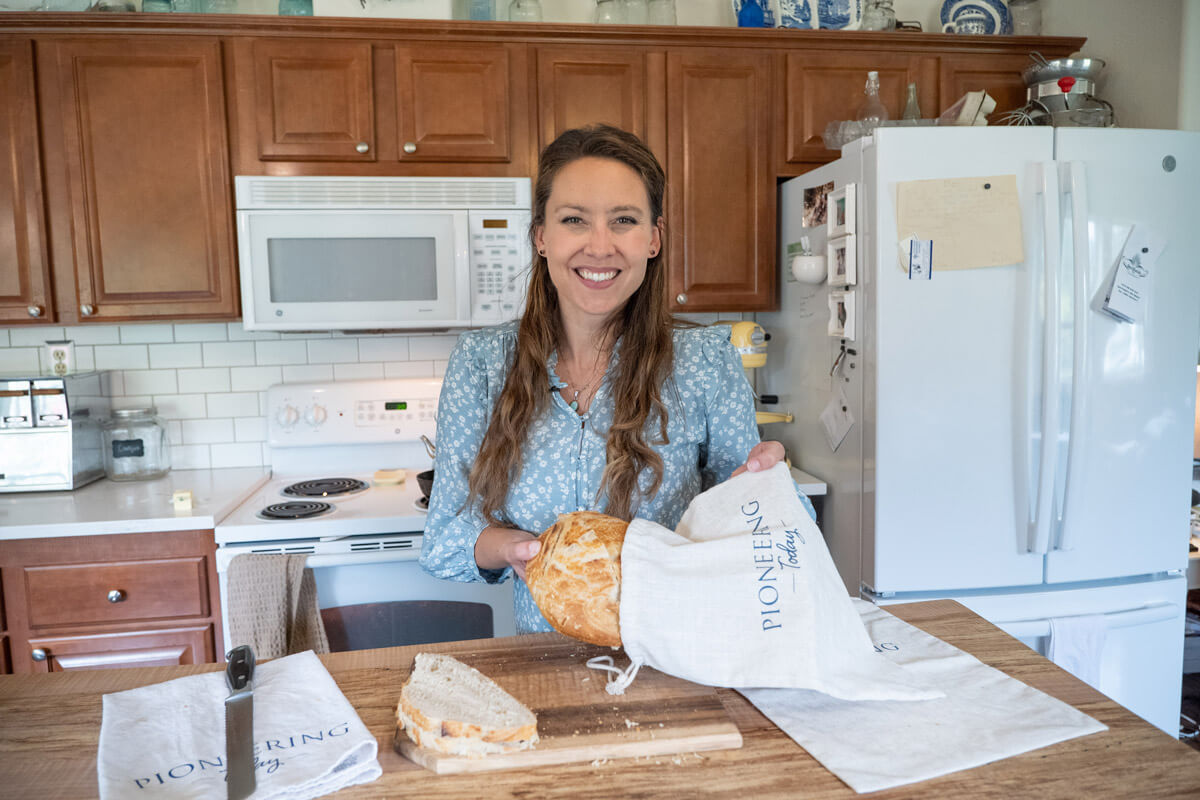
This no-knead artisan bread is best enjoyed fresh, but it stores well if you have leftovers. Keep the loaf at room temperature in a linen bread bag, wrapped in a clean kitchen towel, or loosely covered on the counter for up to 2 days. This helps preserve the crust while keeping the inside soft.
I don’t recommend storing bread in the refrigerator, as it tends to dry out much faster and lose its fresh texture.
For longer storage, slice the loaf first, then place it in an airtight freezer-safe bag or container and freeze for up to 3 months. When you're ready to enjoy it, thaw slices at room temperature or pop them straight into the toaster.
Check out how to keep homemade bread fresh for a complete guide to storing homemade bread.
FAQ’s
Artisan bread uses a wetter dough, longer fermentation, and minimal handling for better flavor and an open crumb, while regular homemade bread is typically kneaded more and made in a shorter time with a tighter texture.
Artisan bread isn’t kneaded because time and fermentation naturally develop the gluten, giving the dough structure without the need for traditional kneading.
Common mistakes include adding too much flour, not allowing enough rise time, skipping proper preheating of the baking vessel, and slicing the bread before it has fully cooled.
Unbleached all-purpose flour or bread flour works best, depending on whether you want a softer crumb or a chewier, more structured loaf.
Home Baking Mastery
Love this no-knead artisan bread, and ready to take your bread baking to the next level?
If you’ve loved learning how simple homemade bread can be, I’d love to help you build even more confidence in the kitchen. In my Home Baking Mastery class, I walk you step-by-step through traditional baking methods so you can make beautiful breads, pastries, pies, biscuits, and more right from scratch.
You’ll learn dependable techniques, how to work with yeast, tips for better texture and flavor, and the skills to bake for your family with confidence.
Are you ready to fill your home with the smell of fresh bread and become the go-to baker in your kitchen?


Did you make this no-knead artisan bread recipe? If so, please leave a star ⭐ rating in the recipe card below (this really helps me out)… then, snap a photo and tag me on social media @melissaknorris so I can see! I love getting a glimpse of what you all make in your kitchens.
📖 Recipe
No-Knead Artisan Bread | Easy Dutch Oven Bread
Equipment
- Cast Iron Dutch Oven Follow the instructions in the recipe tips if you do not have a Dutch oven.
- Mixing Bowl
- Spoon
- Measuring Cups and Spoons
- Clean Tea Towel
- Optional Accessories These tools are not necessary, but fun to use: banneton dough proofing bowl, wooden bench knife, a wooden dough scraper, and a bread lame
Ingredients
- 3 cups water lukewarm (about 120 degrees)
- 1 1/2 Tablespoons yeast
- 1 1/2 Tablespoons salt kosher or coarse sea salt is best
- 1 1/2 Tablespoons apple cider vinegar
- 6 1/2 cups flour unsifted, all-purpose or bread flour (see notes for whole wheat)
Instructions
- In a large bowl, dissolve yeast and warm water. Allow to sit for 6 to 8 minutes until water is foamy.
- Add salt and vinegar. Mix in flour a cupful at a time until it's all incorporated. Dough will be slightly wet.
- Cover your dough with a tea towel and set it on top of the fridge (or a draft free warm place) to rise for about 2 to 3 hours, or until the dough has at least doubled in size.
- Cover dough (make sure it can still breathe, don't seal completely) and place in fridge for 8 hours.
- Take 1/2 of the dough (or 1/3 for a smaller loaf) out of the bowl, it’s very wet, so lightly flour your hands, and pull it into the shape of your loaf. Dust the top with flour and slash it with a sharp knife (flour keeps your blade from sticking) and let it rise for about 40 minutes.
- Preheat oven to 450°F with cast iron Dutch oven inside.
- Remove dutch oven from stove and carefully place one loaf into Dutch oven. Cover with the lid and bake for 25 minutes, remove lid and bake for another 10 minutes until golden on top. (No cast iron Dutch oven, see notes for alternate baking instructions)
Video
Notes
- If dough feels too sticky to handle, dust lightly with flour. A wetter dough creates the best artisan texture, so resist the urge to add too much flour.
- Long fermentation builds flavor naturally. For extra flavor, refrigerate the dough after the first rise for up to 3 days.
- Preheating the Dutch oven creates steam for that crisp crust.
- If you don’t have a Dutch oven, you can use a cookie sheet for your bread (parchment paper is still helpful), and place a metal broiling pan on the lowest rack in the oven. Preheat both pans to 450°F. Put your loaf in the oven, then quickly pour a cup of HOT water into the broiler pan and shut the oven. Bake for 45 minutes.
- Use parchment paper for easy transfer.
- Try to wait at least 20 minutes before slicing into your loaf. If you slice into a hot loaf, you’ll end up with a gummy center that will seem underbaked.
- If you’re not a fan of the crispy, crunchy crust, you can immediately brush your loaf with butter as soon as it comes out of the oven. This will soften the crust just a bit, making it less crunchy.
- Butter and no-pectin strawberry jam
- This homemade peanut butter recipe
- Cream of broccoli soup with cheese or old-fashioned beef stew
- Garlic-infused olive oil and balsamic vinegar
- Sandwiches and paninis
- The best avocado toast
- French toast
- Eggs and breakfast sausage
- Cheese boards and charcuterie
- This hot spinach and artichoke dip recipe


Kelsey
I’ve made a lot of bread recipes over the years, and this no knead artisan bread is one of the easiest and best yet. The crust was perfectly crisp, the inside was soft and chewy, and my family finished the loaf the same day
Rose Felton
I bought your book Hand Made when it came out and I found this bread recipe inside of it. It is so easy to make, I love that you can keep the dough in the refrigerator until ready to use, it can be used for making so many things, (which I've done) and it tastes excellent! It is the only recipe for bread that I use, or will ever use, and I've even taken Carolyns Master Class on bread baking. (Don't tell her that!) 🙂
Gordon Miller
I have yet to get the yeast to bloom. The yeast is fresh. I took temperature of the water and it was fine. But it just sits there. Is my room too cold? Should I add some sweetener? Help!
Melissa Norris
What type of yeast are you using?
Sharon
Take the water i to a 2 cup measuring cup, bring it to 100*F, add 1 tblsp of sugar then 2 1/4 teaspoons of yeast. It should immediately smell like beer if your yeast is fresh. The yeast should also be room temperature., stir gentle for 15 seconds just to disperse the yeast. Leave it on the counter for 15 minutes. It should bloom.
Do *not* add salt or honey to the yeast. Keep yeast in the fridge in an airtight container. Yeast has a distinct odor if it is fresh.
Kim
I am in the process of making this recipe. I wish you had stated in the printed recipe not to add the final 1/2 cup of flour unless needed. This is a very crucial step. I added it following your recipe and my dough was way too dry and I had to add more water. Then I came back here to read in your comments not to add that final 1/2 cup. I think your recipe should be edited accordingly.
Also it would be helpful for you to specify what to do with the other half of the dough. I have no idea how long I can store this in my refrigerator or how long it will last, etc., For novices like me, this information would be extremely helpful.
Thank you for sharing your recipe. We appreciate it. Looking forward to a delicious loaf of homemade bread.
Patti
Hi Kim
I added the 1/2 cup also. Stated 6 1/2 cups in recipe so that’s what I added. Hopefully it works out for me. Letting it rise now for 3 hours. I was hoping to bake it today but states refrigerator for 8 hours.
Kim
Hi Patti. I made this and woah! It was so beautiful and delicious, my husband and I devoured it. I went out and bought a bread lame and I will keep using this recipe.
I still don’t know how long I can keep the raw dough in my fridge. So I baked it all in a couple days.
Carene
Hello,
If you watch her video in this article, she answers many of these questions!
Laurie Bush
I used this recipe for my very first loaf of any kind of bread, and 5 loaves later....they have all turned out beautiful and tastyi
Don Block
Good morning. My question is in regards to the type of flour used. This looks like a very fine loaf of bread but my issue comes from being diabetic. I tried to read all the comments looking for an answer, but wow, there are a bunch. So if this question has already been asked, and answered, my apologies. Has the recipe been tried using alternative flours like almond or coconut, in order to bring down the carb count? And if so, what sort of adjustments were made? Thanking you in advance for any reply/advice. Best regards. Don
Amanda
Can I use Einkorn flour in this?
Barb
Hi, Thanks for posting these receipes. Will this work wiht Bob's RedMill 1to1 All purpose gluten free baking flour?
Has any one tried that yet?
Thanks
Barb
Debra perks
Why are we removing half and what are we doing with the other half? Why make so much if your only using half. Doesn’t make sense
Karen L. Payne
You can keep it in the fridge and bake as needed.
Rose Marie Felton
Best bread I've ever made or ate!! I am using this recipe from now on. I've made the dough twice, making the rustic bread from them, but anxious to try some of the other recipes this dough will make. My husband wants the pretzels first.
Rose Marie Felton
Update: I have used this recipe several times now making the Rustic Bread most of the time, but I've also made it into a loaf, pizza crust and made pretzels from it. It still is the best bread I've ever ate, or made. I am only using this recipe from now on. It is so simple and easy too!
DPO
Hi Rose,
I was wondering what you did to turn it into a loaf? Did you bake in a regular loaf pan? i like to have sandwich bread on hand, and like the idea of having fresh dough in fridge.
Vivian Baker
It is not "easy." I spent most of the afternoon trying to mix in the flour. Finally let it rise for couple of hours. Now I just put in the refrigerator for 8 hours. I just hope it will be okay because I am not getting up at 4:00 am to bake it. It will have to wait. I really had a hard time mixing in the flour.
Carla
I made this bread twice and this time it is perfect. I had to use more flour due to my elevation. I just added a little at a time and after the rise I did a stretch x3. Let it rest and then baked it. So tender and I love the chewy crust. I thought I lost the recipe after making it the first time and finally found it. Thank you so much for fine tuning such an easy and delicious bread recipe.
Ace Miller
I have made this recipe too many times to count, since my mom showed me your site/videos. We love it I usually double it just so there is something leftover a day or two later.
Dottie
Thank you for sharing your recipes and experience! I use sourdough and would love to have a refrigerator dough like this, but made with sourdough starter. Is this even possible? Searching the internet hasn't help me find anything. Do you, or anyone else, have a recipe you can share?
Stacey
I was wondering the same thing. My husband has a yeast allergy.
Sharon
Did you ever find out how to use this recipe with sourdough starter and no yeast?
Sherry
I’ve made this about 3 times now and we love how it tastes much like sourdough! I made one half of the dough into 8 chibatta type rolls that were delicious!!! Has anyone tried this with freshly ground wheat? If so what kind(s) of wheat berries and what quantities? Thanks in advance!
Leah
I tried this recipe but I had problems: it got too warm and did really rise then I turned it and put it in the fridge, it deflated. I put it in the fridge over night and did not let it sit to room temperature for too long before I put it in the oven so it cooked but did not rise very much at all.
I tried too let the second half rise in a warm place but it didn't rise at all, so I tossed it.
I will have to try this again.....
Ashley Hibbert
Hi Melissa,
LOVED this recipe, but I have a question for you.... the first loaf turned out great! I ground a mixture of hard red and white wheat, and it was heavenly! However, the second loaf did not turn out. The dough was in the fridge for about a week, and when I cut into it after baking, it had a spidery grey look to it. Too much oxygen exposure in the fridge? Should the second half of the dough be sealed completely, as it waits?
Thanks for your help, I can't wait to try again!
Ashley
Jayne
Hi Melissa! I made your easy artisan bread, and it had a very good taste but it was very dense. Is it suppose to be? Perhaps I did something wrong?
Anyway I love having dough in my fridge and and going to go the cinnamon rolls next. Thank you so much!
HAPPY NEW YEAR!
Mary and Lee
Could you tell me the name of the yeast you buy in bulk please. It would be great to buy it in bulk and not the small jars. Thank you for the wonderful recipes, just amazing.
Terri
Hi Melissa,
Just made your bread-was great! I would like to make crusty dinner rolls with the the other half of dough! What is the best way to do this? Thanks
Colleen Randal
I make this bread every single week. It is simple easy and soooooo good without all the hard work. You really are my fav go to!!!! Happy new Year.
Sabrina Zajac
Can you do this with Gluten Free flour? If so, what type?
Liz
Artisan bread was delicious. My kids said it tastes like it was from a bakery. Thanks for sharing!
Can you tell me about the mason jar you have your flour in ... what size, brand, where to get. Does it hold 5 pounds of flour?
sue
I love your recipe but was wondering if I could add a teaspoon and a half of sugar and a teaspoon and a half of olive oil to the ingredients that I usually add. Would it alter the texture or taste or ruin the loaf?
Kim
I added sugar and it turned out great.
cathie
It's way too salty. Will using less salt affect the way it turns out? 1 1/2 tablespoons is way too much. Other than that, it's ok. It's a heavy dough. I like how easy it is.
Julie
Why say anything if it’s not complementary? Tweak it however you want.
JoAnne
Hi Melissa! I recently came across your you tube channel/ podcast and love all I’m learning, especially starting up sourdough and learning things I never knew about canning.
I made this bread recipe which turned out wonderfully! I saved the rest of the dough in the fridge according to the recipe. A week later I got it out to make the cinnamon rolls and was so disappointed to find the top of the dough speckled with mold spores! I threw it out. Any idea what went wrong?
Thanks!
Sharlene Paparoa
I made this today to go with pea and ham soup, the family loved it, I found this recipe so easy to follow and do, so thank you for that and for sharing.
Sharlene
I made this today to go with pea and ham soup, the family loved it, I found this recipe so easy to follow and do, so thank you for that and for sharing.
Lance Mortenson
Ran across Melissa on you tube and very glad I did. Started with the bread recipe and found the notes regarding whole wheat to be spot on for my Sprouted Whole Grain (SWG) flour. My family loves it. Had to cook for just an extra 5 minutes for both the pot and uncovered portions but we love it. Easiest recipe and great outcome. Next is to adjust for seeded bread using the SWG as that is our favorite, seeds and cranberries.so far everything I have tried has been one of if not the easiest and having the YouTube videos is priceless. Thank you Melissa!
Kay Williams
Hello, I discovered this recipe recently, and I have to say it is brilliant. Have just taken my second loaf out of the oven and it looks just like the first one. I love the idea of keeping the dough in the fridge, so easy when you need more! I was using a similar recipe, but yours is so much better, and it stays fresher for longer. Thank you.. Kay
Alcina
Looks easy can't wait to try it. Do you think I can use gluten free flour instead?
Leigh Ann Lemke
The easy artisan bread is so delicious! Also thank you for tip about waiting at least 20 minutes before cutting into the bread. It made a huge difference.
Beth
I am not a bread baker, but this turned out very well. I am at high altitude & the inside could have been cooked just a bit longer, but otherwise, it was fantastic!
One note, the video, recipe & blog portion had slight variations in instructions, so I made notes on the recipe for the future
Beth
I am not a bread baker, but this turned out very well. I am at high altitude & the inside could have been cooked just a bit longer, but otherwise, it was fantastic!
Jerry
Amazing! Made the first one as written, and added rosemary and garlic to the second one. Both were delicious! Thank you!!!
Jamy Pingeton
Hi Melissa can you give me the directions for making 1 bread?
Melissa Norris
Just 1/2 the recipe
Monique
Hi, I am making your bread now with my kids. We’re very excited to try it later!! My question is this: with the extra dough, do you keep feeding it like with a Sourdough starter? That way I can always have dough ready for making bread? Or is this a use it and then remake it type of process? I have only made SD bread so that’s what I’m used to. Pardon my question if it’s an obvious answer.?
Melissa Norris
No, this isn't sourdough so you don't keep feeding it. You need to bake the extra dough within 14 days of making.
Leslie M Hickman
Is it possible to double or triple this recipe? I thought I'd ask before wasting ingredients. thanks!
Melissa Norris
Yes if you have a large enough bowl, triple would take a really large container.
Dana
awesome …great texture and flavor…how long will dough keep in fridge?
Making small loaves
Melissa Norris
Up to 14 days, towards the latter end it doesn't rise quite as high.
Theresa
Melissa your recipe is the best, never had a failure baking bread.
Thank you for sharing it with us.⭐️⭐️⭐️⭐️⭐️⭐️⭐️
Michelle Manning
what a find! This is my go to now!
Elba Berdecia
The easiest and most delicious artisan bread I have ever made and tasted!!!
Sam Salter
I made this bread for breakfast this morning.
Started it last evening and left it in the fridge overnight.
I followed the recipe exactly, but cut it in half as this was a first try at bread making.
Excellent results - easy to follow; little working prep time; tastes delicious.
If I can do it - anyone can!
Sam Salter
Alberta, Canada
Shannon
Thanks for this recipe, Melissa! I followed the recipe and directions to the letter and found the bread to be really dense (but great crust, shape, and flavor - my husband won't stop eating it). Assuming this is user error, I'm wondering if I over-proofed or under-proofed it. Any suggestions? I'm a novice when it comes to bread-making, so I'm not sure how to troubleshoot this one but I'd love to keep making this bread! It's so easy!
Melissa Norris
How long was the dough in the fridge (this will help me guestimate on the over or under proofing) and did it rise very much upon baking?
Jenn
I have a small amount of regular yeast on hand and a lot of SAF Instant Yeast. Will the recipe work with instant yeast, which I understand needs to get mixed with the dry ingredients rather than the wet? Thanks!
Denise Hadfield
I loved watching you make your Artisan bread and felt so jealous
as you ate it, looked so yummy..
I am a coeliac and can’t eat normal bread. I would love to be able
to make some bread like the Artisan so I could use it for flat bread,
pizza etc. I am not sure that supermarket brought gluten free flour
will give me the lightness and flavour you would get with normal flour.
A lot of gluten free bread is just not something I dash out to get beside paying the expensive $8 for a small loaf.
Any advice you can give me would be appreciated..
Kind regards
Denise
Adelaide
South Australia
Brigitte
Hi,
Thanks for your video and recipe , I have made no knead bread before in this technique they usually use just a little yeast , I thought this was a lot of yeast so I made it yesterday but I halved the recipe just in case it didn’t turn out good . I used half whole wheat half bread flour , the dough was fine it smelled yeasty a lot . I baked it for 10 more minutes than require it’s very nice I decreased the salt I am glad I did it would have been too much salt for me but this is my preference ...it’s overall a nice dough even with the whole wheat, very moist but I would like you to answer why so much yeast . Thank you
Melissa Norris
That's a standard amount of yeast, 2 and 1/4 teaspoons per loaf is what most recipes call for, because this makes 2 to 3 loaves (depending on how big you want your loaves), it uses the equivalent of two packets of yeast. It's not more than any other standard recipe.
Erica Sturgeon
Melissa, I have had great success and enjoyed this recipe. I am now looking into sour dough. Can sourdough be used in place of yeast?
Tahnee
I have made two batches using both the dutch oven baking method (and burnt myself) and the other one. The alternate method came out a tad too dark. Next time I'll try shortening the baking time slightly or change to base heat for the last 10 or so minutes to stop it browning.
Pam
Where did you find your large plastic container to store your bread dough?
Heather Woodbury
I gave the recipe 5 stars despite a couple problems I had with it because it made a tasty and beautiful bread! But there were a few things I didn't understand.
1. I purchased the optional banneton basket (via your link) . At what point do you put the dough in that basket? It seemed to stick a lot. Pretty sure I floured it but maybe it needed a heavy flouring? Maybe now that the dough stuck in the crannies, it's more seasoned and the next batch won't stick?
Do you let it rise IN the basket when you put it in the fridge?
You don't cook it in the basket, do you? At first I thought so but I took the dough out and it did give a hint of flour rings but they disappeared on cooking.
Thanks, Heather
Melissa Norris
Hi Heather,
The basket should become more non-stick the more you use it, just keep adding flour. You let it rise after you take the dough from the fridge and it's sitting at room temp while the Dutch oven is preheating in the oven. You DON'T cook it in the basket, it would likely burn or catch on fire. If you go heavier with the flour you'll see the rings on the baked loaf.
Judy
Just tried it for the first time, it was very sloppy, nevertheless I carried on and it does not look so bad. Now I will cut it:- yes it is good. I used Scottish highland bottled water as Thames water has both chlorine and ammonia added! The other half of the dough is in the ‘fridge, awaiting another loaf. By the way I am 84.
Jean
We love this bread! I’ve made it at least four times in the last couple of weeks. The only thing I did was cut the salt back to 1 T. We found 1.5 T a little too salty. I really like that you can keep the dough to make some more bread—not that it lasts very long around here. Thanks!
Peg
Hi. I signed p for the free sour dough bread class tomorrow at 4. I have Celiac. Is any of this going to be useful tome to maybe use Bob's Red Mill 1:1 flour?
pam shultz
Any chance this recipe could work with gluten free flour?
Melissa Norris
I think it would need some extra binders, I haven't tried converting this to gluten-free but in past baking experiences I don't think a 1 to 1 flour substitute would work.
Patty
This bread is amazing!! Easy to make and grandchildren loved it! Have you every tried with almond flour ??
Kate Kerr
I can't thank you enough for the artisan bread recipe. I've been making bread for years and many times find that my timing is off. My family doesn't eat much bread but when they do it has to be fresh. Even one day old or from the freezer doesn't work. With this recipe I can make smaller loaves or buns when needed or wanted in half the time and they love the texture and flavour (I'm Canadian). Mind you I am lucky enough to have three refrigerators so I don't have to worry about the space. I have whole wheat on the go right now...I'll let you know how it turns out. Thanks again
Brenda Jerles
Thank you for sharing this recipe! It is sooooo good! I did add a couple of tablespoons of honey to mine. The first loaf got alittle too brown for me so I lowered the oven temp to 425 the second time and it was perfect!
As a new bread baker, this recipe is so easy to use and make since there is no kneading and you can make it up at night, put it in the fridge, then take it out and bake whenever you get ready for bread. Perfect!
Bob
What changes to your recipe can you make if the fridge no longer works?
Melissa Norris
It needs the cold to retard the yeast from consuming all the starch and then collapsing. If you have an area that's cool like a fridge you can use it, otherwise you'd need to knead the dough to develop the gluten, let rise for a few hours, then form and bake.
Gayle Gilham
Can you shape this into a long loaf vs. round and have it turn out okay? My husband is asking me to try this as the size of slices would fit better into the toaster.
Melissa Norris
Yes, I've done it in a loaf pan.
Danielle
So I may have made an oops. Decided to not divide the loaf. It’s been in the oven for over an hour and the tooth pick has come out wet. Did I seriously mess up my loaf?
Kevin Keely
Hi Melissa! I have my Dutch oven on order and can’t wait to give this a go. Have you made this , or sourdough, with sprouted wheat flours?
Melissa Norris
My understanding is sourdough cultures need the nutrients in the grain (starches) and sprouting consumes those. Because sourdough (when fermented for 8+ hours) breaks down phytic acid and consumes the starches, I don't use sprouted wheat flours.
Muriel Johnson
Have you made this with 100% whole wheat flour? My husband has been struggling to make the artisan bread but with 100% whole wheat and it tastes very good, but it ends up being very dense and flat. Someone told me the trick is to use hard white wheat instead of hard red wheat. Have you heard of this?
Melissa Norris
I have used 100% wheat, I prefer hard white wheat, because the white wheat isn't as bitter as the red. As long as it's hard wheat, it has the higher gluten and protein content needed for bread baking, regardless of color. It will be slightly denser because the bran in whole wheat slices through the gluten strands but mine isn't dense or flat. Try using slightly less flour so it's a little bit wetter.
GLORIA OUELLETTE
Well, I tried this bread! Started it last night and baked this morning. AWESOME!!! We loved it especially with homemade raspberry jam on it.
Jeanne
I followed your recipe to the letter except for the amount of flour. I am Canadian and have experienced the difference in flours so I used 5 1/2 cups and then added 1/2 cup more instead of the 6 cups and another 1/2 cup like you suggested. I also brushed the butter on the loaf out of the oven...the bread was wonderful! I will make it again.
GLORIA OUELLETTE
Hi, Canadian Jeanne, I too am from Canada. I just baked this bread this morning. It was very good. I just saw your note that you were from Canada and I thought I would touch base with you. My husband and I live in British Columbia. We celebrated our 50th Anniversary this year. I am so glad for the various cooking shows that I have found in the last year. Anyways, blessings
Gloria
Lizanne
Hi- I made this using Einkorn flour and i didn’t get a good rise. Everything was great until I pulled it our of the fridge. It was nice and bubbly and had a yeasty smell. When I pulled the dough out to make my loaf it was very wet and did not rise well. I went ahead and baked it just to see how it would go. It has a lovely crust and tastes delicious but it is fairly flat. It is not gummy inside. I should have done regular flour. Can you use Einkorn for this? Any other tips?
Melissa Norris
With Einkorn flour you have to reduce the amount of liquid, I haven't tested this particular one with Einkorn but when adjusting other bread recipes I always have to cut back on the liquid.
brenda
So easy to make. Best bread I've ever made. Now to figure out how to do it with wheat flour and sprouted berries.
Ashley
Hey Melissa I have a quick question.....
Have you done this recipe either outdoors over a fire or on a woodstove? If so does the cook time vary by much?
I live off-grid (very new to it) and all my baking is done on top of my woodstove all I have attempted so far is brownies and cookies and I would love to make some fresh bread for my husband this winter.
Thank you for your time!
Melissa Norris
I haven't done this loaf but I bake biscuits, cinnamon rolls, etc. in my Dutch oven with coals in the summertime or power outages. You'll have to play with the amount of coals to get it up to temp (a lot more on top) and most likely it will take a little bit longer. You'll have to watch it and use judgement on the time as the outdoor temps/wind etc. all have an effect on the temp and how long it will take.
Jennifer McDonald
I've made a variation (no apple cider) of this recipe in the past using pre-milled flour as shown in your video. I started grinding my own flour in the past two years and I'm struggling to use this type of recipe with fresh milled flour. You mentioned in the video that you can use fresh milled flour. Do you have video that walks you through this and shows the results. I know you can add a minimum 1/4 cup gluten to help with the rise but was hoping that you could achieve a similar rise in the bread without the additional gluten.
Melissa Norris
I have a video in my full bread baking course (including a whole series on baking with fresh ground flour, including ancient grains here https://melissaknorris.lpages.co/homemadebread/ ), but it depends on the flour. I use hard white wheat for this bread and start with slightly less flour. This is already a wet dough, but I keep it slightly wetter with the fresh ground. I don't use any vital wheat gluten with it but find the fresh ground won't last as long in the fridge, best height is achieved within 5 days.
Jennifer H
This is exactly what our homemade "Shaggy Bread" recipe is. Yummy, perfect and always a winner in our house of 8 children. Nice!
Deb
Hi there, Melissa
I made the granola bars and cooled them an hour
They would not hold shape and totally crumbled into granola
Did I miss something? Would butter help it to hold it together better?
Melissa Norris
Hi Deb, not sure which bars you made as this comment is on the bread recipe page.
Chantel
Hi Melissa,
Have you made the bread into mini loaves? Forgive me if you have mentioned how to do this or if someone has already asked. I am wanting individual sizes for soup "bowls". Any idea the cooking time for something like this? Thank you in advance!
Blessings from TN (Native Oregonian - PNW)
Jennifer Flood
Would like to make the no-knead bread, but my grandson is allergic to apple cider vinegar - is there a substitute?
Thanks for all these great recipes - am definitely going to try some of the others too.
Jennifer
Melissa Norris
Use white vinegar 🙂
Deb
How long can dough stay in fridge before you have to bake it.
Linda Spruce
The recipe makes 2-3 loaves, that's terrific but you can only cook one loaf at a time in dutch oven. What do you do with the remaining dough and how long is it good for?
Melissa Norris
You keep the dough in the fridge for up to 14 days
Aline
Good afternoon,
I am wondering if this is possible. Instead of using yeast could I use some of my sourdough starter? Thank you in advance!
Sabrina
I plan to make your “no knead artisan bread” using Organic All Purpose Stone Milled Flour, following your recommendation of using less flour than regular store bought.
Once the dough is made, how long can it stay in the refrigerator? If using only 1/3 for each loaf, can it stay refrigerated for at least a few days?
Thank you.
Melissa Norris
It will stay in the fridge up to 14 days
Laura
Hi Melissa,
I've been making einkorn sourdough bread for a long time. Would the vinegar be good for that?
Sherri
I used only half my dough to make a delicious boule a few days ago. Can I use the remaining dough that's in the fridge to make focaccia or pizza crust by mixing oil into it? Or does that all have to happen at the beginning?
Melissa Norris
It makes a great pizza crust by just adding some extra flour so it doesn't stick as you roll it out, no need to add oil and bake at 425 degrees F with desired toppings for about 20 minutes or until done.
Melissa Norris
Because that's two separate recipes, one a sourdough and one not. Inside my full course I'm working on a sourdough version but testing because I'm finding it doesn't last as long in the fridge (full 14 days) as the store-bought yeast and I don't publish something until I've tested it.
SCOTT BOWLINGER
Why isn't there a recipe for no-knead artisan bread using sourdough yeast starter instead of regular yeast?
Melodie
I have had problems moving the dough from the counter to the hot Dutch oven. Do you have any suggestions?
Melissa Norris
I use a piece of parchment paper like a sling to lower it in.
Janet Trapp
Could I substitute whey for the Apple cider vinegar? If so 1:1 ratio? Thanks!
Melissa Norris
I haven't done so to say how it would change anything (or if it would). Let me know how it turns out if you do.
Julia
Hi Melissa,
I am trying to get onto your live class and haven't been able to. I really want your instruction and recipes.
Julia
Dorothy Scharf
Made this, very disappointed didn't rise that much and was heavy. Used milled flour hard red wheat 5 1/2 cup used Dutch oven too
Lillian Hamilton
I watched one of your recipe videos where you used a grain mill. It was so quiet and easy to use. I am wondering if you recommend one for purchase? We have a hand-crank grain mill currently, but I would like to get an electric one so I don't have to wait for my husband grind the grain.:)
Thanks for your help,
Lillian
Melissa Norris
Hi Lillian,
Yes, I recommend the Mockmill, they're currently out of stock but I was notified today they have a shipment heading to the warehouse. This is my affiliate link and there's a built in 5% off coupon (it shows up automatically at checkout) https://melissaknorris.com/mockmill I also have this post on grainmills https://melissaknorris.com/grinding-flour-and-beyond-the-homesteaders-guide-to-a-home-mill/
Wanda Holiday
How do you get the circular design on your bread? As in before baking picture? Why vinegar? We cal this Crunchy bread.
Melissa Norris
I use a proofing bowl called a banneton, here's the one I use, https://amzn.to/2XI1e8q
Andrea Verbeek
This is a silly question but how sticky is it supposed to be? I'm afraid I miscounted my flour and it looks soupy.
I made the honey wheat yesterday and it was great. How close is the consistency to that loaf?
Thanks so much!
Verne
How long can the remaining dough stay in fridge
Melissa Norris
Up to 14 days!
Gladys Silrus
Do you have a good banana cookie, bread recipe
Gladys Silrus
Hi Melissa am home from work at bank so going to make bread tonight. Probable gain 5 lb before I go back Ha who am I kidding 10 lbs
Chelsea
I have a ceramic costed Dutch oven, would you recommend using oil on the bottom to keep the bread from sticking?
Melissa Norris
No, it might burn, dust it with a small amount of flour if you're worried about it sticking or cornmeal if you have it.
Darcie
Thanks for this, and here's a tip from an ex-baker, keeping yeast in the freezer rather than fridge keeps it even longer if you're buying big packages. Learned that in a bakery.
Marce Land
I know this was posted a while ago but I need to thank you for this recipe! This past summer we finally got a 6qt Kitchenaid stand mixer which prompted me to try and make more baked goods even though I am not a baker. My husband is a great baker so I don’t even want to try anymore because everything he makes is way better than what I can make. The one thing my husband doesn’t bake is bread. I have always been scared of the yeast part and getting the water the right temp but after finally trying a whole wheat honey recipe I’ve fallen in love with making bread in the stand mixer. When I stumbled upon this super simple delicious recipe I fell even more in love with making bread and have decided to no longer buy bread from the store. With 4 kids I think this is our best option to feed them healthy ingredients and save money. I have made this bread every day for weeks since finding it. Everyone loves it and I can’t thank you enough for sharing this. ❤️
Rosemary
Hi, Melissa!
I was curious if the amount of flour in your recipe is good for freshly milled flour? Thank you and I can't wait to try this!
Rosemary
Melissa Norris
This is with store bought, for fresh ground I'd use a little bit less and go by feel.
Becky
Hey Melissa, YOU ROCK! You talked about baking on a pizza stone but then in the recipe it dosn't say how it gets in the oven or what the bread is actually on. I'm lost 🙁 The stone goes in the oven first and heats with it? How do You care for the stone? how is it non stick for cookies etc? Maybe there is an article some where and You don't need to answer any of this? New to Your site but excited for all the good stuff. Not a homesteader... old lady in the city but... still bunches of good stuff. I don't like GMO, processed blah blah blah 😉 LOVED the apple book with how to make vinegar! gonna try that. sounds scary - eating rotten food... :-/ but I do make my own kombucha so I am kinda used to it. really want to make fermented foods but scared. Looking forward to summit to learn more and become equipped. Thank You and May the LORD continue to bless You and Yours for all Your hard work and skills You so freely share. You are using Your gift for the Kingdom!! Nice Work Sister!! HUGS
Melissa Norris
Hi Becky!
I wash my stone with hot water and dry, but I don't use soap on it. I don't find mine needs to be oiled as often as cast iron. It's pretty non-stick, I do use a flat metal spatula so I can get under things easy in case they were to stick, but I do pizza, cookies, bread, etc on it.
I put the stone in the oven to heat and have the bread just sitting on the counter with a little bit of flour to keep it from sticking. When the stone is pre-heated, carefully use oven mitts and place it on a hot pad, put the bread on it, and right back in the oven to bake.
nancy
I cannot get the yeast to foam! Help!!!! 2 times I have failed. We are at an altitude of 5500 ft.
Thanks, Nancy
nancy
Help!!! The last two times i have tried your bread, I can not get the water to foam with the yeast!!???
Today I am using a plastic bowl, wooden spoon...house is warm.????
Melissa Norris
What type of yeast are you using? How old is it? How long are you waiting for it to foam?
Nancy
Thank you for getting back to me. I am using Fleischmann's Active Dry yeast and letting it foam for over 10 min.
Thank you, Nancy
Melissa Norris
If it's not foaming at all I'm suspicious the yeast is dead. Are there any bubbles at all? If you've already added in the rest of the ingredients I would see if it rises and would still try baking it. I store my yeast in the fridge to extend the shelf life.
Christel
I have used this book many times, but will try your variation. I usually bale my bread on a stone, it gives it a nice crust all around.
Christel
I forgot - I have a spice mix from Germany that makes it taste like Farmers bread from the country in Germany. SO YUMMY!
Elise
got your email and ordered your The Made from Scratch Life book and ordered the stone you recommended as well at the other book. I was so excited as I have never done this before. My problem is that my yeast does not bubble very much. I did a batch at 119 degrees F. and one at 100 degrees as it states on the package, but it does not do anything except a couple of bubbles. I am using a glass bowl. I am also stirring but not adding sugar as it says to on the package. Do I need to add sugar to activate it?
Melissa Norris
Elise, so excited you got the book and the stone.I hope you'll use them both often. You could try adding a dash of honey or honey, but how long are you letting the warm water and yeast sit for? Second, are you storing the yeast in the fridge? This helps prolong the shelf life of the yeast.
Aline
Good morning!!
Thank you for all your wonderful recipes. I am trying to get into making bread with freshly milled flour. This recipe doesn't clarify if you used your fresh milled or just bread flour from the store? I think in your tips you mentioned 2 T less per cup of flour?
Also, can I use any wheat berry? Would hard red or soft white work for this recipe? Thank you so much!
God bless,
Aline
Melissa Norris
Aline,
I've made it with all of those flours, all-purpose, store bought whole wheat, and fresh milled. I prefer hard white wheat berries for this, if you use soft white I'd mix it with some of the hard red. When using whole wheat and fresh ground flour, you'll want to use the recommened 2 Tablespoons less of flour per cup. Hope that helps.
Jennifer
I make all of our bread products now, and I'm happy to report, that I used stainless steel without any problems. My mixer has a metal bowl and I often proof in a metal bowl, and I use metal loaf pans. I have pottery bowls, and they are just so heavy to move around. It's taken me time to learn how to make bread, so I would say even if you don't have the glass equipment, you can still try it!
Tessa
Thank you! I have been worried about this, as I also find glass and crockery too heavy...and breakable. 😉
Cindi
This recipe looks so good! I love the tip about adding the vinegar breaking down the phytic acid. Freshly ground whole wheat bread was a staple at our house when I was growing up. Whenever I bite into a fresh slice of bread I am taken back to the warmth of my Mom's kitchen. Right now, she and my dad are running a bakery in Ireland and whenever they come home to visit she usually makes us some Irish Soda Bread. It tastes amazing! I have been enjoying baking sourdough with a starter from my sis-in-law and I love watching my girls (age 4 and 5) delight when I let them form their own loaves.
Denise
Could you post one of the Gluten Free recipes? This recipe sounds delightful and so easy!! Do you think I could just sub out the flour for Namaste GF flour or Pamela's?
Melissa Norris
Denise, I haven't used a gluten free flour blend with this one. If you did try a gluten free blend, I'd increase the liquid a tad and you'd probably need to add some xantham gum or other binder.
Gloria Reffner
I made this 5 minute no knead bread in the past. After several batches, my stone broke! Another no knead bread to try is Artisan Turbo bread with Steve. You can find it on youtube. I took his honey oatmeal bread and added chia, sesame, and ground flax seed to make a wonderful loaf of bread. Oh, try a stone bread pan - it gives a lovely crust!
Nina
Guess I should have read the comments first. I decided to see if anyone else asked the question 🙂
Thanks
Nina
Nina
Was wondering if you use any whole wheat in this bread recipe? Being pre-diabetic I like to use fiber in my foods to keep blood sugar control.
Nina
Vanshi
Hi. .I'm in the process of making it. .had one question- while keeping the dough in the refrigerator, do we keep it covered with the tea towel? Thank you!
Melissa Norris
I have a lid that fits on my bowl that I don't snap down all the way, but a tea towel would be fine too.
Carol
Can I bake both loaves at the same time? Your bread looks amazing, I want to try it. Thank you!
Melissa Norris
Yes, feel free to bake those bad boys together. 🙂
Karen
I've always loved the idea of getting back to our roots through old pioneering methods and you have an abundance of helpful tips and suggestions. Thanks for the wonderful bread recipe.. tell your husband he's right. What would we do without you?
Isela
Thanks for sharing your experience with bread. I bought the book you recommend a year ago and tried several recipes with good results. But now that you got me into trying to mill my flour I am not quite sure if I can use my fresh milled flour for this book's recipes? Since they use all purpose flour for most recipes. I'd appreciate your recommendations 🙂
Melissa Norris
Isela,
Hey, you can, you just have to alter the amount of flour a bit. Here's an article I did with tips on baking with fresh flour that I think will help you quite a bit. https://melissaknorris.com/grinding-flour-6-fresh-flour-baking-tips/
Debbie
I love this recipe I have been making bread every week since I found it on your website thanks again for the great recipe
Melissa Norris
Debbie,
Woo, hoo! Did you sign up for our new 5 days of free recipes that take less than 15 minutes and are all real food ingredients? If you like this one, you'll love it, too!
Linda Sue
I love baking bread. You mentioned, though, that you shouldn't use stainless steel. Is that at all? I have a mixer with a stainless steel bowl that I use. Do I need to purchase a glass bowl for the mixer?
Melissa Norris
Linda,
Mixing your dough in the stainless steel is fine, and you can let it rise in the stainless steel if your kitchen is warm. But, if your kitchen is cold and you notice your dough not rising, I've found transferring it to a glass or wooden bowl helps retain the heat. So try it out, you can always transfer the mixed dough to another bowl for rising, so you don't have to purchase a new mixing bowl.
Joy Cherry
Great Recipe for ne knead bread. My husband loves this type and I feel guilty every I feed him a slice of store bought bread. I love Jesus, my Husband, canning, crocheting, watercolor painting, baking, creating anything with my hands, singing in our church choir. I would love to follow a sister in Christ in the same drives that I have.
God Bless You Melissa!
Melissa Norris
Hi, Joy!
We sound like two cut from the same cloth, welcome! My canning season is just getting going here.
Cathy Heckman
We are gluten free by choice- can you use a gluten free flour blend if you add xanthum gum with the same results? We desperately miss crunchy bread, but if I cheat feel so terrible, so feel there is a slight gluten intolerance going on in my tummy, and have had success with other baked goods, but not sure if it would work for this bread.
Melissa Norris
Cathy,
I believe you'd need to double the amount of liquid if using gluten free flour blend from what my good friend who is all gluten free does. Let me know if you try it how it turns out! The book I linked to in the article has an entire area on gluten-free recipes in it w/ this bread.
8 Ways to Live Like Little House on the Prairie
[…] down and it’s part of your normal routine, then move on. It might be homemade bread (or this no-knead 5 minute bread), homemade yogurt, or a condensed can of soup […]
Jamie D
Melissa!!!
Thanks so much for the honey buttermilk sandwich bread recipe!!!...it's much softer & tastier than my usual fresh ground wheat honey bread. I do have a question about your other recipes...
Im assuming these recipes are referring to store bought flour? So, if I am using fresh ground wheat flour instead of store bought, would I just lessen the amount of flour used in the recipes?...& if so, would the amount lessened be roughly the same ratio in all the recipes? Or will I be missing out on good results?
Thanks for being a blessing to my family by being willing to share with us!
Melissa K. Norris
Jamie,
Yes, this was with store bought flour. Start with less flour and go by the "feel" of the dough. With fresh ground flour, I always keep it a little bit wetter as the fresh flour will absorb more moisture.
Crystal W.
I LOVE this recipe! I did make a couple changes to spruce it up a little. I added garlic salt and shredded cheese, then and ter I put it I the pan I added thinly sliced onion and fern jalapeño on top. It was great!
Melissa Norris
That sounds super yummy. You had me at shredded cheese.
makalove
I'm constantly on the lookout for a bread that my husband will eat. He grew up on Wonder bread, so what he's looking for is: white bread with a fine airy crumb, soft texture, and soft crust. I definitely can't use steam to get the nice crisp crust that's so beloved in artisan breads. I grew up on my grandma's and my mom's sourdough, but he finds it too dense. Plus I really want the convenience of the no-knead method! So if I skip the steam and use butter and/or milk to soften the crust, what's the crumb on this bread like? 😀
Kiki
Hi,
In this recipe you say to use 6 1/2 cups unsifted flour (you were out of bread flour and regular works just fine).
Is that freshly ground white wheat flour or a ground flour from the store?
I am trying to avoid using processed flours from the grocery store.
Thanks!
Melissa Norris
That was all purpose flour from the store, if using flour ground at home, I'd start with 5 cups as it will absorb more moisture.
information technology
Aw, this was an extremely good post. Taking the time and actual effort to produce a great article…
but what can I say… I hesitate a whole lot and don't seem to get
anything done.
My web site information technology
how much do real estate agents make
This means that in the data, it's possible that acupuncture has been used from the Columbus Acupuncture forbidden city Clinic in Colorado Springs.
We saw a quick forbidden city video Intro to the
kidneys, lungs, kidney and thyroid. Doctors prescribe
a number of short-term solutions, including asthma, bronchitis and recurrent chest infections.
In women, PMS and menopausal symptoms, like dizziness result from a NCCAM National Center for Complementary and Alternative Medicine.
vetement abercrombie et fitch
Lea: la propri茅t茅 de Reaper est tr猫s bien con莽u et j'ai senti qu'il 茅tait r茅aliste en ce qui concerne la hi茅rarchie patriarcale ces hommes ont cr茅茅 qui est bien en dehors des conventions de la soci茅t茅 civile. Ce livre ne comporte d'importantes recherches de votre part en ce qui concerne les clubs hardcore moto?
Amelia
Hello from Australia!
Just wondering, when you say "metal broiling pan" could a loaf pan or ceramic baking dish be substituted? Or is it just any sort of metal tray? (We don't say "broil" I think we say "bake" instead? "down here" in Aus.) Also, is the water poured into the pan with the dough? (ie; the dough is sitting in the water? or above it on a rack or something?) Apologies about all the questions. I'm new to baking bread and I want to get it right. 🙂
Bless!
Melissa K. Norris
A loaf pan would be fine to substitute to pour the water into, or ceramic, as long as it can with stand the high heat. The water is poured into a separate pan (the broiler pan as we say in the US), beneath the bread. It creates a steam that rises around the bread as it bakes creating a crunchy crust with a soft center. Let me know if you have any more questions. Welcome the world of bread baking, it's addicting. 🙂
KYF #066: Inspiring Pioneer Roots with Melissa Norris — GNOWFGLINS
[…] Melissa’s No-Knead Bread […]
stacy
Are you putting the the bread in a pan? Or just shaping it and cooking it?
Melissa K. Norris
I do both, depending upon how we're eating it. It will spread out when done in free form a tad.
Marianna
Hi, Melissa! I love this recipe! I'm having one issue - it's not rising much on the 2nd rise, the 40 minutes right before you bake. My loaves are not as high as I thought they would be. I've tried baking in a loaf pan and on a pizza stone. Any suggestions? Thanks!
Melissa Norris
You can try letting it rise longer. Also, you can let it rise in the oven with just the light on. Just be sure to take it out once you turn on the oven to preheat. It generally doesn't rise quite as much as a regular bread loaf though.
How to Avoid GMO Foods | Melissa K. NorrisMelissa K. Norris
[…] have a lot of time? Try my Homemade Bread in 5 Minutes a Day and Crunchy Granola Bars. Read the first chapter in my book, Pioneering Today-Faith and Home the […]
Robin Swindle
I was making our whole wheat bread with a traditional bread recipe but if we made a sandwich then took it to work, the bread had a moldy taste and smell to it? How is this recipe different and what can I do to keep it from doing this? Also, I noticed you said to not use steel bowls, etc. Could my metal loaf pans be causing a problem? Thanks!
Melissa K. Norris
How old was your bread? Fresh baked bread usually only last between 4 to 6 days, depending upon the humidity etc in your house. If it smells and tastes moldy don't eat it. If you're not eating the bread fast enough, slice it and freeze it, then thaw the single pieces in the microwave each morning. Your metal pan is fine for baking in. If you use a metal bowl it doesn't retain heat and will stop your yeast from fully activating and rising your dough. 🙂
Robin Swindle
It would start doing this only after about a day. I had never thought of putting it in the freezer. and I buy bread when it's on sale and put it in the freezer! DUH! lol
Thanks
Melissa Norris
You're welcome! Good luck on the freezer trick. 🙂
Charley
Thank you for linking up to Fresh Bread Friday! I've tried a few of the recipes from the cookbook, but I think I may need to try a few more!
Melissa Norris
Hi, Charley. One of my favorite things is discovering new recipes! Happy baking.
Cynthia Vanden Beukel
does this follow the rule of 'soaking' your flour as taught in the nourishing traditions cookbook?
Melissa Norris
Hi, Cynthia,
I haven't read the nourishing traditions cookbook, but I am familiar with "soaking" your flour. Soaking your flour breaks down the phytic acid and usually needs to occur over 24 hours, but some studies show in as little as 8 hours. Beings part of this happens in the fridge to keep it from rising before you're ready to bake, I'm not sure if it will break down as much as regular soaking on the counter top. However, all of the ingredients soak together and there is the acid base with the added apple cider vinegar, for at least 12 hours, so let's consider it half soaked? 🙂
Alma
Thank you for putting the printed copy of your bread on this site. I have watched the making of this bread on several websites and this is the first time I have a neatly printed copy of this bread.
Again, thank you and also for all the wonderful things on your site,
alma
Lynn C
Don't put water in the oven with your stone. I made a $35 mistake doing that. It broke my stone in half and I'd only used it 5 times.
Melissa Norris
Lynn, I'm so sorry it broke. I haven't had that problem, but I know some people will let the bread rise on a cutting board to allow the stone to warm up in the oven, then they transfer the loaf to the stone to bake. I haven't tried this, so I'm not sure how easy it will be.
sara
I let my bread rise on parchment paper and then transferred it on the parchment to the baking stone.
Patti
My bread turned out great, but it stuck to my pizza stone. How do you get it to not stick?
Melissa Norris
Patti, sorry I missed this question. You can sprinkle a bit of cornmeal on the stone or a light coating of olive oil.
101 Real Food Recipes in 30 Minutes Hands-On or Less | Cooking Traditional Foods
[...] No-Knead Bread [...]
Schanna
Hello, I was wondering if you can use whole wheat flour in this recipe?
Melissa K. Norris
Hi, Schanna,
Yes, you can absolutely use whole wheat flour in this recipe. If you use all whole wheat, I'd recommend adding a 1/4 cup of vital wheat gluten (it looks like flour and can be purchased in most whole foods sections of any grocery store). The vital wheat gluten helps the texture so it's not so dense.
lynda
But be sure to add extra water tho, I added 1/4 c. extra for 1/4 c. of vital wheat gluten. Was great!
lynda
Thank you so much for this recipe! Finances are such that I didn't want to invest in the book without knowing if we'd like bread this way or not, and we do! So easy. I did with whole wheat entirely, adding 1/4 c. vital wheat gluten and an extra 1/4 c. water. Love the vinegar.
One question tho, I couldn't get the yeast to foam up without sugar. I even bought new yeast thinking that was my problem. Happen to know anything on this?
Melissa K. Norris
Hi, Lynda. I'm not sure on the yeast not foaming. Sugar does provide more foam, but mine foams without it. Are you storing your yeast in the fridge? I always do mine. I tend to mix it pretty good with the water too. As long as it rises, I wouldn't worry too much.
I'm glad you like. We're going on over a year using it. I also have a reader who's son has a kidney problem so she cuts out almost all the salt and says it bakes wonderfully for him.
lynda
Thanks. 🙂
much does cost fly car another state
I absolutely love your site.. Excellent colors & theme.
Did you develop this site yourself? Please reply back as I'm wanting to create my own personal website and would like to find out where you got this from or what the theme is called. Thanks!
Melissa K. Norris
This is the twenty eleven theme from wordpress and I customized it with different plugins. Hope that helps you out. 🙂
Kate P
I just attempted this between last night and this morning and found that baking for half an hour left a very raw middle (I made two loaves). So anyone else who tries this, it's based on each individual oven (and I always have water underneath my bread). Do you have any tips on how to not burn the top of the bread while waiting on the inside to cook? Has anyone tried this at a lower temperature for a longer cooking time?
Also, 1.5 T of salt is a little excessive for me. I am cutting it down in the next batch, but the overall flavor is really delicious. Thank you.
Melissa K. Norris
Hi, Kate!
Glad you gave it a try. Oven's do vary, but it's really hard to overbake a wet dough like this. My oven cooks on the low side so I bake one loaf for 45 minutes. I'll edit the post. I haven't tried a lower temp for longer, but at 45 minutes the top hasn't burned. You can always put a piece of tin foil over the top to keep it from burning for the last 15 minutes or so.
I've noticed if I use sea salt the 1.5 T is perfect, but regular table salt can definitely be reduced. The beauty of this bread is tailoring it for you. I'm planning on adding in some roasted garlic to the next batch. 🙂
Kate P
45 minutes is definitely a little more realistic - I am definitely putting foil on the top for the last 15, though, as 30 minutes seems to get the perfect golden color and crunch. My second batch has fresh rosemary in it. Roasted garlic sounds delicious 🙂
Thank you for your quick response!
Melissa K. Norris
You're welcome. And I'm liking the sound of rosemary. Yum!
Chicken Artichoke Heart Casserole and The Irresistible Table | Melissa K. Norris
[...] 1 cup bread crumbs (I cut up my own from my 5 minute a day Artisan bread recipe-Melissa) [...]
Processed Replacements-Make Your Own Cream Soup Substitution | Melissa K. Norris
[...] It can be daunting and my best advice is to start with one item at a time. Begin with the items that you ingest the most of on a daily basis. For me, that was bread. It’s been over a year since I’ve purchased bread from the store using the less than 5 minutes a day method and only 5 traditional ingredients [...]
http://tinyurl.com/natoday43765
How did u actually get the ideas to publish ““Pioneering Today-Bake Your Own Bread In Less
than 5 Minutes a Day | Melissa K. Norris”? I appreciate
it -Mattie
Melissa Norris
Hi, Mattie
I provide the link above in the article, but I found the original recipe and basic premise for the bread in the book
Artisan Bread in Five Minutes a Day and their website http://www.artisanbreadinfive.com/ I altered it to the above recipe for better texture and health benefits. Hope you enjoy.
Deb
When you say in your directions above the recipe take a chunk of dough out, what do you mean by that?
Melissa Norris
Deb, the above recipe makes two loaves. For the first loaf, I flour my hands and then scoop/rip off half the dough with my hands. I form it into a ball or pull it long ways to fit the pan if I'm not free baking it. Hope that helps. I'm going to make a video this week to show the steps as I've discovered it's sometimes hard to explain. 🙂
Pioneering Today-No Rise Dinner Roll Recipe in less than | Melissa K. Norris
[...] I always have homemade bread on hand from my No Knead Bake Bread in Less than 5 Minutes a Day method. Now if only I could find a no knead and no rise [...]
Pioneering Today-Best Ever Flaky Pie Crust | Melissa K. Norris
[...] the filling just to eat the crust! In fact, my seven-year-old did that tonight. You can also have home baked bread in less than 5 minutes a day. Flaky Pastry [...]
Lea H @ Nourishing Treasures
Thank you for your submission on Nourishing Treasures' Make Your Own! Monday link-up.
Check back later tonight when the new link-up is running to see if you were one of the top 3 featured posts! 🙂
Pioneering Today Slow Cooker Cabbage Rolls Recipe | Melissa K. Norris
[...] The sauce is especially good when sopped up with some homemade bread made in less than 5 minutes a day. [...]
Martha Ramirez
Thank you! Just the other day I told Hubby that I was craving fresh bread.
Melissa K. Norris
THis is so good and no fat! So even on a diet, my husband and I just started the Insanity program, you can still eat it.
Pioneering Today-Homemade White Sauce Chicken Pizza | Melissa K. Norris
[...] As you know, I’m all about homemade bread after discovering I could bake fresh bread for my family in less than 5 minutes a day. [...]
Pioneering Today-Cooking with Cast Iron | Melissa K. Norris
[...] The other cookware you’ll find in my kitchen is stoneware for baking my fresh bread in less than 5 minutes a day. [...]
Barbara Scott
There's nothing like home-baked bread. My problem is that it's so good that my husband and I can't resist eating almost a whole loaf! I need a little self-control. LOL
Melissa K. Norris
Yes, with the two kids and my husband, we went through one in two days. I actually baked two on Sunday to hopefully last us the week. But, there's no sugar, oils, or fat in this, so if you're going to eat a whole loaf, it's by far the best choice. (At least, that's what I tell myself on the third slice)
Nancy Norris
Melissa,
Love the last name! Excited to try this recipe. I have a sourdough starter and we use it all the time.
Nancy
Melissa Norris
Nancy,
I adore sourdough and my little starter is now close to 2 years old. 🙂 Let me know how this turns out for you!
April Dreiszus
Melissa,
Would this bread be good for sandwiches? Ham, Turkey, Grilled cheese?
Thanks,
April
Melissa Norris
April,
I love it for grilled cheese! We use it for sandwiches, but it's chewier than regular store bought sandwich bread. It really shines when toasted or grilled.
Mary Norberg
Love this bread making technique. I add tons of fresh garlic & rosemary. It’s FAB. Also substitute half or so of a nice beer like ipa for equal amt water for rich flavor.
How long can remaining dough last in frig? Saw a headline for:
Make now, bake later 7 recipes bit wasn’t able to locate article.
THANKS!!!!
Melissa Norris
I have left mine in the fridge up to 14 days. Thanks for the tips on ways you've adapted it!
DAVE MINSBERG
Covered and sealed for storing? Or just loosely covered.
Thank you
Melissa Norris
The dough still needs to breathe so I do loosely covered.
Emily
Hi, can I use a metal bowl to cover the loaf inside the oven instead of the Dutch oven?, as I don't have one, Thanks.
Melissa Norris
As long as it's oven safe yes 🙂
sue
I love your recipe but was wondering if I could add a teaspoon and a half of sugar and a teaspoon and a half of olive oil to the ingredients that I usually add. Would it alter the texture or taste or ruin the loaf?
Janalyn Voigt
I have the same trouble but have found that the more often I make bread, the less quickly we eat it.
Melissa K. Norris
Must be that whole thing of we want what we don't have, so the more often we have it the less we crave. lol
Janalyn Voigt
We also know the taste of real food as opposed to the preservative-enhanced variety.
I've been getting into making Irish soda bread lately. It's so good!
Mary
I make a rosemary cheddar soda that is to die for good!!! Recipe foun@ on Pinterest!
Cath Rowe
I have made your “ double “ recipe and the first loaf turned out Ok …well it was edible ⚠️ but the one that sat in the fridge for two days did nothing at all …I couldn’t even cut it
I bought some new yeast yesterday so Ive prepared half your ingredients and the dough looks much livelier It is in my cool box on the warm setting and Im going to turn it off before I go to bed Its that cold here I dont need to use the fridge ….I will update tomorrow x
Melissa K. Norris
Soda bread, that sounds good. Want to share your recipe? I've made lots of traditional egg bread, rolls, and such, but not soda bread. Saint Paddy's Day is coming up.
Janalyn Voigt
I used a recipe from an interesting cookbook I read for review: The Bookclub Cookbook. The recipe was good, but I still prefer the loaves I've made in the past from recipes at this amazing site: http://www.sodabread.us/Recipes/sodabreadrecipes.htm
Whether or not you use the recipe, the site is worth a visit for its wealth of information (click the 'History' tab).
Saint Patrick's Day had always been a big deal for me since I was raised in the Catholic Church, and our Irish priests taught us how to celebrate it. Perhaps that's why the historical romance I'm writing features an Irish main character.
Gwen
Here is my recipe:
2 cups flour
1 cup buttermilk
1 Tablespoon brown sugar
1 teaspoon baking soda
1/2 teaspoon salt
bake at 400F for ~40 min (180 C convection). Check at 30 mins.
The dough should be soft but manageable. Knead the dough into a ball in the mixing bowl with your floured hands. Put on a lightly floured baking sheet and with the palm of your hand flatten out in a circle 1 1/2 inches thick for a freestanding loaf. Or, spray a 9-inch pie plate with cooking spray, dust lightly with oat bran, placed the prepared dough in the pie plate.
With a knife dipped in flour, make a cross through the center of the breads o that it will easily break into quarters when it is baked.
If the crust seems too hard, wrap the baked bread in a damp tea cloth. Leave the loaf standing upright until it is cool.
Melissa K. Norris
Gwen, I love the idea of buttermilk!
Thanks for sharing your variation.