
Cinnamon rolls are a must-have around the holidays. In fact, this recipe is so easy to make ahead and enjoy Christmas morning. The addition of chocolate and caramel have them doubling as a dessert, but the light and fluffy pastry make them perfect for breakfast or brunch.
There is little else I like better than cinnamon rolls. They're ooey-gooey, melt in your mouth, and make lingering over breakfast a must. The only thing that could make them better is chocolate... and not having to make frosting!!
Now don't get me wrong, I love frosting and I've been known to eat it with a spoon a time or two. Just a time or two.
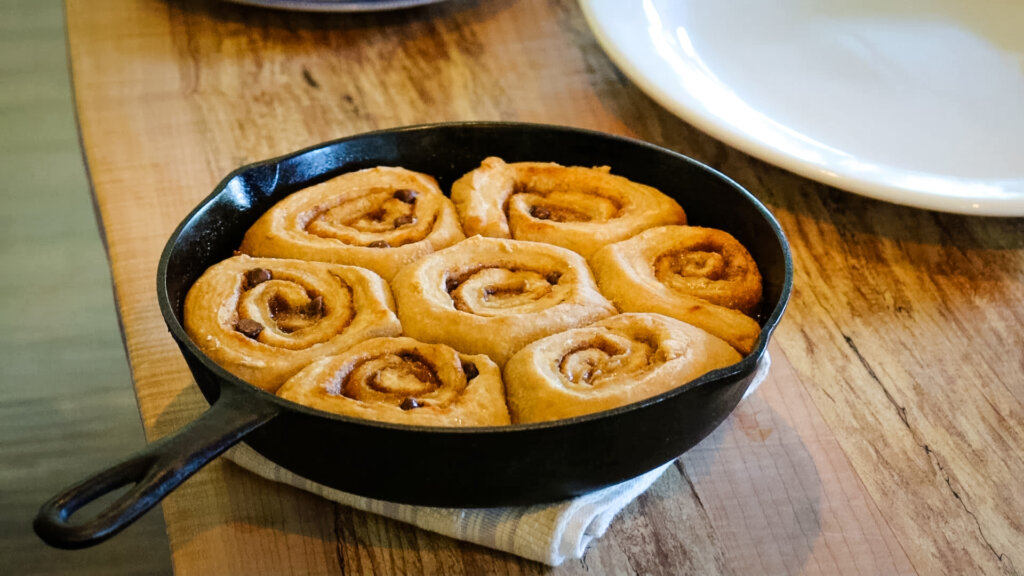
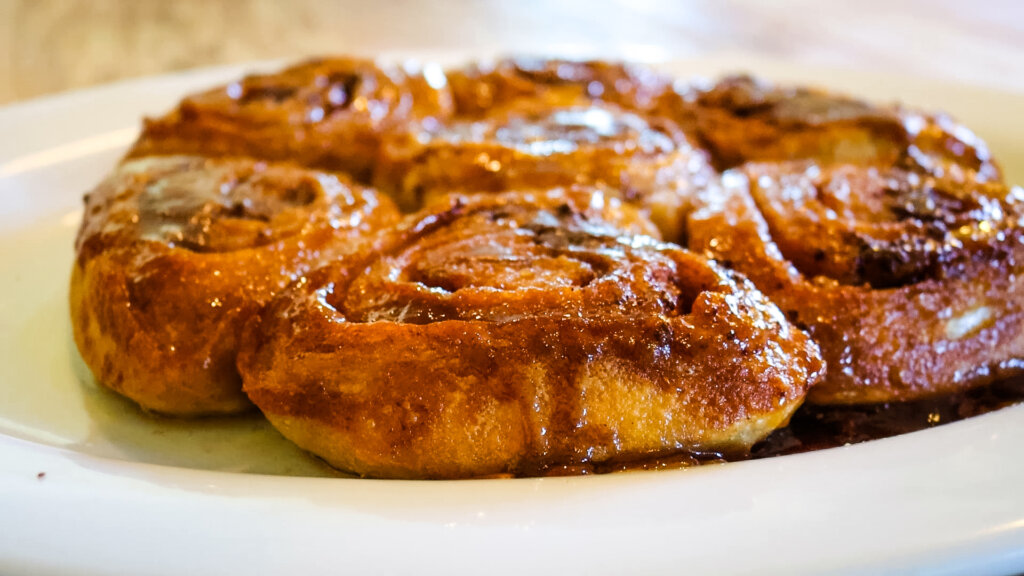
There's a beauty in simply dumping a pan upside down and watching lovely golden sticky caramel sauce drip out. And there's a beauty in diving in face first and eating it too, but more so when no one else is there to witness your stickiness.
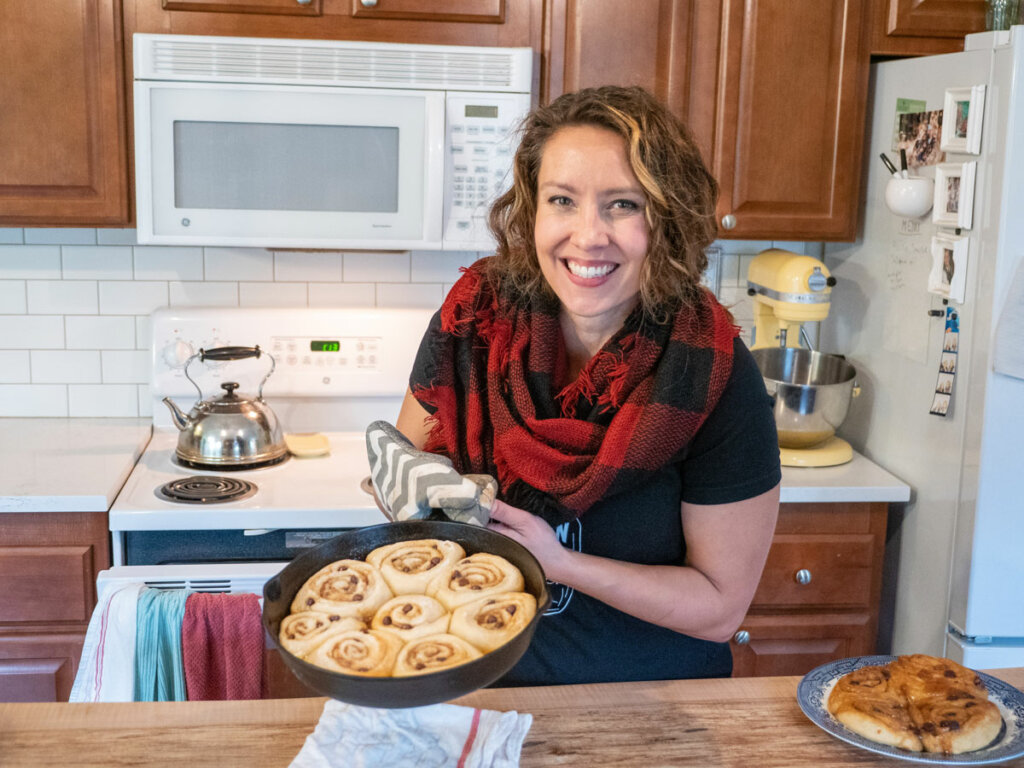
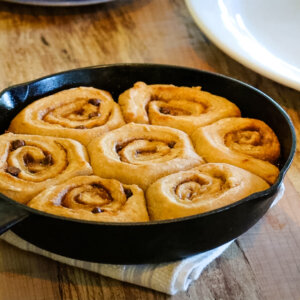
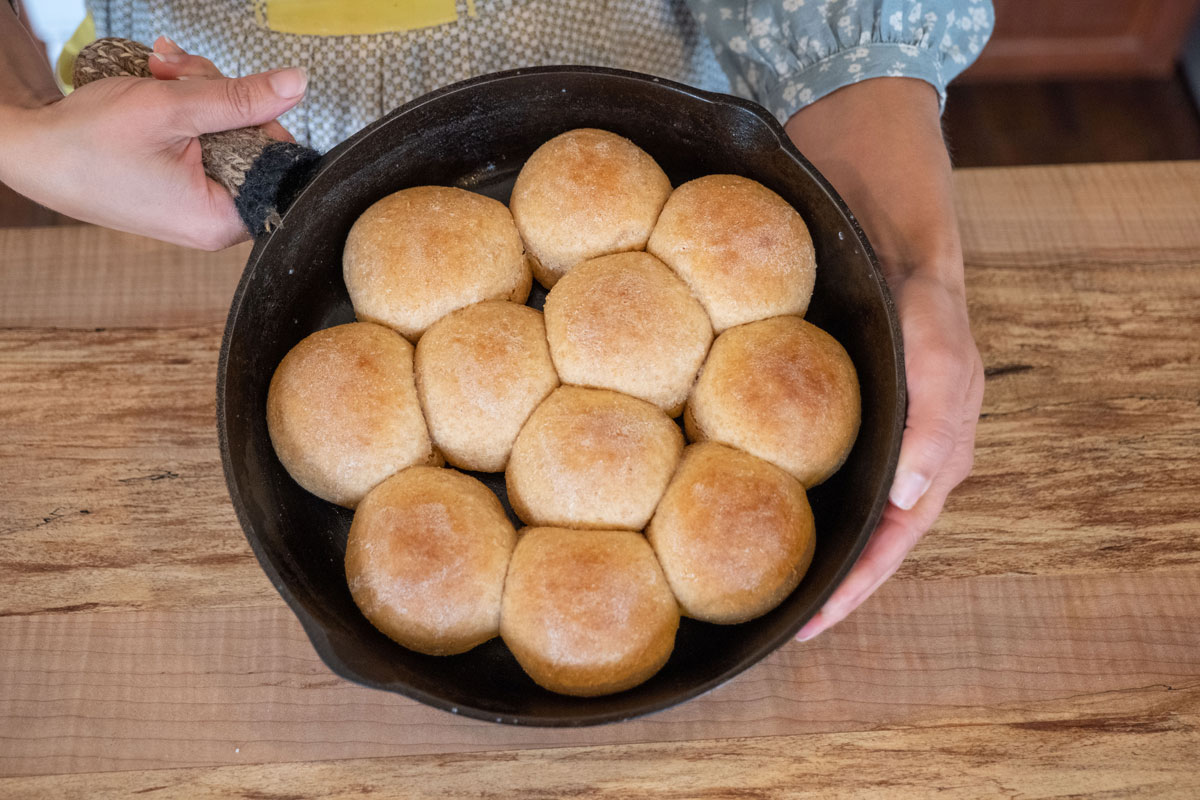
I've come to the determination that everything just looks better in a cast iron pan. Like makes me want to take a picture every time better, and no, not just because I happen to blog about scrumptious recipes. This recipe can be made in a 9x13 pan, but in true pioneer fashion (you did know this blog is based upon Pioneering Today, right?), you haven't really cooked unless you bake your chocolate caramel cinnamon rolls in a cast iron skillet.
Why I Love This Recipe
- Who doesn't love sweet, sticky and delicious cinnamon rolls? But incase you needed more reasons to love this recipe, here they are...
- You can make them from my artisan no-knead dough, which I oftentimes have sitting, ready to use in my refrigerator.
- You can follow the recipe as written below and get them just to the baking point, then let them sit overnight in the refrigerator for quick baking in the morning.
- No need to let the cinnamon rolls cool before frosting, the ooey-gooey caramel sauce acts like frosting and you can enjoy them hot out of the oven.
Cinnamon Roll Dough Instructions

- If you want to save time on this recipe, then use the dough from my no-knead artisan bread recipe and make it up to two weeks ahead of time. Then, just leave it in your refrigerator until ready to bake.
- If using the recipe below, pour warm water and milk over yeast in a glass, plastic, or wooden bowl. (Never use metal for bread. It doesn't hold the heat and can cause it not to rise as well.) Let sit for 8 to 10 minutes until foamy.
- Add egg, butter, and sugar to the bowl and stir to combine.
- Stir in salt and flour. Knead for 6 to 8 minutes on a lightly floured surface. The dough should feel smooth, not sticky. If it's sticky, keep adding small amounts of flour, 1 tablespoon at a time, until smooth.
- Cover dough with a tea towel (traps warmth and helps dough from forming a dry crust on top) and allow to rise for an hour in a draft-free spot. I always put mine on the top of the fridge or in your oven with just the oven light on works, too.
Subscribe to Melissa K. Norris!
Get updates on the latest posts and more from Melissa K. Norris straight to your inbox.
We use your personal data for interest-based advertising, as outlined in our Privacy Notice.
Preparing the Cinnamon Rolls
Cast Iron Skillet Directions:
You'll need two skillets. I use my 10 inch cast iron skillet and smaller 6 inch cast iron skillet for this recipe.
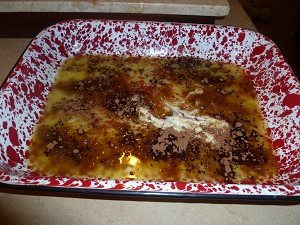
- Measure out 1/2 cup of butter (or coconut oil for dairy-free) and divide it between the two pans, putting a little bit more oil in the larger pan. Place the skillets in the oven and hit pre-heat. As soon as the coconut melts completely, after about 3 to 5 minutes, turn off the oven. (Alternatively, you can melt your butter ahead of time and proceed with making the caramel in a cool cast iron skillet.)
- Using an oven mitt, because we don't want to burn our fingers, pull out the skillets. Swirl the melted butter around until it covers the whole surface of the pan. Sprinkle the brown sugar and optional cocoa powder over the melted butter and set pans aside.
- Put your rolls, cut side down, into the skillet. The heat from the cast iron will help these rolls to rise nicely, especially on chilly fall and winter days, and because of the smaller pan, the rolls will puff up instead of out. (Anyone else's favorite part the center of the cinnamon roll, especially when it's almost not quite all the way done?)
9x13 Pan Directions:
- Layer ingredients for chocolate caramel sauce in your 9x13 pan.
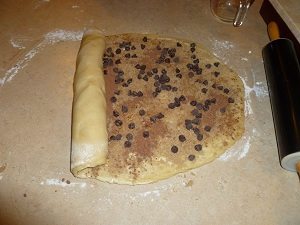
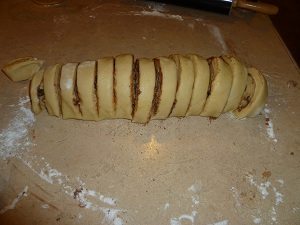
- After dough has risen, roll out on a lightly floured surface into a rectangle approximately 18x14 inches. Spread softened butter over surface of dough.
- Sprinkle brown sugar, cocoa powder, cinnamon, and chocolate chips over the surface.
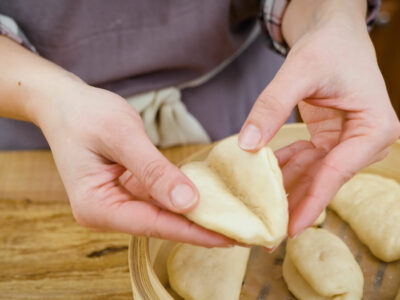
- Roll up, keeping it tight as you go (like rolling up a sleeping bag).
5. Cut into approximately 15 equal-sized pieces with a sharp knife. You can use thread or dental floss as well. I find quilting thread works better than regular thread as it's thicker.
6. Place cut edge down in a pan on top of the sauce ingredients, with sides just touching.
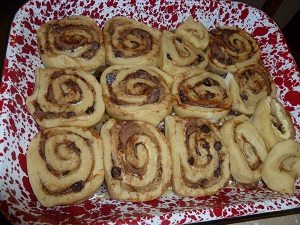
7. Cover with tea towel and allow to rise for one hour. Or cover with plastic wrap and put in fridge if baking in the morning, allow to come to room temperature before baking.
Baking Instructions
- Preheat the oven to 375 degrees. Allow cinnamon rolls to come to room temperature if stored in the refrigerator overnight.
- Bake for 12 to 25 minutes, depending on how thick you cut them. I prefer mine on the doughier side so I pull them out as soon as they're golden on top.
- Let cool in the pan for 3 minutes, then invert over platter or plate. Scrape remaining caramel sauce from pan onto cinnamon rolls. Enjoy!
Tips for This Recipe
- If you want to save time, make my no-knead artisan dough up to two weeks ahead of time. Then, use half the dough for this cinnamon roll recipe.
- Alternatively, you can prepare everything right up to the baking point, then cover and let them sit overnight in the refrigerator and bake in the morning. Then, allow them to preheat in the oven until 175 degrees, turn off the oven and check to see if they have doubled in size.
- Don't let the cinnamon rolls cool completely in the pan, they'll be very hard to turn out onto a pan and some of that delicious caramel will be left behind.
- For an extra chocolatey version, you can add the additional 1/4 cup of cocoa powder to both the filling and the caramel sauce, or serve with this chocolate gravy recipe.
- Try cutting your cinnamon rolls with thread for nice, even cuts.
- Learn how to clean a cast iron skillet and how to season a cast iron pan when you're done.
More Breakfast & Bread Recipes
- Homemade Pop Tarts
- Sourdough Chocolate Quick Bread
- Fried Donuts from Scratch
- Homemade Pumpkin Roll
- Blueberry Pudding Recipe
- Jam Roly-Poly - Vintage Recipe from Great-Grandma
- Grandmother’s Date Bread Recipe (Vintage Recipe)
- Blueberry Skillet Cake
Did you make this recipe? Snap a photo and tag me on social media, I'd LOVE to see your flaky pie crust! Then be sure to rate this recipe by clicking the stars in the recipe card below!
📖 Recipe
Old-Fashioned Homemade Chocolate Cinnamon Caramel Rolls
Ingredients
Dough
- 1/2 cups water warm, 120 degrees or lukewarm on your wrist
- 1/2 cup milk warm
- 2 1/4 tsp yeast
- 1 egg
- 1/2 cup butter softened
- 1/2 cup sugar
- 1 tsp salt
- 3 3/4 cups flour unsifted, all-purpose, pastry or bread flour (plus 1/2 cup or so for dusting your work surface)
Caramel Sauce
- 1/2 cup butter melted (or coconut oil for dairy-free)
- 1/2 cup brown sugar
- 1/4 cup cocoa powder optional
Chocolate Cinnamon Filling
- 1/4 cup butter softened
- 1/2 cup brown sugar
- Cinnamon to taste
- 1/2 cup semi-sweet chocolate chips or raisins, nuts, or other dried fruit
- 1/4 cup cocoa powder optional
Instructions
Dough
- Pour warm water and milk over yeast in a glass, plastic, or wooden bowl. (Never use metal for bread. It doesn't hold the heat and will kill your yeast.) Let sit for 8 to 10 minutes until foamy.
- Add egg, butter, and sugar to bowl and stir to combine. Stir
- Stir in salt and flour. Knead for 6 to 8 minutes on a lightly floured surface. Dough should feel smooth, not sticky. If it's sticky, keep adding small amounts of flour, 1 tablespoon at a time, until smooth.
- Cover dough with a tea towel (traps warmth and helps dough to rise) and allow to rise for an hour in a draft free spot. I always put mine on the top of the fridge or your oven with just the oven light on works, too.
Caramel Sauce
- Layer ingredients for caramel sauce in your cast iron or 9x13 pan.
Chocolate Cinnamon Filling
- Once the dough has doubled in size (usually takes 45 to 60 minutes) roll out on a lightly floured surface into a rectangle approximately 18×14 inches. Spread softened butter over the surface of the dough. Sprinkle brown sugar, cinnamon, chocolate chips, and optional cocoa powder over the surface.
- Roll up, keeping it tight as you go. Cut into approximately 15 equal pieces. Place cut edge down in the pan on top of the sauce with sides just touching.
- Cover with tea towel and allow to rise for one hour. Or cover with plastic wrap and put in fridge if baking in the morning (allow to come to room temperature before baking).
Baking
- Bake at 375 degrees for 12 to 25 minutes, depending on how thick you cut them. I prefer mine on the doughier side so I pull them out as soon as they're golden on top.
- Let cool in pan for 3 minutes then invert over platter or plate. Scrape remaining caramel sauce from pan onto cinnamon rolls. Enjoy!
Video
Notes
- For a make-ahead version, use my No-Knead Artisan Bread Dough, it can be made up to two weeks ahead of time and be ready and waiting in your refrigerator.
- In my husband's opinion, it's not dessert unless it's chocolate. Add 1/4 cup cocoa powder to the pan with other glaze ingredients, and 1/4 cup cocoa powder sprinkled with the filling ingredients. You can omit the cinnamon if you wish, but chocolate and cinnamon do go well together.
Nutrition
This recipe was originally written in 2012, but has been updated with newer photos, a video and an updated version of the recipe.


ClearHolidays
These Old-Fashioned Homemade Chocolate Caramel Cinnamon Rolls sound like the perfect treat for cozy holiday mornings! Just as ClearHolidays offers unforgettable travel experiences, these cinnamon rolls promise a deliciously memorable start to your day with their gooey caramel and rich chocolate. Whether you're indulging at home or dreaming of your next adventure, this recipe adds a sweet touch to any moment. Can’t wait to try these and share the joy!
Melissa S
Do you have a recipe without the chocolate? Like just cinnamon rolls?
Melissa Norris
The recipe already states to substitute raisins if preferred over the chocolate chips and to omit the cocoa powder in the other areas (says optional by them) if you don't want it chocolate, so there's no other recipe as that's the only changes.
Hannah
What brand of yeast do you use?
Janet
The information indicates no knead, although in the recipe it indicates
Knead for 6 to 8 minutes on a lightly floured surface?
I am confused
Melissa Norris
The base dough isn't kneaded (you're using a no knead bread dough recipe), when you're making the cinnamon rolls you have to incorporate extra flour in order to roll them.
Kirsty
Hi!! Love all of your recipes!!! Do you have an alternative for cast iron? Do you think round cake pans would work?
Melissa Norris
That should work just fine!
Jennifer
Hi. Do you have a way to convert the recipe to sourdough? I don’t use yeast; my daughter has dietary issues… no yeast, milk, eggs or nuts. Sourdough is my alternative for yeast.
Thanks
Jayne Cambra
Umm yummmy! I haven't even eaten yet Melissa!! Those cinnamon rolls make my mouth water just reading the recipe. LOL I need to try those this morning. Merry Christmas!!
Monique
I made your no knead bread and we’re enjoying it now, yum!! I’m planning on making the cinnamon rolls with the rest of the dough. Question: how long will these rolls last? We are going to be staying at a cabin for a few days. Not sure if I should make these head of time, or bring the dough and make them there. Trying to food prep so that I can spend less time in the kitchen and more time on the river w the family. Any tips much appreciated 😉
Melissa Norris
The cinnamon rolls are usually gone within 3 days at our house, I've never had any left past that day to see how long they'd last.
AP
Hi. The ratio of 2 cups of liquid to less that four cups of flour doesn't come close to kneadable dough. I think I had to almost double the amount of flour.
Melissa Norris
There was a typo that has been fixed, it should be 1/2 cup water and 1/2 cup milk. My apologies
Tammy Fried
Finding that my days of rolling out anything with a rolling pin are over now. Arthritis has finally progressed too far in all the wrong places. I've learned finally how to use stand mixer and dough hook to do most if not of the kneading and recipes for most things that don't require use of a rolling pin ... but not for any cinnamon roll recipes. At most can press some things out with hands instead of using roller if doesn't take long amount of time nor too much strength ... 5 minutes or less. Most doughs that tick the boxes are too soft or too sticky though. 🙁 I miss homemade cinnamon rolls!
Marie
So if we use your Artisan Bread recipe, we just take the dough and roll it out and proceed from there...? My son has an egg allergy and the Artisan Bread doesn't have egg.
Melissa Norris
Yes, the video shows you each step.
Bev Ross
I LOVE my cast iron pans. They make everything so much nicer. These cinnamon rolls sound wildly delicious. Thank you for recipe
Melissa Clark
Melissa,
Thanks so much for your blog and sharing your experiences with us to learn modern homesteading and being healthier.
My question is: this recipe is using store-bought flour? I would need to alter the amounts for fresh-ground flour?
Just listened to the podcast about fresh-ground flour and I only have hard red wheat...but using it for pumpkin bread recently amazed everyone with it's unique and delicious flavor! So eventually I will make this (and future pastry type items) with soft white wheat or spelt/barley combo for the texture you explained. 🙂
Melissa Norris
Hi Melissa,
Yes, this recipe is with all-purpose flour so to make with fresh ground flour (and I often times will do a mix of both) start with less of the fresh ground, knead for about 4 minutes, let sit for 10 to 15 minutes for the flour to soak up some of the moisture, then add more flour if needed so dough is soft enough to roll out and shape into rolls, but is still a bit tackier than if using all-purpose (so it's not too dense with the fresh whole wheat).
Kathy
I've used mine for biscuits, and the rise is great. I've also used it for pineapple upside down cake. The cake just brings back memories of my mom and grandmother making theirs in cast iron pans. I love how it carmelizes pineapple with the butter and brown sugar!
Melissa Norris
A pineapple upside down cake is an excellent idea!
J.L. Eieio
Thank you ma'am! 🙂
J.L. Eieio
Can you review & correct the recipe please? Steps 4 & 5 are identical. Something seems to have been left out...
Melissa Norris
J.L.
Thanks so much for catching that. You're absolutely right, I got it fixed.
Tina Maxwell
Berry cherry cobbler looks really scrumptious!
25+ Cast Iron & Dutch Oven Recipes
[…] Caramel Chocolate Cinnamon Rolls […]
buy cheap mbt shoes walking
D'autres auraient jeté l'éponge.In . L'acharnement se trouve rrtre d'autant additionally méritant dont Mario n'avait marche vraiment besoin delaware Geox pour vivre
Sally
I came to your page to read a recipe but the back ground is so dark I couldn't ready any of the writing.
it is a nice background but if you could change your text to white it would be easier to read. thank you
Melissa Norris
Sally, try reloading the page. It's a white background with black text. Not sure why it's not showing up that way on your browser....