Melissa K. Norris
  • Start Here
  • Podcast
  • Articles
  • Shop
    • Books
    • Classes
    • General Store
  • In Person Workshops
  • Academy
Log In

How to Can Pears the EASY Way

October 18, 2022 by Melissa Norris 65 Comments

Learn how to can pears the easy way. With my simple trick you'll be able to peel your pears with ease and have delicious home-canned food to line your pantry shelves all year long.

Jars of canned pears in a steam canner.

Why I Love Canning Pears

This time of year is super busy with all of our canning going on. We depend upon our jars of home-canned goodness to feed us during the winter months when fresh fruit isn't just growing on the bush right outside our door.

However, that can make finding the time to fit in all the canning difficult. So when I see a trick that can speed things up, you can bet I'll share it with you. This old-fashioned no-knife peeling tip is one of my favorites.

A bag of sugar from Azure Standard.

Azure Standard

This video is sponsored by Azure Standard, a great place to build up your bulk supplies and long-term food storage.

I like to buy my sugar and cinnamon sticks in bulk, so whenever it's canning season I know my supply will be full.

Azure has a special promotion for first-time customers through October 30, 2022. When you purchase $50 or more, you can get 10% off your order with my coupon code “MKN10”.

[adthrive-in-post-video-player video-id=”1zpMrKr6″ upload-date=”2022-10-12T20:37:41.000Z” name=”How to Can Pears.mp4″ description=”Learn how to can pears the easy way. You will have delicious fruit all year long that's high in flavor. You can even add cinnamon and have it sauced with syrup or sugar. You'll want to do several recipe variations and the best part? No knife peeling involved! I will give you a great tip.” player-type=”default” override-embed=”default”]

What Is The Best Way to Preserve Pears?

The best way to preserve pears is to can them in your own kitchen. See below for the best way to do all three of the canning process steps.

Pears being scooped into a jar.

Do I Need to Hot Pack Pears?

You may be wondering if you need to cook pears before canning. This is considered hot-packing pears, when you boil them slightly before adding them to your canning jars.

You do not need to cook pears before canning, you can use a raw-pack method, but here's why I recommend using a hot pack method. Hot packing pears will give you the best quality end product, but it is unnecessary unless you're only canning with water, not sugar.

I don't know about you, but I want the best-tasting food at the end, so taking the time to do a hot pack and have delicious home-canned pears is worth it.

3 Reasons to Hot Pack Pears:

  1. It helps push the oxygen out of the fruit.
  2. This, in turn, helps you pack more fruit in your jars.
  3. It helps prevent siphoning (which is liquid loss from jars while in the canner).

Do You Need to Use Sugar When Canning Pears?

You may can pears in just water, unsweetened apple juice, or light to medium syrup (which is a mixture of sugar and water in different ratios). You must use the hot pack method if you choose to can fruit with just water.

I prefer to use a light syrup, but if you want, canning pears can be done with honey instead of sugar.

Hot syrup being ladled into a jar of pears.

Syrup Ratios

  • Light Syrup – For light syrup, combine 5 3/4 cup water and 1 1/2 cups sugar.
  • Medium Syrup – For medium syrup, combine 5 1/4 cups water and 2 1/4 cups sugar.
  • Heavy Syrup – For heavy syrup, combine 5 cups water and 3 1/4 cups sugar.

Pro Tip: Because it's safe to can pears with no sugar at all, you can adjust these ratios to your preference. In the video, you'll notice I make a double batch of syrup, but my ratios aren't exact. That's OK!

Canning supplies and jars sitting on a kitchen counter.

Supplies Needed

  • Water Bath or Steam Canner – I love my steam canner because it's much easier to operate, and I don't need to cover my jars with water. You can also use a water bath canner or simply a pot large enough to cover your jars with about one inch of water. I used my pressure canner as a water bath canner when doing quarts because it's taller than my regular canner. You just use a standard tight-fitting lid and the rack instead of the pressure canning lid.
  • Ball Home Canning Utensil Kit– This canning utensil kit is one of the best investments I've ever made for canning supplies. I use the measuring and air bubble remover all the time, and because of the jar lifter, I don't have any more burnt fingertips. The funnel helps keep me from spilling liquid all over the counter.
  • Canning Jars & 2-Part Lids – You can use quart or pint-sized jars, depending on the size of your family. Grab your canning lids from ForJars here (use code “modern10” for 10% off your purchase). Pro Tip: Wide-mouth jars are the easiest to use for packing pears.
A woman holding pears, ready to can them.

Ingredients Needed

  • Pears – Depending on their size, you'll want about 16 medium ripe pears to fill six, one-quart canning jars. Some of the best varieties for canning are Bartlett, but any pear will do. If canning Asian pears, be sure to read the pro tip below.
  • Bottled Lemon Juice (optional) – You can use lemon juice in your bowl of water to help keep pears from turning brown while peeling the rest. This is purely optional and not necessary to safely can them.
  • Sugar – Sugar is optional when canning pears. See syrup ratios above to know how much sugar you'll need.
  • Bulk Non-Irradiated Cinnamon Sticks – Buying cinnamon sticks in bulk will be much cheaper than buying them from the grocery store. I prefer to buy my cinnamon sticks through Azure Standard, but here are some good quality cinnamon sticks from Amazon.

Pro Tip: Asian pears are not acidic enough to can on their own. If you do decide to can this type of pear, add 1 Tablespoon of bottled lemon juice per pint jar or 2 Tablespoons of bottled lemon juice per quart jar to can Asian pears safely.

Jars of canned pears in a steam canner.

How to Can Pears at Home

To can your pears at home, there are three main steps.

  1. Preparing for canning.
  2. Preparing the pears.
  3. Canning the pears.
Blanched pears sitting on a kitchen counter.

Prepare for Canning

  1. Prepare the water bath or steam canner.
    • For water bath canners, fill with water deep enough to cover the jars, place the rack, and begin heating the water.
    • For steam canners, fill to the recommended level and begin heating the water.
  2. Wash canning jars in hot soapy water, rinse, and place on a folded towel near the hot syrup and stovetop.
  3. Make sure you have clean canning lids ready.
A woman dropping whole pears into a pot of boiling water.
A woman putting pears into a pot of boiling water.
A woman placing blanched pears into a bowl of water.

Preparing the Pears

Remember that easy trick on peeling pears that I mentioned? Here it is – you can peel pears the same way you peel tomatoes and peaches by blanching them.

A woman peeling the skin off blanched pears.
A woman slicing pears in half.
A woman using a spoon to core pears.

How to Peel Pears (the Easy Way)

This is my favorite old-fashioned tip for peeling pears. I found this method in a really old 1920s book, and it's been my favorite method ever since.

  1. To blanche pears, take a big pot of boiling water and submerge your washed, ripe pears in a single layer for 15 to 30 seconds.
  2. With a slotted spoon, remove them and place them in a bowl of warm water. Continue until all pears have been blanched.
  3. Rub off the peel of each pear. Seriously, the skin slides right off. There is no knife or peeler needed.
    Pro Tip: If part of the pear is difficult to peel, it may not have been submerged in the boiling water. Just take the back of a spoon and scrape it off.
  4. Cut the peeled pear in half. This is the only time you'll need your knife.
  5. Scoop seeds and core out with a spoon.
  6. Place cored pear halves back into the bowl of water. Continue until all pears are cored and halved.
A woman adding lemon juice to a large bowl of water.
A woman placing peeled and cored pears into a bowl of lemon water.

Pro Tip: To keep pears from turning brown, add 1/4 cup of bottled lemon juice into the bowl of warm water. Once pears are peeled, use this bowl to store them until you're ready for the next step.

Pears in a pot of hot syrup.
A woman putting cinnamon sticks into jars for home canned pears.

Canning the Pears

In the video, I'm showing how to can in a steam canner. However, the directions below will be for a water bath canner. Refer to the video if you're using a steam canner.

Pears being scooped into a jar.
Hot syrup being ladled into a jar of pears.
A headspace measuring tool measuring a jar of pears.
  1. Make syrup by combining water and sugar in a large pot (see syrup options in “Syrup Ratios” above).
  2. Heat over medium-low and stir until almost a boil and sugar is dissolved.
  3. Place the pears into the hot syrup in a single layer and let them heat through for about 5 minutes.
  4. Fill your jar with two four-inch cinnamon sticks.
  5. Fill your jar with the hot pears using a slotted spoon (about 6-8 pear halves per quart jar). Leave 1/2-inch headspace. Pro Tip: If you put the pear halves face down, you can get more pears into the jar.
  6. Pour the hot syrup over the pears to 1/2-inch headspace using a ladle and canning funnel.
  7. Remove air bubbles with the bubble-remover tool and double-check your headspace, adding more syrup if needed.
  8. Wipe the rim of the jar with a clean towel and place the lid and band on.
  9. Tighten the lid to fingertip tight and place the jar in the water bath canner.
  10. Add more water to the water bath canner, ensuring the water's surface is at least 1 to 2 inches over the top of the jars. Bring to a hard boil.
  11. Start the processing time after the water has reached a full boil and process 20 minutes for pints and 25 minutes for quarts.
    Pro Tip: If you're 1,000 feet above sea level, increase processing time by 5 minutes.
  12. When the jars have been processed, turn off the heat. Leave the lid on for 5 minutes.
  13. Remove the canner lid; leave the jars in the canner for an additional 5 minutes.
  14. Remove jars onto a folded towel in a draft-free area and let cool for 24 hours.
A woman wiping the rim clean of a jar of pears.
A woman tightening the lid onto a jar of home canned pears.
Jars of canned pears in a steam canner.

Did you make this recipe? If so, please leave a star rating in the recipe card below. Then take a photo and tag me on social media @melissaknorris so I can see.

Be sure to check out my new canning book, Everything Worth Preserving, for all the ways you can safely can pears at home.

More Posts You May Enjoy

  • Homemade Apple Pie Filling Recipe and Canning Instructions
  • How to Can Apricots- Easy Canned Apricots Recipe
  • Make Homemade Jams and Jellies Like a Pro
  • 129+ Best Canning Recipes to Make This Year
  • Canning 101 Water-Bath vs. Pressure Canner
  • 10 Ways to Preserve Food at Home
Canned pears in a steam canner.

Canning Pears + Spiced Pear Recipe

MelissaKNorris
Easy pear canning recipe with low (or no sugar) but heavy on flavor with optional spices of cinnamon.
3.77 from 43 votes
Print Recipe Pin Recipe
Prep Time 15 mins
Cook Time 25 mins
Total Time 40 mins
Course fruit, side
Cuisine American
Servings 16 servings
Calories 101 kcal

Equipment

  • Water Bath or Steam Canner
  • Canning Tools
  • Canning Jars & Two-Part Lids

Ingredients
  

  • 16 pears about 3 to 4 pears per quart jar
  • 5.75 cups water
  • 1.5 cups sugar
  • 8 whole cinnamon sticks 2 per jar (optional)

Instructions
 

Preparing for Canning

  • Prepare the water bath or steam canner. For water bath canners, fill with water deep enough to cover the jars, place the rack, and begin heating the water. For steam canners, fill to the recommended level and begin heating the water.
  • Wash canning jars in hot soapy water, rinse, and place on a folded towel near the hot syrup and stovetop.
  • Make sure you have clean canning lids ready.

Preparing the Pears

  • To blanche pears, take a big pot of boiling water and submerge your washed, ripe pears in a single layer for 15 to 30 seconds.
  • With a slotted spoon, remove them and place them in a bowl of warm water. Continue until all pears have been blanched.
  • Rub off the peel of each pear. Seriously, the skin slides right off. There is no knife or peeler needed. Pro Tip: If part of the pear is difficult to peel, it may not have been submerged in the boiling water. Just take the back of a spoon and scrape it off.
  • Cut the peeled pear in half. This is the only time you'll need your knife.
  • Scoop seeds and core out with a spoon.
  • Place cored pear halves back into the bowl of water. Continue until all pears are cored and halved.

Canning Pears

  • Make syrup by combining water and sugar in a large pot (see syrup options in “Syrup Ratios” above).
  • Heat over medium-low and stir until almost a boil and sugar is dissolved.
  • Place the pears into the hot syrup in a single layer and let them heat through for about 5 minutes.
  • Fill your jar with two four-inch cinnamon sticks.
  • Fill your jar with the hot pears using a slotted spoon (about 6-8 pear halves per quart jar). Leave 1/2-inch headspace. Pro Tip: If you put the pear halves face down, you can get more pears into the jar.
  • Pour the hot syrup over the pears to 1/2-inch headspace using a ladle and canning funnel.
  • Remove air bubbles with the bubble-remover tool and double-check your headspace, adding more syrup if needed.
  • Wipe the rim of the jar with a clean towel and place the lid and band on.
  • Tighten the lid to fingertip tight and place the jar in the water bath canner.
  • Add more water to the water bath canner, ensuring the water's surface is at least 1 to 2 inches over the top of the jars. Bring to a hard boil.
  • Start the processing time after the water has reached a full boil and process 20 minutes for pints and 25 minutes for quarts. Pro Tip: If you're 1,000 feet above sea level, increase processing time by 5 minutes.
  • When the jars have been processed, turn off the heat. Leave the lid on for 5 minutes.
  • Remove the canner lid; leave the jars in the canner for an additional 5 minutes.
  • Remove jars onto a folded towel in a draft-free area and let cool for 24 hours.

Notes

  • If you put the pear halves face down, you can get more pears into the jar.
  • If you're 1,000 feet above sea level, increase processing time by 5 minutes.
  • Nutrition facts do not include syrup, only the pear.
  • In the video, I'm showing how to can in a steam canner. However, the directions in this recipe card are for a water bath canner. Refer to the video if you're using a steam canner.

Nutrition

Serving: 1pearCalories: 101kcalCarbohydrates: 27gProtein: 1gFat: 0.2gSaturated Fat: 0.04gPolyunsaturated Fat: 0.2gMonounsaturated Fat: 0.1gSodium: 2mgPotassium: 206mgFiber: 6gSugar: 17gVitamin A: 45IUVitamin C: 8mgCalcium: 16mgIron: 0.3mg
Keyword Canned Pears, canning pears recipe, canning pears without sugar, How to can pears
Tried this recipe?Let us know how it was!

Filed Under: Canning Recipes, Canning Recipes, Food Preservation, Food Preservation - Canning, Fruit, Jam and Jelly, Healthy Snacks, Recipes, Water Bath Tagged With: fruit, homesteading, More Canning, pears, preserving the harvest, recipes, water bath

Canned Tomato Sauce Recipe (+ Water-bath & Pressure Canning)

August 2, 2022 by Melissa Norris 132 Comments

Home-canned tomato sauce from vine-ripened tomatoes may as well be an entirely new product as there is no comparison to store-bought. It's incredibly easy to make and you can water bath or pressure can it for long-term food storage.

Jars of home canned tomato sauce on counter with ripe paste tomatoes and wicker basket

Follow this easy step-by-step tutorial for my favorite canned tomato sauce recipe and enjoy it spiced up as pizza or spaghetti sauce, use it in chili, for tomato soup, barbecue sauce, cabbage rolls, and so much more.

Why I Love This Recipe

Learning how to can tomato sauce is life-changing. No, seriously, with a single jar you can create pretty much anything your heart desires with tomato sauce as the base.

Using my principles for growing a year's worth of tomatoes (and then saving the seeds for the following year's garden), I am able to can our entire year's worth of tomato sauce. Never having to purchase tomato, pizza, or spaghetti sauce from the store is pretty amazing. In fact, I dare say this may be the most versatile item in my home food storage.

And let me tell ya, if you've never had homemade tomato sauce before made from vine-ripened tomatoes, then you've never had tomato sauce before. All else is an imitation, my friend.

If you're struggling to grow enough tomatoes to put up for sauce, you can always buy them from the farmer's market. But you may also be interested in how to prune tomatoes for a better harvest, or even my 10 tomato growing tips for a disease-free harvest.

Be sure to also check out these 129+ canning recipes to put up this year!

How Do You Can Tomato Sauce?

The best part about canning homemade tomato sauce is that you've got options! (A girl can never have too many options for canning recipes, right?)

You can use both water bath and pressure canning methods for this canned tomato sauce recipe. Update: you can use a steam canner, as long as the processing time is 45 minutes or less (I incorrectly said 30 minutes but it is actually 45 minutes, yay). Keep reading below to see which option best suits your needs.

If you feel like you could use a bit more hand-holding for canning tomato sauce, you may be interested in my Tomato Canning eCourse! (It's only $19 and includes how to can salsa and other sauces as well!)

Tomatoes growing on the vine.

What Tomatoes Make the Best Sauce?

First off, you can use any tomato, but truly, paste tomatoes are the best for making sauces.

Why, you ask? (I love it when you ask questions, I truly do!)

Paste tomatoes have less water inside and are fleshier. This results in a thicker sauce without so much reduction time. And I'm all about saving time in the kitchen!

Some good paste tomato options are Roma tomatoes and, of course, the mother of all paste tomatoes (and quite possibly the best paste tomato of the bunch) is the heirloom San Marzano Lungo No. 2. I grow them every.single.year.

This also happens to be the variety that frequently ripens first, so it's a double win in my book. We liked the flavor diced and tossed onto pizza, but it really shines in sauces and pastes.

A white colander filled with fresh tomatoes.

How Many Tomatoes Do I Need To Make Tomato Sauce?

You need a lot of tomatoes at once to make tomato sauce. This may be difficult if you don't have a large number of tomato plants and your tomatoes are ripening over a long span of time.

To allow for this without needing to make small batches of sauce, you can freeze your tomatoes whole in gallon ziplock bags until you have enough to move forward with this recipe.

The bonus of freezing tomatoes is that, as they defrost, you're actually able to peel the skins off, eliminating the step of having to roast them in the oven in batches (watch the video above to see how to do this if you're working with fresh tomatoes).

If you didn't grow enough tomatoes in your garden for sauce, you can buy a flat or two at the local farmer's market or barter with a friend. It's up to you how you source them, but for this canned tomato sauce recipe, you'll want at least 20 pounds of tomatoes to make about 7 pints of sauce.

Sliced tomatoes on a blue cutting board with a knife.

Ingredients

  • Tomatoes (about 20 pounds makes 7 pints of sauce), I recommend San Marzano, Roma and Amish Paste, or another paste tomato, but remember, any tomato will do!
  • Bottled lemon juice (1 Tablespoon per pint jar and 2 Tablespoons per quart jar) it's important to use bottled juice from concentrate as fresh lemons vary in their acidity.
  • Salt (1/4 teaspoon per pint jar and 1/2 teaspoon per quart jar) I like to use Redmond Real Salt, but any sea salt will do as long as it doesn't contain iodine or anti-caking agents.
  • Dried Basil (1/2 teaspoon per pint jar and 1 teaspoon per quart jar) I don't like adding dried herbs to my jars anymore because I feel like they lose flavor during the canning process, instead, now I add my herbs after opening my jars of canned sauce for whatever recipe I'm using it for.
  • Canning jars, lids, and bands
  • Either a water bath or pressure canner
Tomatoes on the bottom of a large stockpot and a potato masher mashing the tomatoes.

Making This Tomato Sauce Recipe

1. The first step, pick yourself some tomatoes! I didn't bother weighing out my haul, it was approximately 90 ripe tomatoes which I'm guessing came close to about 20 pounds of tomatoes. It yielded three one-quart jars plus a one-pint jar in the end.

2. Slice the tomatoes in half and remove the inner seeds and white membrane.

3. Lay the tomatoes, skin side up, on a cookie sheet and place in a preheated 350 degree F oven for 5 minutes, or until the skins begin to come loose from the flesh.

4. Remove skins and reserve in a bowl (I like to either dehydrate or freeze dry my seeds and skins to then pulse into a powder and use to thicken soups!).

Tip: If you want to skip this step of removing the skins, try using the Weston Tomato Press. Or simply chop the tomatoes and add them to the stockpot, cook them down, mash them, and then put the sauce through a food mill to remove the skins.

5. Place the remaining tomatoes into a food processor or high-powered blender and give it a quick pulse to liquefy the contents. If you don't have a blender or food processor, you can mash the tomatoes (as shown in the photo above).

NOTE: Keep track of how much liquid you end up with, this amount will be necessary to know how many jars to prepare for canning.

A stockpot filled with boiling tomato sauce.

6. Pour all tomato sauce into a large stockpot and bring up to a simmer and allow to reduce until the sauce is as thick as you like it. For my paste tomatoes, this usually means reducing it for about 40 minutes which allows about 1 inch of the liquid to evaporate. But my sauce is already pretty thick right from the start. This is purely preferential and will vary based on tomato varieties.

7. Meanwhile, prepare your jars, gather your lids, and either your water bath canner or your pressure canner.

8. To each jar, add a small amount of tomato sauce, then bottled lemon juice, salt, and optional herbs (see ingredients above for amounts).

NOTE: Lemon juice (or citric acid), salt, and herbs should be added to each individual jar, not the pot of tomato sauce. And you must add the bottled lemon juice for safe shelf stability.

Canning jars and measuring spoons with lemon juice and salt in them.
Jar of tomato sauce with a head space measuring tool in the top.

9. Fill jars with tomato sauce up to a 1/2-inch headspace for water bath canning and 1-inch headspace for pressure canning. I typically like to pressure can because it takes less time.

10. Run a spatula around the jar circumference to remove air bubbles. Add more tomato sauce if needed to keep 1/2-inch or 1-inch headspace depending upon your method of canning.

11. With a damp clean cloth, wipe the rim of the jar clean. Place on lids and screw down the bands until resistance is met, then to fingertip tight.

Waterbath canner with jars covered with water.

Water Bath Canning Instructions

1. Place jars on a rack inside your water bath canner.

2. Make sure at least 1 inch of water is covering the tops of the jars.

3. Once you've got rolling boiling water, add lid and process pint jars for 35 minutes or quart jars for 40 minutes.

NOTE: See recipe notes for altitude adjustments above 1,000 feet in elevation.

4. Turn off heat and remove the lid from the canner. Allow jars to rest inside the water bath for 5 minutes.

NOTE: If you remove jars immediately, you run the risk of cracking the jars or the siphoning of liquid, which can inhibit a proper seal.

5. After the five minutes have passed, using a jar lifter, carefully lift jars out of the canner and place them in a draft-free area on a kitchen towel folded in thirds. Never place hot jars on a cold countertop.

6. Allow jars to rest, untouched for at least 12 hours, 24 hours if you have the counter space.

7. Remove bands and check seals then move to the pantry for storage. (If any jars didn't seal, store them in the refrigerator and use them within a day or two.)

Upclose shot of a pressure canner with jiggler.

Pressure Canning Instructions

1. Add water to the pressure canner, place the inner rack inside, and load jars.

2. Lock the lid, bring to a boil, and allow the pressure canner to vent steam for 10 minutes.

3. Put the weight on and allow the canner to come up to 10 pounds of pressure (or use a weighted gauge, depending on your pressure canner).

NOTE: See recipe notes for altitude adjustments above 1,000 feet in elevation.

4. Start processing time after weight begins rocking and hissing, or dial gauge reads 10 pounds of pressure.

5. Process both pint and quart-size jars for 15 minutes.

6. Allow pressure canner to cool down naturally and for pressure to return to normal.

7. Carefully remove the hot lid and wait another 10 minutes before taking jars out of canner.

NOTE: If you remove jars immediately, you run the risk of cracking the jars or the siphoning of liquid, which can inhibit a proper seal.

8. Using a jar lifter, carefully lift jars out of the canner and place them in a draft-free area on a kitchen towel folded in thirds. Never place hot jars on a cold countertop.

9. Allow jars to rest, untouched for at least 12 hours, 24 hours if you have the counter space.

10. Remove bands and check seals then move to the pantry for storage. (If any jars didn't seal, store them in the refrigerator and use within a day or two.)

NOTE: If you have enough tomato sauce to fill all the jars needed for a run in the pressure canner, I'd use the pressure canner. Food may reach a hotter temperature in the pressure canner, but because it's processed for less time, it retains more of the nutrients. But, if you don't have enough jars or don't have a pressure canner, the water bath is completely safe with this recipe.

Vertical view of an open jar of tomato sauce with fresh tomatoes on the counter and a teaspoon of dried basil.

Now stand back and look at those gorgeous scarlet jars, just begging to be simmered all day for spaghetti, in chili, or in these slow cooker cabbage rolls.

Seriously, does anyone else like to sit and stare at the rows of home-canned food, or am I the only one weird that way? I'm hoping now that you know how to can tomato sauce, you'll be staring at them, too.

Want to learn how to pressure can?

I have a FREE pressure canning video series here walking you through how to:

  • safely pressure can without fear of blowing it up or exploding
  • how to make sure you stay SAFE and avoid botulism
  • the science of canning so you always stay safe
  • what foods CANNOT be canned at home, even in a pressure canner
  • and more

It's completely free and I've taught hundreds of people how to pressure can, you're in good hands! Click here to snag your seat and get started pressure canning today.

home canned jars of tomato sauce on counter with ripe tomatoes

More Tomato Related Posts

  • Weston Tomato Press (+ Tomato Sauce Recipe)
  • How to Prune Tomato Plants for a Better Harvest
  • Storing Green Tomatoes for Fresh Eating
  • 10 Tomato Growing Tips for a Disease Free Harvest
  • Preventing & Treating Early Blight of Tomato & Potato Plants
  • Slow Cooker or Instant Pot Cabbage Rolls Recipe
  • Homemade Barbecue Sauce Recipe
  • 129+ Best Canning Recipes to Put Up This Year
  • Canning Problems and Solutions: Siphoning (Liquid Loss in Jars)
  • Pressure Canning FAQ's

Want ALL of my best-preserving recipes

This recipe is one of many in my new book, Everything Worth Preserving,

Discover the 9 home food preservation methods to safely store delicious food for year-round eating with Melissa’s step-by-step tutorials, recipes, and easy-to-use charts. Get ready to learn everything you need to know about cold storage (aka freezer), water bath/steam canning, pressure canning, dehydrating, fermenting, freeze-drying, root cellar, infusion, and salt/curing!

Pre-Order now for $29 USD!

https://melissaknorris.com/book/everything-worth-preserving/

Did you make this recipe? If so, I'd love for you to leave me a star review in the recipe card below, then tag me on social media @melissaknorris so I can see!

Easy Canned Tomato Sauce

Melissa Norris
Learn how to can tomato sauce at home with this easy recipe, safe for both water bath or pressure canning!
4.22 from 82 votes
Print Recipe Pin Recipe
Prep Time 1 hr
Cook Time 1 hr
Canning Time 35 mins
Total Time 2 hrs 35 mins
Course Sauce
Cuisine Italian
Servings 14 cups
Calories 119 kcal

Equipment

  • Pressure Canner or Water Bath Canner
  • Canning Jars and Lids

Ingredients
  

  • 20 pounds tomatoes 20 pounds makes about 7 pints of sauce
  • 7 tbsp bottled lemon juice
  • 1.75 tsp salt
  • 3.5 tsp dried basil optional

Instructions
 

Prepare Tomatoes

  • Pick your fresh tomatoes, slice in half and remove seeds.
  • Place tomatoes, flesh side down (skin side up) on a cookie sheet and roast in a 350 degree F oven for 5 minutes (or until skins start to pull away from the tomatoes).
  • Carefully remove skins and set them aside in a bowl.
  • Add tomatoes to a food processor or high-powered blender. Pulse quickly to liquefy contents.
  • Add tomato sauce to a heavy-bottomed pot and bring to a boil.
  • Reduce heat and continue simmering until tomato sauce is reduced down to desired thickness. (This will vary based on tomato variety.)
  • Meanwhile, prepare your jars, gather your lids, and either your water bath canner or your pressure canner.
  • To each jar, add one scoop of tomato sauce, then add 1 Tablespoon bottled lemon juice to each pint jar (or 2 Tablespoons lemon juice to each quart jar).
  • Add 1/4 teaspoon salt to each pint jar (or 1/2 teaspoon salt to each quart jar).
  • Add the optional 1/2 teaspoon dried basil to each pint jar (or 1 teaspoon dried basil to each quart jar).
  • Fill jars the rest of the way with tomato sauce leaving 1/2-inch headspace for water bath canning and 1-inch headspace for pressure canning.
  • Run a spatula around the jar circumference to remove air bubbles. Add more tomato sauce if needed to keep 1/2-inch or 1-inch headspace depending upon your method of canning.
  • With a damp clean cloth, wipe the rim of the jar clean. Place on lids and screw down the bands until resistance is met, then to fingertip tight.

Water Bath Canning Instructions

  • Place jars on a rack inside your water bath canner.
  • Make sure at least 1 inch of water is covering the tops of the jars.
  • Once you’ve got rolling boiling water, process pint jars for 35 minutes or quart jars for 40 minutes. (See notes for high altitude canning instructions.)
  • Turn off heat and remove the lid from the canner. Allow jars to rest inside the water bath for 5 minutes.
  • Using a jar lifter, carefully lift jars out of the canner and place them in a draft-free area on a kitchen towel folded in thirds. Never place hot jars on a cold countertop.
  • Allow jars to rest, untouched for at least 12 hours, 24 hours if you have the counter space.
  • Remove bands and check seals then move to the pantry for storage. (If any jars didn’t seal, store them in the refrigerator and use within a day or two.)

Pressure Canning Instructions

  • Add water to pressure canner, put in the rack, and load jars.
  • Lock the lid, bring to a boil, and allow the pressure canner to vent steam for 10 minutes.
  • Put the weight on and allow the canner to come up to 10 pounds of pressure (or use a weighted gauge, depending on your pressure canner). See notes for high-altitude canning instructions.
  • Start processing time after weight begins rocking and hissing, or dial gauge reads 10 pounds of pressure.
  • Process both pint and quart-size jars for 15 minutes.
  • Allow pressure canner to cool down naturally and for pressure to return to normal.
  • Carefully remove the hot lid and wait another 10 minutes before taking jars out of canner.
  • Using a jar lifter, carefully lift jars out of the canner and place them in a draft-free area on a kitchen towel folded in thirds. Never place hot jars on a cold countertop.
  • Allow jars to rest, untouched for at least 12 hours, 24 hours if you have the counter space.
  • Remove bands and check seals then move to the pantry for storage. (If any jars didn’t seal, store them in the refrigerator and use within a day or two.)

Video

Notes

  • Keep track of how much tomato sauce you're blending as you go to have an idea of how many jars to prepare for canning.
  • You MUST use bottled lemon juice for this recipe in order for it to be considered safe (or citric acid, see free chart for differing types of acid and amounts right above recipe card).
  • Lemon juice, salt, and optional herbs should be added to each individual jar, not the pot of tomato sauce.
  • If you have enough tomato sauce to fill all the jars needed for a run in the pressure canner, I'd use the pressure canner. Food may reach a hotter temperature in the pressure canner, but because it's processed for less time, it retains more of the nutrients.
  • If you don't have enough jars to fill a pressure canner, or you don't have one, the water bath is completely fine with this recipe.
  • Even if you are pressure canning the tomato sauce, you still need to use the bottled lemon juice (or citric acid).
  • Allow jars to remain in the canner for the recommended time to prevent siphoning of liquid which can inhibit a proper seal.
If you're 1,001 feet above sea level, you must make processing adjustments.
  • For water bath canning 1,001 to 3,000 feet is 40 minutes for pints and 45 minutes for quarts, 3,001 to 6,000 is 45 minutes for pints and 50 minutes for quarts. For altitudes above 6,001 feet increase by an additional 5 minutes.  
  • For pressure canning, 1,001 + feet use 15 pounds of pressure with a weighted gauge canner. For dial gauge, if 0 to 2,000 feet use 11 lbs PSI, for 2,001 to 4,000 feet use 12 lbs PSI, for 4,001 to 6,000 feet use 13 lbs PSI, for 6,001 to 8,000 feet use 14 lbs PSI.

Nutrition

Calories: 119kcalCarbohydrates: 26gProtein: 6gFat: 1gSaturated Fat: 1gSodium: 323mgPotassium: 1550mgFiber: 8gSugar: 17gVitamin A: 5398IUVitamin C: 92mgCalcium: 70mgIron: 2mg
Keyword Canned Tomato Sauce, pressure canning, Tomato, Tomato Sauce, Water Bath Canning
Tried this recipe?Let us know how it was!

Filed Under: Canning Recipes, Food Preservation, Food Preservation - Canning, Pressure Canning, Recipes, Water Bath Tagged With: homemade, More Canning, prepper, preserving, recipes, survival, tomato acid chart, tomato sauce

Easy No Knead Artisan Bread Recipe

November 11, 2021 by Melissa Norris 225 Comments

This easy no-knead artisan bread recipe takes just 5 minutes a day and uses only 5 ingredients. It has a soft and fluffy inside and a perfectly crunchy crust. Everything bread should be without all the work! This step-by-step tutorial will have you turning out loaves of homemade goodness in no time.

artisan bread on parchment paper

I first fell in love with this bread when I had toddlers at home, was working full time, and needed a foolproof quick bread recipe.

Since then I've tweaked this basic recipe from No-Knead Artisan Bread in 5 Minutes a Day by Jeff Hertzberg and Zoe Francios to a thing of perfection. If you have my book Hand Made: the Modern Guide to Made-from-Scratch Living you'll recognize this from page 44 as my Master Dough Recipe.

Having a versatile quick super easy no-knead bread recipe is key, I've made this all different ways over the years, including different bake times and baking dishes, and below is my favorite variation.

Trust me, this will quickly become a staple at your house. Fresh bread is a thing of beauty, and this recipe makes excellent garlic bread, sandwiches, torn and dipped into soup… or you might just devour it as is, slathered with some butter, of course!

If you're wondering just how to make those delicious looking cinnamon rolls, pizza crust, hamburger buns, and more, go grab my full Homemade Bread and Baking Course! 

bread dough in bowl with flour and vinegar on table

Ingredients

With this dough sitting in the refrigerator waiting for you, it's so nice not to have to worry about having ingredients on hand when making a fresh loaf of bread, or needing to let your dough rise to room temperature first. This dough actually works best straight from the fridge.

You will, however, need the following ingredients to make the master dough. See each ingredient for tips or substitutions.

  1. Flour – Use unsifted all-purpose flour or bread flour. You can use whole wheat or fresh ground, but reduce flour to 5 1/2 cups and increase only if the dough is too wet and won't hold any type of shape. I've successfully done half whole wheat and half all-purpose at the full 6 and 1/2 cups. To avoid measuring errors, spoon flour into measuring cup and then level.
  2. Water – Make sure water is warm enough to activate yeast but not so hot it kills it. If using a thermometer about 115 degrees Fahrenheit or warm to the inside of your wrist. You'll also want to be sure your water is free of chlorine or other contaminants as this can affect baking.
  3. Salt – I use Redmond's Real Salt or sea salt, but table salt works fine too.
  4. Vinegar – I use my homemade apple cider vinegar but any vinegar will do, it helps create a better texture in no-knead bread recipes.
  5. Yeast – I use active dry yeast but instant will work too. Store your yeast in the fridge to help prolong shelf life.

This bread has that awesome crunchy yet chewy crust with an incredible soft flaky crumb. My kids inhale it. The recipe states this makes two nice sized loaves.

A bread lame scoring a shaped ball of artisan bread dough.

No Knead Bread Equipment

While not required, these are some tools that I find invaluable in my bread baking, both this easy no knead artisan bread dough and my sourdough loaves. Speaking of sourdough, here's my free homemade sourdough starter series!

  • Banneton dough proofing bowl this little bowl is priceless to help form a nice dome on top of round loaves.
  • Bread lame this razor blade makes it easy to slash the top of the dough without tearing it or burning myself on the side of the preheated Dutch oven.
  • Cast iron bread baking Dutch oven I love this one because I don't worry about the knob melting and can use the lid as a skillet, plus no enamel coating to scratch or damage.
  • Wooden bench knife makes it super easy to separte out the dough without it sticking to your hands and helps to form the loaf, plus makes clean up a breeze (no gummy flour on sponges or countertops). You can make it without one but they make things so much easier and are a work horse in the kitchen 10 Time-Saving Uses for a Wooden Bench Knife in the Kitchen
  • Wooden dough scraper is handy for scraping the dough out of the bowl
A woman shaping dough with her hands on a well-floured work surface.

How to Make This Recipe

1.Mix together yeast and water in a large bowl. Allow yeast to turn bubbly (about 3 to 6 minutes).

2. Stir in vinegar, salt, and three cups of flour.

3. Incorporate remaining flour one cup at a time. Only add in that extra 1/2 cup if your dough doesn't seem to be holding together (see video for demonstration).

A large bowl of bread dough.

4. Allow dough to rise for 2 to 3 hours until it has at least doubled in size.

5. Cover bowl, don't seal completely and place in the fridge for at least 8 hours before use.

A woman's hand scooping out half the dough from a large bowl.

6. Use 1/2 of the dough (just pull it out with your hands) and from a round loaf on parchment paper. Let the dough rise for 40 minutes (rise time may vary depending on the temperature and humidity of your kitchen).

Note: You can use a well-floured banneton for the rise time if you'd like your dough to stay a nice tall uniform shape. The banneton isn't necessary and I use it whenever I'd like a pretty swirl on the top of my loaf.

7. Preheat oven with cast iron Dutch oven inside to 450 degrees Fahrenheit.

Artisan bread dough shaped and scored on parchment paper in a cast iron dutch oven.

8. Transfer loaf to preheated Dutch oven (it's hot, use oven mitts) and slash the top with a sharp knife or bread lame.

9. Bake with lid on for 25 minutes. Your bread should just be starting to brown at this point.

Loaf of artisan bread, halfway through baking, in a cast iron dutch oven with lid removed.

10. Remove the lid and bake for another 10 minutes or until perfectly golden brown on top and starting to get very crunchy.

Finished loaf of artisan bread in a cast iron dutch oven lined with parchment paper.

11. Carefully remove from oven, move bread to a cooling rack and allow to cool for 1 hour before slicing (or at least 20 minutes if you're in a rush!).

Artisan bread sliced open to reveal the crumb.

Artisan Bread Tips and Tricks

  • Flour. Use unsifted all-purpose or bread flour. Spoon flour into measuring cup and level. You can use whole wheat or fresh ground, but reduce flour to 5 1/2 cups and increase only if the dough is too wet and won’t hold any type of shape. I’ve successfully done half whole wheat and half all-purpose at the full 6 and 1/2 cups.
  • The dough will be wet. This is intended to be a wet dough, don't keep adding flour expecting a loaf to form. We call this a “free-form” loaf of bread. Because it's no-knead, it needs to be wet in order for the gluten to form properly.
  • Flour your hands and work-surface. Using well-floured hands and work-surface will help tremendously in keeping the dough from being too sticky. You don't want to go crazy with the flour, but a well-coated surface is helpful.
  • No Dutch Oven? No problem! You can use a cookie sheet for your bread (parchment paper is still helpful) and place a metal broiling pan in the oven on the lowest rack and preheat both pans in the oven to 450 degrees. Put your loaf in the oven and then quickly pour a cup of HOT water into the broiler pan and shut your oven. Bake for 45 minutes.
  • Wait to slice into the bread. I know it's difficult, but try to wait at least 20 minutes before slicing into your loaf. If you slice into a hot loaf, you'll end up with a gummy center that will seem underbaked.
  • For a softer crust – If you're not a fan of the crispy crunchy crust, you can immediately brush your loaf with butter when it comes out of the oven. This will soften the crust just a bit so it's not so crunchy.
  • How to store your artisan bread. If you don't eat it all immediately, the best way to store it is in a linen bread bag. Go here for How to Store Homemade Bread (Stays Fresh Longer!)
Woman holding up a loaf of artisan bread.

More Easy Homemade Bread Recipes

  • Easy Honey Whole Wheat Sandwich Bread
  • Easy Dinner Roll Recipe from 1950
  • Traditional Hot Cross Buns – Easy Recipe from 1950
  • How to Make Homemade Indian Fry Bread
  • Grandmother’s Date Bread Recipe from WWII
  • How to Store Homemade Bread (Stays Fresh Longer!)
  • EASIEST Homemade Bao Bun Recipe

Turn the other half of the dough into these Chocolate Caramel Cinnamon Rolls – the sauce makes itself in the pan while they bake!

Chocolate caramel cinnamon rolls baked in a cast iron pan sitting on a table.

Did you make this recipe? If you did, I'd love for you to give it a quick star-rating on the recipe card below! And if you're on social media and love posting pics of your food, tag me, I wanna see!

Easy No Knead Bread Recipe

MelissaKNorris
This easy no-knead artisan bread recipe takes just 5 minutes a day uses only 5 ingredients. It has a soft and fluffy inside and perfectly crunchy crust, everything bread should be without all the work!
4.16 from 264 votes
Print Recipe Pin Recipe
Prep Time 5 mins
Cook Time 45 mins
Total Time 50 mins
Course bread
Cuisine American
Servings 32 servings
Calories 93 kcal

Ingredients


  • 3 cups water lukewarm (about 120 degrees)
  • 1 1/2 Tablespoons yeast
  • 1 1/2 Tablespoons salt kosher or coarse sea salt is best
  • 1 1/2 Tablespoons apple cider vinegar
  • 6 1/2 cups flour unsifted, all-purpose or bread flour (see notes for whole wheat)

Instructions
 

  • In a large bowl, dissolve yeast and warm water. Allow to sit for 6 to 8 minutes until water is foamy.
  • Add salt and vinegar. Mix in flour a cupful at a time until it's all incorporated. Dough will be slightly wet.
  • Cover your dough with a tea towel and set it on top of the fridge (or a draft free warm place) to rise for about 2 to 3 hours, or until the dough has at least doubled in size.
  • Cover dough (make sure it can still breathe, don't seal completely) and place in fridge for 8 hours.
  • Take 1/2 of the dough (or 1/3 for a smaller loaf) out of the bowl, it’s very wet, so lightly flour your hands, and pull it into the shape of your loaf. Dust the top with flour and slash it with a sharp knife (flour keeps your blade from sticking) and let it rise for about 40 minutes.
  • Preheat oven to 450 degrees Fahrenheit with cast iron Dutch oven inside.
  • Remove dutch oven from stove and carefully place one loaf into Dutch oven. Cover with the lid and bake for 25 minutes, remove lid and bake for another 10 minutes until golden on top. (No cast iron Dutch oven, see notes for alternate baking instructions)

Video

Notes

  1. No cast iron Dutch Oven, no problem: Place a metal broiling pan in the oven on the lowest rack and preheat to 450 degrees. Place loaf on a cookie sheet, cast iron skillet, or baking stone and place in oven. Quickly pour a cup of HOT water into the broiler pan and shut your oven. Bake for 45 minutes.
  2. Flour. Use unsifted all-purpose or bread flour. Spoon flour into measuring cup and level. You can use whole wheat or fresh ground, but reduce flour to 5 1/2 cups and increase only if the dough is too wet and won’t hold any type of shape. I’ve successfully done half whole wheat and half all-purpose at the full 6 and 1/2 cups.
  3. The dough will be wet. This is intended to be a wet dough, don't keep adding flour expecting a loaf to form. We call this a “free-form” loaf of bread. Because it's no-knead, it needs to be wet in order for the gluten to form properly.
  4. Flour your hands and work-surface. Using well-floured hands and work-surface will help tremendously in keeping the dough from being too sticky. You don't want to go crazy with the flour, but a well-coated surface is helpful.
  5. Wait to slice into the bread. I know it's difficult, but try to wait at least 20 minutes before slicing into your loaf. If you slice into a hot loaf, you'll end up with a gummy center that will seem underbaked.
  6. For a softer crust – If you're not a fan of the crispy crunchy crust, you can immediately brush your loaf with butter when it comes out of the oven. This will soften the crust just a bit so it's not so crunchy.

Nutrition

Calories: 93kcalCarbohydrates: 19gProtein: 3gFat: 1gSaturated Fat: 1gSodium: 329mgPotassium: 29mgFiber: 1gSugar: 1gCalcium: 4mgIron: 1mg
Keyword Artisan bread, Bread recipe, no-knead bread
Tried this recipe?Let us know how it was!

Filed Under: Bread, Recipes, Sides Tagged With: artisan bread, bread in less than 5 minutes a day, home baked bread recipe, no knead bread, Pioneering Today, recipes

How to Make Perogies- Traditional Ukrainian Perogi Recipe

December 22, 2017 by Anastasia Sakawsky 30 Comments

Learn how to make perogies (or pierogies) from Anna, with her traditional Ukrainian Perogi recipe.

I can hardly remember a Christmas dinner without perogies. I want to say it happened once and so many family members complained that it never happened again.

Bowl of homemade perogies sitting on a wooden table. Text overlay says, "How to Make Homemade Perogies From Scratch: Family Recipe".

Because these potato-filled dumplings aren’t just a staple of holiday dinners in my family, they’re a part of our heritage; A heritage full of traditions that have been passed down through generations, many of which still find a place on our dinner table at every special occasion (and many meals in between).

Perogies are a versatile food, great for both holiday dinners and midweek meals alike. They’re also super frugal, costing mere pennies a piece when made from scratch. And a single batch will easily feed a large family (or a small village).

They make a fantastic main course as well as a perfect side dish. They stick to your ribs despite having no meat, and they're pleasing to just about everyone’s tastebuds. I’ve literally never met anybody who doesn’t like them.

The History of the Humble Perogy

Perogies originated in Eastern Europe out of necessity. They were originally considered a peasant food as they are composed of humble ingredients like flour, potatoes and onions. Nevertheless, they were a frugal way to fill hungry bellies with a few simple ingredients and helped stave off hunger during frigid and barren Eastern European winters.

Today they are enjoyed by all, regardless of class or social status, and they remain a staple food for Eastern European families like mine, even though we’ve lived in North America for multiple generations.

Food is one of those things that connects us to our past and to our ancestors and to the ways of life of long ago. Although I’m fourth generation Canadian, the perogies I make and feed my family have changed very little from those my great-great-grandmother fed to hers.

A Frugal and Filling Addition to Your Family Table

Many people are familiar with perogies, but unfortunately they don’t know much more than the fact that you can buy them pre-made from the store. I often meet people who tell me they love perogies but have never made them from scratch (and probably never even tasted them from scratch). And yet, these are one of the easiest things to make at home!

They do tend to be a little time-consuming as you typically roll out enough dough at one time to make anywhere from 50 to 150 perogies at once. But the process is straightforward and a few simple ingredients go a very long way, making this an easy pierogi recipe.

Pierogi filling recipe

  • 5 lb. bag of potatoes
  • 1 lb. of sharp cheddar cheese (optional)
  • 1 large onion
  • a pinch of salt
  • pat of butter

With these ingredients you can make a batch of about 150-200 pierogis, depending on how large you’re cutting them. Now, it’s been a while since we bought them from the store (yes, it’s happened), but I think you get around the same amount or a little less in a large box from Costco and that will run you around $10.00 plus tax.

Store-bought perogies also contain added, unwanted ingredients like the food additive soy lecithin that you won’t find in this homemade version.

If you’re making them with cheese (which I highly recommend), the cheese will probably be the most expensive part of this recipe. We bought a 1-lb. brick of cheese for $6.50 and a 5-lb. bag of russet potatoes for $2.50. Add in an onion, a couple eggs and some flour and salt from our pantry, as well as a little butter and oil, and our last batch probably cost around $10 or $11.

While this is roughly the same as the store-bought Costco version, it contains no questionable ingredients, the cheese is real (not processed) and you could essentially cut your costs to under $5.00 for the whole batch if you omit the cheese. For a batch of 150, this works out to just over 0.03¢ per perogy! Even with the cheese it still works out to around 0.07¢ per perogy. Now if that ain’t frugal I don’t know what is.

My Family's Pierogi Main Dish Recipe

This perogy recipe was passed down to me from my aunt, who inherited it from her mother who learned it from her mother and so on. Every year around this time we begin making dozens and dozens of these little dumplings to serve at Christmas dinner as well as for Ukrainian Christmas in January and then for Malanka (Ukrainian New Year).

Traditionally, the women and girls of the family would get together to make a huge batch of perogies together. I highly recommend making this a family affair if you can!

For one, many hands make light work. But more importantly, this is such a fun tradition and is something that all generations can do together. And nothing says the males in the family can’t help out too. In fact, my husband enjoys a good perogy session just as much as I do:)

Old-Fashioned Cooking for a Busy Home

Tired of hectic meal times and complicated recipes or relying on processed foods? Instead, learn how to have

  • Simple and easy time tested from scratch meals.
  • Easy skillet suppers
  • Nourishing and kid-approved soups and stews
  • Old-fashioned baked goods from buttermilk pie, homemade cake mixes, to Mom’s chocolate chip cookies
  • Don’t spend all day in the kitchen, tips for busy times without sacrificing hand made goodies
  • Wholesome ingredients without processed and questionable items

Want more easy homemade recipes all in one place? This recipe and 100+ more are found in my book–-> click here Hand Made: the Modern Guide to Made-from-Scratch Living. 

How to Make Perogi Potato and Cheese Filling

First you’ll want to prepare the ingredients for your filling. Start by peeling your potatoes, then cut them into quarters and boil them until soft enough to mash. While the potatoes are cooking, grate your cheese and then dice up one whole onion and sauté in a little butter.

Once the potatoes are ready to mash, strain the water out but reserve 2 cups to make your dough with. You can use regular water but using the starchy potato water makes for great dough and makes this recipe even more frugal.

Return strained potatoes to the pot. Add grated cheddar and sautéed onion and mash really well. You want the filling to be thick and firm (so don’t add any milk or cream like you might with regular mashed potatoes).  But you also want to make sure there are no lumps, so mash well.

How to Make Perogies

Prepare your dough. This perogies recipe will make about 150-200 depending on how big you cut them, but you can easily multiply or divide this recipe to suit your needs.

How to Make Pierogi Dough

  1. Mix together flour and salt.
  2. In another bowl, mix a little oil with a couple eggs and the potato water (or regular water if you accidentally dumped your potato water down the drain).
  3. Slowly add wet ingredients to dry and mix well.
  4. Flour your hands and knead your dough ball until smooth.
  5. Then let it rest, covered, for about half an hour.

When perogie dough is ready, roll it out to about 1/8 of an inch thick. You want it thin, but be careful not to roll it too thin as it could break.

Either use a biscuit cutter or an upside-down cup to cut your circles out. Cut out as many as you can and then ball up remaining dough and roll out once more. Repeat the process until all of the dough has been used up.

By this time, your perogi filling will be cool enough to touch. Scoop about a tablespoon of potato filling for each dumpling and roll into a neat little ball. It’s easiest if you prepare a bunch of these balls before you start filling your perogies.

Gently stretch out each circle of dough and then place a ball of filling in the centre of each one. Seal them up with your fingers as you go, pressing the two edges firmly together. Wet your fingers a little if needed to help stick the edges together.

Be careful not to get any filling between the dough as this can prevent a proper seal. If your perogy dumplings aren’t sealed well the filling could boil out when you cook them. The dough is still quite edible (and yummy with sour cream!). But let’s face it; A perogy ain’t a perogy without the filling.

Repeat this process over and over until you’ve filled and sealed all your perogies. Lay each finished perogy on a baking sheet lined with parchment paper so they don’t stick together. Double check each one to make sure they’ve sealed all the way around.

To cook, bring a pot of water to a boil and cook in small batches (no more than 10-15 perogies at a time for best results). Cooking them in small batches keeps them from sticking together as much. Stir them gently to keep them from sticking as well. Boil until done. Perogies will float to the top of the pot when they’re finished.

For best results (and to prevent them from breaking), use a slotted spoon to remove perogies from water and transfer to a colander to let drain more. Toss each batch with about a tablespoon of butter (again to prevent sticking… and because… butter).

Repeat until all perogies are cooked and then transfer to a serving dish. Serve with fried onions and sour cream, and enjoy alongside sauerkraut, cabbage rolls, pickles and Ukrainian or Polish sausage with a little mustard and you’ve got yourself a meal that’s fit for a king, but on a peasant’s budget.

Homemade Frozen Pierogies

Now, what to do with them all? Perogies freeze really well, so if you’re not planning on cooking them all the same night, put the baking trays in the freezer to flash freeze them before transferring them to a freezer bag. They should keep in the freezer for up to 4-6months.

Other Creative Fillings and Meal Ideas

Once you’ve A) used up all your dough or B) used up all of your filling, you’re finished your batch! But don’t worry about having leftover dough or filling. You can add an egg to the potato filling and form into balls, then roll in bread crumbs and fry to make potato croquettes.

And if you have extra dough, you can fill them with a variety of other ingredients to make different types of perogies. Pierogi dinner ideas with other popular fillings are sauerkraut and bacon, cottage cheese, ground or shredded meat or fruit fillings like cherry and blueberry.

You can really put anything you like in the middle. This is just a dumpling after all. You could even just cook the dough on it's own and serve dumplings with chicken or in soup. Get creative with whatever you have on hand! Just be sure to cook any meat before using it as filling.

Share with loved ones and enjoy!

Traditional Ukrainian Perogies

Anastasia Sakawsky
This traditional Ukrainian perogy recipe is extremely frugal, averaging out to less than 10¢ a piece. This recipe makes around 150-200 perogies but can be doubled or divided to fit your needs.
4.32 from 16 votes
Print Recipe Pin Recipe
Cuisine Ukrainian

Ingredients
  

For the Filling:

  • 5 lbs russet potatoes
  • 1 lb brick of old/sharp cheddar cheese grated
  • 1 onion finely chopped and sautéed in butter

For the Dough:

  • 6 cups all purpose flour
  • 2 tsps salt
  • 2 cups warm water potato water from filling is the best
  • 2 Tbsp vegetable oil
  • 2 large eggs lightly beaten

Instructions
 

  • Peel potatoes and cut into quarters. Cook in boiling water until soft enough to mash.
  • Drain well, reserving 2 cups of potato water for dough.
  • Return potatoes to the pot and add grated cheese and sautéed onion. Mash until smooth. Let filling cool while making the dough.
  • In a large bowl, sift flour and combine with salt.
  • Mix together water, oil and egg, and pour half of mixture into flour. Mix and slowly add the remaining liquid. Knead by hand until flour and liquid are well combined, into an elastic ball. You may need to add a small amount of either flour or water, depending on the consistency of the dough.
  • When well blended and smooth, wrap in plastic wrap or a clean plastic bag and let dough rest for at least 30 minutes.
  • Cut dough in half or in thirds, keeping unused dough well wrapped in plastic until needed. Flour the table or counter lightly and roll dough to about 1/8 inch thickness (thin is best, but not too thin, as you don't want the dough to break as you fill your perogy).
  • Cut the dough in rounds using a biscuit cutter or a small drinking glass (upside down).
  • Scoop about 1 Tbsp of potato filling for each perogy and roll into a ball in the palms of your hands.
  • Fill each round of dough with a ball of potato filling and seal the edges of the dough together with your fingers. Make sure when pinching the edges to ensure there are no gaps or that the 2 sides of the dough do not pull away from each other. Wet you fingers just a little if needed to help dough stick together.
  • Freeze on a baking tray and then transfer to a freezer bag if making in advance.
  • To cook, bring a pot of water to a boil and cook in small batches (10-15 perogies at a time), stirring gently to prevent dumplings from sticking together. Perogies are finished cooking when they float to the top.
  • Use a slotted spoon to remove them from water and drain before transferring to a serving bowl. Toss with butter and serve hot with sour cream. Add fried onions and.or bacon bits to take your perogies to the next level!
Tried this recipe?Let us know how it was!

There you have it, how to make perogies at home. Will you be making this treat any time soon?

Pinterest pin with two images. Top image is of a bowl of homemade perogies with a side of sour cream. Bottom image is a close up of a bowl of homemade perogies. Text overlay says, "How to make homemade perogies: Great-great-grandma's traditional Ukrainian Recipe".

Filed Under: Main Dish, Recipes, Sides Tagged With: from scratch, from scratch recipes, homemade, recipes

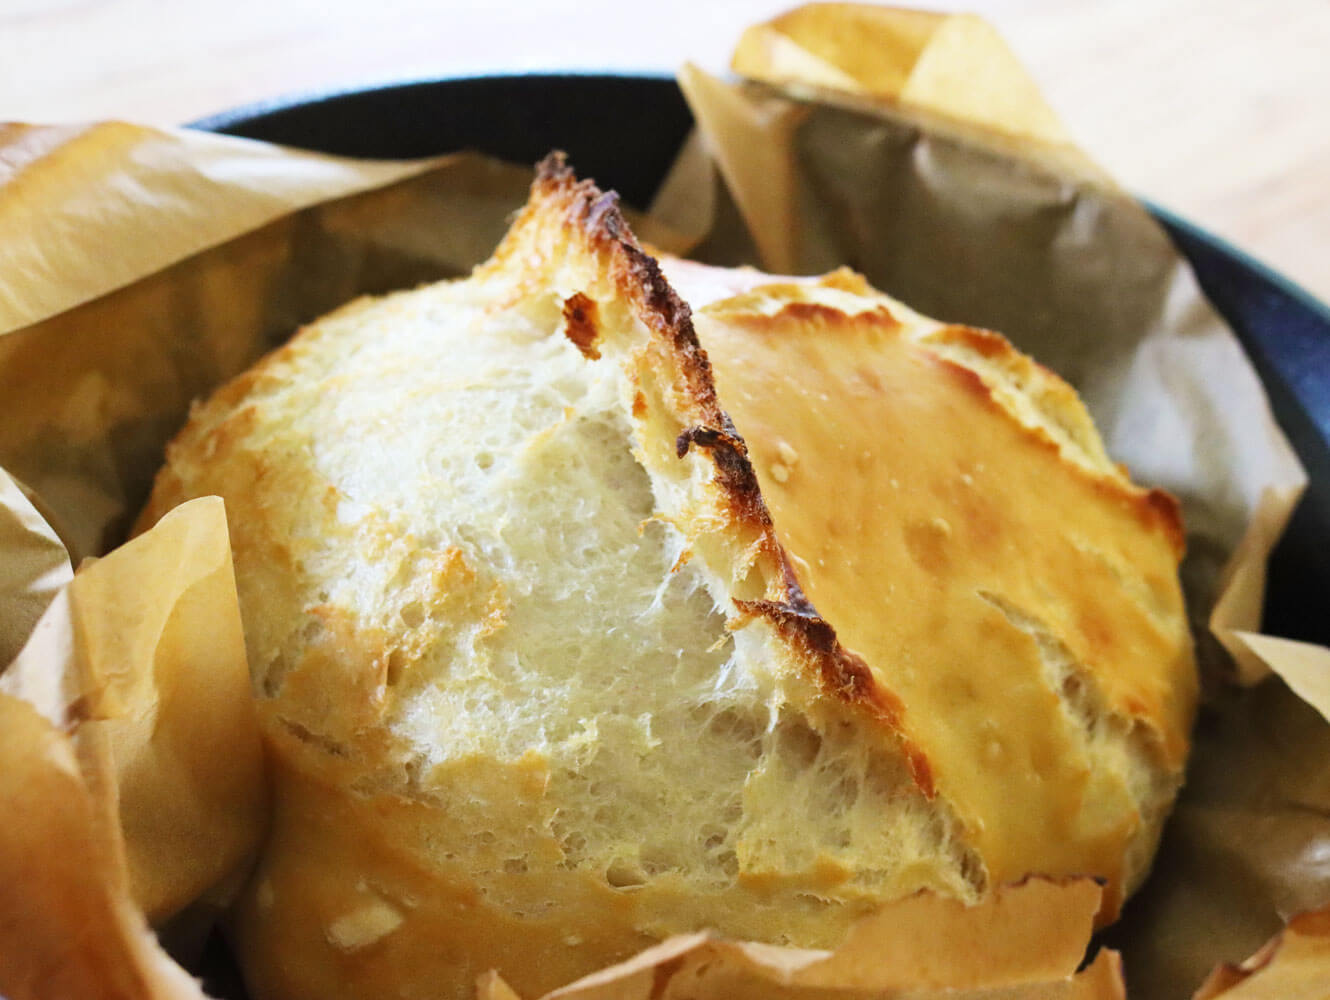
Easy Flaky Buttermilk Biscuits Ready to Eat in 20 Minutes

October 18, 2017 by Melissa Norris 61 Comments

Best ever flaky buttermilk biscuits are coming your way. No joke. If you've ever used those biscuits from a can because you thought you couldn't get flaky biscuits at home or it took too much time, my friend, you shall never return to those again. Seriously, never again.

buttermilk biscuits

I've got a few tips to share with you and you will have the flakiest melt-in-your-mouth biscuits coming out of your oven in 20 minutes, that includes the baking time ya'll. (Yes, the southern roots come out when we're talking biscuits)

Tips for Flaky Homemade Biscuits

  1. Thou must use buttermilk. The higher acid content does wonderful things to the texture of baked goods, especially in no knead baked goods like pie crust and biscuits. Buttermilk is your secret to flakiness. Both this recipe and how to make your own cultured buttermilk are just two of the over 100 recipes found in my new book Hand Made: the Modern Guide to Made-from-Scratch Living. 
    Don't have buttermilk, you can take 1 cup milk and add 2 Tablespoons lemon juice, let sit until nice and thick.
  2. Thou shall only use cold butter. I've tried frozen butter and didn't like the texture as well as using cold butter. Nor did I like the little flakes from grating it. Cut into cubes and cold from the fridge is a must.
  3. Thou shall not over handle the dough. Over handling the dough creates tough hockey puck biscuits. Follow the instructions exactly for best results…. I sound like I could be a drill sarge huh?
  4. Thou shall only use a metal biscuit cutter! I know you've been told you can use a cup turned upside down, but that results in short squatty biscuits, no one wants a squatty biscuit. It pinches the edges of the biscuit down so it can't rise. You my friend, deserve mile high biscuits. Use a metal cutter.
  5. Thou shall not be a biscuit twister. When you push the biscuit cutter down, don't twist! Twisting pinches the sides, push straight down and lift straight up. Boom! Ya got this.

Resources:

Find old-fashioned cooking for a busy home without spending all day in the kitchen, get more recipes (over 100) like these easy buttermilk biscuits ready to eat in just 20 minutes including baking time in your copy of Hand Made: the  Modern Guide to Made-from-Scratch Living. Psst, don't forget to claim your bonuses here. 

Stainless steel biscuit cutters, you read tips 4 and 5 above, right?

Pastry cutter, I know, people say you can use forks, but I won't be without a real pastry cutter for biscuits and pie crusts. This one is stainless steel with a wooden handle. 

Easy Buttermilk Biscuit Recipe (ready to eat in 20 minutes)


Mix up your dry ingredients and then bring your butter out from the fridge. Cut it lengthwise in half, then in half again, and then cube it on up.

Use a pastry cutter and work in the butter until it looks like itty bitty pea size clumps with the dry ingredients.

Add the honey and 3/4 cup of buttermilk till it sticks together on itself. If you need to add the rest of the 1/4 cup, go ahead, but it should be a shaggy type dough, not smooth.

Lightly dust the counter top with flour and dump your dough out. Gently pat it into a 1/2 inch rectangle. It should be slightly tacky, if it sticks to your fingers, lightly (and I mean lightly) dust the top with flour.

flaky buttermilk biscuits

Fold into thirds, turn it vertical, and pat back out into a rectangle, fold into thirds and repeat once more (a total of 3 times patting and folding).

On the final 3rd pat out, cut out your biscuits. You'll get six biscuits and then push the scraps back together for the last two biscuits.

Place your biscuits into a cast iron skillet (because everything tastes better in either a Mason jar or a cast iron skillet). And because the skillet pushes them up even more sky high.

easy buttermilk biscuit recipe

Try not to burn your mouth as you inhale these delicious bits of melting heaven. Top them with this 1930's chocolate gravy recipe for a fun treat.

How to Make Easy Flaky Buttermilk Biscuits

MelissaKNorris (from Hand Made)
Flaky buttermilk biscuits from scratch, with these easy tips you'll turn out delicious melt-in-your-mouth biscuits every time.
4.17 from 91 votes
Print Recipe Pin Recipe
Prep Time 5 mins
Cook Time 15 mins
Total Time 20 mins
Course bread
Cuisine American
Servings 8

Ingredients
  

  • 2 cups all-purpose flour
  • 1 and 1/2 teaspoons baking powder
  • 1/2 teaspoon baking soda
  • 1/2 teaspoon salt
  • 1/2 cup butter one stick
  • 2 teaspoons honey
  • 1 cup buttermilk

Instructions
 

  • Preheat oven to 400 degrees Fahrenheit
  • Mix up your dry ingredients and then bring your butter out from the fridge. Cut it lengthwise in half, then in half again, and then cube it on up.
  • Use a pastry cutter and work in the butter until it looks like itty bitty pea size clumps with the dry ingredients.
  • Add the honey and 3/4 cup of buttermilk till it sticks together on itself. If you need to add the rest of the 1/4 cup, go ahead, but it should be a shaggy type dough, not smooth.
  • Lightly dust the counter top with flour and dump your dough out. Gently pat it into a 1/2 inch rectangle. It should be slightly tacky, if it sticks to your fingers, lightly (and I mean lightly) dust the top with flour.
  • Fold into thirds, turn it vertical, and pat back out into a rectangle, fold into thirds and repeat once more (a total of 3 times patting and folding).
  • On the final 3rd pat out, cut out your biscuits. You'll get six biscuits and then push the scraps back together for the last two biscuits.
  • Place biscuits in cast iron skillet (or a baking sheet) and bake for 15 minutes or until golden on top.

Notes

You can cut out the biscuits, place on a cookie sheet and freeze for 15 minutes, then place in a freezer container. To bake, put frozen biscuits in the cast iron skillet or baking sheet and bake from frozen, increasing bake time by 3 to 4 minutes.
Keyword buttermilk biscuits, flaky buttermilk biscuits from scratch
Tried this recipe?Let us know how it was!


You did go check out all the bonuses, including freebies, with your copy of Hand Made, right? Whew, good!

What's your favorite way to eat buttermilk biscuits?

Filed Under: Bread, Recipes Tagged With: how to make biscuits, recipes

Easy Mint Water Recipe & Benefits

July 1, 2017 by Melissa Norris 15 Comments

Mint Water is my new obsession you guys. What's not to love about a drink you can make in less than a minute and literally, all of it is harvested straight from my homestead. Oh, plus, for those of us who don't drink soda pop (or those who are trying to stop, and I'm so happy you're moving that way) drinking nothing but plain water all day can get kind of, well… boring.

When I first quit drinking pop (yes, I hang my head to say I was a total diet soda drinker for years) I had a hard time not reaching for something sweet in the afternoon. But I knew my health depended upon kicking that habit, and I can now say I've not drank soda pop for almost a decade.

Glass with iced mint cooler and a straw. Text overlay says, "Easy Mint Cooler Recipe".

Here in the Pacific Northwest we're not always hot, but last weekend we moved close to the hundred degree Fahrenheit mark. And yes, I totally wilted. Wouldn't you know the air conditioning in my husband's truck went out that week, too? And air conditioning in the house, forget about it, I've never lived in a house with air conditioning.

Mint water benefits:

  1. You can grow it yourself. Mint does best in a pot because it tends to spread, which means just about anybody can grow it!
  2. Mint helps aid digestion. So you can sip away and help your guts at the same time. (Note: if you suffer from indigestion peppermint can relax the sphincter muscle, which helps keep the contents of your stomach away from your esophagus, making heart burn or GERD worse).
  3. Mint is cooling. Adding it to your water makes for the perfect cooling drink on a hot summer day.

Mint water is so easy it really doesn't require a recipe, but here's how I make mine.

Just like this easy herbal drink, the simple things in life are often the best. Mason jars up!

How to make mint water at home

3 to 4 mint leaves

ice cubes

water

4 to 6 drops Stevia extract (optional)

Rinse the mint leaves and roll them between your fingers to crush the leaves and release the mint oil. Place in a clean Mason jar, add ice, drop in a few drops of Stevia extract if using, cover with cold water and sip and enjoy.

Easy peasy!

The Stevia extract is totally optional, but makes it taste more like a “soda pop” without the sugar. And if I hadn't killed my Stevia plant, I could have used Stevia leaves instead of purchasing an extract. But this brand of Stevia extract is my pick because it doesn't have that bitter after taste.

Do you make summer mint water or any other homemade beverages?

Mint Cooler

Melissa Norris
4.38 from 8 votes
Print Recipe Pin Recipe

Ingredients
  

  • 3-4 Mint leaves
  • ice cubes
  • water
  • 4-6 drops Stevia extract  (optional)

Instructions
 

  • Rinse the mint leaves and roll them between your fingers to crush the leaves and release the mint oil. Place in a clean Mason jar, add ice, drop in a few drops of Stevia extract if using, cover with cold water and sip and enjoy.
Tried this recipe?Let us know how it was!

Filed Under: Miscellaneous, Recipes Tagged With: Herbs, recipes

Old-Fashioned Italian Date Nut Bars Recipe

December 16, 2015 by Melissa Norris 4 Comments

Old-fashioned family recipes are as much of our Christmas traditions as putting up the tree. Just the scent or the first bite of a certain food can take me right back to years and people past. One of my favorite things about the holidays is baking our favorite treats and remembering those who gave them to us. 

I first found Ruthie on Instagram and she made me want to invite her over to decorate. She's got true pioneer style and her photos are swoon worthy, plus, the girl knows how to bake! When she mentioned her favorite Christmas treat was an old family recipe, you guys know I lickety-split emailed her to ask if she'd share.

Woman in a red and white apron holding a plate of date nut bars. Text overlay says, "Old Fashioned Italian Date Nut Bar".

And she said yes! I'm excited to introduce you to another vintage loving gal~

Hello friends! I'm Ruthie, also known as Aunt Ruthie from Sugar Pie Farmhouse blog. It's an honor for me to join Melissa in her Homemade Christmas Series…which happens to be my favorite time of year! I'd like to share with you a favorite Christmas memory of mine along with a treasured, old family recipe!

I love old family recipes! These old-fashioned Italian date nut bars have been passed down in her family for generations. I love the story and the recipe. They look amazing!

For me, Christmastime is always filled with sweet memories of my big Italian Family. Back in the day on Christmas Eve my family and I, along with my Grandma and Grandpa, Aunts, Uncles, and cousins, would all gather at my Aunt Lucy's home. The faces I loved gleamed around the long lace-covered table, as we enjoyed homemade Spaghetti and Meatballs…or “meat-a-balls” like my Sicilian Grandma and Grandpa would say! There would be lots of loud conversation and laughter which would probably seem like happy chaos if someone were to peek into the window!

After tummies were filled, us kids ran off into another room to play “Button, Button, Who's Got the Button”, while my mom, my aunts and Grandma would tie their aprons on to clear the table, wash the dishes and turn the electric Coffee Percolator on. Once the kitchen was tidy and the coffee was fresh and hot, a huge tray of Italian cookies was carried to the table. Biscotti, Gemelli, Anisette, Pizzelles, Nut Meringues, just to name a few of the variety these delicious, Southern Italy confections.

aunt gen

As soon as my cousins and I realized the cookies had been set out we rushed to the table to grab a handful. I would search through the mountain of sweet treats to find my favorite…Aunt Gen's Italian Date~Nut Bars. Sweet, chewy with a bit of crunch. One bite and I was in Christmas heaven!

This Christmas Eve tradition also included a skit about the Birth of Jesus presented by my cousins and I, wearing bathrobes as costumes. Soon after, we all gathered around the piano as my mother played, to sing old time carols, Silent Night, O Little Town of Bethlehem and Jingle Bells. My Uncle Joe, who was the life of the party and a talented singer, would grace us with a solo of such as Ava Maria.

When it was time to say our goodbyes, with hugs and kisses, we stepped out into the dark, chilly night to get into our cars for the drive home. My little girl heart was filled to the brim with treasures of comfort and joy, as I sleepily reflected upon all the crazy fun with my cousins and the scenes of my loved ones around the table where we feasted upon God's goodness. These are the memories that have lasted me a lifetime.

Now, decades later as I bake a batch of Aunt Gen's Italian Date~Nut Bars it takes me right back to that cozy and fun-filled gathering of my beloved big Italian family on Christmas Eve.

I love old family recipes! These old-fashioned Italian date nut bars have been passed down in her family for generations. I love the story and the recipe. They look amazing!

It's my pleasure to share with you this very old and special recipe.

Resources for Old-Fashioned Italian Date Nut Bars

You guys, isn't Ruthie's kitchen swoon worthy. I love her flour tin. I found this tin (which has labels you can change out to say flour, sugar, cookies, or whatever your baking heart desires, and you can get it in 4 different colors! Click here–> Vintage Flour Canister

Another staple in any good pioneer or vintage kitchen is a nice set of flour sack towels. I use them from covering rising bread, on goodies as they cool, wiping hands dry, taking hot pans out of ovens (make sure to double up), and just plain looking cute hanging on the oven handle or nestled into bowls. Striped Flour Sack Towels–> 3 different colors

Family stories and recipes are two of my favorite things. I share both of my great-grandmother's, and my husband's grandmothers family recipes and more in The Made-From-Scratch Life. 

Old-Fashioned Italian Date Nut Bars Recipe

3 eggs

1/8 teaspoon or a pinch of salt

1 cup sugar

1 cup flour

1 cup minced dates

1 cup chopped walnuts

2 teaspoons Baking Powder

1 Tablespoon Vanilla

Powdered Sugar to sprinkle after baking

I love old family recipes! These old-fashioned Italian date nut bars have been passed down in her family for generations. I love the story and the recipe. They look amazing!

Directions:

Preheat oven to 350 degrees.

Mix all ingredients well. (I use my standing mixer).

Pour into a buttered 9 x 13 glass pan and spread evenly with rubber spatula.

Bake at 350 for 25 minutes

I love old family recipes! These old-fashioned Italian date nut bars have been passed down in her family for generations. I love the story and the recipe. They look amazing!

Aunt Gen's Italian Date Nut Bars

Ruthie
4.19 from 16 votes
Print Recipe Pin Recipe
Prep Time 10 mins
Cook Time 25 mins
Total Time 35 mins
Servings 12 +

Ingredients
  

  • 3 eggs
  • 1/8 teaspoon or a pinch of salt
  • 1 cup sugar
  • 1 cup flour
  • 1 cup minced dates
  • 1 cup chopped walnuts
  • 2 teaspoons Baking Powder
  • 1 Tablespoon Vanilla
  • Powdered Sugar to sprinkle after baking

Instructions
 

  • Preheat oven to 350 degrees.
  • Mix all ingredients well. (I use my standing mixer).
  • Pour into a buttered 9 x 13 glass pan and spread evenly with rubber spatula.
  • Bake at 350 for 25 minutes
  • Once cooled, cut into squares and sprinkle the top liberally with powdered sugar.
Tried this recipe?Let us know how it was!

Once cooled, cut into squares and sprinkle the top liberally with powdered sugar.

Enjoy! Or Mangia! Mangia! As my Grandma would say!

God bless you and Buon Natale! (Merry Christmas!)

~Ruthie

What's your favorite family Christmas recipe or story?

Filed Under: Dessert, Healthy Snacks, Recipes Tagged With: baking, recipes

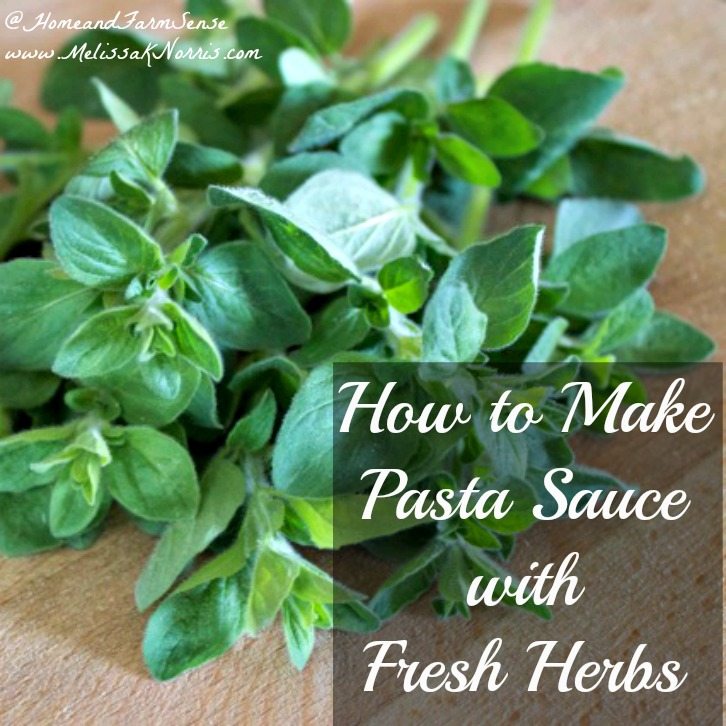
How to Make Pasta Sauce with Spinach and Fresh Oregano

June 17, 2015 by Amy Maus 2 Comments

My grandmother rarely used a recipe or a cookbook. In fact, most pioneers didn't lug around numerous cookbooks or recipe cards, they simply put together the ingredients they had on hand and in season to create their meals.

Which is an old-fashioned skill I think we could all do better at. If you've ever planted oregano, you know it spreads quickly and grows like a weed. However, it's delicious enough I let it hang around and play, though it is sequestered to a corner of a rock bed to keep it from growing into the yard.

Learning to cook with what you have on hand and in season is frugal and healthier. Learn how to make pasta sauce with fresh herbs.

When using fresh herbs, you generally need three times as much fresh herb as you do dry. So don't be afraid to use more of the fresh herbs and add it towards the end of cooking, as it tends to loose its flavor if cooked to long.

This recipe from Amy is fun because it also incorporates a lot of spinach, but feel free to exchange the fresh herbs for whatever you have in season at your house.

Aren't you glad its Spring?  We have grass growing like crazy, bees buzzing, apple trees in bloom – its such a lovely time of the year!  Another huge benefit of Spring is the harvesting of greens and perennial herbs.  My oregano patch has grown quite large and so I wanted to come up with a recipe to showcase all that yummy herb flavor.

We have also been gifted with lots of spinach from a friend who starts his plants early in a greenhouse.  Because my kids don't tend to jump for joy at the thought of eating spinach, I try to incorporate it into everyday recipes.  I will be posting more spinach recipes at my blog Home & Farm Sense over the next couple of weeks.

This pasta sauce is super easy to make and who doesn't love spaghetti?  We start by browning some of our farm's sweet italian sausage in a medium stock pot with a large onion, chopped up and some garlic.

While its browning, I strip the oregano leaves and finely chop them on my mezzaluna board (I've never used one of these, but apparently, they are the bomb for chopping up fresh herbs,~Melissa). Then, I take the stems off the spinach and roughly tear it into bite size pieces.  The amount of spinach and oregano you use is totally up to you.  The spinach cooks down so much that I think I used two whole bags.

pasta sauce with spinach 2

Once the sausage and onions are nicely browned, I add in tomato sauce, tomato paste, honey, salt and red wine.

I made a huge blunder when making the recipe for this post.  I needed to open a new bottle of wine and so just grabbed one out of the cupboard.  I asked my husband to uncork it but unfortunately neither of us really looked at the bottle.  If we would have paid attention we'd have realized the wine I grabbed was a special bottle he had bought in Brindisi, Italy while stationed there 15 years ago that he wanted to keep as a souvenir.  Oops..

The final step for this sauce is to add in the finely chopped oregano and spinach.  The spinach will not all fit in the pan at first but will wilt as the pasta sauce cooks, so I just keep adding more until its the amount I want.  I then let the sauce simmer for about 30 minutes in order for the flavors to maximize. And that's it – I told you it was easy…:)

You can serve this sauce over pasta but its also great over polenta or spaghetti squash.

Bon Appetit!!

pasta sauce with spinach 4

Pasta Sauce with Spinach and Fresh Oregano

MelissaKNorris-Amy Maus
A yummy Spring pasta sauce using fresh spinach and oregano from the garden.
5 from 1 vote
Print Recipe Pin Recipe
Course Pasta
Cuisine Seasonal
Servings 8 servings

Ingredients
  

  • 1 lb Italian Chub Sausage
  • 1 chopped onion
  • 2 cloves minced garlic
  • 28 ounces tomato sauce or stewed tomatoes
  • 2 cans tomato paste 6 ounce cans
  • 3 TBSP Honey
  • 1 TBSP Salt
  • 5-6 Sprigs of Fresh Oregano
  • 1 or 2 Bags of Spinach ends removed
  • 1/2 cup Red Wine

Instructions
 

  • Cook sausage, chopped onion and garlic in stock pot until sausage is cooked and onion is soft.
  • Add in tomatoes, tomato paste, honey, salt and red wine.
  • Remove stems from oregano and chop fine. Add to pasta sauce.
  • Remove ends from spinach, tearing any really large pieces. Add to pasta sauce.
  • Simmer over low heat for approximately 30 minutes.
  • Serve over pasta or polenta.
Tried this recipe?Let us know how it was!

Filed Under: Miscellaneous, Recipes Tagged With: from scratch, Herbs, recipes

How to Make Buttermilk Fried Chicken Strips

June 3, 2015 by Maria Alison Leave a Comment

Easy homemade chicken strips bathed in buttermilk and fried to crispy perfection. These are simple comfort food at it's best, plus, baking instructions if you're not into frying. Only $.65 a serving!

Homemade chicken strips are one of my favorite things ever? And at less than $.65 a serving, my budget is happy too. Who doesn't like from scratch goodness, combined with buttermilk, in a golden-crispy-finger-licking-good chicken strip? You must say yes or we can't be friends. Kidding, kind of.

But seriously, when you look at the ingredient list on store bought chicken strips, you're likely to find lots of soy bean oil (can you say GMO) and the “natural ingredients” which tells me nothing because it doesn't list out what those ingredients are, which leads me to believe they're not so natural. Anyone else?

Price Break Down of Homemade Chicken Strips

I paid $1.99 a pound for our chicken breasts (I used two and they're antibiotic and hormone free) and cut them up into strips. I got 16 chicken strips out of the two breasts. With the cost of the buttermilk, spices, and flour, I added another $1.00 to the overall cost.

For four people that breaks down to just $.65 a serving. I consider that a great price and knowing what's in them and what's not=priceless.

So when Maria offered up a recipe for buttermilk fried chicken strips my heart might have skipped a beat.

~Maria, I absolutely love summer at my grandparents house! I love seeing them so often, swimming, hearing stories, helping in their garden, and of course- the food! My grandpa is famous for his Hungarian deviled eggs, and Hungarian chicken paprika, while my grandmother is more of a Southern belle and prefers to cook up some good old fashioned food. My favorite? Her buttermilk fried chicken tenderloins!

She normally cooks it for a large crowd, so I usually help her get several batches going at a time. During those summers, I have become an expert. It's hard to believe that something so juicy and delicious could be so easy to make, but it is! There are just a few simple steps, and the marinating time is worth the wait. It really helps to keep it juicy.

Let's get started!

Resources for Homemade Chicken Strips

Coconut oil– for greasing the pan or to use as your frying oil. Coconut oil has replaced shortening at our house and is my go to oil.

Cast Iron Skillet– I use my cast iron skillet for everything, from frying up chicken, to baking it in the oven, and for cornbread… because cornbread and chicken are best friends. Seriously, every kitchen needs at least one cast iron skillet, if not more.

Smoked Paprika– You can use regular paprika, but smoked paprika raises any dish to a whole new level. Your taste buds won't know what danced across them, but they'll be begging for more. I get my smoked paprika from Mountain Rose Herbs… and they're smoked sea salt.

How to Make Homemade Chicken Strips

How to make homemade chicken strips. Bathe them in buttermilk and fry or bake them up crisp with this easy old-fashioned recipe

Don't have buttermilk? Don't despair, simply add 1 Tablespoon apple cider vinegar or lemon juice to a cup of milk and let it sit for a few minutes. Voila, buttermilk!(It just sounds better with a little French thrown in) ~Melissa

Place all the marinade ingredients in a gallon size freezer bag or deep container with a lid for the fridge. Combine the chicken tenders with the marinade ingredients and place in fridge for at least 4 hours of overnight.

Melissa Note: I simply use two large chicken breasts and slice them up into chicken strip sizes

How to make homemade chicken strips. Bathe them in buttermilk and fry or bake them up crisp with this easy old-fashioned recipe

After chicken strips have marinated mix your breading ingredients in a large bowl. Dredge chicken strips through the flour mixture. Don't be afraid to press them down in deep and get them covered in flour. Ya know how your mother told you not to play with your food, well this is one time you get to play away. Fingers just work best for this, ya need to get in there and get down and dirty.

To fry chicken strips, get a large cast iron skillet out and place approximately a quart of oil in it. I prefer coconut oil or lard (yes, lard does magical tasty things to food and I whole hardly use it in my kitchen, in face here How to Render Your Own Lard)

Turn it on medium heat and let liquify. To test if it's hot enough to cook with, place the end of a wooden spoon in the oil, if it bubbles, you're ready to go. You can also place a small piece of chicken in the oil and if it starts to bubble or spit when the chicken hits the oil, it's ready to fry.

Baked Chicken Strips

~Melissa While I love cast iron and a good old deep fry, sometimes a girl is in a hurry, doesn't want the grease mess, or is low on said oil/grease…

So she needs an alternative. And that is where baked chicken strips come in. Preheat your oven to 425 degrees Farenheit.

Take a rimmed baking sheet (we don't want to clean up the drips by using a regular cookie sheet) or a large cast iron skillet and grease it well. I find coconut oil works great for this and is my go to cooking grease.

Beat an egg and dredge chicken strips through the egg before putting it through the breading. When baking, the egg is needed to keep the breading on the chicken. 

Place breaded chicken strips on sheet, leaving space in between them. Put in oven and set the timer for 10 minutes. With tongs (nothing worse than a burn, nothing) turn chicken strips over and bake for another 10 minutes or until golden.

Easy homemade chicken strips bathed in buttermilk and fried to crispy perfection. These are simple comfort food at it's best, plus, baking instructions if you're not into frying. Yum!

There you have it, homemade from scratch crispy baked chicken strips.

Buttermilk Fried Chicken Tenderloins

Maria
5 from 1 vote
Print Recipe Pin Recipe

Ingredients
  

For the marinade:

  • 2 pounds chicken tenderloins
  • 1 cup buttermilk
  • 1-1/2 teaspoons salt
  • 1/4 teaspoon chili powder
  • 1/4 teaspoon garlic powder
  • 1/4 teaspoon paprika

For the breading:

  • 2 cups Spelt or whole wheat flour or 2 cups bread crumbs or 1/4 cup cornmeal and 1 & 1/4 cups all purpose flour, or just 1 and 1/2 cups all purpose flour (really any combo ya want)
  • 1 heaping teaspoon salt
  • 3/4 teaspoon black pepper
  • 3/4 teaspoon garlic powder
  • 3/4 teaspoon paprika
  • 1-1/2 teaspoons baking powder
  • 3 tablespoons buttermilk reserved from the marinade
  • Oil for frying about a quart
  • 1 egg when baking them on a well-greased rimmed baking pan

Instructions
 

  • Combine the chicken tenders with the marinade ingredients in a large ziplock bag. Seal the bag tightly and smush it around to ensure chicken tenders are evenly coated with buttermilk and seasoning. Place in a baking dish (to prevent messes) and refrigerate at least 4 hours.
  • Make the breading by combining the dry ingredients in a large bowl. Whisk until well combined, then add the buttermilk and stir with a fork until mixture is evenly clumpy. (You can also use your fingertips for this.)
  • Line a baking sheet with a cooling rack (or foil). Remove the chicken tenders from the marinade a few at a time and toss into the flour mixture. Make sure to press the chicken firmly into the breading so clumps stick to the chicken. (It's best to use one hand to remove the tenders from the bag and the other to toss in the breading.) Set the breaded chicken on a large plate.
  • Add oil to a large pot or cast iron pan until the level reaches about 3/4-inch. Heat over medium heat until oil is shimmering. (If a small piece of the chicken sizzles when you drop it in, it's ready. This will take a few minutes.) Using tongs, place several chicken tenders in the hot oil without crowding the pan. Cook until golden brown on the bottom side, a few minutes, then flip and cook until second side is also golden, a few minutes more. Set cooked tenders on baking sheet lined with paper towels to drain. Fry remaining tenders in batches. Serve hot.
  • Optional Baking Instructions. Don't want to fry your chicken strips? Bake 'em instead. Preheat oven to 425 degrees.
  • Beat egg, then dredge chicken through the egg and then your breading. Place chicken strips on a well-greased rimmed baking pan (coconut oil works well) and bake for 20 minutes, turning over half way through.

Notes

Adapted from Once Upon a Chef (http://www.onceuponachef.com/2012/01/buttermilk-fried-chicken-tenders-2.html)
Tried this recipe?Let us know how it was!
Maria

Maria Alison is family-focused Christian, who's finding new ways to feed her family quality home-cooked food on a budget. She understands how difficult it can be to prepare a meal from scratch with such a busy schedule. On Maria's blog Ten at the Table you will find time saving recipes that are friendly to your budget and your health.

Filed Under: Main Dish, Recipes Tagged With: buttermilk, chicken strips, cooking from scratch, recipes

  • 1
  • 2
  • Next page

Grow Your Own Food In-Person Worksop

Saturday May 20th

$349

An intimate and hands on workshop

At Norris Farmstead

Click Here to Learn More

Want to grow a year’s worth of food?

Get my FREE planting chart!

Know exactly how many plants per person you need to plant with my easy worksheet and chart!
Melissa K. Norris

Follow me:

  • Start Here
  • Courses
  • Academy
  • Contact
Log In

Articles

  • Gardening
  • Homesteading
  • Recipes
  • Lifestyle
  • DIY

Podcast

  • Orchard Planning to Keep Pests Out (Live Coaching Call)
  • How to Boost Your Immune system (10 Easy Ways)
  • Homesteading With Special Needs Children
  • Seventh-Year Land Sabbath and Bread Baking Tips (Live Coaching Call)
  • Must-Have Pantry Items For Long-Term Storage

Books

  • Everything Worth Preserving
  • The Family Garden Planner
  • Hand Made
  • The Made From Scratch Life

Education

  • Organic Gardening Workshop
  • Home Fruit Preservative Canning e-course
  • Home Canning With Confidence
  • Homemade Bread & Baking Class
  • Natural Homemade Bath and Beauty
  • Pioneering Today Academy


Copyright 2023 - Melissa K. Norris Pioneering Today LLC

  • Privacy Policy
  • Affiliate Disclaimer
  • Terms of Use

Melissa K. Norris and Pioneering Today LLC is a participant in the Amazon Services LLC Associates Program, an affiliate advertising program designed to provide a means for sites to earn advertising fees by advertising and linking to Amazon.com.