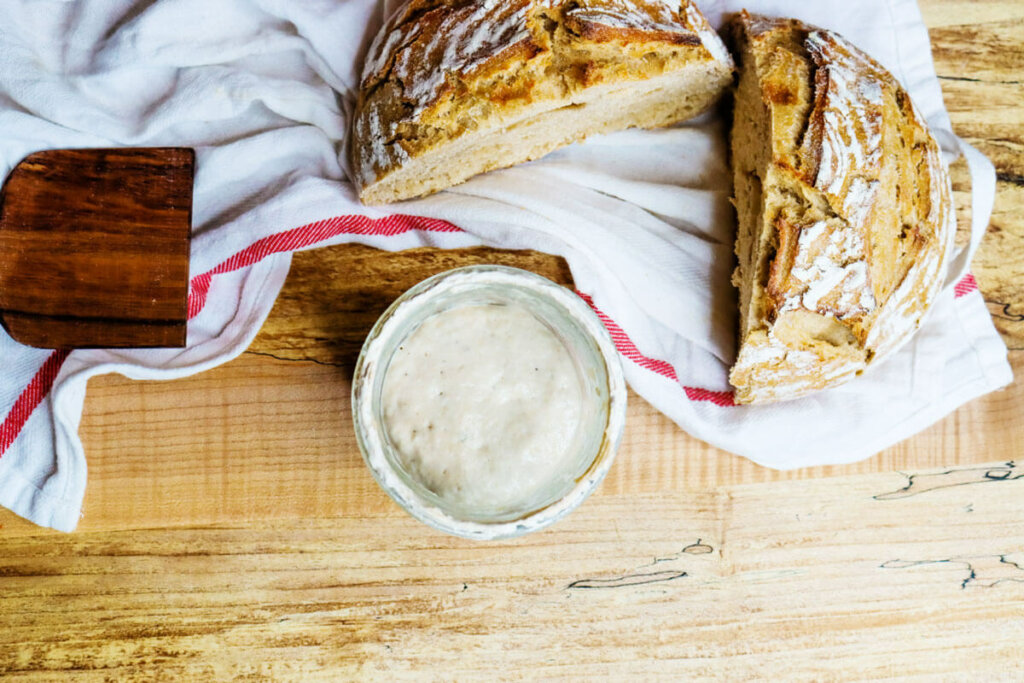
Learn how to easily make a sourdough starter from scratch with just two simple ingredients: flour and water. Catching the wild yeast in the air sounds strange, but it's so simple! Once your starter is bubbly and happy, you'll be able to make all kinds of sourdough recipes. I'm talking sourdough bread, pizza crust, cakes, cookies and so much more!

Let's make a sourdough starter that actually WORKS! Most of us have eaten sourdough at one time or another in our lives, whether cookies or cakes, pizza crust or sourdough tortillas.
Some of us love that tangy sourdough flavor, while others of us don't really like the sourness of it (there are tips for less sour sourdough!). Wherever you stand, you're gonna wanna stick around and learn more about all of the amazing benefits of sourdough and about why you should consider making your own sourdough starter completely from scratch.
Table of Contents[Hide][Show]
- Why You'll Love My Sourdough Method
- Tips for Sourdough Starter Success
- Health Benefits of Sourdough
- Best Flour to Use for Sourdough Starter
- When is My Starter Strong Enough For Baking?
- How to Revive a Sourdough Starter
- Feeding Your Sourdough Starter
- Why You MUST Discard Half Your Starter
- Where to Store Sourdough Starter
- Signs Your Starter Is Active
- Signs Your Starter Has Gone Bad
- Sourdough Starter
- More fermentation articles:
Why You'll Love My Sourdough Method
If you've tried making a sourdough starter before, you may have had some failures in the past. Maybe the sourdough starter didn’t grow as it was supposed to or you were successful with getting your starter off the ground and going, but when baking your bread, you had loaves that were dense as a rock.
My hand is raised, y’all. Even though my husband and I enjoy the sour flavor of sourdough, our bread was so sour that we didn't even like it.
My kids don't like even a hint of sour flavor, so we generally err on the side of less sour and everyone is happy.
For the best success, I highly recommend listening to Episode #288, How to Start a Sourdough Starter, of the Pioneering Today Podcast as well as watching both the video above and below in this blog post. You'll soon be armed with all the information you need to make a successful sourdough starter.
Tips for Sourdough Starter Success
I've definitely had a love/hate relationship with making sourdough. Not to mention, there have been a few times I've had a successful sourdough starter going, only to leave it in the oven while it's preheating accidentally! So frustrating!
If you’ve found yourself in any of the previous scenarios and you're nodding your head, then this post is for you. Here are a few tips to know about when getting started:
- Safe Storage - I'll recommend storing your sourdough starter in a warm location. For some, this may mean a cold oven with the light turned on. I've hit preheat on my oven a time too many to know this option isn't safe for my sourdough starter. I now store it in the refrigerator and feed it once a week (or the day before I need to bake with it). This eliminates the possibility of killing my starter in the oven! Sourdough starter likes to be warm, like a warm room temperature. The top of the refrigerator is also a great spot.
- Ingredients - Sourdough starter only needs flour and water to get started. If you find a recipe that recommends adding ingredients such as sugar or yeast, toss that recipe out! You'll end up with a moldy, stinky mess.
- Flour - Flour choice is important (more on that below). Don't limit yourself to only one flour choice! Mix it up until you find your favorite.
- Feeding Schedule - You'll see an example feeding schedule below. Once your starter is established, don't feel like you need daily feedings anymore. You can store your sourdough starter in the refrigerator where it will "hibernate," meaning you only need to pull it out once a week for feedings.
- Have Fun - There is a lot of information out there about sourdough baking. It can get extremely technical with hydration percentages, weights and measurements, feeding timings, etc. In my experience, you can get very fussy about it or just have fun and experiment. I think you'll soon find that specific measurements and timed feedings aren't only unnecessary but also take too much bandwidth. A sourdough starter is extremely flexible. Find a routine that works best for you.
Health Benefits of Sourdough
The beauty of sourdough is that it contains bacteria and yeast. Though that doesn't necessarily sound like something we want to eat, if you've heard about the benefits of fermented foods, then you'll know it is.
This yeast and bacteria are essentially consuming the mixture of flour and water, meaning they are pre-digesting the flour for us. This is really good for our gut health, which is why live cultured and fermented foods of all kinds are so good for our digestive system and overall health.
When it comes to sourdough though, the bacteria isn't alive when we eat it because we're not eating our sourdough starter raw. We’re using it to bake with. However, when we add our flour, or whatever grain medium we're using (ie. brown rice, quinoa, buckwheat, gluten-free flour, etc.), it's being pre-digested during the soaking or rising phase.
This means our bodies can get the nutrients out of it much easier, even though we’re baking it.
Best Flour to Use for Sourdough Starter
You can use any grain or flour that you want to start your starter! In my sourdough class, I teach you how to make a sourdough starter from 4 different types of grains: all-purpose, ancient grain einkorn, fresh-ground hard white wheat and gluten-free brown rice flour.
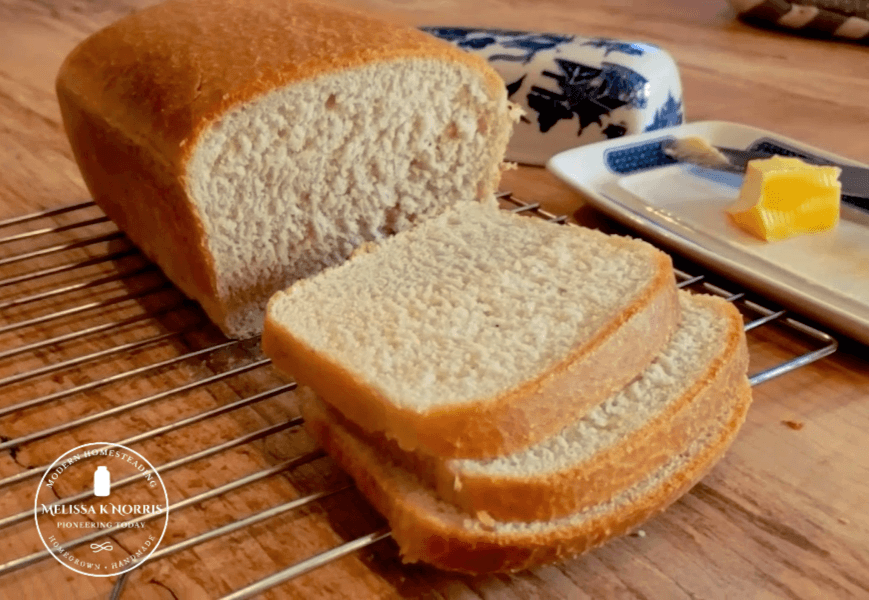
- Hard White Wheat - This is my go-to for feeding my sourdough starter because, most of the time, I'm baking bread that I want to have a higher gluten and protein content (so I get a nice tall rise). Looking for a soft and sliceable sourdough sandwich bread recipe? Give my best beginner sourdough sandwich bread recipe a try!
- Spelt - This flour is great for making pancakes, waffles, cakes and other pastries. It has a lower gluten and protein content, which creates soft and fluffy baked goods.
- Soft White Wheat - This is another option for light and fluffy baked goods such as pancakes, waffles and cakes.
- Pastry Whole Wheat - This also makes delicious baked goods and pastries due to the low protein content. All-purpose flour generally contains about 10-12% protein, whereas pastry flour contains about 8-9%.
- Ancient Grain Einkorn - A great option if you're looking for flours that are easier to digest. I generally save my einkorn flour for baked goods that aren't sourdough, but it also works wonderfully for sourdough. If you're not used to baking with ancient grains, I recommend checking out this post health and baking tips for Einkorn flour.
- Gluten-Free Brown Rice - This is a great gluten-free option. Many people like to create gluten-free blends, but I find having a single flour sourdough starter is easiest and works just as well for gluten-free baking. You can make your recipe with additional gf flour added for better consistency, but the starter itself can just be a single flour. You may enjoy this post on successful gluten-free baking that actually tastes good.
For my recommendations on where to find hard white wheat and other grains, check out this post on where to buy grains in bulk.
What is Sourdough Discard?
This is where sourdough can become confusing. Sometimes, it can feel like people are speaking another language... starter, discard, hydration, feedings, autolyze... the list of terms goes on and on.
Sourdough "discard" does not mean we're throwing or discarding the sourdough starter. It simply means we're removing some of the previously fed sourdough starter from the container and adding it to a new "discard" container to be used in recipes (see the list of sourdough discard recipes below).
Discarding your starter is very important at the beginning when you’re getting your starter established. It's also something that will come into play later on if you put your starter to sleep in the fridge and you need to bring it back to life!
Sourdough Discard Recipes
Before your starter is mature, meaning it's not yet strong enough to raise a loaf of bread, you can use the starter and the discard to bake all kinds of sourdough goodies. This discard can continue to be used once your starter is strong!
You do NOT want to try and bake a loaf of bread when your sourdough starter is in its infancy. You'll just get discouraged when the loaf doesn't rise. Experiment with these sourdough discard recipes instead:
- Pancakes and Waffles - Get my sourdough pancake and waffle recipe in video three of my sourdough series.
- Cakes and Brownies - This sourdough chocolate cake tastes incredible and is so light and fluffy!
- Cookies - These sourdough chocolate chip cookies are a must-try!
- Muffins - Sourdough discard muffins are a win. This sourdough muffin recipe has so many variations and mix-ins to try!
- English Muffins - Looking for a friendlier breakfast sandwich option? Try making sourdough English muffins.
- Tortillas - Sourdough tortillas are so simple to make and are a great addition to any taco night.
- Pie crust - In need of a flaky sourdough pie crust? Look no further!
- Crackers - Sourdough crackers may just be the easiest thing ever... well, maybe second to my five-minute cracker recipe.
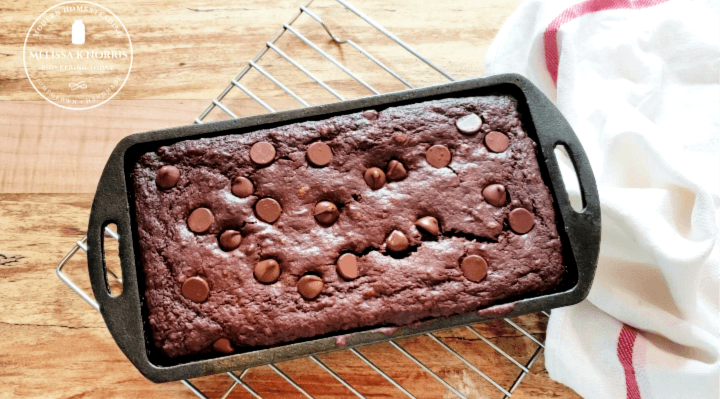
- Quick bread - My all-time favorite is this chocolate sourdough bread. You won't even have to feel guilty eating it for breakfast!
Now, if you have my book Handmade, you know we walked through making a sourdough starter and I've got quite a few recipes already in there for using your starter and your discard.
In my class, I walk you through making sourdough pancakes and waffles with your discard. These types of recipes are especially helpful when your starter is in its infancy because, as I mentioned, you can't use it to bake bread yet.
When is My Starter Strong Enough For Baking?
How do we know when our sourdough starter is strong enough to bake up amazing loaves of bread? You'll want to catch my free class to know just when your starter is ready. But the short answer is at least 4 weeks of age and consistently doubling in size a few hours after being fed.
In my class, we even dive into how to make sourdough bread, which is really interesting because it’s a different technique than using active dry yeast for homemade bread.
Since a sourdough starter is a living thing and it reacts differently to different temperatures, humidity levels, etc., you have to learn how to nurture your starter until it’s ready to bake bread with. Once you know what it's supposed to look like and how to manipulate it, it really is easy to make amazing bread!
I make sandwich bread with 100% sourdough starter (no active dry yeast in these loaves!). Lovely sliceable, barely-any-crumb sandwich bread that's not full of holes (because for sandwich bread, we don't want to have those huge holes because then all your stuff comes smushing out everywhere!).
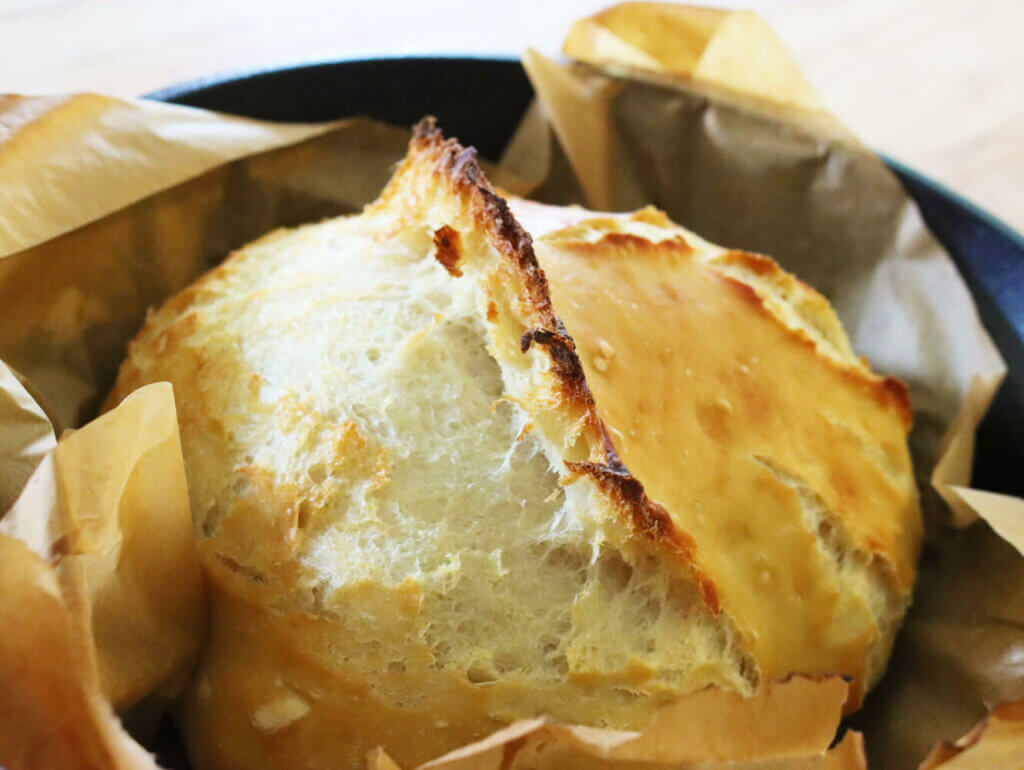
You can also take that same sourdough starter and turn it into more artisan-style loaves, such as big round loaves, French bread rolls, jalapeno cheddar sourdough boule recipe… the list goes on and on.
When you're ready to bake, here are my Sourdough Baking Tips & Tricks for Success.
How to Revive a Sourdough Starter
YIKES! Have you ever completely forgotten about your sourdough starter after tucking it in the back of the refrigerator? You're not alone!
I revived a sourdough starter that was tucked in the back of the refrigerator for SIX months! After a little TLC, it came back to life and was stronger than ever.
Check out this post to learn how to revive a sourdough starter. This is great to know in case you want to take a break from sourdough baking, but don't want to have to start from scratch with a brand new sourdough starter.
>> Sign up to join my sourdough class for free! <<
How to Make a Sourdough Starter
If you've heard the terms “wild yeast” or “wild fermentation,” that’s exactly what we're doing when we make a sourdough starter. We’re capturing that wild yeast and growing our starter with naturally occurring yeast and bacteria.
Once we understand our sourdough starter is a living thing, it’s easy to see why it doesn’t just taste good, but, like all fermented foods, it’s beneficial to our health too. Plus, the fact that it’s fermented means that it’s got natural preservatives because fermentation is basically nature's way of preserving food.
Now that I've filled you in on all the basics, here's how to start your very own sourdough starter...
Ingredients
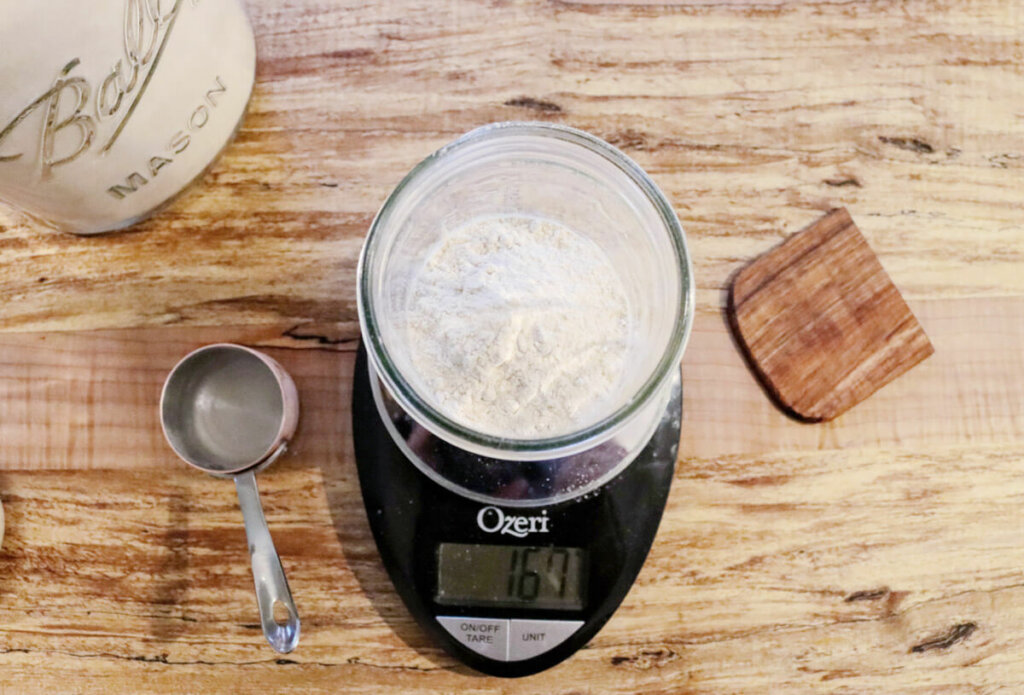
- ¼ cup flour (30 grams)
- 2 Tablespoons warm water (30 grams)
Directions
- Mix together ¼ cup flour and 2 Tablespoons water (or 30 grams of each for 100% hydration sourdough starter).
- It's ideal to use warm water, around 65 to 70°F. If your house is on the cool side, you can increase the water temperature to 80 to 85°F.
- Every 12 hours (or so), discard half your starter and feed it with the amounts listed again. You can see my example sourdough starter feeding schedule below.
Feeding Your Sourdough Starter
At each feeding, you’ll use ¼ cup (30 grams) of flour and 2 Tablespoons (30 grams) of water. Your goal is a thick, pancake-like batter consistency. If your starter looks a little thin, add a bit more flour. If it looks too thick, add a bit more water (remember, we don't have to be fussy about this!).
Try to keep your feedings 12 hours apart, but don’t stress or set a timer. Twice a day is ideal to keep your new lactobacilli bacteria fed, where they can multiply to establish your colony. I like to feed my starter once in the morning and once before I go to bed.
Example Sourdough Starter Feeding Schedule
Day 1
AM feeding = Add equal parts flour and water (by weight), or about 1/4 cup flour and 2 tablespoons warm water, and stir until well combined. Scrape down the sides and bottom of the jar to make sure everything is incorporated.
PM feeding = Add equal parts flour and water (by weight), or about 1/4 cup flour and 2 tablespoons warm water, and stir until well combined. Scrape down the sides and bottom of the jar to make sure everything is incorporated.
Day 2
AM feeding = Discard ½ the amount of your starter (this is very important to establish your starter with a healthy colony). Add equal parts flour and water (by weight), or about 1/4 cup flour and 2 tablespoons warm water, and stir until well combined. Scrape down the sides and bottom of the jar to make sure everything is incorporated.
PM feeding = Add equal parts flour and water (by weight), or about 1/4 cup flour and 2 tablespoons warm water, and stir until well combined. Scrape down the sides and bottom of the jar to make sure everything is incorporated.
What you might see: You may start to see a bubble or two!
Day 3
AM feeding = Discard ½ the amount of your starter (this is very important to establish your starter with a healthy colony). Add equal parts flour and water (by weight), or about 1/4 cup flour and 2 tablespoons warm water, and stir until well combined. Scrape down the sides and bottom of the jar to make sure everything is incorporated.
PM feeding = Add equal parts flour and water (by weight), or about 1/4 cup flour and 2 tablespoons warm water, and stir until well combined. Scrape down the sides and bottom of the jar to make sure everything is incorporated.
What you might see: You should be seeing quite a bit of bubble action now! Some starter will even double at this point BUT it’s not ready for bread. If your starter is extremely bubbly right now, don’t be alarmed if at day 5 or beyond it suddenly stops being so bubbly, this is normal for a young starter.
Day 4
AM feeding = Discard ½ the amount of your starter (this is very important to establish your starter with a healthy colony). Add equal parts flour and water (by weight), or about 1/4 cup flour and 2 tablespoons warm water, and stir until well combined. Scrape down the sides and bottom of the jar to make sure everything is incorporated.
PM feeding = Add equal parts flour and water (by weight), or about 1/4 cup flour and 2 tablespoons warm water, and stir until well combined. Scrape down the sides and bottom of the jar to make sure everything is incorporated.
Day 5
AM feeding = Discard ½ the amount of your starter (this is very important to establish your starter with a healthy colony). Add equal parts flour and water (by weight), or about 1/4 cup flour and 2 tablespoons warm water, and stir until well combined. Scrape down the sides and bottom of the jar to make sure everything is incorporated.
PM feeding = Add equal parts flour and water (by weight), or about 1/4 cup flour and 2 tablespoons warm water, and stir until well combined. Scrape down the sides and bottom of the jar to make sure everything is incorporated.
What you might see: Even if you don’t see signs on days one or two, continue with the feeding routine and have patience. Your starter will likely smell yeasty, sour, tangy and or even like alcohol in the beginning stages.
You now have an active but young sourdough starter and can begin using it in non-rising sourdough recipes (discard recipes) like pancakes, waffles, muffins, quick breads, crackers, and cakes.
Day 6 through 28
At this point, you can continue with the twice-daily feeding amounts OR use the alternate once-a-day feeding.
Alternate once-a-day feeding is to add ½ cup flour (60 grams) and ¼ cup water (60 grams). This can be used once your starter is bubbly and active. If you feel it's sluggish, stay at the twice-a-day feedings and amounts.
Once your starter is 4 weeks old, it will likely show consistent signs of doubling a few hours after feeding and be ready to try in bread recipes.
Why You MUST Discard Half Your Starter
Don’t skip the discard. As mentioned above, this is important during the beginning stages of a new sourdough starter and means you’ll use less flour throughout the first week. The lactobacilli aren’t established and can’t sustain the full amount of flour and water if you don’t discard them.
If you'd like, you can use the discard in regular recipes that call for flour and water, but it's not truly a sourdough discard yet (not to mention it's only a small amount).
Other options are to add it to your compost pile, feed it to your livestock, or throw it in the trash. DON’T put it down your sink unless you want to call a plumber.
Where to Store Sourdough Starter
The best temperature for your starter is between 70-85° Fahrenheit. Our house cools down between 60-65°F overnight as the woodstove cools and then is back in the low to mid 70s during the day and evening, and my starter does just fine.
You don't have to be too fussy with your starter. If you’re seeing good bubble action, don’t worry if your temperatures dip.
If your house is consistently colder, you can place your starter near a heat source (not on it; we don’t want to cook it), on top of the refrigerator or in the oven with the light on (just don't forget it's in there when you need to preheat your oven!).
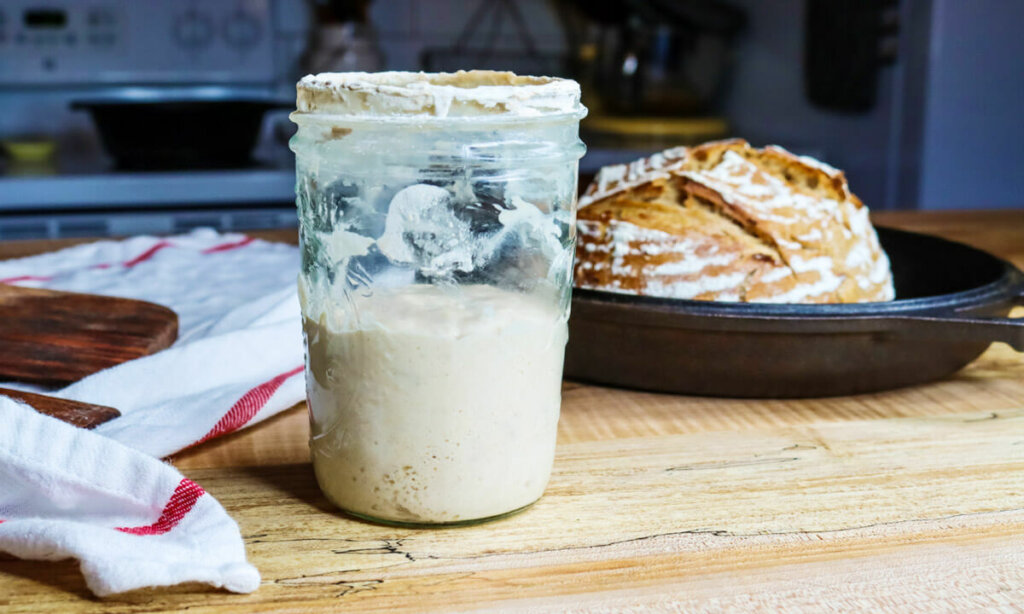
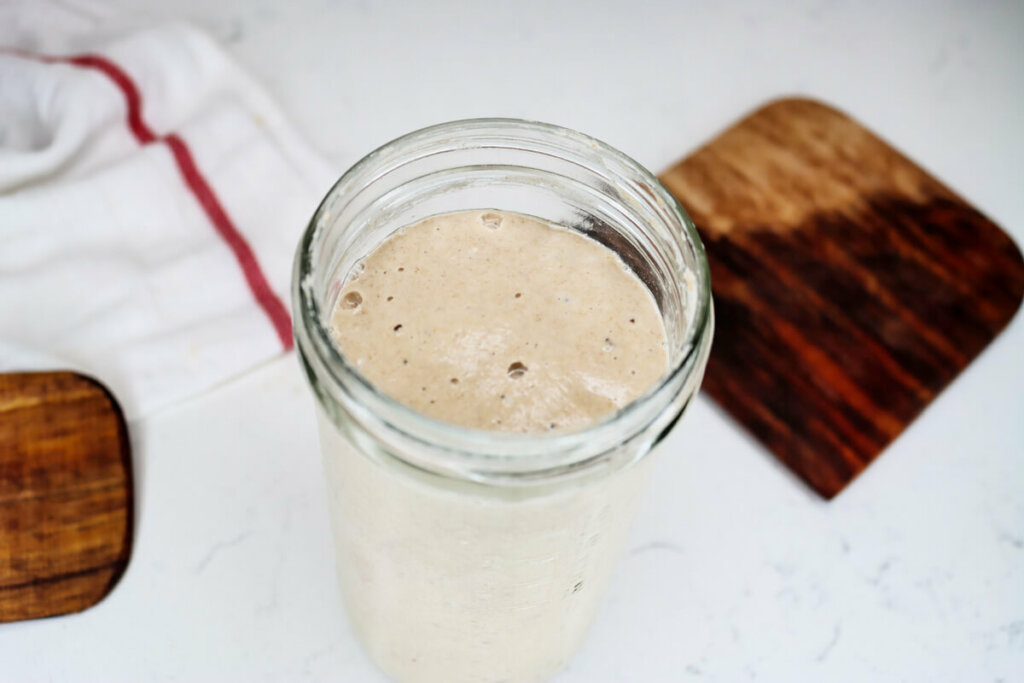
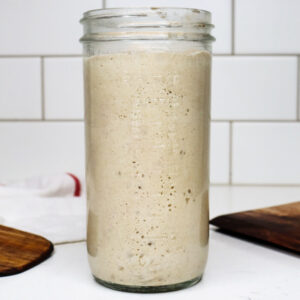
Signs Your Starter Is Active
A healthy and mature sourdough starter will show lots of signs of activity:
- Bubbles on the sides of the jar
- Bubbles on the top of the jar
- Domed on top a few hours after feeding
- Starter doubling in size a few hours after feeding
- Liquid on the top as you come due for the next feeding
Signs Your Starter Has Gone Bad
There's really no mystery here. Honestly, you'll know! There's a difference between a strong fermented smell and a putrid, rotten, or rancid smell. Sourdough starter can smell like vinegar or a strong alcoholic smell, but that doesn't mean it's bad.
It can also build up a dark liquid layer, called “hooch,” and that's also harmless. Sometimes the top of the starter will even turn gray and get firm. All you need to do is pour off the liquid and/or scrape off the thick gray layer, feed it, and continue with daily feedings until it's bubbly and active again.
What you don't want to see is pink, gray, green, or black fuzzy mold. Also, if it smells putrid, like you may get sick after smelling it, those are signs that your starter has gone bad.
Trust me when I say, sourdough starters are extremely resilient and I've neglected mine for an extremely long time without them going bad (like, forgetting them in the back of the refrigerator for months on end!).
📖 Recipe
Sourdough Starter
Ingredients
- 1/4 cup flour all-purpose, whole wheat, fresh ground, etc.
- 2 tbsp water warm
Instructions
- Mix together flour and water in a pint mason jar, cover jar with cheese cloth or coffee filter and set in a warm area of your house for 12 hours.
- After 12 hours, feed your starter the same amounts again, cover and let sit 12 hours.
- On the second day, discard half the starter, then feed with 1/4 cup flour and 2 tbsp warm water. Cover jar and let sit another 12 hours.
- After 12 hours, feed your starter the same amounts again, cover and let sit 12 hours.
- Repeat these steps for 5 days, discarding half the starter once daily, but continuing with the twice daily feedings.
- By about the 6th day you should have pretty bubbly starter that is great for baking pancakes, waffles and other pastries, but might not be ready to bake a loaf of bread.
- On day 6 you can switch to feeding once per day (see instructions in the post), and keep using your starter in the sourdough starter recipes listed above.
- By week 4 your starter should be ready to bake bread (see notes in the post on how to know if your starter is ready to bake a loaf of bread).
Notes
- Be sure to feed with the same kind of flour (or the same combination of flours) throughout the whole first month.
- On days 1-4 of your new starter, your discard won't be ready to use in sourdough recipes like pancakes, waffles, muffins, etc., but you can use it in the place of flour and water in recipes that call for it.
- By day 5, you will finally have a sourdough starter, although it won't be strong enough for bread baking, you can use it in recipes like waffles, pancakes, muffins, and chocolate sourdough bread.
- On day 6, you can switch to once a day feedings, or continue feeding twice daily.
Nutrition
[fusebox_transcript]
More fermentation articles:
- Best Beginner Sourdough Sandwich Bread No Yeast
- Sourdough Chocolate Bread From Scratch
- Rehydrating Sourdough Starter
- 8 Tips for Strengthening Your Immune System Now
- Ultimate Guide to Fermenting Vegetables
- Fermentation for Health Benefits & Food Preservation
- Fermented Dairy – Why You Should Be Doing This Now
- How to Make Yogurt at Home
- Fresh Fermented Salsa Recipe
- Kahm Yeast (What, Why & Does it Ruin a Ferment)