Learning how to render lard in ten easy steps. Knowing how to render lard is like a homesteader’s right of passage. It’s an extremely healthy fat, despite what you may have learned growing up, and makes the most delicious pastries, flaky pie crust, and crispy fried chicken!
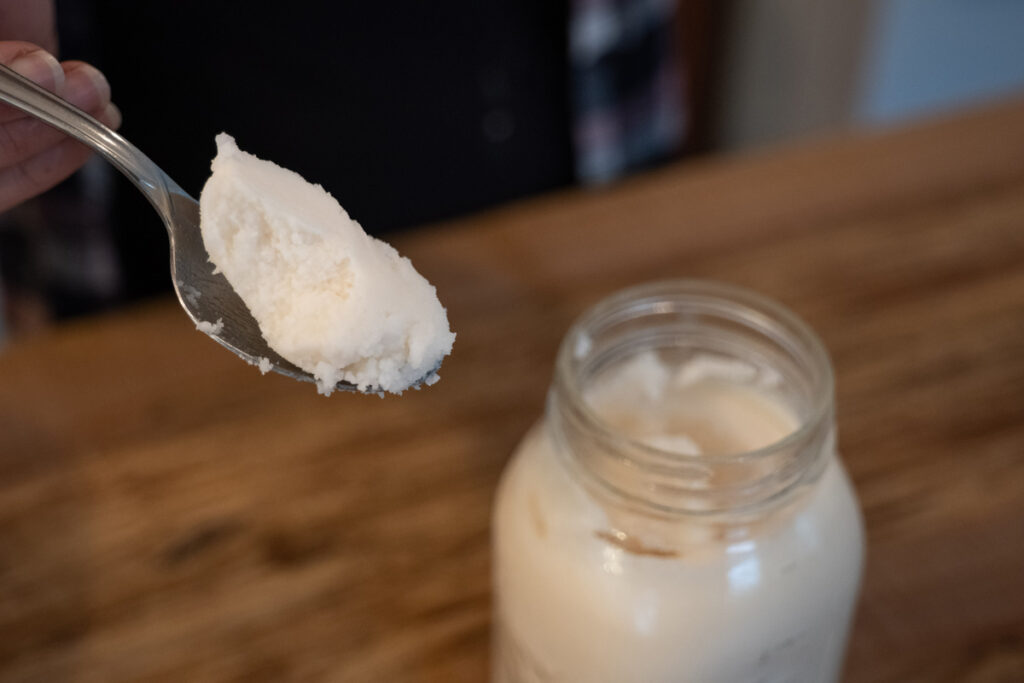
Table of Contents[Hide][Show]
🍞 Struggling With Sourdough?
If your starter won’t take off, your loaves are dense and hard, or sourdough just flat-out overwhelms you…
👉 I’ll show you how to fix all of it.
Join my FREE workshop and learn how to make a bubbly, active starter—the right way, from Day One.
Why I Love Lard
We practice many pioneering skills at our homestead, from butchering pigs, raising beef cattle and meat chickens (a proud flock of egg-laying hens), heirloom organic gardening and seed saving, and traditional cooking and meals. But before I learned how to properly render lard I’d never saved the fat from our hogs! It almost pains me to say that!
The Hidden Cycle Keeping You Inflamed
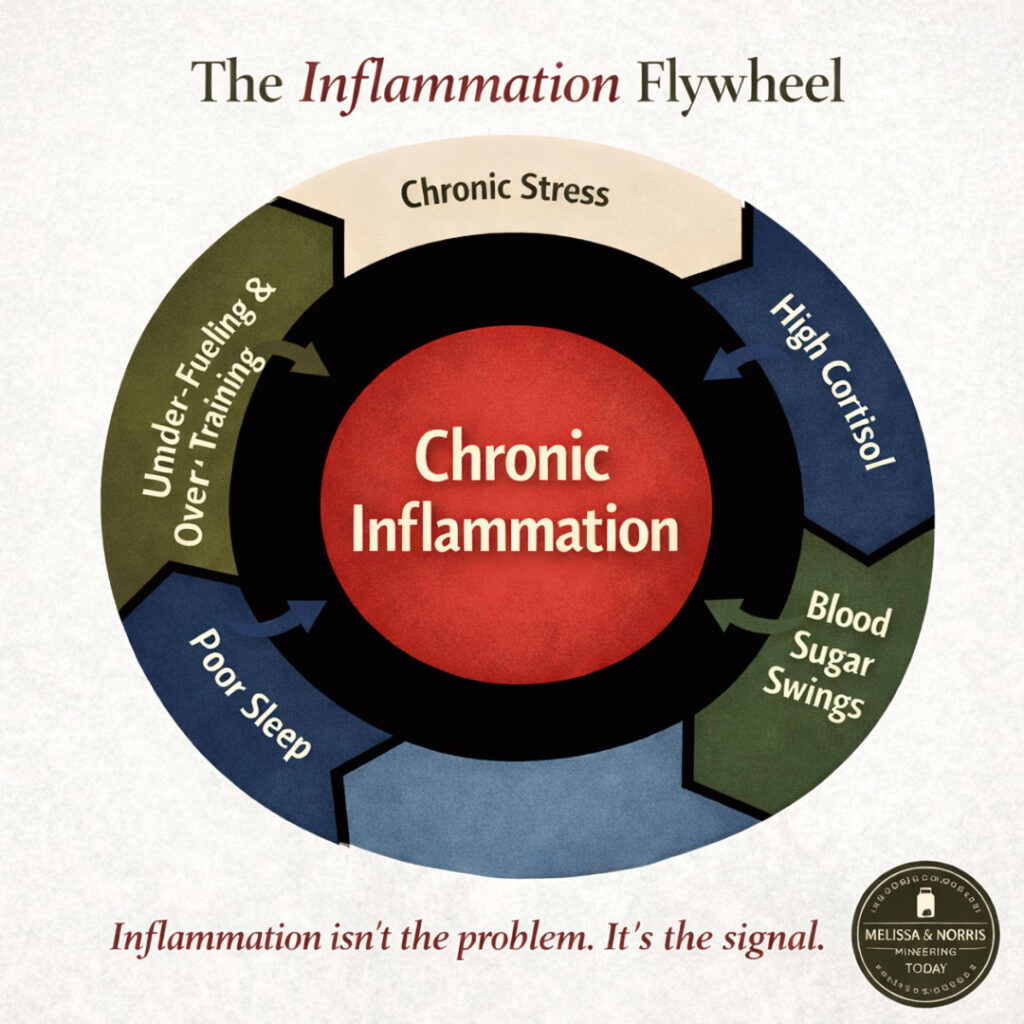
If you’ve been feeling puffy, tired, achy, or wired-but-tired, this two-page guide will help you understand what may be happening behind the scenes — even if you’re eating “healthy.”
Download the Inflammation Flywheel Guide and learn:
- Where to start so you don’t feel overwhelmed
- The 5 most common drivers that keep inflammation switched on
- Why blood sugar swings, stress, and poor sleep feed each other
Sure, I had saved bacon grease from the pan after cooking and poured it into a small jelly jar and stored it in the fridge for future use, but never had I rendered down the white creamy lard that’s so wonderful for homemade pie crusts, hand pies (aka homemade pop tarts), flaky biscuits with layers upon layers.
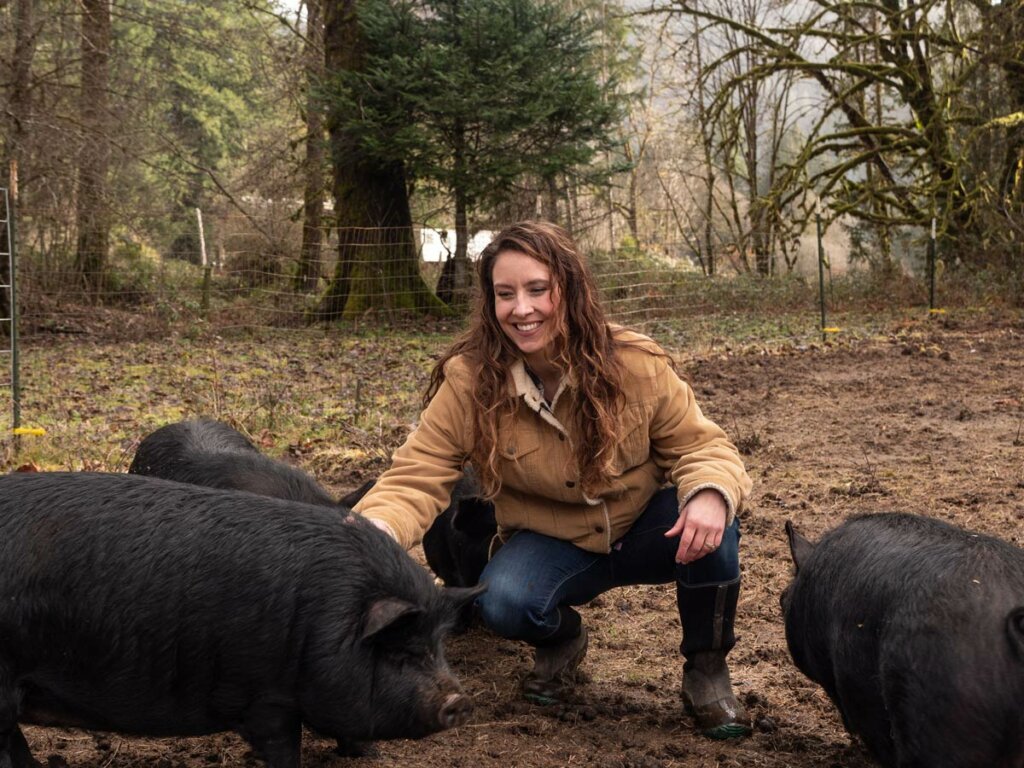
Little did I know I was basically rendering lard from my bacon and collecting it on a small scale all those years, but now we do it on a larger scale. I’m happy to say that by the time we tried our hand at raising American Guinea Hogs (known for their fat production) I was well versed in rendering lard! And boy did those pigs produce a lot of it!
Lard vs. Tallow
Last month when our local butcher came to butcher the cows, I asked him for the beef fat (called tallow). He asked if I was making soap from it, and I told him I wanted it for cooking.
He was so sweet and let me know that pork lard is preferred for cooking, as beef tallow tends to have a much stronger flavor for cooking (especially for pastries). I was thrilled when he offered me some lard for free.
That was my first experience rendering lard, which is when I originally wrote this blog post back in 2013. But I’ve been rendering lard for over eight years now.
Subscribe to Melissa K. Norris!
Get updates on the latest posts and more from Melissa K. Norris straight to your inbox.
We use your personal data for interest-based advertising, as outlined in our Privacy Notice.
Types of Lard
There are two types of lard and it’s important to know the difference as the flavor is quite different.
Leaf Lard
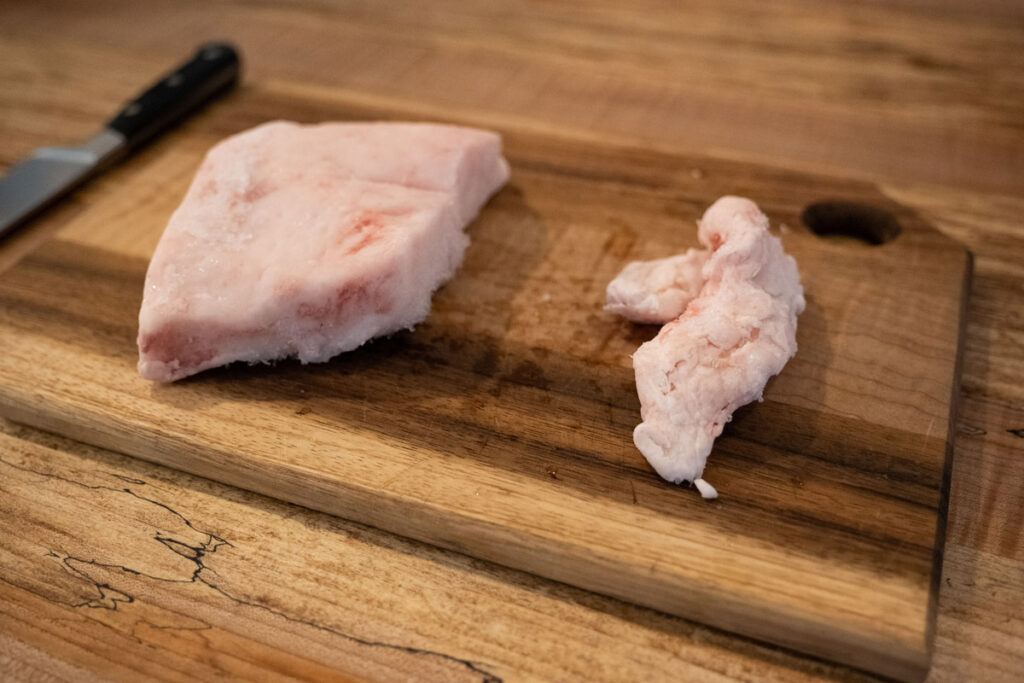
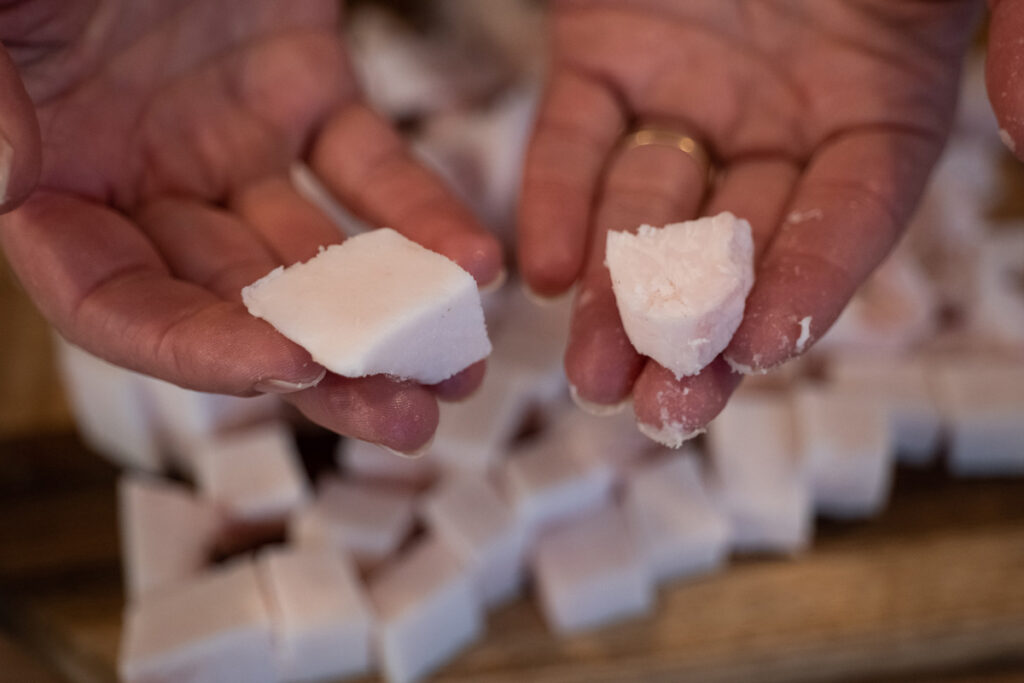
The lard around the kidneys and organs of the animal is referred to as leaf lard and is considered the purest form and best for baking. In the above photo, the leaf lard is on the right, it looks more ropey.
Fat Back or Back Fat
Another form of lard is the back fat of the animal. The first time I got lard from the butcher it was all mixed together. (But not to worry, there’s a way to make it work for both baking and general cooking/frying.) In the above photo, the fat back is a larger solid piece of fat.
If you can, I recommend requesting your butcher separate the types of fat so you know what you’re rendering and how you’ll use it.
Pork Belly
Pork belly is part of the pig that’s been growing in culinary circles for its incredible flavor! The pork belly is the fat right alongside the bacon and it tends to have quite a bit of meat intertwined with the fat.
You could render it down, but I wouldn’t recommend it because pork belly is so yummy when cooked just right!
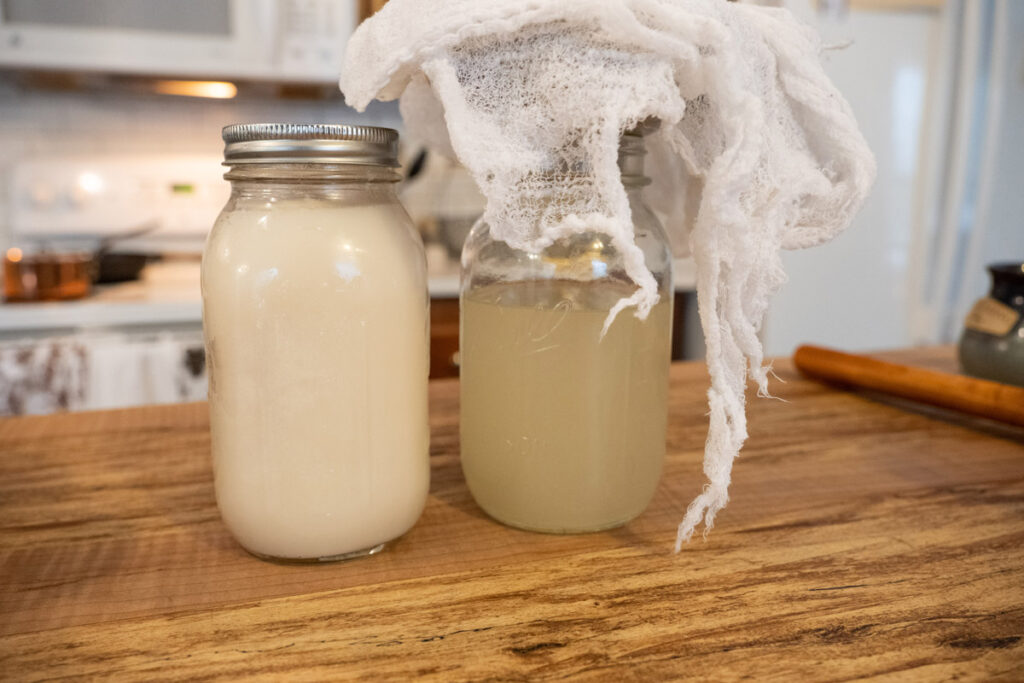
Results of Different Renderings
When rendering lard I break it up into three different renderings. You can think of the process in thirds. The first third of the lard that melts is the first rendering, the second third is the second, etc.
I’ll explain the differences in flavor and how I like to use them below:
First Rendering
The first part of the rendering is going to be the pure white lard that is excellent for baking.
This will have the least amount of “porkiness” in flavor which is why it’s best for pastries, pie crusts, cookies, etc.
Second Rendering
With the second rendering, the flavor will have a bit more porkiness, but not overpowering. It’s a more desired flavor which is why I’ll use that lard for items like making my homemade 5-minute crackers or homemade tortillas.
Third Rendering
With the third rendering, the pork flavor will be much more pronounced. This is the lard I will use for cooking savory foods like fried chicken and sauteed vegetables. Dishes that will benefit from that added flavor.
Is Lard Healthy?
You may be wondering why I would want to render lard to use in cooking and baking. Despite popular myth, lard is not bad for you. It’s actually a source of healthy fats when used in moderation.
Let’s first put to rest the myth that fat is unhealthy and low-fat is the way to go.
When you have organic pasture-raised pork (or any meat for that matter), you’re getting meat that’s high in vitamin d as well as omega 3 fatty-acids rather than a high ratio of omega 6.
As we know, getting too many omega 6 fatty acids without omega 3s is very unhealthy. Having a diet high in healthy fats is one of the best things you can do for your health.
Lard is much preferred over the GMO-laden shortening (I’m looking at you Crisco) and vegetable/canola oil found on store shelves. This article explains the top 3 reasons you should be using lard.
We now raise pigs about every other year and I keep all the fat from them. I use organic butter and coconut oil when baking, but the cost of it can be expensive. The lard was free and after rendering down five pounds of it, I ended up with two pints and almost one full quart. Compared to organic coconut oil, that’s a savings of $20.
Plus, I love adding more lost traditions to our home. Now I can use my great-great-grandmother’s cookbook and know how the recipes are supposed to taste with the lard. Want more old-fashioned tips and tutorials? Check out The Made-From-Scratch Life!
How to Render Lard
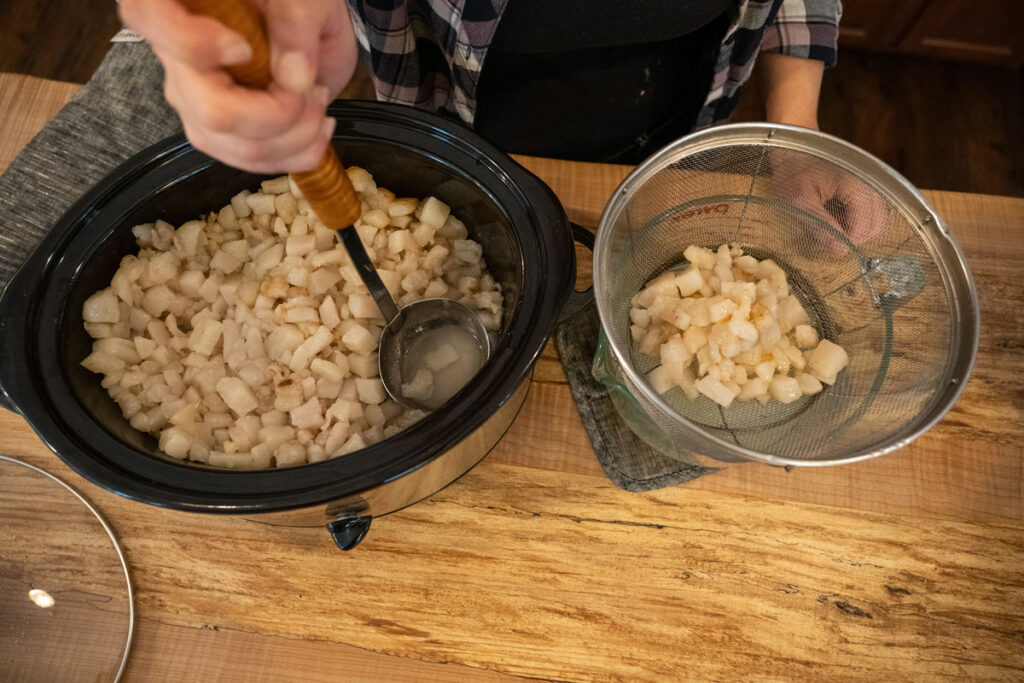
I prefer using the slow cooker method when rendering lard. I’ve tried rendering lard multiple ways including the stovetop and outside on a cookstove, but I like using the slow cooker the best because I feel like there’s less chance for scorching or a burnt flavor in the end result.
This also eliminates the possibility of tying up my stovetop if the process is happening during dinner time (and avoiding possible grease splatter).
1. Freeze the Lard
When rendering lard, it’s easiest to work with if you freeze it first. Allow it to partially thaw for about two hours on the kitchen counter so you can at least cut through it.
I actually store my lard in the freezer until I’m ready to render it down. Last year we raised and butchered five pigs and only one other person wanted their lard, so we have an excess! It does take up quite a bit of freezer space, but it’s worth it to me not to have to worry about it until I have the time to render it down.
2. Chop the Lard
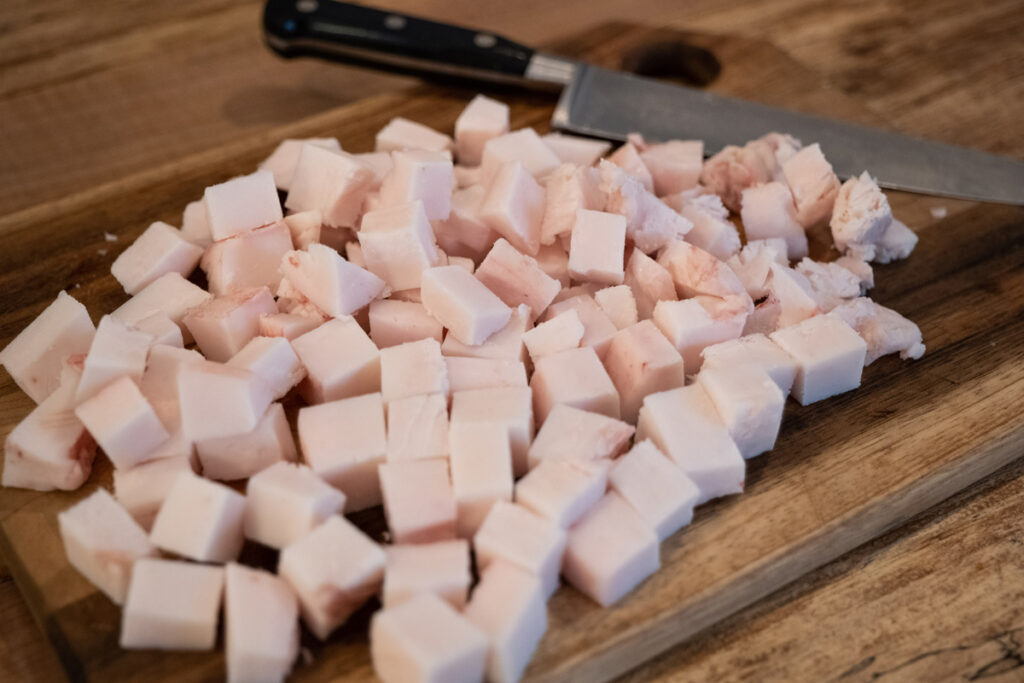
Chop the lard up in 1-2 inch cubes. You want the pieces of fat to be uniform in size to avoid scorching and uneven cooking. And the pieces should be small so they’ll release the oils.
Some people will ask the butcher to grind the fat up first, but I’ve never bothered with this and the small cubes seem to work just fine. Either way would work.
While chopping the lard, your knife and cutting board will become slick, so use caution.
3. Add Water to Slow Cooker
Put 1/4 cup water in the bottom of your slow cooker. This is to prevent any scorching as the fat is starting to melt. The water will cook off during the rendering process.
4. Add Lard to Slow Cooker
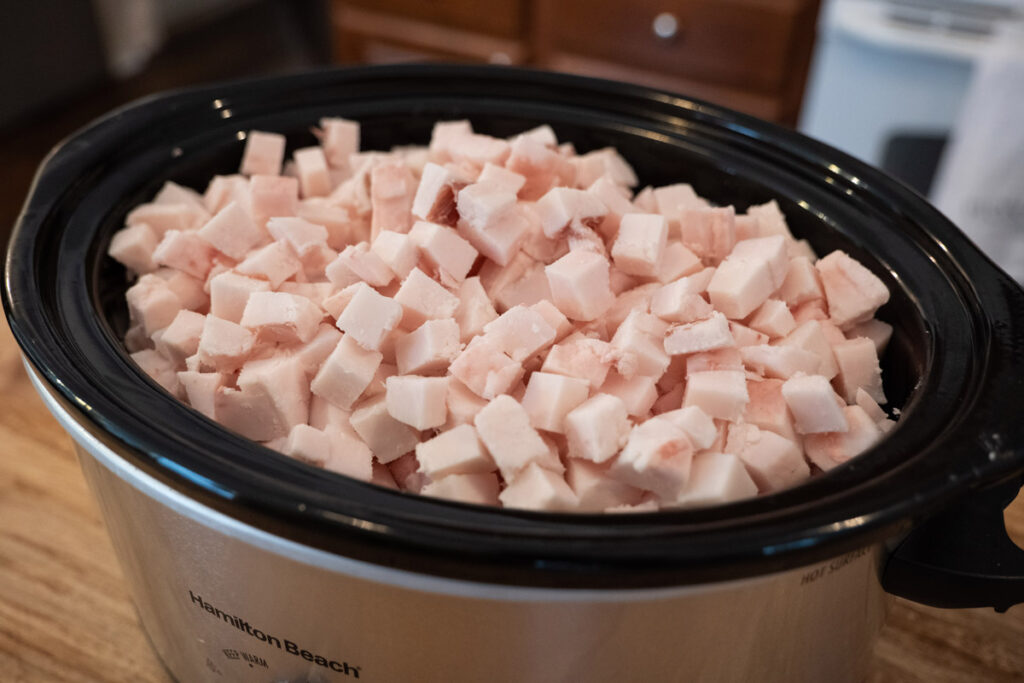
Fill your slow cooker to the very top with the cubes of lard, really heap it in there but just be sure you can still secure the lid.
The lard will cook down and you really want to make your time count, so pack it full!
5. Cook Lard
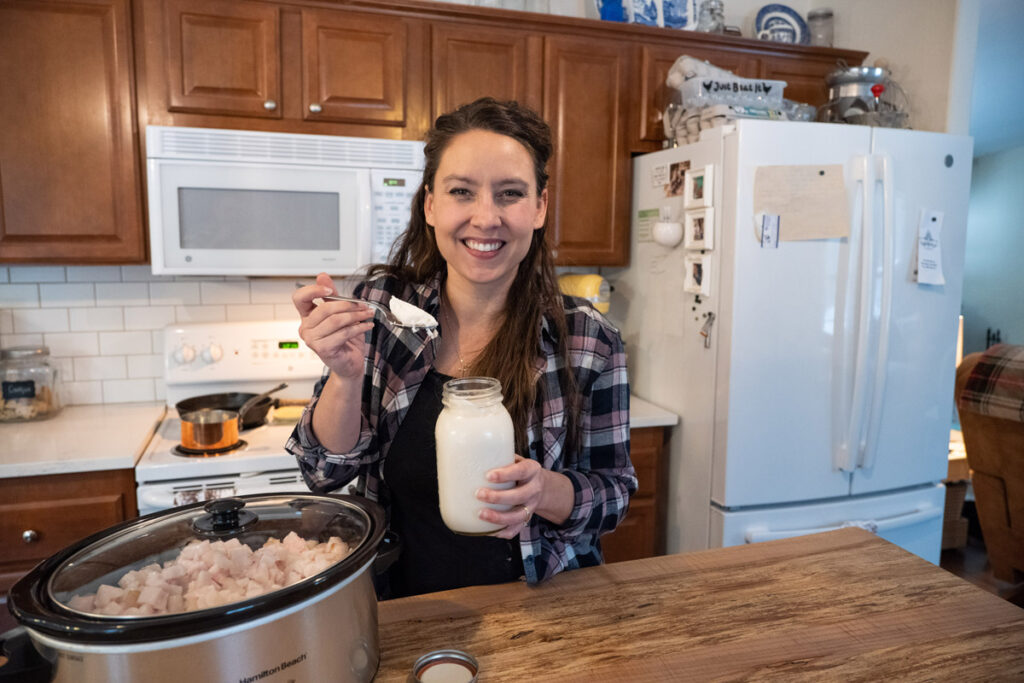
Turn the slow cooker to high and cook for 30 minutes, then turn the slow cooker down to low for the remainder of the time.
You may need to leave your slow cooker on high for upwards of 60 minutes depending upon the temperature of your slow cooker’s high setting. Mine tends to run a bit hot, so after 30 minutes it’s ready to be turned to low.
What you’re looking for is the very beginning of melting. The lard will get shiny and turn from slightly pink to white around the edges of the pot.
Keep an eye on it and once it starts to melt, turn the slow cooker to low.
6. Stir Every 30 Minutes
It’s important to stir the lard every 30 minutes to evenly distribute the heat and avoid the outside pieces from burning.
Check on your lard after 20 minutes, just in case your low setting on the slow cooker runs hotter than mine. You might hear some sizzling, this is a good sign it’s time to stir.
7. First, Second, and Third Rendering
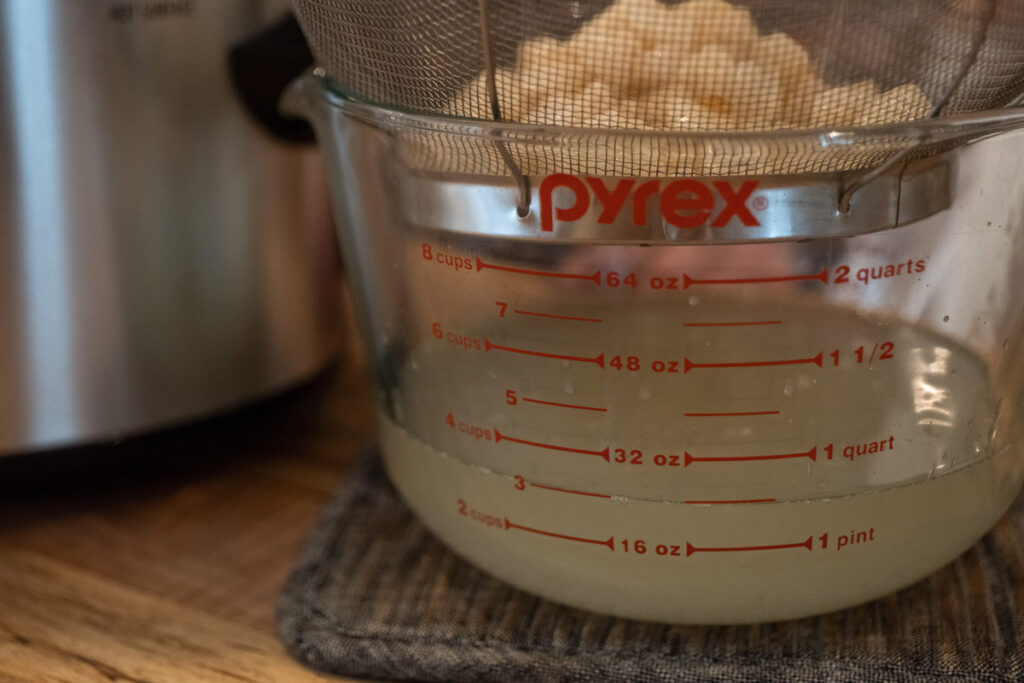
Once the liquid reaches the top of the lard, you’re ready for the first rendering.
Depending upon the amount of lard you’re rendering, the time it takes for this to happen will vary. I did four quarts at once and it took almost three hours for the first rendering.
Place a strainer, or sieve, lined with a layer of cheesecloth over a large bowl. Using a ladle, pour the rendered lard through.
Any solid pieces of lard can be placed back into the slow cooker to continue rendering.
After the first rendering, you can remove the lid to allow any water to evaporate.
You’ll render the “second” rendering when you have enough liquid fat melted again (about 2 to 3 inches) to drain off.
The third rendering is the same when the rest of the fat has melted and you’ve got a few inches of liquid melted fat.
8. Cool Lard
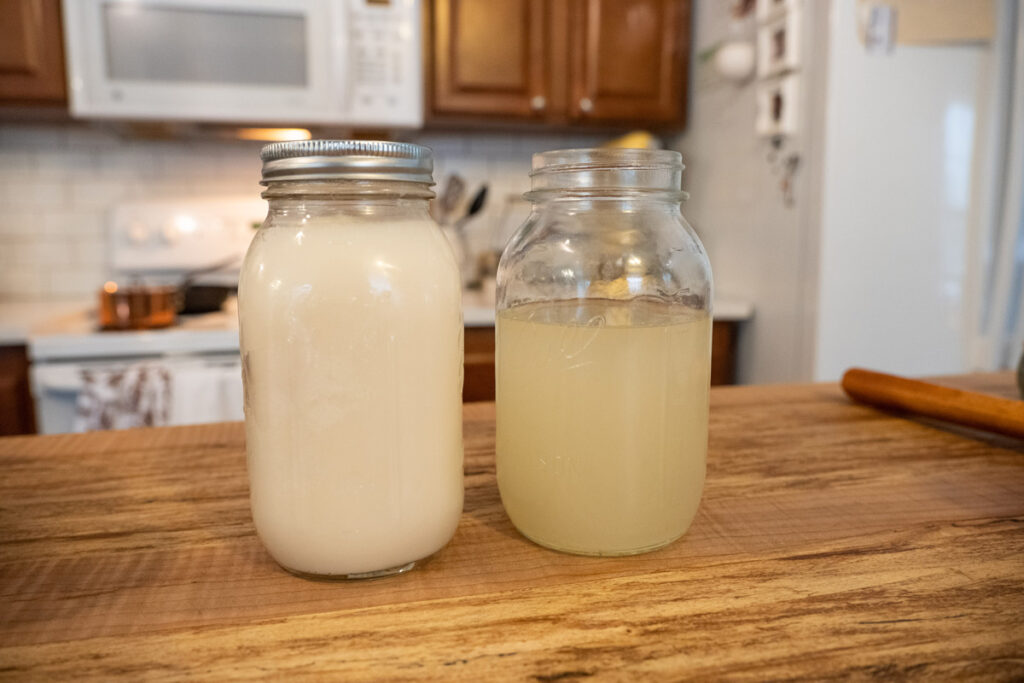
Be sure to wipe down the outside of the jars to remove any grease residue. Then allow the lard to continue to cool to room temperature before putting on lids and placing them in the fridge.
9. Label Jars
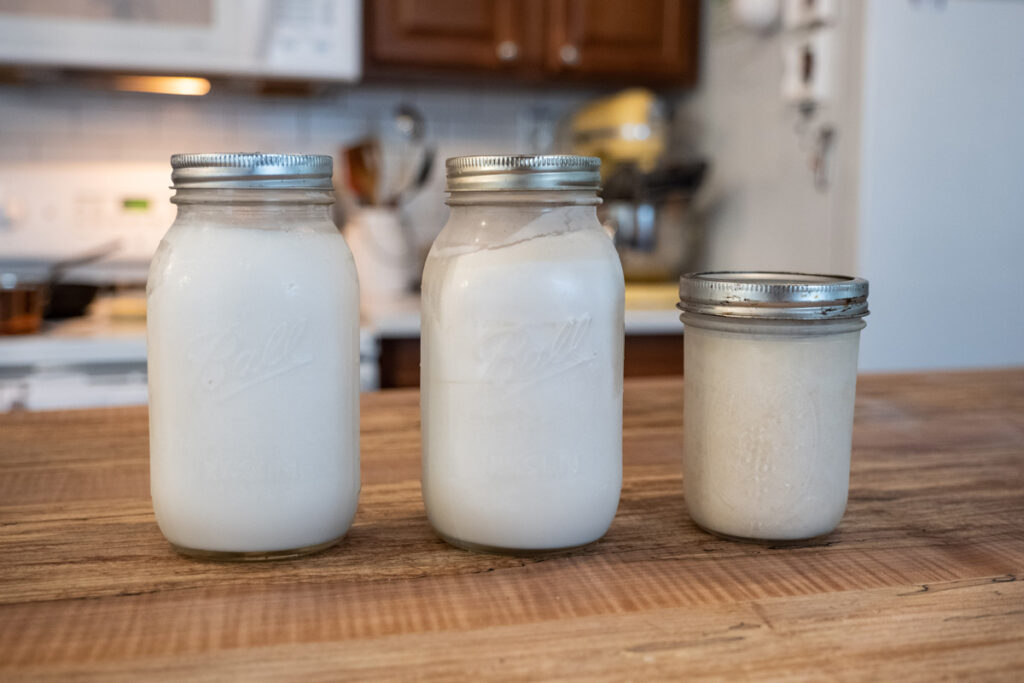
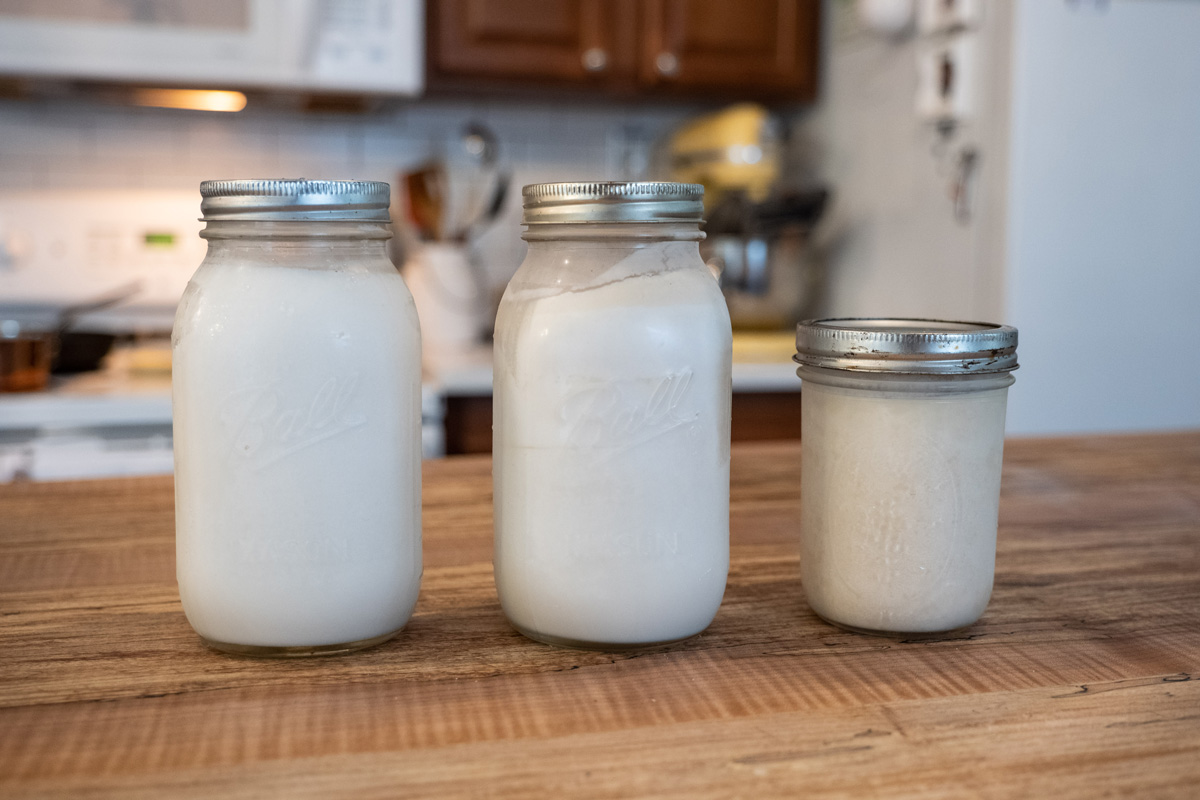
Be sure to mark your jars with which rendering it is so you know which jar to grab depending on what you’re using it for.
As a reminder, your first rendering is the purest. It will have virtually no pork flavor and is perfect for baking pastries, cookies, and cakes. Once solid, the first rendering will be snow white.
The second rendering will be slightly darker in color and is still fine for biscuits, pie crusts, cornbread, and more savory-type dishes.
The third rendering will be the darkest and is best used as cooking oil for frying dishes. This rendering lard will have the most pork flavor.
All of the renderings will be a golden-yellow color in their liquid form but will turn white as they cool.
10. Store
For best results, store your lard in the refrigerator. Lard should be fine on the shelf, but I prefer to store mine in the fridge to avoid any of my hard work turning rancid.
How to Render Lard in the Oven
If you don’t have a slow cooker, you can render your lard down in the oven. Preheat the oven to 250-300° F and follow the process just the same using an ovenproof stockpot.
The entire process takes about 8 hours, which is why I prefer to use the slow cooker so my oven isn’t on an entire day.
How Long is Lard Good For?
Lard is good in the fridge for up to a year. Do take care when scooping lard out that you’re using clean utensils. If the jars get contaminated, this could cause early spoilage.
For longer shelf life, keep the extra jars of lard in the freezer until needed. They are good for at least a year or two when frozen. Simply defrost on the counter overnight (or in the refrigerator for a couple days) when ready to use.
How to Use Lard
Use your lard in place of shortenings, butter, and oils. I make my biscuits with lard on occasion and they are amazing! Using lard in pie crusts will help give you the flaky crust we all want in a pie.
Lard also has additional uses around the homestead such as candle making and seasoning cast iron pans. You can even use lard for skincare!
How to Eat Cracklins
I was surprised at how far the lard rendered down. I went from a full slow cooker to a single cookie sheet of leftover cracklins.
I baked them at 350° F for 20 minutes to use in place of bacon bits and as a flavoring in beans and on top of soups.
Depending upon the amount of lard you’re rendering, the time it takes for this to happen will vary. I did four quarts at once and it took almost three hours for the first rendering.
Depending upon the amount of lard you’re rendering, the time it takes for this to happen will vary. I did four quarts at once and it took almost three hours for the first rendering.
Did you make this recipe? I’d love for you to let me know how it went for you by leaving a comment below, then leave a star rating on the recipe card! Snap a photo and tag me on social media so I can see @melissaknorris. I love seeing what all you Pioneers are up to!
Be sure to also follow me on Pinterest, Instagram, Facebook, and my YouTube channel where I share many more modern Pioneer-lifestyle tips, gardening tips, and tutorials, as well as other homesteading knowledge I’ve gleaned in my 20+ years as a homestead gal.
Other Posts You May Enjoy
- How to Raise Pigs: 12 Tips to Raising Pigs for Meat
- Raising American Guinea Hogs
- Were the American Guinea Hogs Worth It?
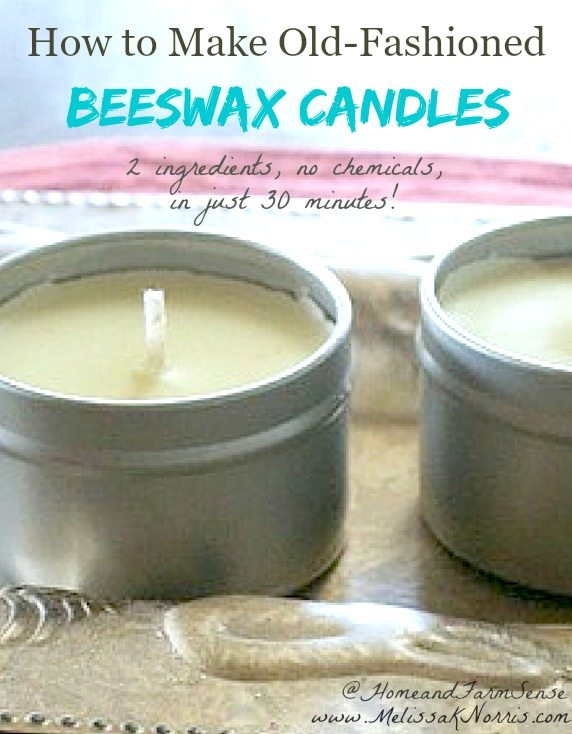
- How to Make Beeswax & Lard Candles
- Pressing Your Own Seed & Nut Oils at Home
- 17 Self-Sufficiency Tips from the Great Depression
- Must-Have Pantry Items For Long-Term Storage
- 12 Non-Food Essentials to Always Have on Hand
How to Render Lard
Equipment
- Slow cooker
- Large glass measuring cup
- Ladle
- Colander
- Cheesecloth
Ingredients
- 4 quarts lard cubed
- 1/4 cup water
Instructions
- If your lard isn't frozen, go ahead and pop it in the freezer for a few hours to harden up. If it's frozen solid, leave it at room temperature for a couple of hours to soften a bit. We're looking for slightly frozen lard.
- Chop the lard into 1-2 inch cubes. Try to keep all pieces uniform in size.
- Add 1/4 cup water to the bottom of slow cooker.
- Add cubed lard to slow cooker and turn to high.
- Cook on high for 30 minutes, or just until lard is beginning to melt and pieces look shiny.
- Give the lard a stir and turn slow cooker down to low.
- Continue stirring every 30 minutes.
- Once liquid reaches the top of the cubes of lard (after approximately 3 hours), it's time to get your first rendering.
- Place strainer, or sieve, lined with a layer of cheesecloth over a large bowl. Using a ladle, pour the rendered lard through.
- Any solid pieces of lard can be placed back into the slow cooker to continue rendering.
- Let liquid lard cool for about ten minutes, then carefully pour into quart-sized mason jars.
- Continue this process three times, pouring each rendering into different jars and labeling them as "first", "second", or "third" so you know how to cook with them.
- Allow lard to cool completely in the jar before adding a lid.
- Store lard in the refrigerator for up to six months and in the freezer for a year.
Notes
- You can render lard in the oven by following the steps above and, in an oven-safe stockpot, rendering the lard at 250-300° F.
- Storing lard in the refrigerator will prolong the shelf-life.
- Properly rendered lard is shelf-stable at room temperature but is susceptible to going rancid if there’s any cross-contamination.
- Be sure to use clean utensils when scooping lard out of the jar.


I cut up a couple hogs on the weekend for a niece. They gave me the leaf fat and all other fat. Took it home and rendered it today using your instructions. Got 12-500 ml jars. Love it. Used a electric roaster pan. Thank you for your awesome information
Woo hoo!
I know this is an old thread I just found it so if I don’t get a response no surprise, we raise and butcher our own pork (kuni kuni) we render down the lard but some of it doesn’t solidify in the jar any idea why?
My butcher is getting some back fat in for me, is there my difference between that and leaf fat?
Yes, back fat isn’t leaf fat.
Lorraine, While they are 2 different fats, based on the location it’s on the pig, they both will make good lard. It’s just that the leaf fat is better from baking, like for pies and pastries, while the back fat is better as a cooking oil. You can definitely use backfat in your baking, it just will have a slightly stronger taste to it, which you may or may not like.
Can you give the beef tallow version as we don’t eat pork? TY. I wonder how strong it is compared to say coconut oil? Virgin coconut has a strong coconut taste so would beef tallow have a very strong flavor ?. Or do you have a recipe for tallow lotion? Thanks
Email listed wrong with my typo….
Thanks, Melissa! Just used your recipe for my first time rendering lard on Thursday. It wasn’t hard, just a little time management. Haven’t used it yet, but will soon give it a try!
We bought a pig from an Amish butcher. We had asked for the fat to be left and I was going to render it myself. Either my husband or the butcher had miscommunication but he rendered it to lard for me. However when I use it is taste off and isn’t white in color. It’s almost almond in color. Can I heat it up, Being very watchful, and strain it into jars if that would help/
Thank you
First timer
I haven’t ever done that so I don’t know if it would separate out for your (the leaf lard/pure white would rise to the top and melt first or not). You could test a small amount and see, otherwise for savory dishes, meats, etc. it would still be good.
I have render lard after we harvest hogs many times. The key I found to having snow white lard with vey little pork taste is to maintain the rendering temperature below 215 degrees F. Any higher will start to cook the lard and produce a stronger pork taste. I usually use my fish cooker to render lard and a thermometer to keep the temperature regulated between 200 and 215 degrees F.
Makes some of the best bread, rolls, and pastries.
Can any tind of animal fat be used? For religious reasons, we don’t eat pork.
Thank you for all your efforts.
I just want to say Thank you! I am so excited to have found your site. We have just bought a farm and we are city folk so we will be learning everything about gardening and animals. I am so thankful that you share your knowledge on your site! Oh, and I just snagged your Family Garden Plan book!! I am looking forward to reading it and learning all things traditional.
I render lard every now and then and always cool it in my big pans (lined with tin foil) then cut into 8 to 12 ounce blocks and package with freezer paper. I keep it in the freezer. Much easier to use this way than trying to get it out of the jars.
Although I haven’t tried your recipe yet, I can totally agree with your idea of using the lard for making exquisite flaky pastry. Growing up in England during the war, we used to get occasional food stuffs from the States. One favorite was canned pork, skinless sausage packed in lard. My mother used the lard to make flaky pastry for sausage rolls – to die for and the sausages flavor was wonderful – ‘can’t seem to get anything like that now. That lard was also wonderful for frying eggs, fried bread, etc. It also takes me back to roast leg of pork with the skin slashed in 1/2″ wide strips, which were crunched up with great delight with fat running down your chin. Using that lard gave so many dishes exquisite flavor and in those days people would exercise more, so no overweight problems.
I wish you could design your recipes so that they could fix on 1 sheet of paper. It would be so much easier to put in protectors in my binder. Thanks so much, it’s a great tutorial.
Great article but I’m confused by first rendering versus second and third. How do you know when to do each? It would seem like it would all mix together. Thanks!
Did you watch the video? The fat that melts first is the first rendering, you strain it off when there’s a few inches of clear liquid, then again for the second rendering when there’s enough to strain and same thing with the third.
Sigh … how nice to have a free source of lard … I paid just over $10 for a 1 Lb package last summer, melted it looks like it might be around a cup.
I don’t think my Chicago neighbors would appreciate even a cute pig in my little back yard.
Hello Melissa,
due to my thyroid disease I am not allowed to eat pork, this includes the lard.
So my alternative is clarified butter. Are there any tips on how to make clarified butter? Or alternatives?
I am really looking forward to your answer.
Kind regards
Juma
P.S.:
I love browsing your blog and have already tried some very good recipes. Really delicious! I will try the sourdough soon
Where can I checkout your cookbooks?
The book tab in the menu on the top of the website has each of my books listed, this one has the most recipes https://melissaknorris.com/book/hand-made/ and this is my other one https://melissaknorris.com/book/the-made-from-scratch-life/
Is it normal to get a layer, 1 inch, of gel at the bottom of my jar
Hi Melissa,
I grew up on a farm just north of Nashville Tn. And my dad slaughtered hogs every year around Thanksgiving and we had awesome hams, sausage and all the wonderful meat that a hog provides.
After my dad trimmed all the fat from the hams, shoulders and other meat he would cut the fat up and we would render the fat and make lard in a big iron pot over an open fire.
It was work but also a lot do fun seeing that fat turn into a product that would be used into the winter months and make wonderful dishes with pork and veggies that we raised in our garden.
I thank you for the tips on how to render the lard in a crockpot and look forward to doing that same thing this fall after I have my part of a hog butchered and processed in October.
I hope you have a wonderful Fall and I enjoy reading your post even though this is the first time doing that.
Best wishes to you and your family, enjoy the holidays since they will be upon us soon.
Take care, Dale
[…] the lard, although, you just butcher the pigs probably once a year and rendered that down into lard(How to Render Lard). We used Mortin salt and salt-cured (How to Salt Cure Your Own Meat) a lot of it, I think, was […]
one of my favorite articles yet! Thank you so much for this information. I’ve been wanting to learn how to do this. I’m sure you’ve noticed the BHT and other scary stuff added to quote on quote lard on the grocery shelf! Hoping for some Leaf fat to come back with my neighbor’s cow from the butcher 🙂 that won’t be so good for cooking, but it will be good practice, and I can use it to make candles!
Drew, you can use it for soap making too!
I am so excited to try this! I’m working on a post for saving bacon grease/fat/rendering right now, which is supposed to be slightly different in flavor than pork lard. It would seem obvious that natural real food is better for you than fake, ultra-processed, chemical junk, but our generation has been duped by the so-called experts. I’ve gone back to whole milk (since I found out that non-fat has aspartame in it), whole eggs rather than egg whites, and am trying to go as organic as my budget will allow. Thank you for the great post. If I can find a kind butcher I might do a Pintesting on it. 🙂
So glad you enjoyed it Anne and lard makes the best tortillas and pie crusts.
thanks for the lard rendering instructions.on my way home yesterday,from getting the cat spayed, i stopped at a butcher/slaughterhouse that i have wanted to go to for a long time. i asked about leaf fat and he took down my number. today he called me and said he had 10lbs. of course i went and got it. now i need to render it.
wish me luck,
barb Gardiner (sp7608)
Hey! I do that! I’ve been rendering leaf lard since last holidays and I love it! I cut mine into 1″ pieces and throw them all into a lidded dutch oven and stick it in a 200f oven for a couple three hours. Less “piggy” smell through out the house when done this way and no need for water in the pan prior to heating. Just stir every half hour or so. I use it for baking (just made an awesome red velvet cake with half butter and half lard) cakes, cookies, biscuits, whatever I’m baking I’m subbing half the butter with lard. Such a luxurious taste and texture! A couple things I noticed and don’t let them throw you: when taste-testing batters beware that they may taste and smell a bit “piggy” – remember, you’ve replaced half the butter with lard. Next, when cooling in pans there is none of that shrinking from the edges of the pan as with an all butter batter. When cooled and or frosted there is no lingering “piggy” smell and your finished product has a taste and texture that is far superior.
Wonderful article. Love your style!
Cracklings are good in cornbread. Just mix them in the batter and bake. Oh so good!!!!
We had three hogs butchered. we got the lard from them and I was surprised at the amount that we received. we were not for sure how we would like it butt my mother said she would buy what we did not want. I am surprised at how wonderful it taste in bake goods.my children could not tell the difference in my brownies but I could the seemed moister and brought more of the flavor out in them. and the pie crust are awesome I have gotten many complements about it. My mother tells me her mother used to make a cake out of the rind after she rendered the lard. curious to try.
Roger,
That cake sounds super interesting. I’m loving using lard too. We’re butchering our three pigs next week!
I will see if she can find the recipe and post it for all that are as curious as I am. I am going to be buchering our two pigs this month also at least all but he smoking. thanks for your information it has been helpful.
[…] Lard- If you don’t have access to any good pig fat, you can purchase it at most stores now. We raise our own pigs and here’s how to render your own lard. […]
[…] I prefer butter. Pie crusts and flat breads, like tortillas, make lard my new best friend (I render my own lard from our pigs, a plus for my dairy-free folks). Coconut oil is also great in pie crusts, but not so […]
Hi Melissa,
I rendered the lard from this year’s hog a couple of weeks ago. One thing I do differently from you that is a time saver – I don’t cut the lard in cubes, I cut it into 1″ strips and feed it into the meat grinder. This goes much faster than cutting into cubes as I used to do and the smaller chunks render more quickly. I fill the large turkey roaster and render it in the oven at 250 degrees, stirring every 15-20 minutes. All 3 passes are done in less than 2 hours. I finish the cracklins in my cast iron skillet on top of the stove while another batch of lard is in the oven. If you don’t want to use the stove top, you could save up the cracklins and put them on the cookie sheet after the roaster is no longer using the oven space.
As another reader said, I also put my lard in mason jars where I wipe the rim and place the canning lids and screw bands. The jars seal as they cool and are nicely shelf stable in the pantry with the other home canned items instead of taking up space in the fridge or freezer.
The lard works great in your great-grandmother’s pastry recipe. I love my grandma’s pastry recipe but have used your recipe since I like to try new things. I found it delicious and very easy to work with as long as it was well chilled before rolling.
Thanks for a fun and interesting blog site!
Thank you for sharing this! I have a difficult time processing things I have just heard or read about, and not seen, so please forgive me as I clarify a few things. So, after the first rendering, you put the pork fat back into the crockpot…do you add more water, then? How much? Do you fill it to the top again and do the entire process two more times? Thanks again for such good information! 🙂
After the first rendering I put the chunks of pork fat in and I don’t add anymore water. I repeat this two more times. 🙂
I’m making this tomorrow! Last year I made this in the crockpot but ‘cooked’ it too long. I like the idea of pouring off the rendered lard in three stages. We order pastured pigs each year .. and I’ve already got the fat in the freezer.
Chicken fat is a delicious. easy and inexpensive source of lard on a small scale. When making chicken & dumplings, skim the fat off the top of the broth to use for the noodles, and when boiling the chicken for chicken salad, save the fat to use for pie crust. So yummy!
wow! we render pork fat to make cracklin but didn’t know to render 3 times to get the most lard and then cracklin and seasoning bits. That’s why I love your site, I learn so much. Thanks.
Thanks, Melissa. Am getting 1/2 an organic, GMO-free pig in the spring of 2015, and was wondering how to render the lard.
Julie,
Congrats on the pig, they’re really a funny animal to watch. We enjoy them and the lard. 🙂
[…] a well-balanced diet, but unless you have access to your own meat for rendering lard (here’s how to render your own lard), you probably won’t have a fat source. We need fat for cooking and baking. I use butter, […]
I was wondering, a friend of ours gave us quite a bit of bacon from a pasture raised pig but it has almost no meat, just fat. Could I render it?
You bet! The fat will melt off and the meat will remain behind and be caught in the strainer. Love to hear how it turns out for you. You could try trimming off any large portions of meat while chopping up the fat for the rendering process.
Great so I could get a cheap box of bacon ends and pieces and give this a try and see how fast it’s used up, before I make a big batch, Thank you Melinda for asking the question, I’m sure it’s not as pure as fresh bacon or pork, but when your on a limited income it’s either this way or not even trying.
I’d love to hear how it turns out for you and how you like cooking with the lard.
Hi all! I actually render bacon ends and pieces often. I get about a 16 oz container of bacon crackling/crumbles at the end and 4 +- , 8 oz jars of fat. We use it for everything! makes the best biscuits and crackers! good eggs and great for reheating veg. Just used it last night to coat leftover baked potatoes and reheat for a roasted potato type side and they got super crispy and just a hint of bacon…. do be warned tho this kind of lard/fat will probably taste like bacon so i’d probably keep it out of cookies – unless you were making something interesting, now I wanna try pecan/maple/bacon cookies! LOL Good luck!
Melissa, this is a great post with lots of pictures! I’m adding the link to a post on our blog. I didn’t know about the difference in the first, second, and third renderings, but that explains why some of our lard tastes porky!
Thanks, Marie! The porky lard is great in crackers or things where you want some of the savory type flavoring.
I’d love to hear when you make your next batch. Santa is bringing a vaccum sealer to our house…
Good morning! I rendered lard years ago and just haven’t gotten around to doing it again-although we loved and used every bit of it! When I poured mine into the canning jars, I wiped the rims, put on the seals and rings-just like I was going to put them in the canner-and let them sit on the counter until completely cooled. The cooling down process allows the seals to seal (?). I guess you could also use a vaccumn sealer with the jar attachment to do the same thing, creating an air tight seal to make it have a longer shelf life. Gonna have to try this again!!! Thanks! Susie 🙂