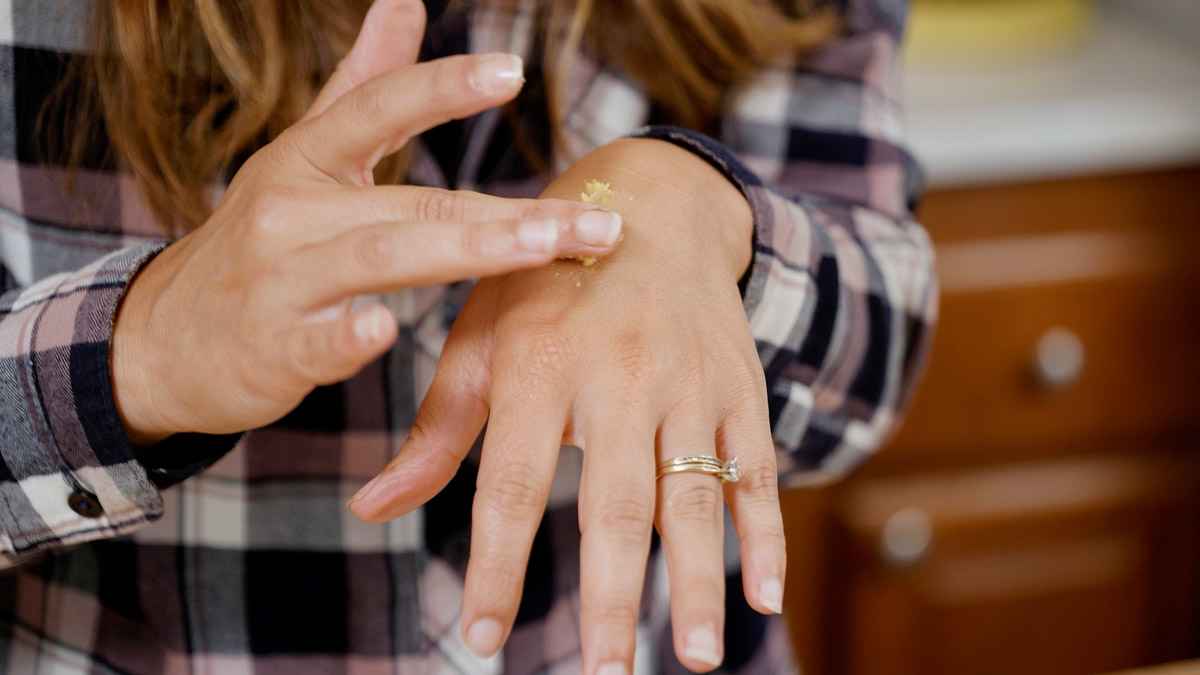
Does anyone else have hands that feel like sandpaper? Seriously, I've contemplated just sticking both hands into my bottle of olive oil if only the opening were large enough. For my worst flare-ups, I need something that truly works to relieve my skin.
If you are in the same boat, make this herbal salve recipe to rescue your skin. It combines natural beeswax, oil, and herbal support for the best healing against dry, flaky skin.
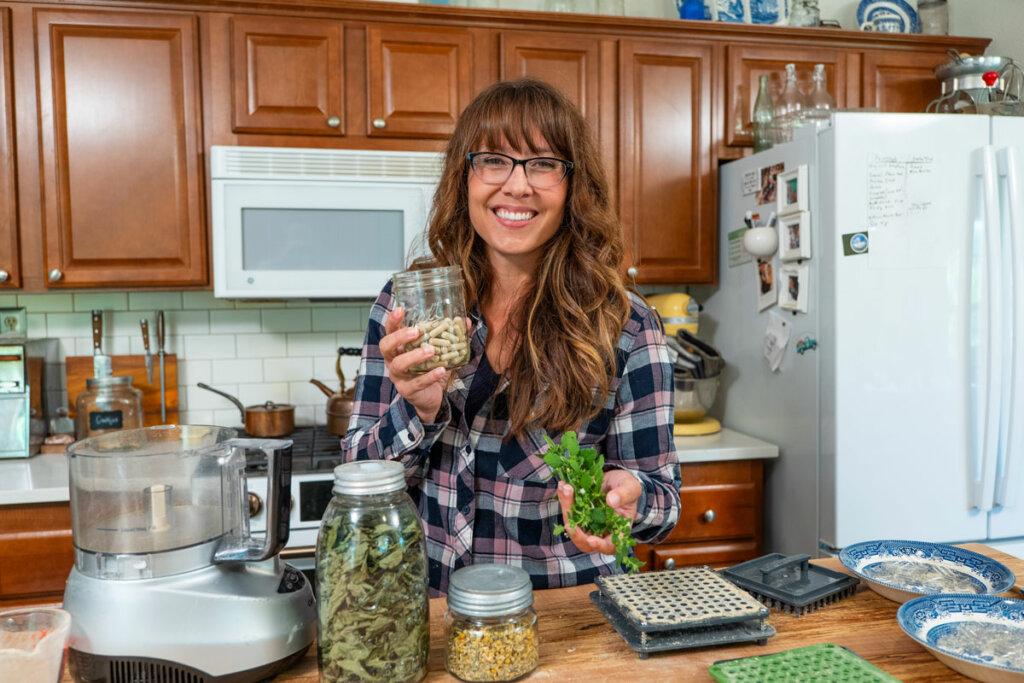
This DIY recipe contains absolutely no harmful chemicals and even works well for other body care needs like healing scar tissue! And you can even make it in bulk to make homemade herbal gifts for your friends.
It's important to note that I am not a certified medical practitioner. This post is not intended to diagnose or treat, but is for informational purposes only. Please contact your medical care professional before introducing new herbal remedies into your wellness routine.
Why You'll Love This Herbal Salve Recipe
If you are like me, you make efforts to improve your health. Perhaps that's growing your own food, having a medicinal herb garden, making herbal remedies for summer, or simply limiting sugar. We care about what we put in our bodies, and we should also care about what we put on our bodies. This herbal salve recipe provides:
- Safe Ingredients - It feels good to know that what I use to heal, soothe, and protect my family’s skin comes from healthy plants, oils, and beeswax - no chemicals or hidden ingredients!
- Simple Ingredients - Not only are the ingredients in the herbal salve safe, but they're also readily available and easy to access from local stores or trusted online sources.
- Minimal Hands-On Time - Thanks to the slow cooker, your active work time takes a few minutes, and the slow cooker does the rest!
- Gateway DIY Project - When you understand why natural skincare ingredients matter, easy DIY projects like this herbal salve will be the gateway to take on other projects like homemade lip balm, healing salve for wounds, wild-crafted dandelion salve, and homemade muscle rub.
The Difference Between a Balm and a Salve

While herbal salves and balms contain similar ingredients, the consistency and purpose are different. Salves tend to be more oily, soft, and creamy. They easily absorb into the skin and are primarily used for healing conditions like extremely dry skin.
Conversely, balms contain a higher percentage of beeswax, making them thicker, waxier, and more difficult to rub into the skin. This feature aids in prevention. The beeswax provides a layer of protection from outside irritants and helps keep moisture in.
Balms are also great for protecting chapped skin or chapped lips. They may also include other skin care ingredients with heavier oils, like shea butter.
Both balms and salves are excellent choices for keeping your skin healthy, moisturized, and protected, especially in cold, dry weather. This herbal salve recipe works especially well for severe dry skin.
Subscribe to Melissa K. Norris!
Get updates on the latest posts and more from Melissa K. Norris straight to your inbox.
We use your personal data for interest-based advertising, as outlined in our Privacy Notice.
Ingredients Needed
A full ingredients list, including measurements, can be found in the recipe card below.
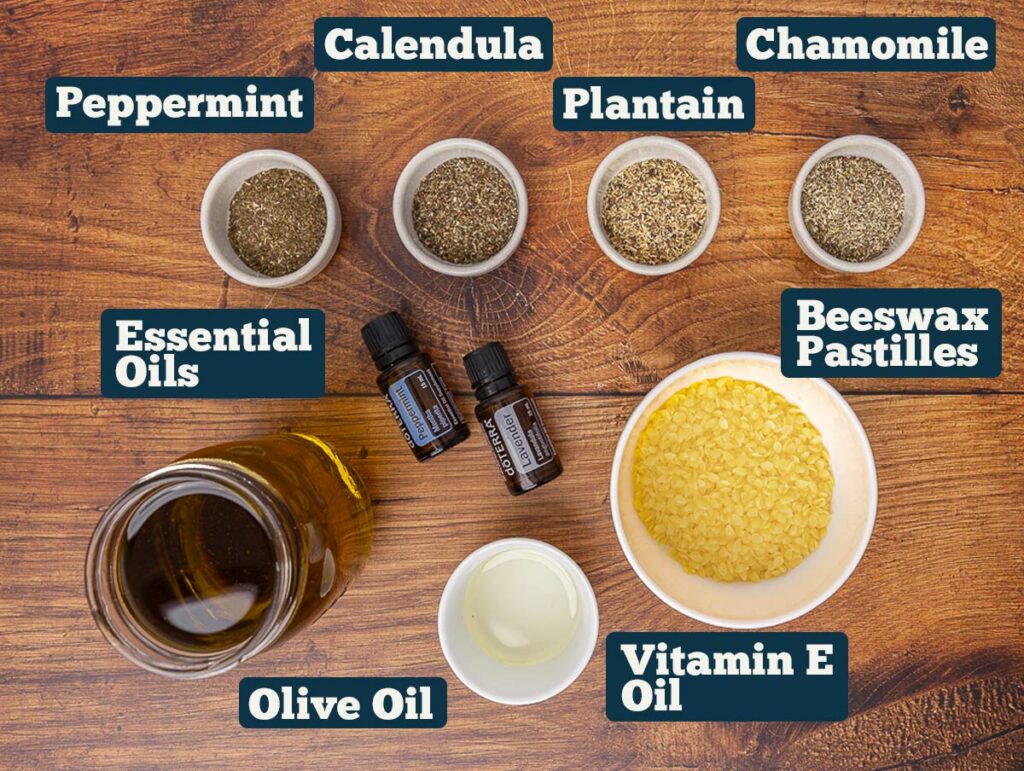
- Extra Virgin Olive Oil (EVOO) - This is the bulk of the recipe. While I love olive oil, you can also experiment with other oils such as avocado oil or sweet almond oil. I purchase my EVOO from Azure Standard. Use that link and enter code “Melissa15” to receive 15% off your first minimum order of $100! It’s a great company to order items in bulk.
- Beeswax - Organic beeswax pellets are safe for cosmetic use and easy to measure accurately. You can use a full two oz. of beeswax for a firmer salve. While I've found the beeswax pellets are super convenient and speed up the process, you can also save money by buying a block of beeswax and grating it yourself.
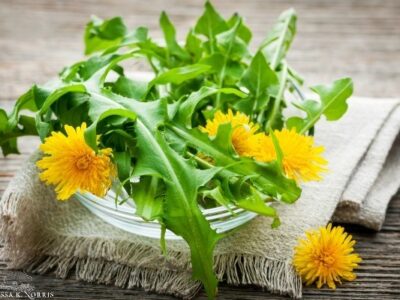
- Peppermint - Peppermint smells great and helps support the body's response to inflammation, which is perfect for irritated skin. (Source)
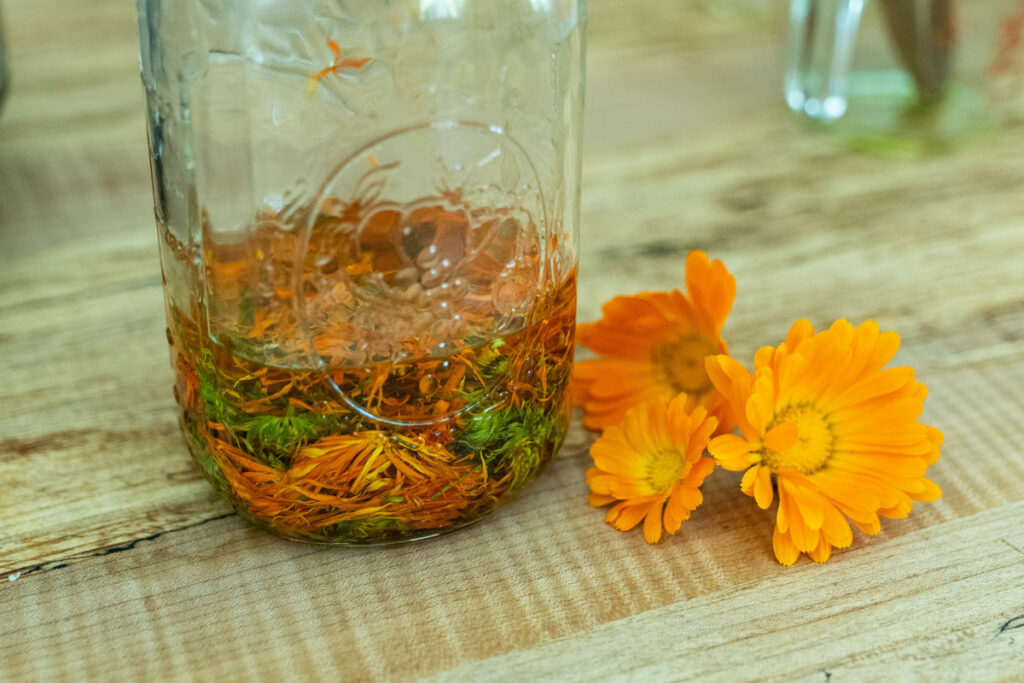
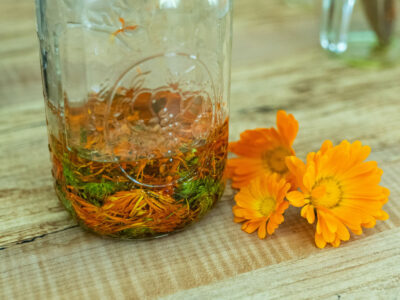
- Calendula - Calendula helps to heal minor infections, skin irritations, inflammation, scrapes, and bruises. (Source) You can use all calendula for your herb choice to make a calendula salve.
- Plantain Leaf - Commonly known as a weed, plantain leaf can repair skin and aid in wound healing. (Source)
- Chamomile - Chamomile offers wound-healing powers and antibacterial properties. (Source)
Herbal Salve Recipe Instructions
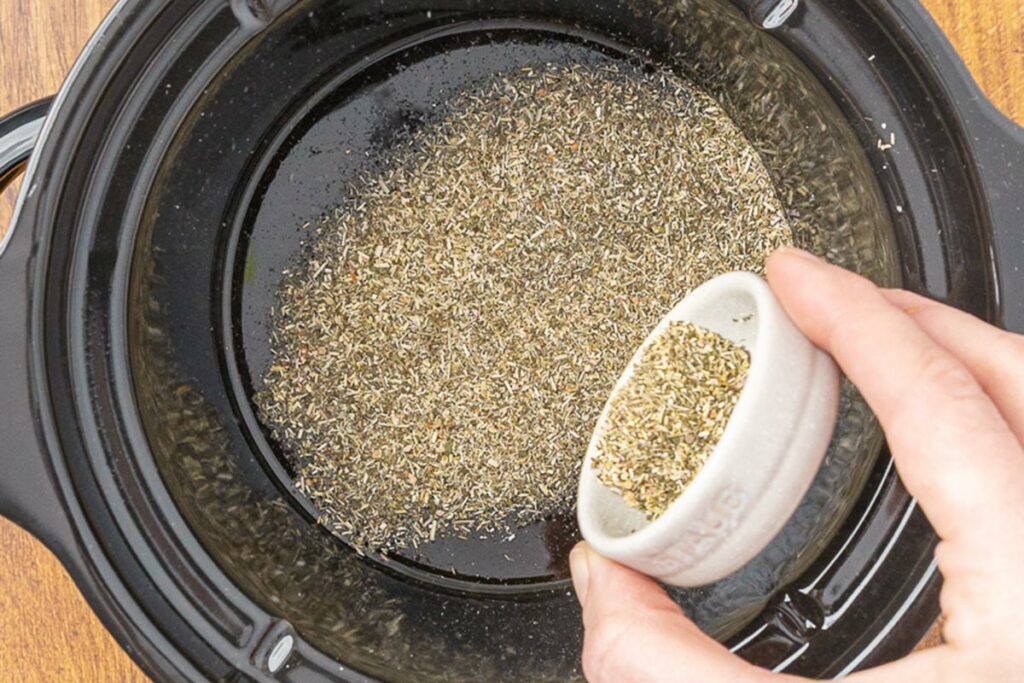
Step 1: Add dried herbs and olive oil to your crockpot or pot and turn on low. If using a pot on the stove or if your crockpot runs hot, be careful that your herbs don't burn. Burned herbs = stinky salve! Ick! Let the herbs simmer on very low heat all day.
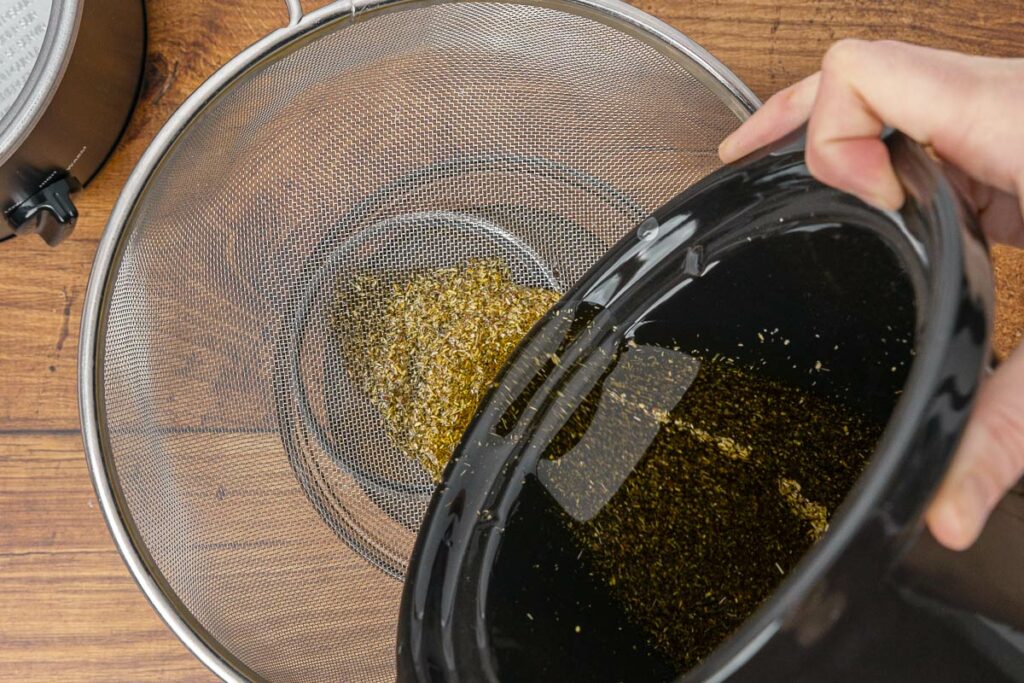
Step 2: At the end of the day, strain out the herbs using a colander or strainer.
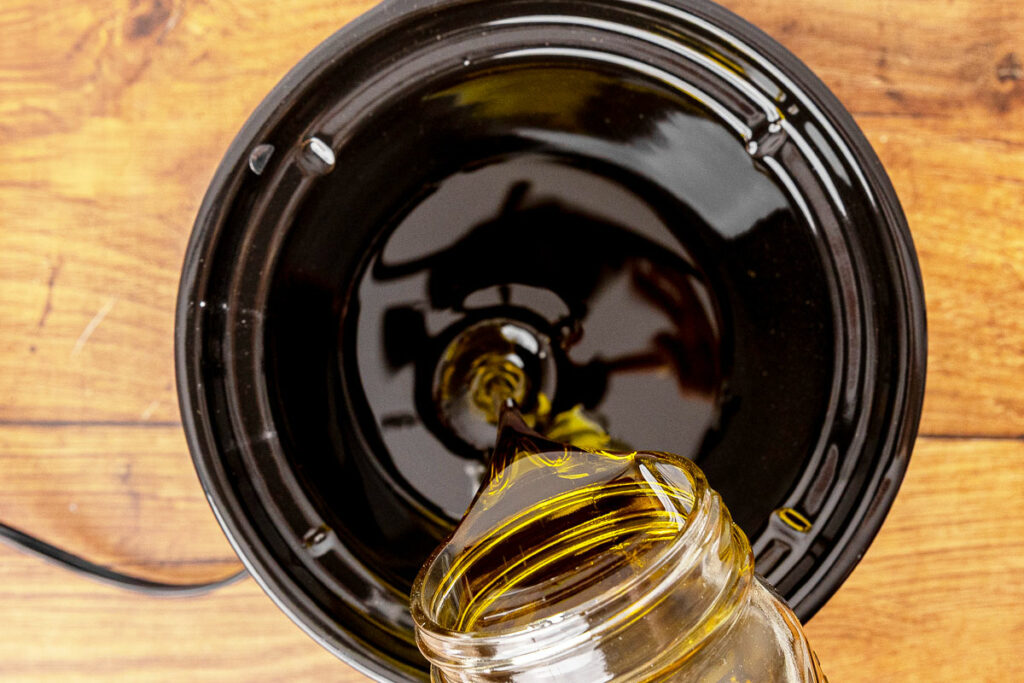
Step 3: Put the oil back into the crockpot or pot. Toss the spent plant material in your compost pail. (This is my favorite compost pail. The copper pail looks cute on the farmhouse countertop, and it keeps the smell down and doesn’t attract fruit flies into it!)
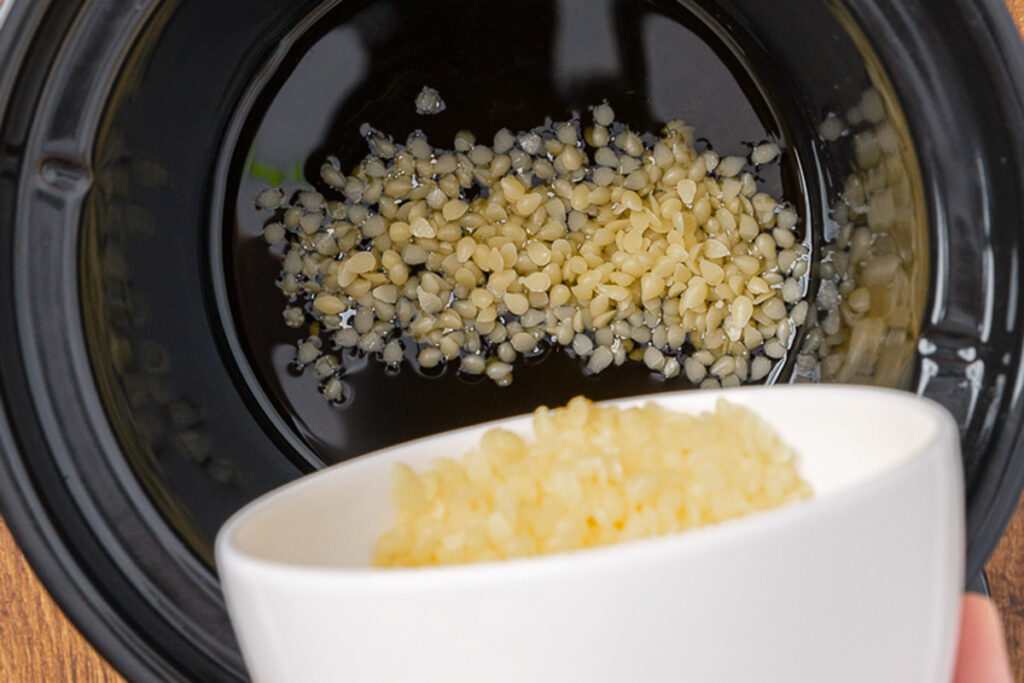
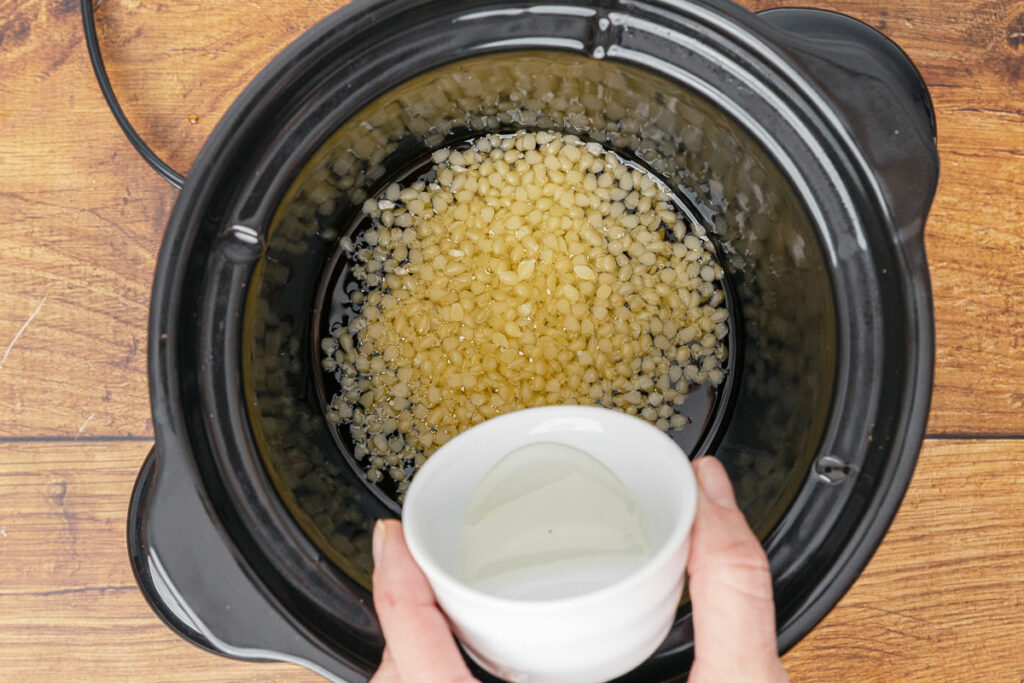
Step 4: Add beeswax granules to the crockpot.
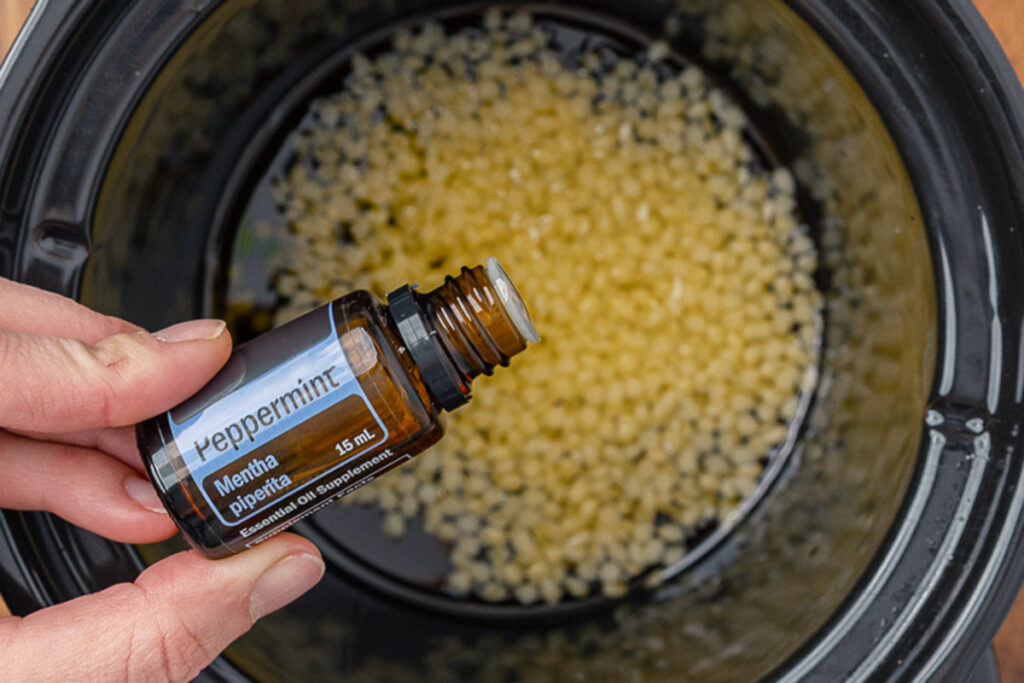
Step 5: Add the peppermint essential oil to the crockpot.
Step 6: Pierce the capsules of vitamin E and add the contents as well. Stir all the oils together over low heat until the beeswax melts.
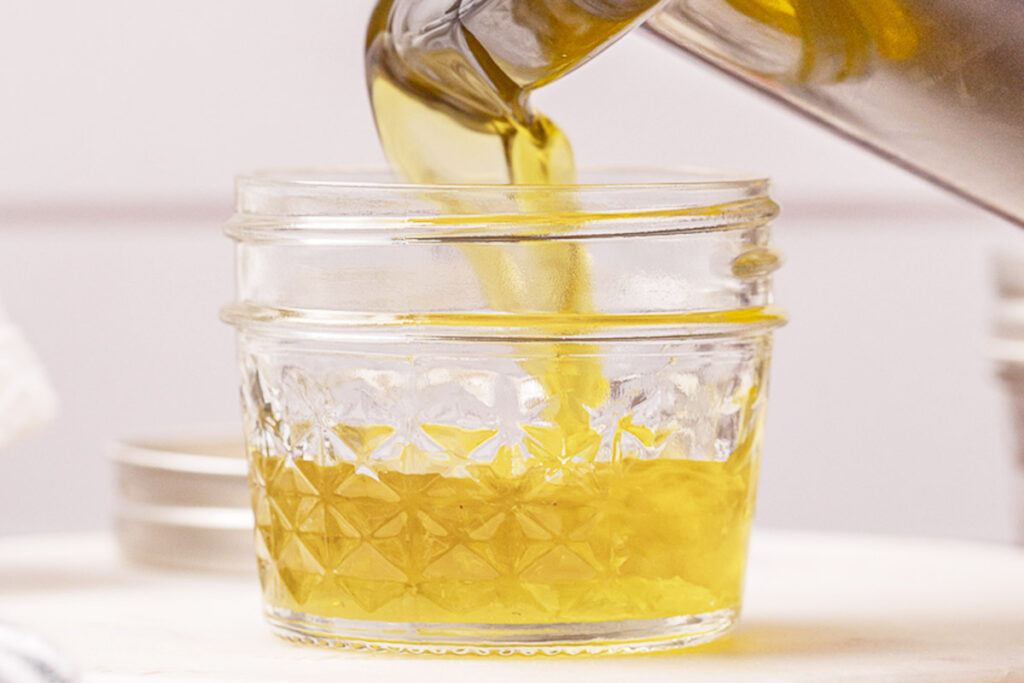
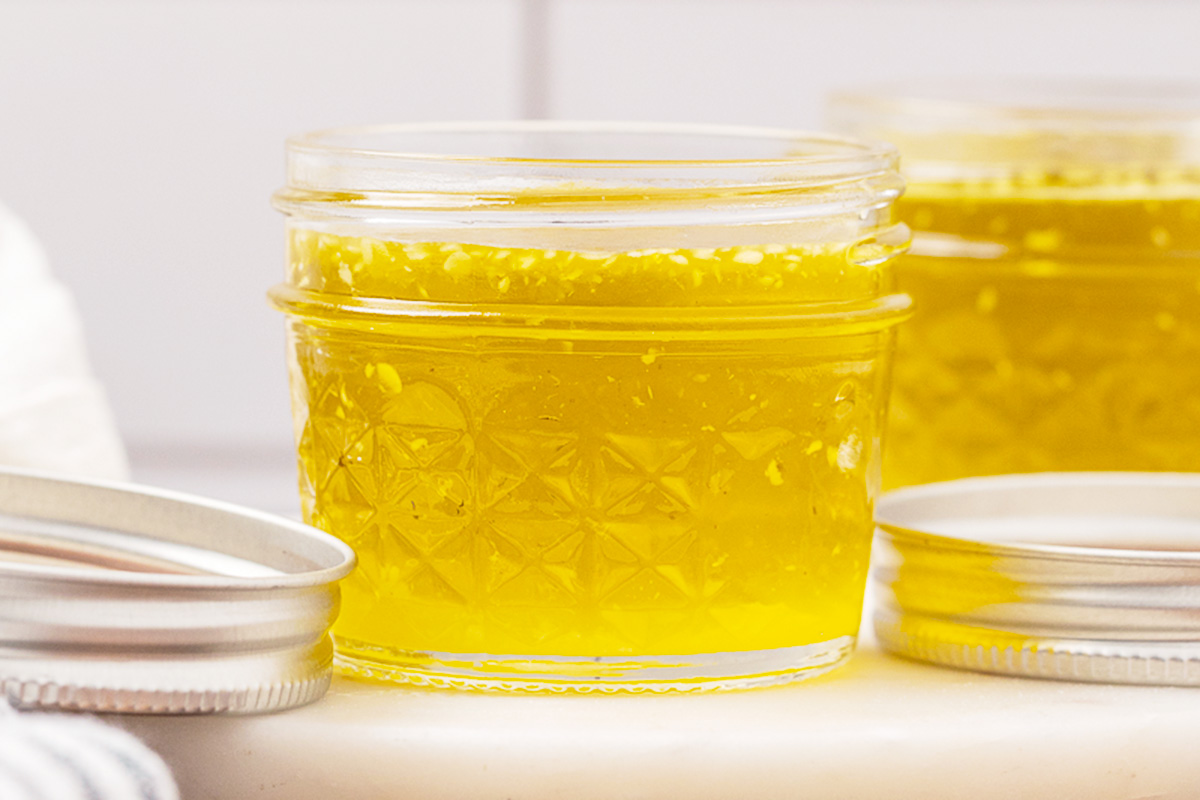
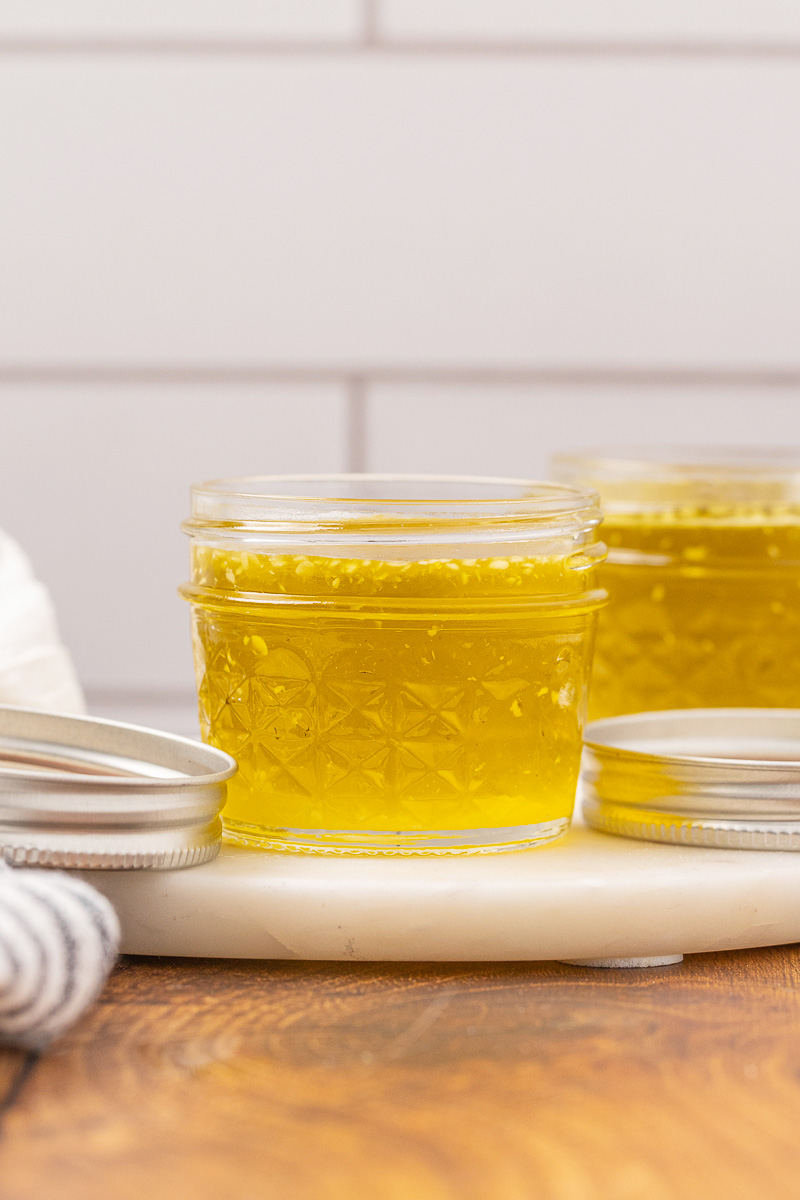
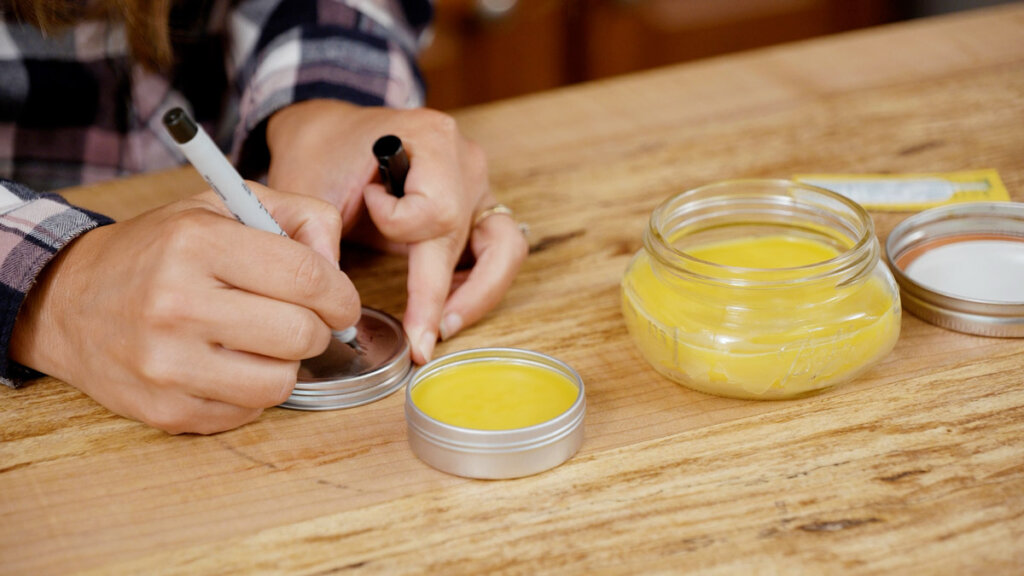
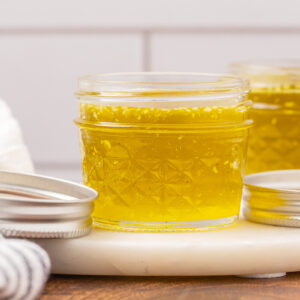
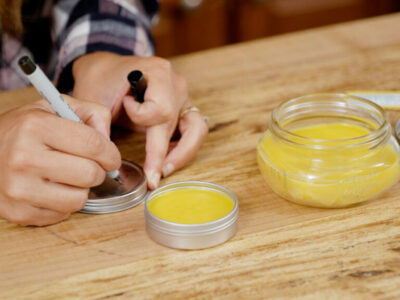
Step 7: Pour the oil and beeswax mixture into the containers of your choice and let cool. Store in a cool, dark place to preserve the healing properties of your herbs.
Pro-Tip: If you wait too long to pour and the salve has hardened, gently warm it again and then pour. It is also easier to clean out your pot when the oils are still warm before they have hardened onto the pot (wipe clean with a paper towel to remove all the residual oil).
Recipe Tips
- Carrier Oils - When making your own salves, use a combination of oils. Carrier or base oils I like to use include olive, sweet almond, argan, or coconut oil. These gentle oils provide healthy moisture for your skin.
- Avoid Water: Never add water to your salves. Water will harbor bacteria and reduce the shelf life of your salve, so steer clear of salve recipes that call for it. Also, make sure your containers are completely dry before adding the salve.
- Infusing Carrier Oils - Making an herb-infused oil adds properties to your salve that soothe and heal the skin. (Here's how to make calendula oil.) In this herbal salve recipe, I use herbs, including peppermint, calendula, plantain, and chamomile. All these herbs contain oils that support the body's response to irritated skin and anti-inflammatory properties (See more about this in the ingredients list.)
- Beeswax - Choose a quality beeswax and make sure that it is pure. Lower quality beeswax can have paraffin added, and I avoid using petroleum-based products when possible. Beeswax keeps the infused oils in and any outside irritants out. It also provides a thick consistency that stabilizes the oils so they don’t melt into a soupy mess.
- Vitamin E - Don't skip this ingredient! Vitamin E is critical to boosting the antioxidant properties of your salve (Source) and also works as a natural preservative, keeping your salve fresh longer.
- Essential Oils - I recommend using a reputable company to source your essential oils. Do your own research and educate yourself on essential oil safety.
FAQs
When making your own salves, use a combination of oils. Carrier or base oils I like to use include olive, sweet almond, argan, or coconut oil. These gentle oils provide healthy moisture for your skin.
The basic ingredients in a healing salve are beeswax, an herbal-infused carrier oil, vitamin E oil, and optional essential oils. Follow the tutorial in this post for ratio measurements and ingredient customization to match your skin's unique needs.
The moisture content in fresh herbs will shorten the shelf life of your oils. For this reason, dried herbs are recommended for this recipe.
Practical Home Herbalism
Making an herbal salve recipe is a great place to begin using natural remedies at home. Swapping over-the-counter products for natural, homemade remedies gives you peace of mind, knowing exactly what is in your medicine cabinet.
If you're ready to jump in and learn more now, get my Practical Home Herbalism course. I'll teach you how to listen to your body, learn what remedies work best for you, and even how to make them so you can build up your own herbal medicine cabinet that you can feel confident using for yourself and your family.
Other Posts You May Enjoy
- 15 Homemade Natural Herbal Bath and Body Gifts
- Why Makeup & Skincare Ingredients Matter
- Safety of Essential Oils
- Homemade Lip Balm
- Herbal Wound Healing Salve
- Dandelion Salve
- Sore Muscle Rub
- How to Make Homemade Lotion Bars
Did you make this herbal salve recipe? If so, please leave a star rating in the recipe card below. Then snap a photo and tag me on social media @melissaknorris so I can see!
Herbal Salve Recipe for Dry Skin
Equipment
- Crock Pot Or double boiler
- Strainer
- Storage Containers I like using these metal salve tins, but glass jars work, too. Just make sure you don’t use plastic containers, which are not appropriate for essential oils.
Ingredients
- 16 Ounces Extra Virgin Olive Oil Or Sweet Almond, Argan, or Coconut OIl.
- 1.8 Ounces Beeswax Granules Organic beeswax pellets are best for cosmetic use and easy to measure accurately. You can use a full two oz of beeswax for a firmer salve.
- 1/2 Cup Peppermint Dried
- 1/4 Cup Calendula Dried
- 1/4 Cup Plantain Dried
- 1/4 Cup Chamomile Dried
- 3 Capsules Vitamin E Oil
- 30-40 Drops Peppermint Essential Oil Optional
Instructions
- Add dried herbs and olive oil to your crockpot or pot and turn on low. If using a pot on the stove or if your crockpot runs hot, be careful that your herbs don't burn. Burned herbs = stinky salve! Ick! Let the herbs simmer on very low heat overnight or all day (about 12 hours.)
- At the end of the day, strain out the herbs using a colander or strainer, and toss the spent plant material in your compost pail.
- Put the oil back into the crockpot or pot.
- Add beeswax granules and essential oil to the oil in the crockpot.
- Pierce the capsules of vitamin E and add the contents as well.
- Stir all the oils together over low heat until the beeswax melts.
- Pour the oil and beeswax mixture into the containers of your choice and let cool. Pro-Tip: If you wait too long to pour the salve that has hardened, gently warm it again and then pour. It is also easier to clean out your pot when the oils are still warm before they have hardened onto the pot.
- Store in a cool, dark place to preserve the healing properties of your herbs.
Notes
- Carrier Oils – When making your own salves, use a combination of oils. Carrier or base oils I like to use include olive, sweet almond, argan, or coconut oil. These gentle oils provide healthy moisture for your skin. Pro tip: Never add water to your salves. Water will harbor bacteria and reduce the shelf life of your salve, so steer clear of salve recipes that call for it.
- Infusing Carrier Oils – Making an herb-infused oil like a DIY calendula oil adds properties to your salve that soothe and heal the skin. In this herbal salve recipe, I use herbs, including peppermint, calendula, plantain, and chamomile. All of these herbs contain oils that support the body’s response to irritated skin and anti-inflammatory properties (See more about this in the ingredients list.)
- Beeswax – Choose a quality beeswax and make sure that it is pure. Lower quality beeswax can have paraffin added, and I avoid using petroleum-based products when possible. Beeswax keeps the infused oils in and any outside irritants out. It also provides a thick consistency that stabilizes the oils so they don’t melt into a soupy mess.
- Vitamin E – Don’t skip this ingredient! Vitamin E is critical to boosting the antioxidant properties of your salve (Source), and also works as a natural preservative, keeping your salve fresh longer.
- Essential Oils – I recommend using a reputable company to source your essential oils. Do your own research and educate yourself on essential oil safety.


Rachel Lunde
Hi there!
Your recipe indicates 1/4 cup dried, but the Farmhouse Teas site sells it by the ounce.How many ounces of calendula flowers do you use to equal 1/4 cup? same question for the plantains, beeswax, etc. 🙂
I'm new to this, but I have an aloe plant that I'd love to incorporate in this recipe. At what point in the process would you put the fresh aloe goo in? and how do I know how much to put it?
Thanks!
Kelsey
I love this recipe for my dry garden hands and cracked heels that I get from walking barefoot all summer! Also, I used Melissa's recipe for calendula oil instead of the EVOO! This is the BEST!
Kelsey
This saves my gardening hands and dry heels in the summer! I love making this with the calendula oil recipe Melissa has on her website, too!
Svetlana
Hi Melissa, i can’t wait to try this recipe, I’m just starting to experiment with making my own skin care products. Quick question on your instructions. When you say put it in a crockpot or regular pot and let it go all day, is there a rough timeframe? 8 hrs? Also, since I figure that would be an approximate estimate, what am I looking for when I know the oil is ready for straining? I’m a total novice and I haven’t even used a crockpot before so any guidance would be very much appreciated 🙂
Melissa Norris
About 8 hours, you want to look for the color change of the oil as the herb seeps into it.
Svetlana
Thank you so much Melissa! I just got all my herbs today and I’m really excited to see how this turns out. Perfect time for a healing salve, my hands have been really dry this winter!
Lora Fischer
I have a daughter that has anaphylactic food allergies, peanuts, tree nuts and coconut/coconut oils/coconut derivatives. She reacts thru ingesting and skin contact. I am looking for recipes for facial cleanser, body wash and shampoo and conditioner without any of the above. Any suggestions?
Lynne
What vitamin e product do you use? Is it a natural vitamin e or synthetic? I’ll have to buy this, so would like to know before buying. Thanks
Barbara D
I want to make sure that I am reading the recipe correct. This recipe says 1.8oz of beeswax and not 18oz. Is that correct?
Melissa Norris
Correct, not 18 ounce. You can increase the beeswax slightly for a firmer salve. I test a small amount after it's mixed up but still in the main pot by putting a spoon in the freezer and then dropping a few drops on the frozen spoon. It will set immediately and if you want it firmer, just add a 1/2 ounce beeswax and test again until desired firmness.
Angel
Thank for so many great recipes Melissa! I have a question though... do you have any recommendations for something to use in place of beeswax? If I use anything with beeswax in it I get welts that look like burns. 🙁 Just thought I would ask!
Melissa Norris
Angel, oh no that's a bummer. I haven't personally tried it with other waxes, but here's a post from my friend Leah on using other waxes and the ratios. https://fabulousfarmgirl.com/homesteading/beeswax-and-alternatives/
Angel
Thank you for the link, Melissa! I have the same issue with propolis and raw honey also, but I guess one just learns to live with it.
Deb Casey
Hi Melissa,
I made this salve a couple years ago for Christmas presents. I still have people raving about it. My daughter was pregnant at the time and it was the only thing she could use on her face to clear it up. A son-in-law said it is the only thing he can use on his hands after working on the cars. A friend said she loved it and that I need to make more. I guess I will be making more this week. 🙂 Thank you so much for the recipe! 🙂
Deb Casey
Edgewood, NM
Mary
I'm wondering how this would work for someone with psoriasis. My daughter has had psoriasis since she was a baby and we think the prescriptions are no longer working very well.
Melissa Norris
Mary,
I'm not sure how ti will work, but figure it never hurts to try.
Opal
Just finished up making this. I did add a few drops of rosehip oil, and a few drops of patchouli to mild down the peppermint. Can't wait to give it a try 🙂
Melissa Norris
Isn't it fun being able to make your own add adjust it. I think lavender would be good, too.
Katie Swensen
I was just wondering, I have heard that you can only store these types of salves or lotions in glass jars because the essential oils will react with plastic and such. So are tins ok to use then? Or have you noticed oils loosing their potency in them?
12 Toasty Tidbits to Warm Your Heart | AuthorCynthiaHerron.com
[…] Need something to combat dry skin? Sarah Mueller’s homemade peppermint salve may be just your ticket. This is a recipe from Melissa Norris’s fantastic Christmas blog post […]
Irene Briggs
I made this and my crock pot was too high on low so it burned it. I am going to try using the warm setting and keeping a better eye on it!
My question is when using the essential oils how much dilution did you do to how many drops, and I am assuming you diluted the drops with water?
Thanks in advance for the reply and lets hope my second batch turns out better!!
Sincerely,
Irene
Melissa Norris
Irene,
Newer crock pots tend to run higher, even on their low setting. The essential oil is diluted just by adding it to the salve. No need to dilute it before pouring in.
Easy DIY Christmas Gifts
[…] Simple Homemade Peppermint Salve […]
20 Homemade Beauty Product Gift Ideas • Accidentally Green
[…] Peppermint Salve from Melissa K. Norris. […]
Jen
What would be the shelf life for the salve?
Melissa Norris
Jen, let me ask Sarah and we'll get back to you.
Sarah Mueller @ Earlybirdmom
I have kept it for at least a year. This is my 3rd year making this salve. The vitamin E acts as a preservative.
Shannon Wallace
Hi Melissa, thank you so much for this series!
I'm wondering if I could use bulk beeswax (I have 1 pound bars) in lieu of the granules? Also, I'm wondering where else besides Amazon or Mountain Rose that I could buy the herbs? Mountain Rose is out of most of them, and I really don't want to buy that large of a bag off of Amazon. Thanks!
Melissa Norris
Shannon,
Unfortunately that's the two places where I've ordered mine, so I don't have another source.. do you have a co-op locally you could check with?
Shannon Wallace
Thank you for responding! I don't think we have a co-op here in the San Antonio area. We did when we lived in WA state! 🙂 Maybe Whole Foods or similar would have it?
Sarah Mueller @ Earlybirdmom
Shannon, you could definitely use the bulk beeswax. I have done that in the past. It's just so tricky to cut and measure, at least in my experience.
Shannon Wallace
Thank you for answering my question, Sarah! I'll just try it with what we have. I have 3 pounds of beeswax! 🙂
Katie
I can't wait to try this recipe to give as gifts this Christmas. I tried purchasing the herbs from the suggested link but they are currently out of stock of 3 of the 4 herbs. Any recommendations? Thanks!
Melissa Norris
Katie,
You can try these organic bulk herbs from Amazon http://amzn.to/1yhEvO7 *affiliate link (I've purchased them when Mountain Rose Herbs has been out) another good line of organic herbs is Frontier, but they're slightly more expensive. Amazon carries them in 1 pound bulk bags as well.
Katie
Thanks!!
Homemade Hand Sanitizer - Early Bird Mom
[…] Once you have these essential oils at home, there are lots more things you can do with them! Things like homemade adhesive remover, all purpose cleaner and peppermint healing salve for dry skin. […]
Jennie
Wow, this looks amazing! I made peppermint lip balm years ago...never thought of slowly cooking herbs to steep them into the balm. Mmm! Thank you!
Jennie
Melissa Norris
I know! It's so smart, especially when cracked skin is so painful.
Melissa Morris
The weather has just turned very dry and I'm needing something for my hands, I will have to try this out!
Allison
About how many ounces is in the final product?
Danielle Spears
I just thought of a question. This wont ruin my crock pot will it? Also does the crockpot size matter?
Melissa Norris
It shouldn't harm your crockpot as it's cooking oil and herbs. Just make sure you wipe it out before the oils dries as Sarah mentioned. I don't think the size is too crucial either.
Danielle Spears
I saw this on my email and immediately knew this was what I wanted to make for teachers and co-workers. I can't wait.
Melissa Norris
Let us know how it turns out!
Melissa
This sounds wonderful! Do you think you can cut the recipe in half and still have it come out right?
Melissa Norris
I think it should be fine cut in half as long as you keep the ratios the same.
Andrea
I make a similar salve with just calendula. I can't believe how quickly it heals. I have chamomile and plantain saved from my garden so I might have to give this blend a try!
Melissa Norris
Andrea,
I dried both plantain and comfrey this year and can't wait to try them in this!