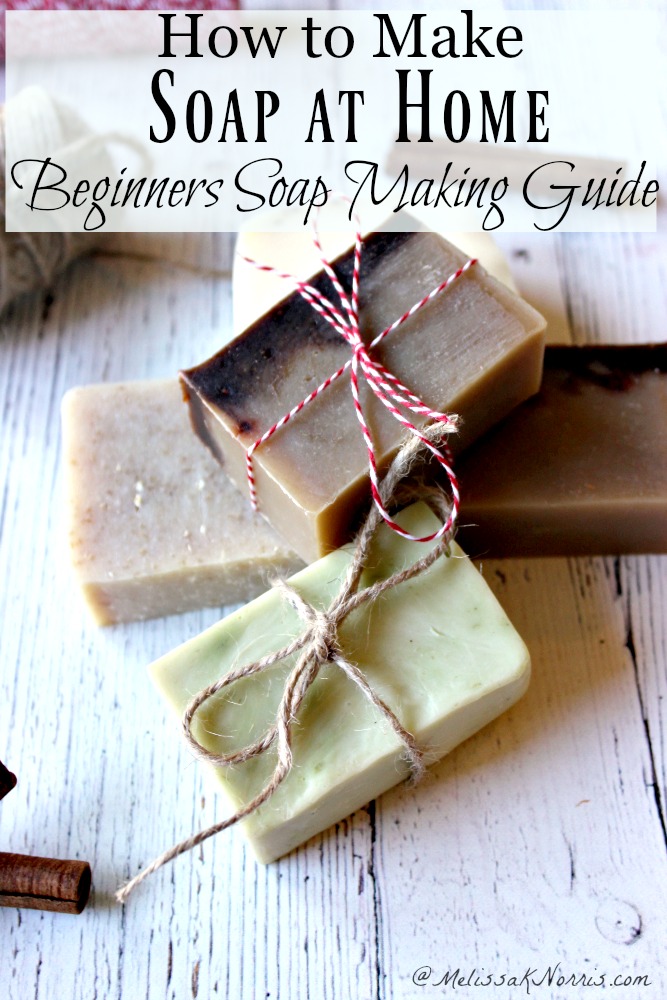
If you've been wanting to learn how to make soap at home, then this beginner's guide to soap making is for you. We'll be talking about the different ways to make soap when to choose which method, and how to get started with cold process soap making with lye water.

The pioneers of old used lye, which they made from wood ash and water until it formed lye, then it was mixed with either tallow (beef fat) or lard (pork fat) to form their soap. They didn't have the benefit of science like we do today to make sure it wasn't too harsh (aka too much lye).
Listen to the Pioneering Today Podcast where we focus on old-fashioned wisdom and essential homestead skillsets in a modern world to help you create a more self-sufficient home and well-stocked larder.
Table of Contents[Hide][Show]
- How to Make Soap at Home- Beginners Guide to Soap Making - Episode #119
- Pioneer's Soap vs. Today's Soap
- Can you make soap without lye?
- Why should you avoid store-bought soap?
- 3 Ways to Make Soap at Home
- How to Stay Safe with Lye
- Properties of oils for making handmade soap
- My top oil picks for soap making
- Resources for Making Soap at Home
- Now that you know how to make soap at home, which type are you going to make first?
- More Posts You May Like
How to Make Soap at Home- Beginners Guide to Soap Making - Episode #119
Pioneer's Soap vs. Today's Soap
Today we have many oil choices, all of which allow you to custom your soap based on what you want from it. We'll be diving deep into those oil choices shortly.
It seems when people begin questioning the ingredients and wisdom used in commercial products, they start by replacing the items in their pantry or their cleaning and body care items. And the soap you're using to clean your body is no exception.
No matter which path we start down, once you start, you end up looking at the ingredients in everything you come in contact with.
Not only is homemade soap a healthier alternative when you use natural nourishing ingredients for your skin, but it's less expensive to make it at home than it is to buy it.
Grab your copy of Hand Made: the Modern Guide to Made-from-Scratch Living for my favorite soap recipes & tutorial, how to make herbal infused salves, balms and more by clicking here.
Can you make soap without lye?
No, you cannot make soap without lye.
I often hear people asking " how to make soap without lye ?"
I get it, making homemade soap can be a bit confusing and scary, so let's break down why lye is such an important ingredient.
To answer that you have to understand the role of lye in soap, let's be very clear, all soap has lye in it. But there is a method you can use without dealing with active lye, and that's melt and pour, see below for more info.
What is Lye (or Sodium Hydroxide)?
Lye is one of the main ingredients necessary to create soap, you can't have soap without it. Sodium Hydroxide is the form of lye we use when making bar soap.
The chemical process of soap
The formula for soap:
Alkali base (lye) + water + acid (your oil/fat) = soap
Sodium Hydroxide (known as lye) is your base and when combined with oil (considered the acidic part of this equation) it goes through the process of saponification. This means when you mix the two together they start a reaction that converts it into glycerin (the fatty acids combine with the hydroxide ions) and your soap.
Soap is made when your base ingredients go through the chemical process of saponification.
All soap, regardless of the kind, goes through the saponification process and has lye in it.
Why should you avoid store-bought soap?
Most commercial bar soaps at the store are closer to detergent than actual soap because they've stripped out the glycerin in order to sell it (more profit) but this soap doesn't contain the moisturizing benefits found in glycerin. They also contain synthetic dyes, fragrances, and other additives many of us want to stay away from.
Store-bought soap is harsher on the skin and I find it feels like it leaves a layer behind. When I use homemade soap I notice a difference immediately.
3 Ways to Make Soap at Home
- Melt and Pour - you are using a base that has already undergone saponification
- Cold Process - mixing lye and oils together to create the saponification process, involving a curing time
- Hot Process -mixing lye and oils together with heat to shorten the saponification process
Which soap-making method is right for you
Melt and Pour Soap
Melt and pour is when you purchase the base (someone has already done the saponification process for you) you can add your own additives from natural colorants, essential oils, scents, herbs, or bentonite clay, then you pour it into your mold and you have usable soap in less than 24 hours.
The Benefits of melt and pour soap:
- Making melt and pour soap is a project you can do with really small children and kids because you're not dealing with active lye. It can be a great entryway for people who are nervous about the lye.
- Some people say melt and pour is not real soap making (who would have thought there would be so much division when someone is trying to make a better product than store-bought), but I disagree.
- You can choose your soap base. I am picky on the melt and pour base I will use, I don't want petroleum, parabens, or propylene glycol.
- You can get goat's milk base, shea butter, glycerin, etc. but make sure you read the ingredients listed on the base before purchasing.
- It is still more frugal to customize a melt and pour base than it is to purchase this item from the store and you still can control the ingredients and create a customized bar.
FREEBIE, grab our resource page where I've done the research for you and share my favorite places to order (for both price and ingredient reasons) here. Click here to get your FREE Soap Making Resource Charts and Supplies
Once soap has gone through the saponification process, the lye is no longer active and is safe to use
If you want to know how to make soap from scratch, then the next two methods are for you, my friend!
Cold process soap
Cold process soap is my current favorite because you really get to customize and control every single ingredient in your soap. Each oil has specific properties and reasons for using it in your soap recipe, I've got the most common oils listed for you in the freebie.
In general, cold process soap creates a smooth and creamy bar, with tons of options for customizing its scent, colors, and additives with herbs, spices, and essential oils.
How to make cold process soap safely
- Mix your lye with your water. Always pour the lye into the water, and not vice versa, to avoid a dangerous eruption. Allow it to cool.
- Mix your oils together (melting any that are solid when room temperature) and allow oils and lye to cool to the same temperature near 120 degrees Fahrenheit.
- Add your lye water to your oils and mix them until it reaches the tracing point. Trace is where you can drip the soap on to the top layer and see a line on the top.
- At this point, you add in your herbs, spices, natural scents (I don't use synthetic colors, dyes or fragrances).
- Pour it into your mold, wrap it up with a blanket or towel for 24 hours to keep it insulated so it doesn't cool off too quickly.
- At the 24 to 48-hour mark, cut your soap into bars and allow it to cure.
- Cure bars for 4 to 6 weeks in a single layer on a cookie sheet, flip bars once a week so they cure evenly.
As it cures, the soap continues to go through the saponification process and the bar will harden up. You don't want your bars to be too soft (we want it to last when in contact with water) and you also need it to finish out the saponification process so it's not too harsh on your skin.

Hot process soap
Hot process soap is made in a slow cooker or a pot on your stove and it goes through the saponification process and the gel phase before you pour it into the mold. This means it's in the pot and under heat for about an hour or so. It doesn't have the longer curing time but it's not thought to be as creamy and it will have a different finished texture.
How to make hot process soap safely
- Mix your lye with your water. Always pour the lye into the water, and not vice versa, to avoid a dangerous eruption. Allow it to cool.
- Mix your liquid oils together (melting any that are solid when room temperature) and allow oils and lye to cool to the same temperature near 120 degrees Fahrenheit.
- Add your lye water to your oils and mix them until it reaches the tracing point. Trace is where you can drip the soap on to the top layer and see a line on the top.
- In a crockpot, cook on low for 60 minutes. The soap will expand and look like waves on the edges of the crockpot. After 60 minutes you shouldn't see any pools of oil remaining and your soap will almost look like mashed potatoes.
- At this point, you add in your herbs, spices, natural scents (I don't use synthetic colors, dyes or fragrances) and stir them in well.
- Spoon the soap into your mold, tapping your mold gently on the table to avoid air pockets.
- Wrap up your mold with a blanket or towel for 24 hours to keep it insulated so it doesn't cool off too quickly.
- At the 24 to 48-hour mark, cut your soap into bars.
- Technically, your soap is ready to use, but if you allow it to cure for a week or two, your bars will last longer.
How to Stay Safe with Lye
- Slowly add your lye to the water. It immediately gets as hot as boiling water and never pour your water into the lye, it can cause a chemical reaction like a volcano.
- For the first few minutes lye water will let off caustic fumes. The fumes themselves can burn your airway and the lye water itself can burn your skin. Do not lean over or breath in the fumes.
- Wear proper safety gear. Be sure you're well protected by wearing a long-sleeved shirt, pants, shoes, safety goggles, and gloves! Your hands are the closest part to the lye because you're stirring it.
- You must have good ventilation. Mixing it outside is best, but if you're mixing indoors make sure it's under an exhaust fan and in an excellent ventilated area, no kids or animals running through or around!
- The fumes are done letting off after the first few minutes. I mix my lye water outside and then bring it in after a few minutes.
It's easier to prevent the injury than it is to treat one!
Properties of oils for making handmade soap
Let's talk about the different properties each type of oil gives to your homemade soap and how to choose which type of oil to use in your soap.
Homemade soap can be (and should be in my opinion) superfatted. Superfatted means there's extra fat left behind to create a more nourishing bar of soap, instead of just enough to be used during the saponification process.
My top oil picks for soap making
- Coconut oil is common and found in many soap recipes. It's cleansing and helps create a hard bar of soap.
- Palm Oil is not always harvested responsibly, so take care in purchasing this, it does help create a good lather, is long-lasting and helps create a hard bar. (Grab the freebie to find the sources I use for palm oil and the chart of oil properties.)
- Olive Oil is very moisturizing to the skin with Vitamin E and K and also creates a creamy soap.
- Lard and tallow help create creamy soap, lather, a hard bar and a white color (many people prefer a soap with a mix of the two).
- Castor Oil helps the lather to stay longer when you're using it and acts as a humectant, helping draw the moisture down into the skin (similar to beeswax).
- Avocado Oil creates a medium lather, gentle on the skin and great for your face.
Resources for Making Soap at Home
Grab my favorite bases and supplies to make your soap at home, including my oil properties chart done for you in an easy to read and print chart.
To make soap at home, you'll need the following supplies:
- Oil of choice
- Lye
- Essential oils, herbs, colorants or add-ins (optional)
- Protective gear (goggles and gloves)
- Immersion blender or stick blender
- Thermometer
- Crockpot (for hot process only)
- Soap mold (or old cardboard box lined with wax or parchment paper)
- Sharp knife
Now that you know how to make soap at home, which type are you going to make first?
Let me know in the comments below!
More Posts You May Like
- Do Natural Deodorants Really Work?
- DIY Herbal Bentonite Clay Face Mask and Scrub
- How to Make Homemade Lotion Bars
- 5 Homemade Natural Cleaner Recipes (That Really Work!)
- Homemade Peppermint Salve for Dry Skin
- Homemade Soap with Natural Colorants and Tips
- 3 Ingredient Homemade Lip Balm Recipe
- 15 Homemade Natural Herbal Bath and Body Gifts
- Why Makeup & Skincare Ingredients Matter