Knowing how to dry herbs and store them to ensure they have the strongest medicinal properties is key if you plan on using herbs as natural medicine. From correct harvest time, drying method, and one of the areas I see people making the biggest mistake, storage.
I'm going to be sharing with you the steps to ensure that you're harvesting your herbs at the correct time as well as what you need to do when storing them to ensure you have the highest medicinal properties in the herb.
It's important to note that I am not a certified medical practitioner. This post is not intended to diagnose or treat but is for informational purposes only. Please contact your healthcare professional before introducing new herbal and natural remedies into your wellness routine.
You may also want to read my posts on how to plan and grow a medicinal herb garden and how to prune herbs and perennials for maximum growth.
Listen in below to the full podcast, Episode #273 Use This Method for Drying Herbs for Stronger Medicinal Properties of the Pioneering Today Podcast, where we don’t just inspire you, but give you the clear steps to create the homegrown garden, pantry, kitchen, and life you want for your family and homestead.
Which brings us to the next step, which is preserving herbs as well as stocking our natural medicine cabinet. If you want to learn more about using herbs effectively, especially during cold and flu season, make sure to snag your seat for my free live class on September 24th. Be sure to join this 1 hour herb class where I'm going to be sharing five tips to use herbs effectively, the best ones for during cold and flu season, why safety with herbs matter, and how to know where to start. I hope that you join me there.
Every year, for the past seven years, I have been increasing the number of herbs that we're able to grow at home as well as our natural medicine cabinet. It's going on 11 years ago that I healed from taking some medications to control acid. I had severe stomach acid, GERD reflux, as well as stomach ulcers. My stomach and esophagus were actually biopsied for cancer, which came back negative, fortunately, but it did show erosion and cellular change beginning. I had to get off the medications for which I had been on the max dose for way too long.
The only way I was able to do that and to find healing was by the foods that I ate. For those that are interested in learning more about how I did that, you can catch the three-part episodes as listed in the references below. I walk you through the steps that I took.
When I realized how much of an impact just changing the foods that I ate had on my health, I naturally wondered what would happen if I started using herbs instead of turning to pharmaceuticals. So my curiosity was piqued and I began down the road of using herbs and natural medicine. Every year I have expanded what we're using and how I'm using it with myself and my family.
As a gardener and homesteader, being able to raise my own medicine and grow it and then harvest it has been amazing. Now, there are still quite a few herbs and spices that just won't grow in our climate, or I just haven't gotten it in yet, but we did a large expansion this year and are growing a lot more herbs, which means I have a much bigger harvest of herbs that needs attending to.
Best Times to Harvest Herbs
When you are harvesting herbs, the plant parts that are used depends upon the herb. Most people are familiar with harvesting the leaf or flower blossoms, which are called the aerial parts of the plant.
The best time to harvest the aerial parts is in the morning before the sun has hit those parts of the plant. It goes without saying, you really want to be harvesting the ones that are free of blemishes or disease, don't have any rust or discoloration and they're really in their prime. Early morning is when you want to harvest them because the largest percentage of essential oils and the medicinal properties is at it's height in the early morning. So when you harvest them in the morning that's when the highest concentration is there.
If you wait until later in the day when the sun and heat of the day has set in, those essential oils start to go back into the stem and root of the plant so you're not getting the most benefit. If it's a culinary herb you won't get as much flavor and you definitely won't get as much of the medicinal properties.
Should you wash herbs before drying
Here in the Pacific Northwest we will often get rain. If we've had a good rain the night or day before, I just go straight out and harvest mine in the morning and I don't rinse them. I feel they've already been washed by the rain. But if it's been dry, as it often is in the summertime, then definitely give them a rinse.
Best Practice for the Highest Concentration of Medicinal Properties
When I harvest my herbs that we use the aerial parts I just take a pair of scissors and cut them leaving them on the stem or stalk of the herb. The reason is that the least amount of handling you do is best. Have you ever noticed that if you touch anything like mint or lemon balm your fingers smell like it? Anything in the mint family is a strongly aromatic herb with large amounts of essential oils in the leaf. So if you touch or brush against anything like mint, lemon balm, or basil for example, you will come away with the scent on your skin and you'll smell like that herb.
You don't want those oils to be released onto your skin, you want it to stay in the leaf and release when you need it in whatever you're putting it in later when you use it medicinally. So I do not strip the leaves or the blossoms from the stem when I harvest them because I don't want to be bruising the leaves. I try to handle it as little as possible.
I also find that it's easier and faster when I do that later. When I dry mine, I dry them on the stem and don't take off each individual leaf or blossom. When it comes to drying herbs, the temperature is really important, especially if you plan on using them medicinally, you don't want to overheat them. If you have a dehydrator allows you to get the temperature down to the lowest setting. Ideally 95 degrees Fahrenheit.
My dehydrator, this Nesco model, allows you to adjust and pick the temperature settings. (You may also want to read about the benefits of Freeze Drying Vs Dehydrating.)
How to Dry Herbs
If you are using an oven, you can use an oven to hydrate your fruit and vegetables, but I don't recommend using an oven for your herbs. Most ovens won't go down that low. Even with the door propped open and on it's lowest temperature setting, it's likely that the temperature is going to be warmer than 95 degrees Fahrenheit. It's very hard to control.
A dehydrator that will let you put a setting at 95 degrees Fahrenheit or lower is ideal. Especially if you live in a high humid climate where there's a lot of humidity it can be hard, especially for flower blossoms or some of those thicker leaves to dry them without getting any mold on them because they don't dry fast enough. So that's when a dehydrator is really going to be an essential part of this process. But there was the use of herbs and drying them for many a century before we had modern dehydrators.
So let's talk about that method. We are actually growing and dehydrating many more herbs now and I only have one dehydrator which only has so many trays. I'll use my dehydrator but I also use these other methods more. The very oldest fashion that's been used for centuries to dehydrate herbs is just air drying.
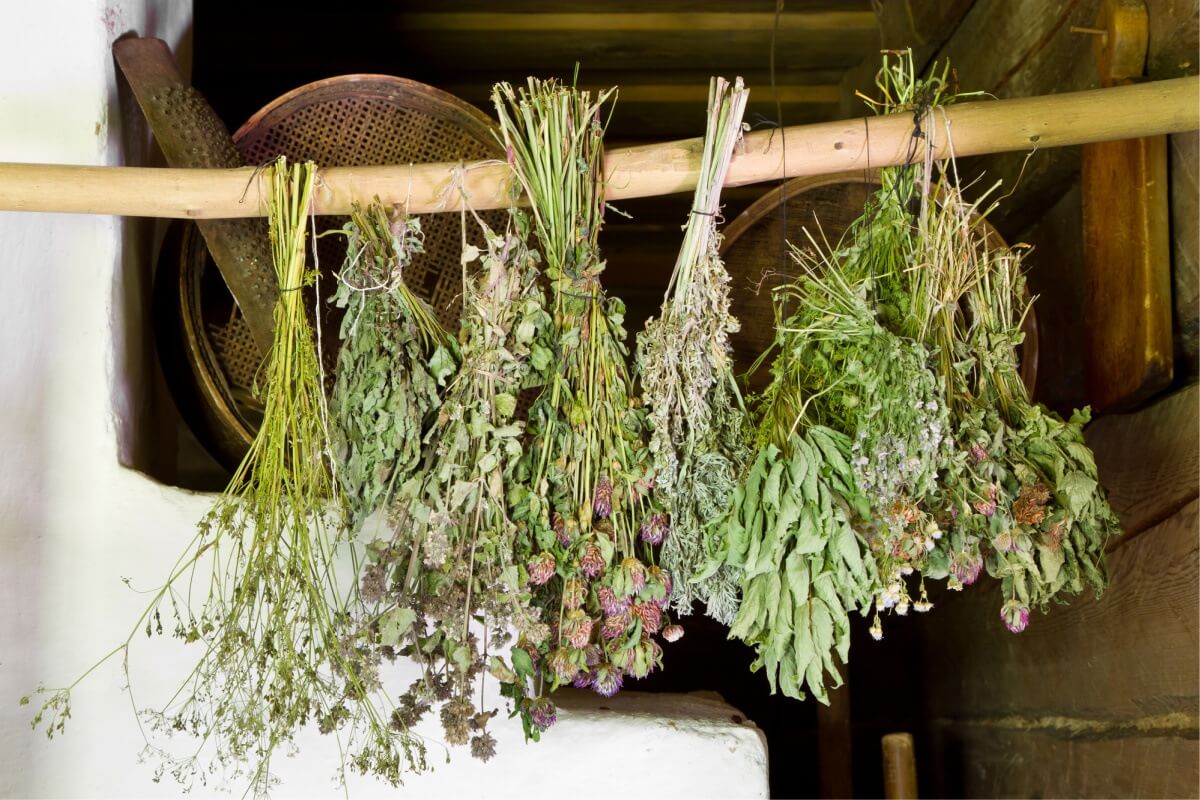
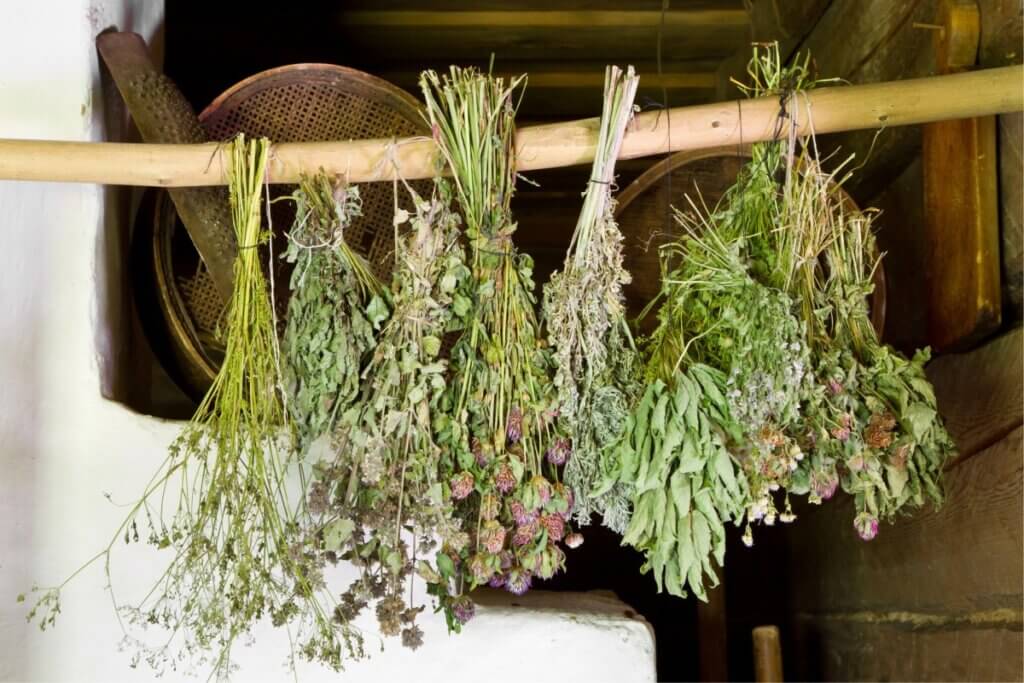
With air drying, it's important that you leave the herbs on the stalk and gather them together. Make sure that you hang them upside down. Gravity is our friend and pulls the essential oils into the leaves and flower blossoms away from the stem. This is ideal.
I like to make a bundle, but not too thick of a bundle because we need airflow. If there are too many stalks or too large of a bouquet, even though we're hanging it upside down, then it can be hard for the air to circulate all the way through and there could be potential for mold.
When you're tying the stalks together you want to make sure you tie it tightly because as the moisture content is removed, as they're dehydrating they will shrink up. So if you don't tie them tightly you'll get some that fall out as they dry. I hang mine in the house where I have some hooks near the woodstove. Obviously, during the summer we don't have a fire burning in the woodstove but this is a great area to dry my herbs. They're not in direct sunlight and it's not in a window and there is good airflow there.
But I only have so much room in order to do that. This other method works well and allows you to do to them outside without getting flies on them. In order to hang them outside where I have more space, I'm not going to just hang them upside down. I know people say that certain plants repel flies and other insects but let me tell you, I've seen flies land on my peppermint, sage, and all my other herbs. A paper bag is an excellent way to dry herbs outside, especially for those smaller blossom things like chamomile where you have a lot of them.
A plain old regular brown paper bag. Just put your herbs in there, fold over the top once, and then I use a clothespin to clip it to some wire where I have our onions and garlic drying outside under a covered Southern exposure porch. The brown paper bag allows air to go through but it keeps the dust and flies off, which is perfect. It also allows me to do quite a bit at one time. I can also do multiple bags.
In the past, I have tried pillowcases because I had read that you could use pillowcases to dry herbs. But mine molded in pillowcases. I did stinging nettle leaves in there and in the center a bunch got moldy. So I had to throw them out. I much prefer using a brown paper bag. I've never had mold issues. You'll still want to check to make sure there isn't any mold and ensure they're dry. I usually check mine every few days.
I walk you through step by step on how to do this.
How to Store Dried Herbs Correctly
Once they're fully dehydrated via whichever of these three methods, then it's time to get them packaged in containers and stored on the shelf. This is where a lot of people make a really big mistake. Oftentimes when we buy tea bags or loose leaf tea, it's already cut up into small and sifted pieces of the leaves, stems, root, bark, etc. That is not ideal for medicinal purposes. We don't want to do that.
After my herbs are dry, I find it easier to remove each individual leaf. If it's a larger leaf-like mint and lemon balm or blossoms you still don't want to break it up. You don't want to crinkle it up. You don't want them chopped up. You want to keep them in as a whole form as possible for storage. The reason for this is because as you are crushing them up you are releasing some of the essential oils, which is why we were trying not to touch them in the first place.
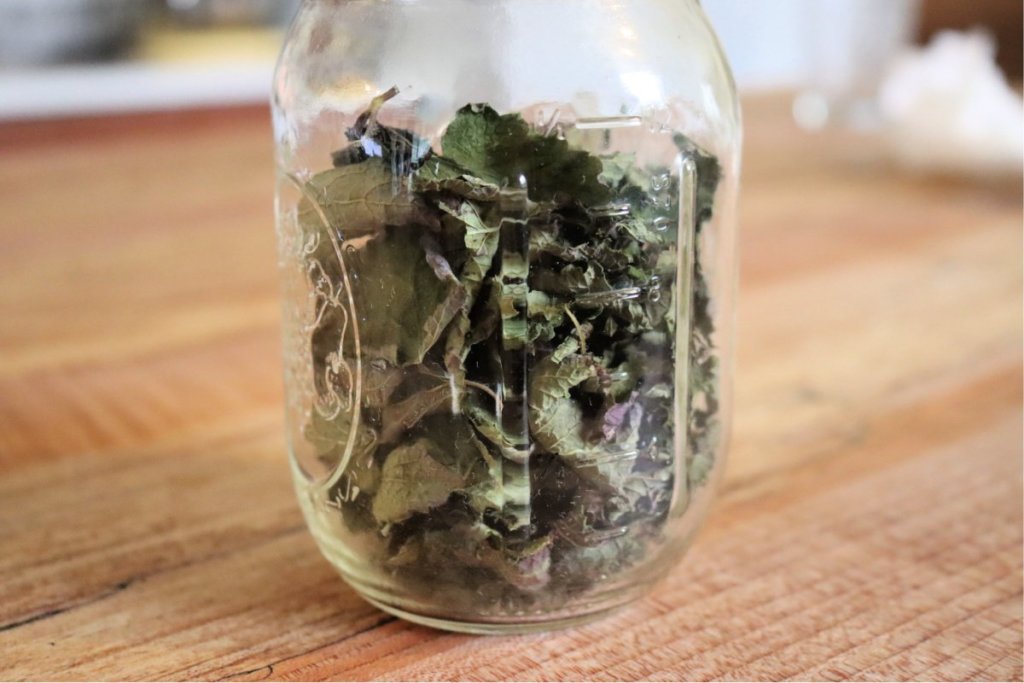
We don't want to release them prematurely to us actually using them. The second reason is you have a larger surface area. If you have a whole leaf or a whole flower blossom, once you cut that up, you've increased the surface area where the oxygen gets in. You've also released those essential oils and it begins to break down much faster. We don't want either of those things to happen until we're ready to use it.
I store mine in glass jars such as Weck, Fido, or Mason jars. Mason jars allow you to vacuum seal them up if you wish. I usually don't. I know we'll be using it over the next six to nine months, totally personal preference. It's key that you keep it in that whole form until the time of use.
When to Harvest Herb Roots
We've been talking about the leafy and blossom part but there are quite a few herbs that you actually harvest the root of the plant. I know many of us are racing against that first frost that comes in the fall because that's when a lot of our herbs get killed off. If they're not harvested before that first hard frost, then they're completely lost.
However, some plants, like echinacea, that you don't harvest the root until it's gone through that first hard frost. Now, echinacea the aerial parts, as well as the roots, can be used. You also need the plant to be well established, at least three years old before you harvest the root. The reason for waiting until it's gone through that first frost is similar to the reason why the leafy parts are harvested in the morning. In the spring and summertime, it's putting its energy and whatever food that root is drawing up from the ground into producing the leaves and flowers, but once the killing frost has come through then it begins to divert all of the energy from the above-ground parts back into the roots to sustain it throughout the winter months.
So you want to harvest the root after it's gone through that frost because that's when it's going to have the strongest amount of medicinal properties in it. This is also really nice because a lot of us are busy running around trying to get everything else harvested and trying to beat the frost. There are a few plants that you'll wait until after the frost. Echinacea is a prime example of that as well as dandelion root. Of course, you want to do it between the window of when it frosted and ground freeze. You don't want the ground so hard that you can't dig and get it out.
Same as the aerial parts, you want to try to not bruise it, handle it as little as possible. Same principles for dehydrating. You don't want to really cook it per se. Some people will roast their dandelion root and use roasted dandelion root as a tea as a coffee replacement. But for most of your roots, you do want to make sure that they are fully dried, but you don't want to be cooking them.
It is faster and easier to dehydrate anything in a smaller form, but again, keeping that surface matter larger retains the most medicinal benefits. So it's better if you can dry the roots in larger chunks and then cut it up when you are doing to use it.
References
- 9 Things to Do Now for Fall COVID Preparations
- A Complete Guide to Home Food Preservation
- 5 Symptoms Your Gut Health is Off – Heal Your Gut Naturally
- How to Heal Stomach Acid Naturally – Part 1
- How to Find Your Trigger Foods – Part 2
- What Happens to Your Body When You Eat Healthy & Cut Out Sugar – Part 3
More articles about medicinal herbs…
- Plant These Medicinal Herbal Flowers from Seed
- 5 Tips to Harvest Herbal Flowers for Medicinal Purposes
- How to Grow an Herbal Tea Garden at Home (+Favorite Herbal Tea Blend Recipes)
- Herbal Medicinal Tea – How to Make Your Own
- Echinacea Tincture – How To Make It & Use It
- How to Use Herbs and Natural Remedies at Home
- Herbal Home Remedies for Cold and Flu
- Homemade Traditional Fire Cider Recipe & Benefits
- 15 Homemade Natural Herbal Bath and Body Gifts
