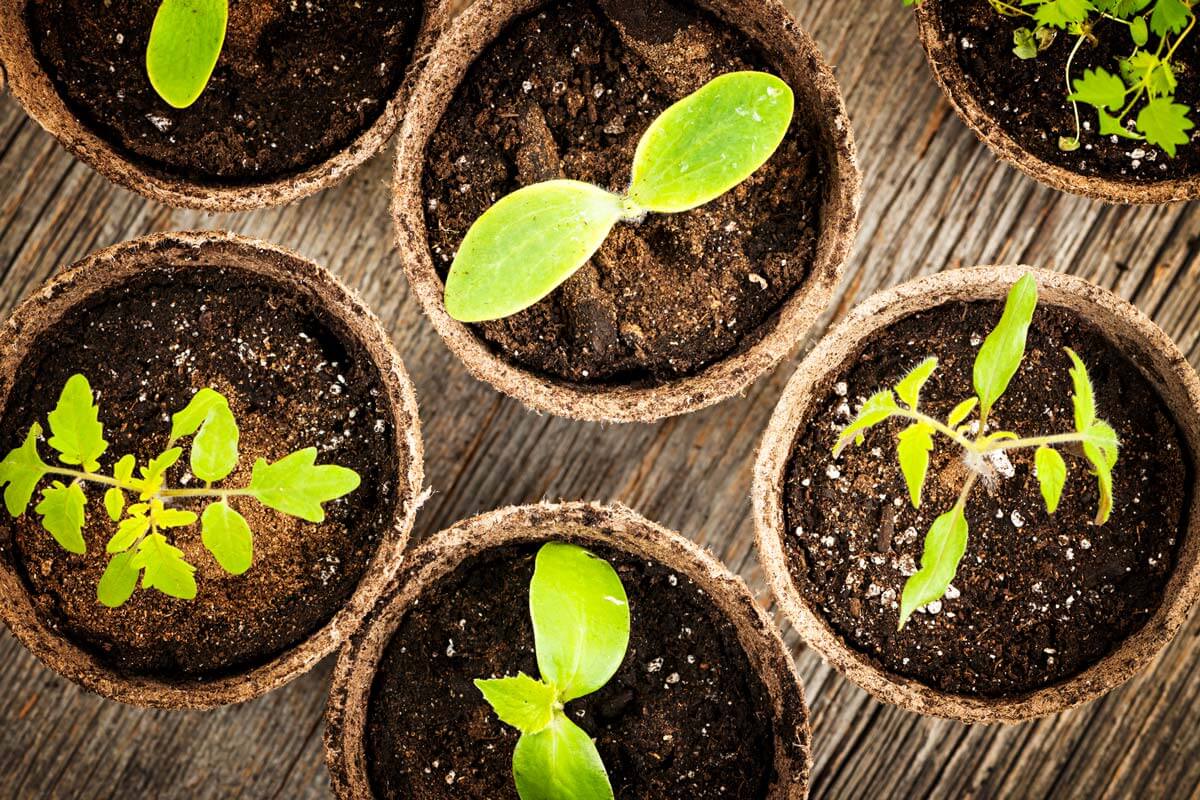
Today's episode is all about gardening. I'm sharing the best beginner gardening secrets every home gardener should know, plusst I'm answering listener questions based on my decades of experience in gardening.
I can't believe we're actually on episode #300 of the Pioneering Today Podcast! If you've missed any of my previous episodes, or you want to search by topic, just click the podcast tab at the top of the page, or use the search bar for any specific questions.
If you're brand new to gardening, be sure to check out my post (and video) on the 13 basic steps to getting started with backyard gardening, as well as time-saving tips for new gardens.
In This Episode:
I'm answering your questions about:
- Soaking seeds before planting.
- The importance of soil temperature when planting.
- The difference between high-tunnels, tunnels, row frames, cold frames, and cloches.
- How to plan for and grow an organized garden.
- How to grow a garden that will fill your pantry all year.
- What causes leggy starts.
Soaking Seeds Before Planting
The question I was asked is, “How do you feel about soaking seeds before planting them? Will this help germination for all the seeds?”
Which Seeds Can You Soak First?
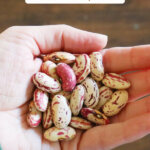
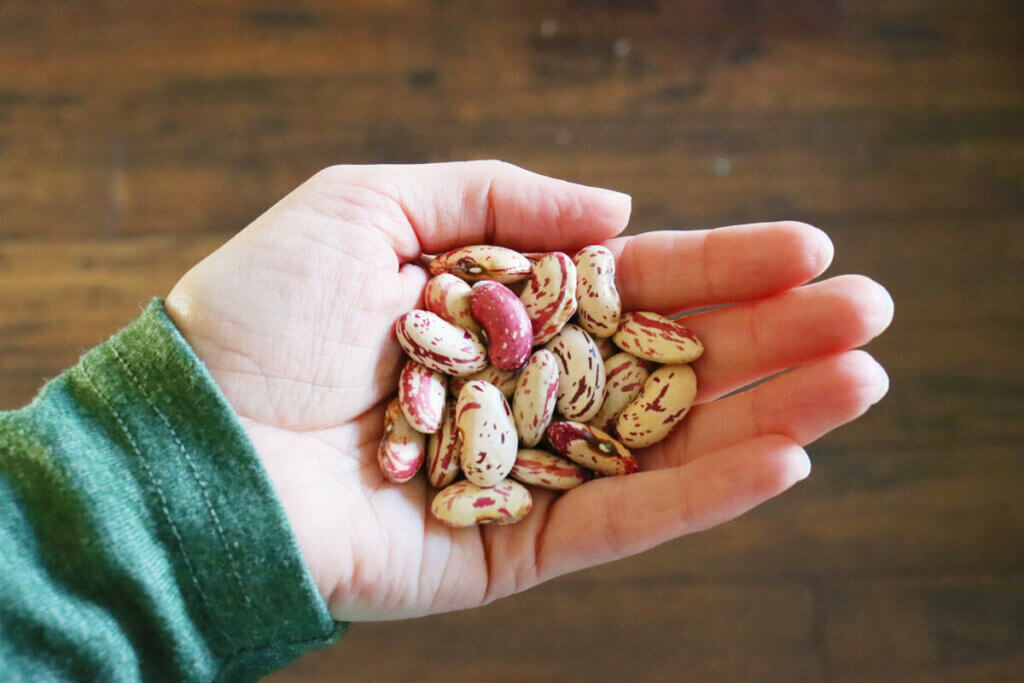
I only soak larger seeds and/or seeds that have a harder coating on the outside.
For example, beet seeds, which have several seeds encapsulated inside what we actually see as one seed. Because they have such a hard coating, I prefer to soak the seeds to soften them up, allowing them to germinate faster.
I have also soaked corn and bean seeds, but that’s about the extent of it.
Be sure to check out my ultimate seed starting guide. It's filled with so many tips for a successful start the very first time. You may also like my tips in this post on the best way to germinate seeds.
Growing Conditions & Weather
You’ll want to pay attention to the growing conditions and the weather. If your soil is wet enough, then there is enough moisture that you shouldn’t need to soak your seeds for proper germination.
If you struggle with damp soil that doesn't drain well, soaking seeds may not be beneficial as they could rot.
If your soil is very well-draining, soaking seeds first is a great idea because you won't need to worry about them possibly drying out before germination.
Paying attention to the weather is important when planning to soak seeds. If a lot of rain is forecasted around the time you want to plant, you may want to skip the soaking step as your seeds could rot from too much water.
I've talked more about this in my seasonal monthly planting guide as well as my succession planting guide.
Short Growing Season
If you have a short growing season, soaking the seeds can speed up the germination process, giving you up to 4 or more days of growing time.
It's not always easy, or predictable, but try to know your weather, know your soil, and then make your decisions.
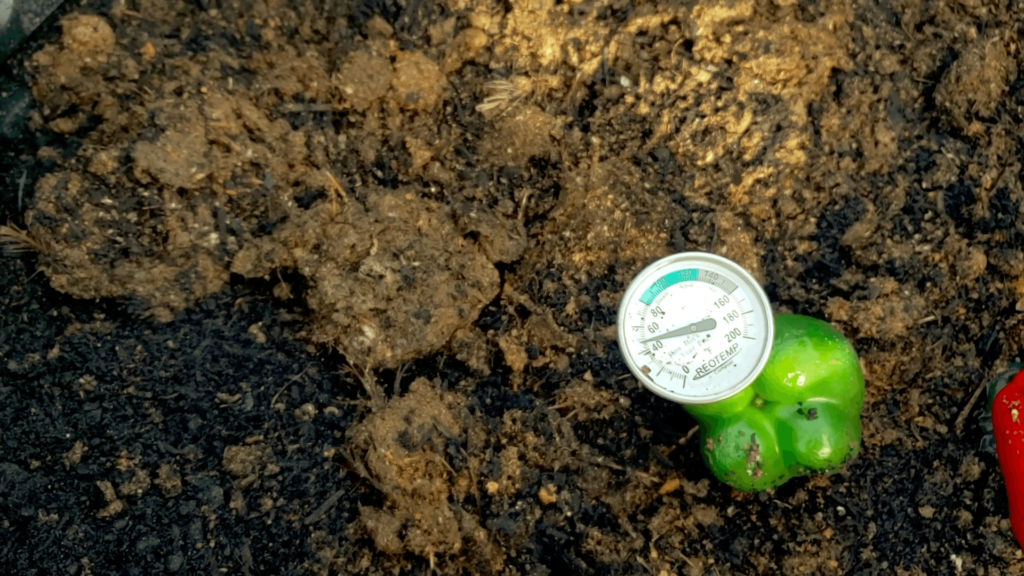
Soil Temperature when Planting
A listener wrote in and said, “April 9th is our average last frost date, should I wait an extra week before I plant? I don’t have a ground thermometer so I don’t know what the soil temperature is and we’re just coming off a two-day cold snap.”
Typically speaking, the soil temperature is going to be a few degrees different than the air temperature around it (either warmer or cooler, depending on the time of year).
However, if you’ve recently had a hard frost, or if you’re not past your average last frost date, then you’ll want to wait a couple of weeks for the ground temperature to finally be above freezing before planting certain crops.
Remember, the surface of the soil may be about air temperature, but beneath the surface a couple inches (which is where your plants roots are going to grow down to) could still be too cold for the plant.
There's no harm in waiting about two weeks after your last average frost date before planting warm weather loving plants. By allowing the soil to warm up just a bit, these plants will actually grow a bit faster than if you planted them out when the soil is too cold to promote healthy growth.
If you're waiting around for the soil to warm up, there's no reason you can't be doing everything you can to improve your soil so it's ready for your crops. Here are my tips on the best way to improve your soil for gardening, and how to improve your soil with sheet mulching (this is a great practice to follow in the late fall).
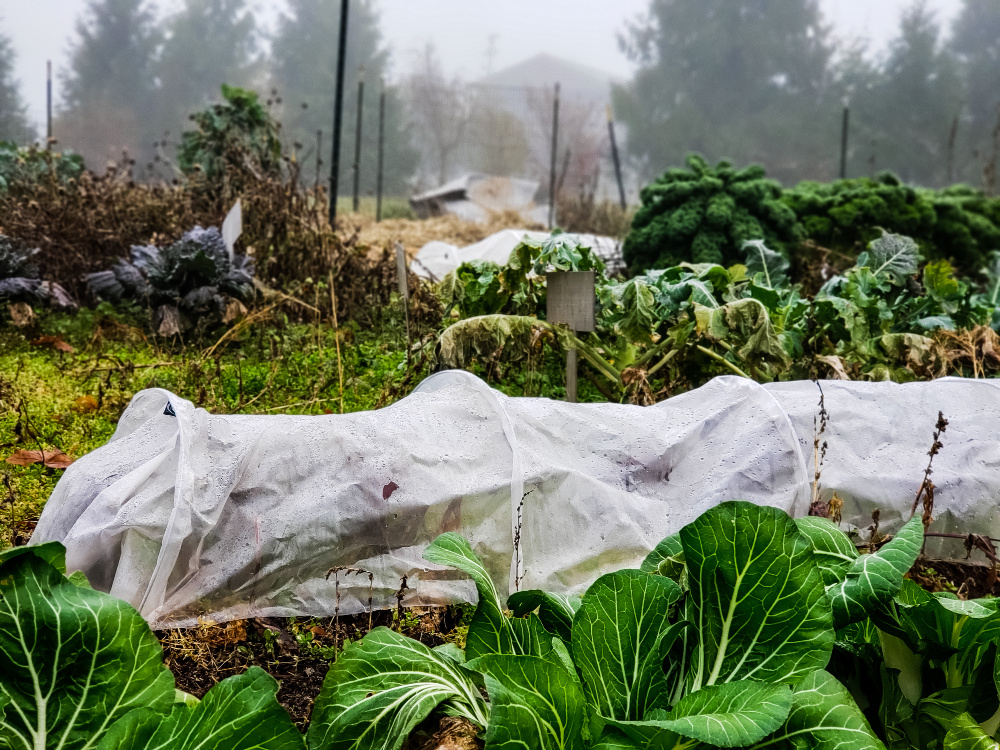
Tunnels, Row Frames, Cloches & Cold Frames
I'm frequently asked, “What is the difference between tunnels, cold frames, coaches and row frames and when, why and how do you use them?“
This is a great question as many different gardeners will use different terminology, and even exchange terms when there are slight differences. Here's the simple breakdown (for more detailed information check out my post on plant covers for cold weather gardening – how to grow vegetables all year, and how to grow food using covers (Hot & Cold Weather).
Cold Frame
A cold frame is where you have a frame, usually built upon wood, where the crops are growing inside of it during the colder months. Usually you can open and close the frame on a hinge to allow the warmth of the day, but close it up when it’s still getting too cold at night. These frames can usually be removed during the summer months when they’re not needed, and only utilizing them in the early spring and late fall through the winter.
Cloche
A cloche is typically made of glass, but you could use something like a clear plastic container, but it’s an individual container that you put over a plant that sits on the ground to act as a tiny greenhouse. They are typically used for seedlings and will protect them at night from a frost or cooler weather.
High-Tunnel
High tunnels are basically an unheated greenhouse. However, unlike a greenhouse, a high-tunnel has no heater. In the winter months it will provide temperatures about 5-10 degrees warmer than the air outside the tunnel. In the summer I also grow my peppers and tomatoes in my high tunnel so they don’t get any overhead rain on them to avoid blight. The tunnel will also increase the temperature in early summer to allow my warmer weather crops a longer growing season.
Tunnel
Tunnels can be much smaller than the average high-tunnel. Some people take hog panels and create a hoop with them either over their garden rows (secured with rebar or ground stakes) or in a raised bed. These can then be used as a trellis for climbing plants, or wrapped in greenhouse plastic to allow the planting of crops earlier or later in the season. Regular tunnels are typically much smaller and wouldn’t actually allow you to walk through them, however you could grow a full-sized tomato plant inside the tunnel. The size will vary based on your needs.
Row Cover
Row Covers can be made with different material, but they’re typically long and narrow and only a couple of feet off the ground. Depending on the purpose of the row cover, the material will be different.
- Greenhouse plastic: If you’re needing it for heat, it will typically be made of greenhouse plastic. They tend to only provide a 5-10 degree temperature buffer, so plan accordingly and don’t let your crops get too cold. These greenhouse plastic row covers tend to be used when small seedlings are transplanted into the ground, or to get cooler crops into the ground faster. You do need to be careful with these as they can get very hot on sunny days and there’s the possibility of “cooking” your plants.
- Fleece fabric: There are also materials like fleece fabric that will allow some protection from the frost, but it also won’t get as warm during the ground. The fleece also allows rain to seep through and water the plants, plus these don’t heat up as much during the day.
- Mesh Fabric: Mesh fabrics are used to keep pests away from crops. These are simply used to keep bugs away from pest-prone crops. Sometimes people also use these mesh row covers as shade in really warm areas.
If you're a Pioneering Today member, we have an entire section that covers cold frames, cloches, building instructions, terminology and ways to use them all.
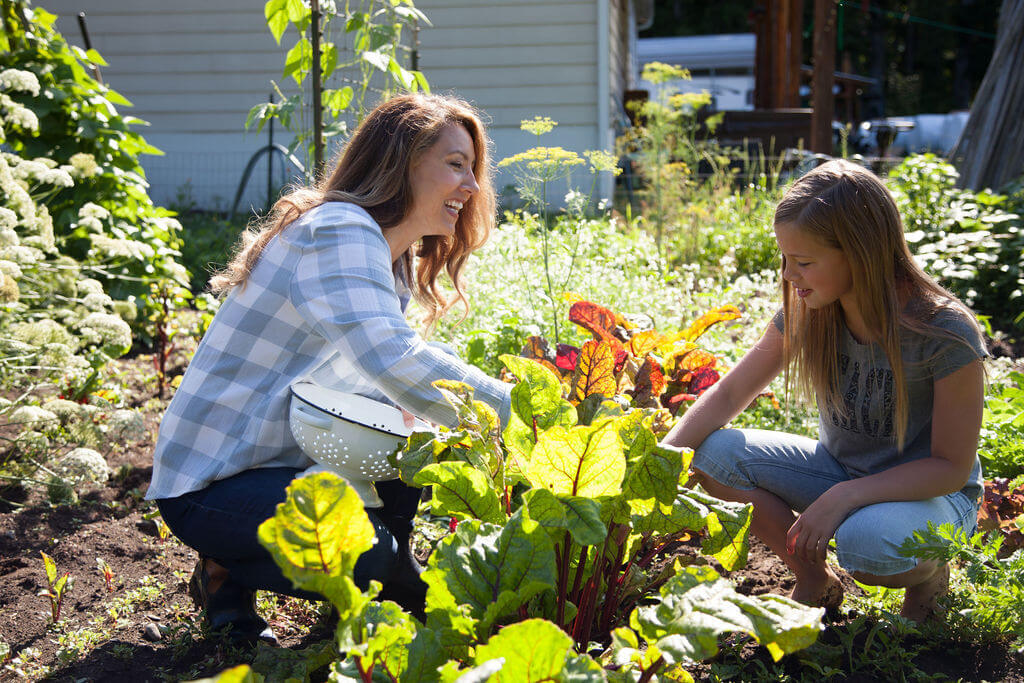
Growing an Organized Vegetable Garden
A listener said, “We’ve always had a garden, but never really been intentional with it. How do I get started without feeling so overwhelmed?“
This exact question excites me and is why I wrote The Family Garden Plan (and subsequently The Family Garden Planner). In my books, you can walk through how to plan out your family’s specific garden needs (rather than following the plan for someone else’s needs).
This book is filled with worksheets and questions about what your family likes to eat, what your climate is, and what foods you can grow and preserve on your own.
You can grab a copy of my book here, or if you’d like, I’ll give you a free download with a planning guide and free charts for how much to plant per person.
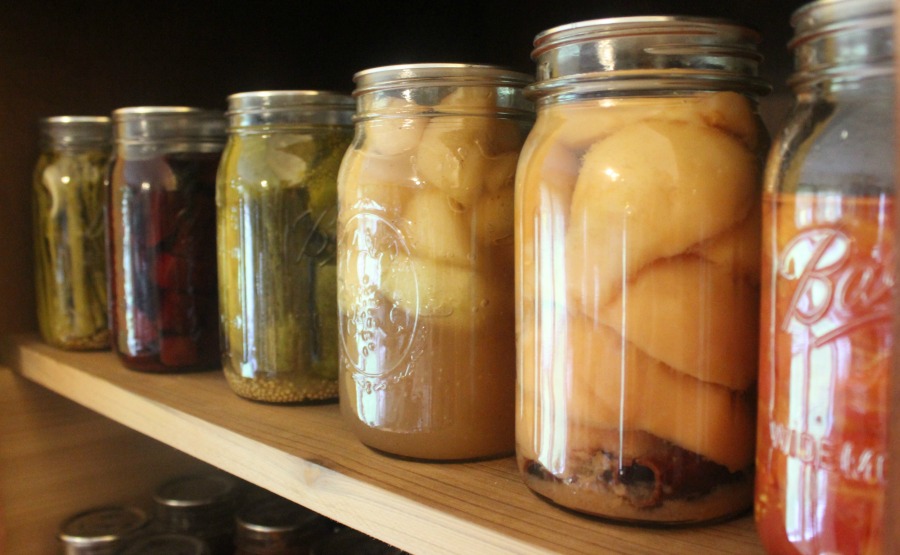
What to Grow to Fill Your Pantry?
One of you wondered, “What types of crops make the most sense to grow when you’re thinking about filling up a food pantry?”
Fabulous question and a great thing to consider before just tossing some seeds into the garden.
One of the things I think about when planning my garden is how easy the food is to preserve. There are 9 ways to preserve food at home and if something isn’t easy to preserve, then I might not grow it at all, or I might not give it a very large amount of space in my garden.
I like to look at my staple crops and think about all the ways I can preserve that crop to use throughout the year.
I grow tomatoes in the garden, for example, to preserve enough for a year of homemade tomato sauce and canned tomatoes. The tomato sauce is then transformed throughout the year into pizza sauce, marinara sauce, tomato soup, condensed tomato soup, etc. So from one crop, I’m actually getting quite a few different uses and meals.
Fresh tomatoes also happen to be one of the more expensive produce items to buy at the store. So if I wanted to buy tomatoes and then can them I would be spending a whole lot more money than growing them and canning the products myself.
Check out these 10 tomato growing tips for a disease-free harvest, how to prune tomatoes for a better harvest, and you can also get this free guide on everything you need to know to raise a year's worth of tomatoes for your family.
The other crops I grow that feed us for a year are green beans, pickling cucumbers, winter squash and summer squash, corn, and potatoes (early spring and early summer crops).
Then, with whatever space I have leftover in the garden I’ll fill it in with the other crops that I like to eat fresh, but that I’m not growing a huge amount for preservation. These are things like lettuce, kale, chard, radishes, etc.
I'm also excited to experiment with growing food forests, companion planting for better nutrients in the soil, as well as my beloved companion planting for bug control.
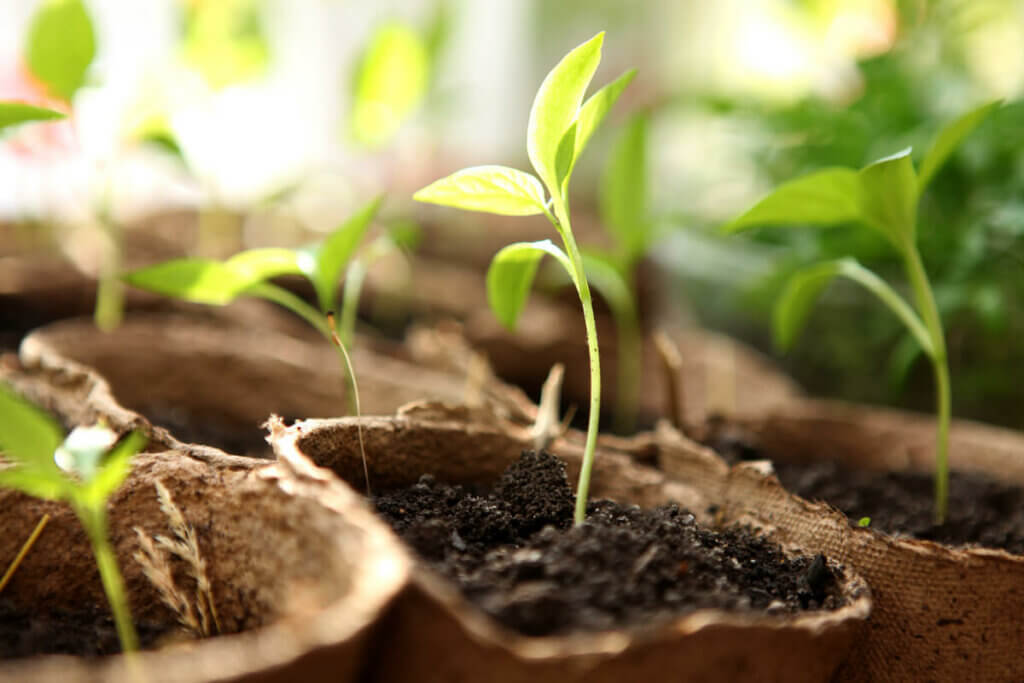
Leggy Starts
Sometimes, when we're starting plants or herbs indoors, they can become leggy. I was asked, “What do I do with leggy herb starts?”
If your starts are leggy, that most often means your plants aren’t getting enough light. Occasionally plants will get leggy if they're competing for space (meaning you started a lot of seeds in a small container) and they're growing leggy in order to reach the light, even if there is adequate light.
For most climates, a southern-facing window does not provide enough light for your seedlings. I have found I always need to use a full-spectrum grow light that’s on for at least 16 hours per day (this is equivalent to about 8 hours of direct sunlight per day).
So, if your plants are leggy, make sure your lights are on for long enough during the day, if they’re still leggy, your grow light might be too far away from your plants. Ideally, your lights should only be 2-3 inches above your plants.
For more troubleshooting tips on starting seeds indoors, check out these common seed starting problems and how to fix them.
Verse of the Week: Luke 9: 25-26
More Gardening Articles
- Debunking Common Garden Myths
- Sheet Mulching the Easy Way
- Hugelkultur Garden Beds (What, Why & How)
- Fall Gardening Tasks for a Better Garden Next Spring
- Wood Chips for Garden Mulch – Beneficial or Not?
- 13 Basic Steps to Starting a Vegetable Garden
- How to Create a Garden Plan for More Harvest & Less Stress
- Planning a Fall Garden (28 Crops to Plant in August)
Hey pioneers, and welcome to episode number 300. 300, can you believe we are at episode number 300? I, a little bit of me can't but here we are and today's episode is a really fun one. Now, normally with inside the Pioneering Today Academy, which is my membership and is not open again until June, but one of the things that I do inside the Academy is we have a couple of different monthly live calls. One of those is a live Q&A where members can come on and ask me any questions and get answers in live time, which is one of the member's favorite things about the Academy is those live calls where they can get one-on-one help and in real time asks their questions.
I can't do that for everybody at large, because simply my audience is just too big. There's no way that I would be able to do that and have people come on live and be able to get to anybody in any type of manner, but I thought it would be really fun for our 300th episode to be able to answer your question. So on my Instagram account last week, I put up a post and I said, "Ask your questions here. Anything you want to ask me about gardening, and if I put your question on air and answer it, then your names will go into a drawing to get my garden planner."
So I thought it was a really fun way to, one, do a giveaway of my family garden planner, which you can go to today's show notes, melissaknorris.com/300, because this is episode number 300. So melissaknorris.com/300 and you can see a link there for the planner. You could follow me on Instagram as well because I have a feeling I may do this every now and then, fun little things like that.
If you're not following me on Instagram, it's just instagram.com/melissaknorris and I would love to hang out with you there, but I put the post up and a slew of questions came through. So when I was going through the questions, my goal is the questions that I picked were questions that didn't pertain necessarily to just one person or picking questions that would serve lots of people who were listening in, who probably have similar situations and or may have similar questions or it would just be applicable to more than one very specific growing zone or set up.
So I am super excited. I think this is going to be a really fun episode. So the first question that I had came from Michelle and her actual handle says @stencilmichelle. I think that's how you pronounce it, and hers is a twofold question.
So the first part of the question is, "How do you feel about soaking seeds before planting them? We always do okra that way, but I was wondering if it would help the germination for all the seeds." The first part of that question is great. So this is part one, and I do soak some of our seeds, but I only soak larger seeds and or seeds that have a harder coating on the outside. So for example, beet seeds, which actually when you plant a beet seed, there's several little seeds encapsulated in what we look at as one seed, but it's several beet seeds are inside that little capsule.
So once that breaks force and germinates, that's why you have so many little beets growing close together, and then you have to go back out and thin them so that they can develop a nice large size beet underneath the soil because obviously beets are a root vegetable and if you don't thin them, then you have too many close together and then none of them can grow ... The beet can't develop into a nice, large beet.
The other reason I'm using the beet seed as an example is because it has a really hard coating. So sometimes with beet seed, some people will actually take sandpaper and give it like a rough little scrape in order to soften that. I have never done that. I would prefer to just soak the seed. I find it much easier. I can soak a whole bunch without me being hands-on with each seed. So to speak with doing the scarifying or the scratching of it with sandpaper.
So I will soak my beet seed. I have soaked corn seed and I have also soaked bean seed, but I don't soak any small seeds. I've only soaked those large ones, and really it's paying attention to your growing conditions and the weather. So if you have really soggy soil or your soil doesn't drain very well and it holds a lot of water and your soil is really waterlogged, then there's no point in soaking the seeds.
There's enough moisture there. There'll be just fine. Soaking the seeds can speed up germination by a couple of extra days, and if you have a really short growing season, being able to speed up germination by say three, four or five days earlier, actually could give you a lot more growing time when you're already counting the days and hoping that the frost stay away at the end of the growing season.
Now, paying attention to the weather is important though, because on your planting day, when you're direct sowing these seeds out in the ground, if you have a lot of rain coming in where you're going to have the potential for saturation of soil, and it's going to be really, really wet, then soaking the seeds could, if soil temperatures aren't warm enough and you've got a bunch of rain coming in, actually could lead to rot.
So it's really knowing your soil conditions, your weather patterns, and on the day that you're planting what the upcoming forecast shows for at least the next few days, if not the next week. I know with forecast, especially here in the Pacific Northwest ... There's a joke where the weatherman is the only place in the world where you can be wrong 70% of the time is still keep your job. So we can take it with a grain of salt, but always look at the weather beforehand, but that being said, we do soak our corn seed, we'll soak our bean seed and I definitely soak my beet seed before planting. I don't soak any of the other seeds,
But if you soak your seeds and you plant them before the soil is warm enough for that particular crop, beet seed can obviously, well, it might not be obvious. I shouldn't say that. Beet seed is a cooler weather plant. So you can plant beet seed in cooler soil temperatures, and it will still germinate and grow. Whereas if you try to do a bean plant, which really likes warm soil temperatures, ideally 75 degrees Fahrenheit or warmer for perfect germination things, and if you were to soak that bean seed and plant it when the soil temperatures are still quite cool, it's more likely that it's going to rot than it is going to speed up germination. So it's like having the perfect storm of weather and time of year and soil temperatures.
But I only soak the larger seeds would be the more short answer to that question. Now, the second part of her question, which is why we did already start talking a bit about soil temperature, we're going to dive into that further, says, "Our average last frost is April 9th. So should I wait another week before I plant? I don't have a ground thermometer, so I'm not sure what the soil temperature is, but we just came off of a two day cold snap. Temps this week are supposed to reach 80 degrees Fahrenheit."
So great question, and with your soil temps, I don't have a ground thermometer either that goes down in the ground and will actually take the temperature of the soil an inch or two or even further, but at least a couple of inches below the surface because the surface of your soil is going to be the same as the air temp. I'm talking about just the very, very surface of the soil. So if the ground is frozen, that be exposed soil is going to be 32 degrees Fahrenheit or cooler, depending on how cold it froze that night.
If it's 60 degrees out, that top layer will be 60 degrees Fahrenheit. Could be a little bit warmer, but when we're talking about soil temp and we're sowing seeds, because most seeds are sown beneath the soil with the exception of little carrot seeds or really tiny lettuce seeds. I usually put those just right on the top of the soil. I don't even really cover them much and just water them. The soil temperature down beneath that very top layer will change a little.
In the early spring, it's likely going to be a couple of degrees cooler than what the air temperature is. However, once you move into the warmer part of the year, June and on, especially in your more Southern climates, probably even a little bit earlier than that, you're going to begin to have where the soil temperature, as it has accumulated all of the heat from the sun, and then you've got radiate heat beneath the ground and it's beginning to accumulate that, it's likely in summertime going to be a couple of degrees hotter in the soil than it actually is the air temperature.
So there's a little bit of a variance there that it really is usually just a few degrees. So if you have had cold snaps where it's been really cold, then most of the time you wait for warm weather crops or warm weather seed that needs to have temperatures of at least 60 degrees Fahrenheit or warmer in order to germinate and a lot of them, ideally, like I said before, it's about that 75 degrees Fahrenheit mark. You have to wait usually two to three weeks after your last average frost date before soil temperatures have actually come up and reached that temperature.
So they just need that many days without having temperatures overnight that are at freezing, hence after your last average prostate. So one week, I can't actually grow okra here. I know that you were actually asking about okra. We can't actually grow okra here because we're not warm enough at all throughout the summer months, but for all of your other warm weather plants, I would wait two weeks for those really heat loving plants before I direct sow them in the ground, just to ensure that the soil temperatures are warmer because the seeds are going to germinate that much faster.
So they'll germinate faster. The soil is warmer. So even once they germinate with the warmer soil, then the plant itself with the roots are going to be able to be at a warmer temperature as they go down into the soil. It's just going to grow faster. So really if soil temps are a little on the cool side, for warmer weather crops, like okra, beans, tomatoes, et cetera, even if you try to plant them a week earlier because of the cooler conditions, you're really not buying yourself any extra growing time.
You're better off just to wait that extra week, at least two weeks after that last average frost date before you plant them, because they will grow faster with those warmer temperatures. Now, this next question I have is from Leah Hirsch and Leah said, "What is the difference between tunnels, cold frames, cloches, row covers, et cetera and when and why, how do you use them?"
This is a great question, Leah, because oftentimes, especially when you're new to gardening and I'll even find different gardeners will sometimes use different terminology or will exchange them when they are slight differences. So a cold frame is where you have something that is a, obviously a frame. Most of the time it's built upon wood and you actually are building this cold frame that the crops are growing inside of during the cold winter months. Then you can open and close it or remove it in most cases in order to when you do have warm days, so you can let the warm air in and it doesn't get too hot, but it's not something that you ... It's to retain heat and to make it warm enough that something can live there, that it normally wouldn't without that.
So it's not something ... Obviously the cold frame is usually not going to be used at all in the summer months. It's just going to be used to extend the growing season either in the fall, when it's really getting too cold for that crop and you're trying to extend its life within this cold frame or in the spring. Sometimes people will use cold frames and they'll set them out in the spring a little bit early in order to heat up the soil, and then they'll put some of their transplants in there that are still cool weather plants for the most part.
Then they will be able to grow them in there until it is warm enough that they can then remove the cold frame and grow that crop throughout the rest of the summer. So that's typically what we see when we're thinking of cold frames and usually they're removable. So they're not like a permanent structure, in most cases. Sometimes people will have cold frames built and they'll just keep them folder in the cool months and then during the summer, if they can remove the top, they'll do that and grow in them year round but a lot of times people are putting them out and then taking them down or putting them away for the summer months.
Now, a cloche is where, typically it's glass, but you could do the same thing with a clear plastic container if you wanted to, but you're putting it on top of the plant and it touches the soil. So it creates like a little sealed environment and it's going to protect an individual plant in most cases. So this is not something that you would put over a whole row, but if you have a small amount of plants, usually they're either small plants are done when the plants are seedlings.
So it's used more in the spring time when you've got smaller seedlings and it acts like a little mini greenhouse and will protect it at night because it's a smaller environment. So it's easy to just go and put them out at nighttime when you need to protect them from a frost or if you're having really abnormally cool weather during the day where they would need to be protected, you could do that, but they are generally small. You can just move them by hand and they're only going to really cover and protect one plant at a time.
So it's on a much smaller scale. Then when we talk about tunnels and row covers. So for a tunnel, oftentimes you'll hear the term high tunnel. So a high tunnel is basically an unheated greenhouse. So the difference between a high tunnel and a greenhouse is a greenhouse usually has some type of heat source.
It can be out of plastic. Greenhouses can be done out of glass, but there's a heat source in there. So you can artificially heat it and create this really warm environment with heat, and you can grow in it year round. Whereas a high tunnel is unheated and is typically used to grow ... In the winter months, it will provide about 10 to five degrees warmer temperatures. So in the winter months you can usually grow cool weather crops in it all year long, which is how I grow lettuce and greens all year long in my high tunnel. Then in the summer months, you can also grow in it, but I grow because I'm in a Northern climate with a lot of rain and typically a lot of cool weather.
I grow my tomatoes and my peppers inside the high tunnel, which again is not heated so that they don't have any overhead rain on them. So they don't get blight, which is a fungal disease that if you have overhead watering and or rain, which is overhead water, but I'm not using an overhead sprinkler, you'll get blight introduced. So I use it for that, but it also will increase the temperature even without heat during the summer months, and because we're predominantly cooler here during the majority of summer, pretty much with the exception of the last two weeks of July and August, that helps provide enough warmth that the tomatoes and peppers will give me a really good harvest and grow better than they would just outside in an open air type environment.
So that's a high tunnel. So typically high tunnels are large enough that you can walk inside of them just like you can a greenhouse. So they're a larger structure. Then when you're talking about tunnels, those can be much smaller. So sometimes people will take the hog panels that I like to do vertical growing with and I've got some blog posts and some videos that show some of these different things. So we'll make sure and link to those that are appropriate within the blog post that accompanies this episode at melissaknorris.com/300.
Tunnel, when it's not the high tunnel, which is the larger structure that you can walk into, just those smaller tunnels, those can be done where you fold a hog panel over. So you could still walk between it, but it's much smaller than a high tunnel, though you can still get underneath it and you can use plastic to cover it and create a tunnel that way, but you can also have much smaller tunnels as well. So some people will make smaller ones that they can't really walk through, but will cover larger crops to help protect them.
So like tomatoes, for example you could have a larger tunnel that you wouldn't necessarily be able to walk through, but it would protect a full-size tomato plant. Now row covers are, you can do them a couple of ways. I actually have purchased where they are small. There are only about, oh, probably about a foot and a half high, anywhere from a foot to two feet high, depending on which size you want to purchase. Row covers can be with different material, but they're typically made long, because most of our rows are longer and they come in different specific lengths, depending upon the lengths of your rows that you'd like to purchase them, or if you're making it yourself, of course, then you can make it any length that you so choose for your rows.
They're usually shorter, so a couple of feet off of the ground, one to two feet off the ground and they're out of different ... Oh my goodness, words come out hard. I get so excited I can't talk. Fabric choices is what I was trying to say. So it depends on what the purpose of the row cover, what you're needing it to do. If it is for cold weather protection, so against frost early or late freezes at the beginning or end of the season, then it's usually going to be out of the greenhouse plastic type material.
So that's going to get really warm and it's going to help protect against frost at night. Generally speaking, they will only provide five to 10 degrees extra temperature buffer against your lowest temperature at the coldest part of the morning, right before the sun comes up. They'll only give you about five or 10 degrees above that. So if it's 28 degrees, then you'll be protected in about the mid thirties, and then as soon as the sun heats it, of course it will begin to heat up a lot faster because it's that plastic and it traps the heat in there.
So it can get a lot warmer during the day, but I'm talking about your maximum protection at night is about five to 10 degrees warmer than the outside air at the coldest part of the night. So that's where your plastic row covers come in. Typically, these are put out just on young tender seedlings when they're first transplanted out, or if you're trying to get cooler crops in the ground faster, that's where these come in. Then you have other row cover type of material and you can have a like fleece fabric. This still allows rain to come through.
So if you have moisture coming down, it's going to allow the rain to trickle through, but it will provide some protection from frost. Now, not as much as the plastic because it's breathable, but it won't get as hot during the day either and that can be an advantage because when you're using the plastic, if you're having overnight lows where it's like 28 degrees, but then the sun's coming out during the day and it's hitting like close to 60, you generally have to remove, especially if it's covering more cool weather crops, you have to remove those plastic row covers because it'll cook them inside.
So if you're just needing a little bit of protection, the fleece ones are actually really nice and the water will still come through and it doesn't heat up as much during the day. Then if it's not for frost protection or warmth, you'll have where it's more of a mesh type fabric. The reason for these types of row covers is really for insect repellent. So it's a way to keep the insects, especially flying insects off of your crops. Oftentimes, you'll see these on brassicas.
So Brussels sprouts, cauliflower, cabbage, broccoli, et cetera, where winged cabbage moss moths come through. It'll keep aphids off of them. Any of those winged things that you don't want to be on there, these can work really, really well because they're just creating that barrier. So you're not having to spray. You're not having to use anything or hand pick off, you're just not having to deal with the bugs. So they can work really well for that. Then there's also, sometimes people will use row covers more the mesh type if they need to shade something.
So if you live in a really Southern climate or you have some crops that you want to keep in the shade because they'll bolt if they get too hot, sometimes people will use those in the summer to help protect an area, or if they're trying to so fall crops, which are typically sewn in the heat of summer, so that they're of harvestable or larger size, once the fall and frost hit. People will also use row covers in order to shade the ground or to shade those crops when they're first putting them in when it's the heat of summer and those plants don't necessarily do well.
So it really depends with those row covers. Like I said, you can buy sheets of the different fabric types, and you can lay them over and use some of your own fasteners. We've done that where we've run a wire down the center of the row, over top of the crops and then we folded the sheets of these fabrics over that, and then just use piece of woods or rocks or even boards to hold them down so the wind doesn't blow it off.
I've done that for large rows, but then I also have the row covers where you can buy them in the different material. I have several different kinds of material, depending upon the crop and the time of the year. They kind of look like an accordion. They have a drawstring at each end, so you can close the tunnel off. Then they have these little wire hoops in there, like little wire stakes and you just pop, pop, pop, pop them in the ground. Literally you can get a whole row covered or uncovered in less than a minute. They do phenomenally well and I've had the same ones and reused them for, oh my, I think like three or four years maybe longer.
So they really do hold up but I'll leave them out in the wind and the rain. They went through small amounts of snow. I've never left them out all winter, but they have went through some small amounts of snow and done just fine. So that is your basis of all of those different terms and terminologies and for those of you who are listening in, who are Pioneering Today Academy members, we have an entire section within the gardening course that goes over cold frames and different ways to build them and cloches and tunnels and all those things. So you can check that out.
This question is from @lolliandpopsplace and she says, "We've always had a garden, but never been really intentional with it, just a row of this and a row of that and I really want to be more intentional and grow exactly what my family needs. How do I get started without feeling so overwhelmed?" So this is a great question and it is one of the reasons that I actually wrote The Family Garden Plan was to give people an exact roadmap for figuring out how to be intentional and in growing what your family needs, not just based off of what someone else needs.
So I'm going to walk you through this and then you can also go, if you don't have the book or you're not an Academy member with access to the charts, I actually give away for free the first set of worksheets that go through this, as well as the planting charts. You can get for free at thefamilygardenplan.com, or if you go to my website and look at the book tab, pick The Family Garden Plan, and you can enter in your name and email, and I will send you the charts directly from the book for free. So you can go in and do that.
I have a worksheet that walks you through figuring out the crops, or I should say the fresh produce, vegetables and fruit that you and your family eat on average throughout a month. So basically you want to look at what your family eats on a very consistent basis, make a list of those foods. Then you'll look at your garden climate. Are those things that you're actually able to grow? I can't grow pineapple where I live, I can't grow sweet potatoes and I can't grow okra. I can't grow very many citrus fruits. So I just know that even though my family may like to eat a lot of those and on a consistent basis, bananas would be another one, I'm not ever going to be able to grow them. So those immediately go off of my growing at home list.
So it sounds really basic, but oftentimes we don't think to step back and look at it through those lenses. So with those charts, I walk you through how to do that. Then you decide which of these can I grow in my growing climate, and then you look at the chart on how much would I need to plant per person of said crop in order for us to get a year's worth of food, if that is our goal.
So I have a chart on what you get average yield per plant. So then you can figure out based upon the amount that your family eats of said plant, how many you would need to put in. So it walks you through that really beginning process with really easy to use worksheets and charts for you to be able to figure that out. That's where I start. I would say, grow the things that are easily grown in your growing climate without you having to do a bunch of outside work.
So for example, technically where I live, if I wanted to try using the black grow bags that will get really hot and I could situate in the warmest spot possible on my property, and we had a really nice hot summer, I may be able to grow sweet potatoes, maybe, but that's a lot of work and that's a lot of ifs on counting on a hot droughty summer. That's a lot of work for probably not very much yield simply because it's not something that grows well here. So I instead would pick things that your family eats a lot of, and that is going to grow decently within your growing conditions.
Now on the flip side, your family might love broccoli. You guys might eat a ton of broccoli, but if you live in a Southern climate or a climate that has really hot summers, you're not going to be able to grow broccoli during those months. Now, depending on how cool you are in the fall in the spring and the winter, you could probably grow it very well during one of those options. If you have super cold winters, you're only going to be able to grow it in spring and fall.
I think you kind of get my drift there is picking crops your family likes, you eat a lot of will grow relatively easy in your climate and those are the ones that I would pick to grow. I also do apply a fourth lens, so to speak, when I'm looking at deciding on those crops, and that is how well does this preserve, which kind of rolls right into the next reader's question. So I'm going to read that one and then we're going to walk through that because it really builds on what you're asking @lolliandpopsplace.
That one is, this question is actually from Maria Frazier. So Maria says, "What types of crops make the most sense when you're growing for the purpose of a food pantry? Would you grow all of one crop so everyone can have carrots or a little bit of everything or something fast, so you can feed more people quickly?" So this is a great question. One of the things that I look at is, can I preserve this crop very easily? Now, lettuce is fabulous.
I like my fresh lettuce for salads and sandwiches and all the things, but lettuce, when it comes to preserving is basically pointless. Now I know someone's going to argue with me and say, "You can dehydrate lettuce and you say it's a green powder in your smoothies, or add it to a soup." Yes, you could, but lettuce has a lot of water in it. It's going to take a long time to dehydrate and if I was looking to add a green and do a green powder, I would pick something like spinach or kale or something that had actually more nutrients and vitamins than I would lettuce, if I was going to go through that amount of work.
So I would not preserve lettuce in any way, shape or form, personally, but lettuce is a fast grower and I do grow lettuce, but I don't grow it with the point of preserving. So as long as there's space in your gardening, then I would say include lettuce. I like to do a mixture of some of the fast things so that you can feed people fresh from the garden. Radishes are another great one. Radishes, spinach, depending upon the time of year, because spinach will bolt but those are great ones to do in the spring because radishes, especially if you're doing like a french breakfast radish, you can plant and it's at harvestable size in ideal conditions and that's true for any plant.
A lot of the averages we have are ideal conditions. So if you're having adverse weather one way or the other, it can definitely affect how quickly you get a harvest from it, but 21 days on a French breakfast radish from planting to harvest, 21 days, that's pretty fast turnaround. Now, as far as preserving radishes, you could ferment them if you wanted to. Most people don't. Canning radishes. I've seen where people have done pickled radishes, but I've yet to come across a tested pickled canned radish recipe that was actually from a tested facility to ensure that the pH level was correct and that the vinegar was getting all the way through the radish in order to acidify it to make it safe for canning. So it's kind of one of those crops I would definitely grow it. It's fast growing, but it wouldn't be one of my crops that I grow in the purpose for a food pantry.
So what I like to do with the food pantry is I look at those staple crops and then I grow enough of them to fill my pantry with said food for the year. For me, that's tomatoes, because I can turn that into tomato sauce, which then becomes spaghetti sauce, pizza sauce, marinara sauce, it becomes my tomato soup. I use tomato sauce and I mix it with some of my homemade bone broth chicken or beef, and then I'll add in a little bit of cream at the time of serving, not at canning.
I just take the canned tomato sauce and will saute up garlic and onions, a little bit of olive oil. In the olive oil, add the jar of tomato sauce, add my jar of bone broth, and then heat that up. Add some salt, add some herbs, a little bit of cream right at the end and I've got my tomato soup. So like I said, that tomato sauce becomes so many things for me.
It's the base of a condensed tomato soup and Castro recipes. I don't buy store-bought condensed soup, anything, not even tomato. I use my tomato sauce. So for me, I make sure I'm growing enough tomatoes to take everybody through it so that everybody gets. That next step is green beans because it's also my seed bean, it's my dried bean and then it's my regular fresh eating and canned green bean. So that would be the second one and it's enough so that everybody has enough. It's a large volume. Then after that, it is pickling cucumbers, winter squash, and summer squash.
I grow enough of that so that everybody can have it, and it meets our preserving needs for the year and corn. Corn falls in there with that as well as potatoes. So I usually do two crops of potatoes. I do an early spring crop, and then I do one that I plant in early summer that is at harvestable stage right when our first frost hits in the fall.
Then I leave that in the ground, cover it really well with layers of straw and then I can harvest fresh ... I'm still harvesting last fall's potatoes. They're literally in the ground. I just go up and dig them up. So it depends on what the crop is and the growing season for it, but I focus on growing a large part of it so everybody has it, and then I fill in doing the little bits of everything after those staple crops are in the ground with whatever space I have left.
So like the lettuce, for example, coming back to good old lettuce and beets, I'll put small bunches of those in and try to even stagger plant them throughout the spring and into the fall so that we have a small amount coming on all the time, but it's not one huge amount that I'm preserving mass amounts of beets on. Now, I will do pickled beets and I can do root cellar in the ground a little bit with the beets, but if we get a lot of really hard freezes and thawing, the beets, because they're closer to the surface and the potatoes, because I grow my potatoes in really deep trench methods and you can't do that with beets, they won't last all the way out through the winter.
So I kind of have to plan that. So I will can some of the beets, but predominantly we prefer to eat beets fresh and then roasted. So I try to just grow small amounts. So it really is crop dependent, but I try to blend both of the methods that you're asking for together. Now, the last question, I might have to do a part two on this you guys. I am going through here and there are a lot of questions and some really good ones, but the last one I'm going to do for this episode is from @caliberdesignco and says, "What do I do with leggy herb starts?"
So if your starts are leggy, they are not getting enough light. I have found for a most climates and most seeds starting, you have to have a grow light in order to avoid leggy starts. For most climates, yes, there's always exceptions, but for most climates, a Southern facing window is not enough light and they will be leggy and they will reach and they'll just be weak.
Now, if you have a grow light and your starts are still leggy, you either don't have the grow light on for enough hours a day. When you're using a grow light, which just need to be a full spectrum bulb so that it's getting both wavelengths of light there, you'd really need to have it on about 16 hours a day because the light is not as strong as sunlight, hence the need to have it on for more hours a day to equal the amount of light they would be getting if they were in a full sun environment, which would be six to eight hours a day of actual full sun.
Of course, a lot of our gardens, in the middle of summer, that sun's coming up way early and it's going down way late and they're getting more, but if it's under a grow light and it's leggy two things. One, grow light is not on for enough hours a day, try to get 16 hours a day light. Second, grow light is too far away from the top of your plants. The grow light really needs to be one to two inches away from the top of the plants. Most people will have a grow light if they're having leggy issues, they have the grow light up too high.
It's too far away from the plants and that's why they're leggy because they're reaching towards the light. They're like, oh, please, I need more and they become really leggy. So those are usually the top scenarios that create leggy starts. So you most likely need to get them under a grow light. If there are under a grow light, make the adjustments like we just went over. Now we're on to our verse of the week, which is from Luke 9 and verse 25 through 26. Now I know some of you who are listening to the podcast, based upon the reviews, especially, some of you really enjoy this part of the podcast.
Others of you don't care very much for it and I always find it interesting, but I think as a creator, obviously I'm the creator and host of the podcast, I have to do what sits right with me and my goal is to serve people, which I feel that I give away a ton of free content and value. My goal is to really give you the inspiration and the education and the tools that you need in order to live a homemade and homegrown lifestyle. So that's why I give away charts that are actually in my book and I give away some of them for free so that you can download them and get going, even if you can't afford to get the book or whatever.
It's why I have the website with videos and tutorials and all of that for free, and I also obviously have paid courses, my paid membership. I have paid stuff too. Because I put in 40 to 60 plus hours a week in order to do all of the things that I do, and if I didn't have a way of being compensated for that, then there would be no way that I could give all the way that I do for free.
I know that most of you who are listening to this totally get it and understand that, but I also have to decide for myself, what do I stand for and what do I want part of this to be as well as what people need when they're listening in. So I've gotten quite a few reviews lately on the podcast through iTunes, which I appreciate the reviews, even the negative ones, even if I don't agree with them. I am not going to stop sharing the verse of the week from the podcast. Many of you have written me countless emails and given reviews on how helpful you find the verse of the week, even if you're not a Christian.
I love those ones, and then there's other people who really can't stand it and I'm not quite sure why then they just keep listening to that portion. If it really bothers you that much, it's always at the end, just listen to the beginning, but everybody likes to have an opinion with social media these days and that's just fine. I want to just put that out there because it really does have a point with the verse. So the two verses are Luke 9:25 and 26, and this is the Amplified translation of the Bible.
"For what does it profit a man if he gains the whole world and ruins or forfeits, loses himself because whoever is ashamed of Me and My teachings, of him will the Son of Man be ashamed when he comes in the threefold glory, the splendor and majesty of Himself and of the Father and of the Holy angels". So I have to say that sometimes I will read the negative things and sometimes I'll question or even will find when I'm writing my newsletter.
So I send out, for those of you who are on my email list, you're really used to this. You get my weekly newsletters and on Fridays I send out a newsletter recap where it has a new podcast episode, the new YouTube video, and then usually another applicable article or resource for that time of year that fits in. I always start the newsletter out with a personal story or lesson or thing that's going on in our life or that I'm learning. It's like you would sit down and write somebody a letter and I share a lot of personal things in there, always with the goal that you will learn from my mistake in most cases and, or be inspired.
I really do share more private thoughts and feelings and behind the scenes things in that than I do on YouTube or even social media, or really other capacity. There've been a few times where I've sat down to write something, and I've paused when I was writing it wondering, "Do I share this line? Does this line sound okay? Is someone going to be offended by this?" It usually has to do when it is with my faith, but honestly my faith is a really big part of me, and I don't think that I can authentically and truthfully share the vulnerable parts and the real parts without some time sharing the faith part.
It's never shared with I'm expecting you to do anything with it or to believe the same way I do, but it is who I am and it is at the core of my being. So I can't honestly share things with you if sometimes that doesn't come out in some fashion or another. So sometimes I really struggled with that because I have shared things like having a tubal pregnancy where I lost my first pregnancy and my first child to a tubal pregnancy and how that affected me and how grief ... That was a couple of weeks ago.
If you're on my email list, you read that email probably the week before Easter and how that grief will still sometimes come out, but how thankful I am that the Lord gave me two children after that and that we were celebrating Easter at church and with my family, for my son's birthday and how thankful we were for the good things the Lord has given us and really that was as much as I talked about Jesus during that time. Oh my goodness, the replies back that I got were some very, very sweet replies from those of you who have went through the same experience or you've dealt with grief, or you've lost a child, or you've lost a pregnancy and how even decades later it can still hit you.
Then I had people who responded back so rudely. It was like, wow, I just was sharing my grief with you and the only thing you could see was I had mentioned resurrection Sunday and how that's what offended you. Not only were you offended, you felt it was okay to lash out me in a very rude manner. So I share all of that with you because sometimes I have sat there and wondered, do I write this line and do I share this? Because I know that I'm going to deal with backlash. It's not a question of, or if.
It is how much, and I know that it's going to hit my inbox and I know I'm going to read it, and I know I'm going to have to deal with it. So that's why I wanted to share this verse with you, because I have to remind myself, what does it profit a man or a woman if I gain the whole world and ruin or forfeit and lose myself, and because my faith is such a deep part of me, it doesn't matter if I gain all of the email people, newsletter, readers and the world if they all stay, if I'm not my real self. So I wanted to share that with you, because maybe you have dealt with that.
Maybe it's not that you're writing a newsletter or that you have people who are following you, but even within our own realm, like on social media, like your own personal profiles, if you have social media, or even in real life like with people who don't share the same views as you, and you're scared, and maybe you don't even realize that you're scared, but you're like, "Man, I don't know if I should actually put this out there because I'm going to know I'm going to deal with some pushback."
Of course, I'm sharing this within the context of faith, but really, even within the context of homesteading, we get pushed back on so many things these days. So I just feel like it's important that we remember, and especially myself not to be ashamed and it's okay if people don't agree with me, as long as I am being true to myself. For me, that means being true to my faith, which is the Holy Bible and the word of God.
So I hope this episode was helpful for you. I hope that you enjoyed it and I will be back here with you next week with the next episode of the Pioneering Today podcast. So blessings and [inaudible 00:43:26] for now, my friends.
Sign up to receive email updates
Enter your name and email address below and I'll send you periodic updates about the podcast.


