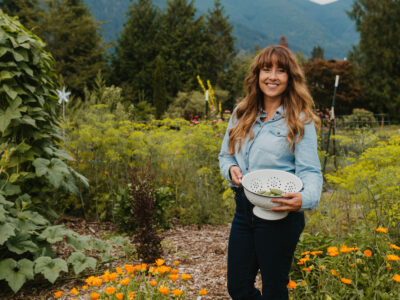
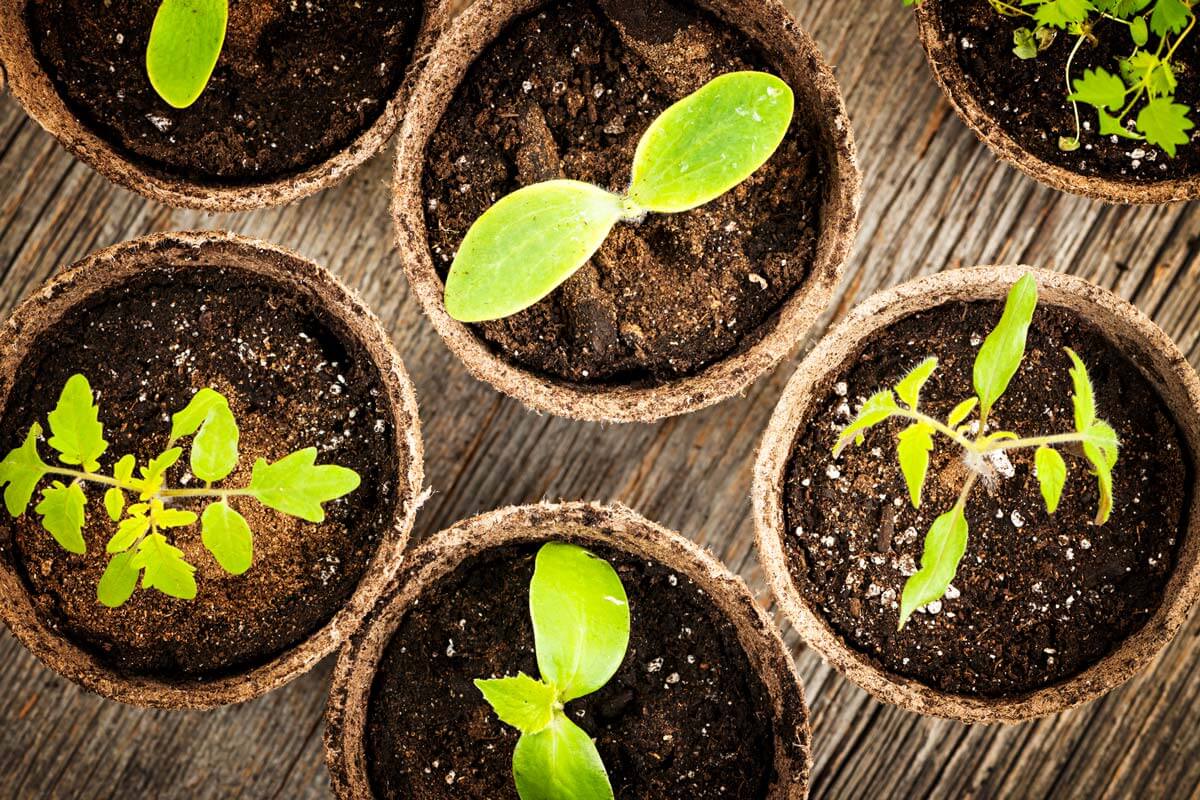
Most often, people think of growing garden crops under cover is only for colder climates, but this method actually works for helping grow your garden in the heat of summer, too. Learn about the different methods for extending your growing season to all four seasons using covers.
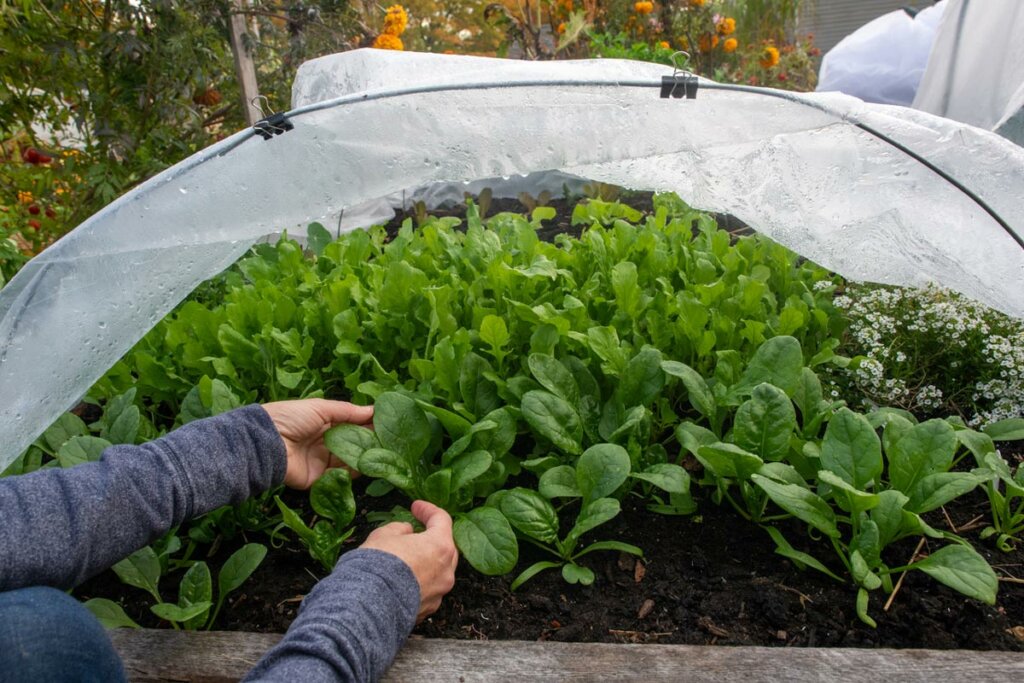
Niki Jabbour, living in Nova Scotia, Canada, has learned to grow year-round in her garden by utilizing row covers and other growing methods without using electric heat.
Tips for Growing Year-Round
The most important things to remember when growing year-round is to know that it's more about light than heat, and to think about the crops that grow best with the temperatures you're dealing with.
For example, we're not trying to grow tomatoes in the dead of winter, but we're growing things like arugula, kale, carrots, beets, and scallions. Things that don't mind the colder temperatures.
How to Grow Vegetables Year-Round
Knowing how to plan your growing year is important to make sure you start your crops at the right time of year to ensure you'll get a harvest year-round.
Most people grow a summer garden that's planted mid-spring. But you don't want to plant your winter garden in the spring because everything will be overgrown before you're ready to harvest it mid-winter.
Likewise, if you plant a garden in winter, the temperatures might be too low for anything to germinate, so you must plan accordingly and work with your temperatures to grow food year-round.
Late Fall & Early Winter Garden
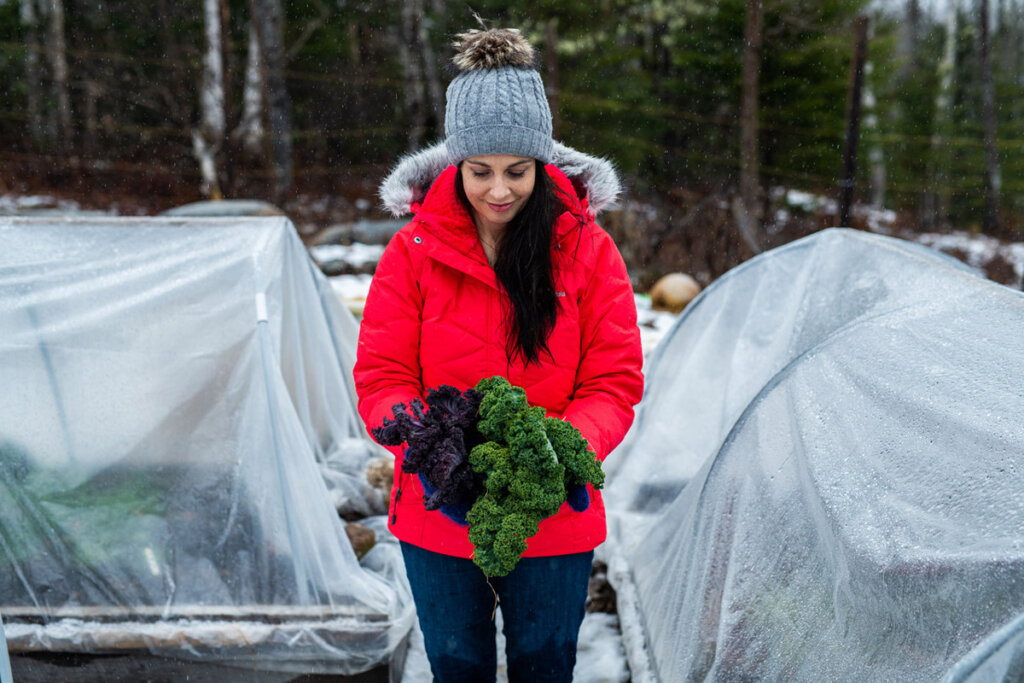
If you're planning for a late fall or early winter harvest, you'll want to plant those crops from early August to late September. Once the crops have matured, heavily mulch them and harvest throughout the winter.
Knowing which crops to grow during each season is the key to success. Plan to grow crops that keep well in the ground such as carrots, turnips, parsnips, and beets.
Late Winter & Early Spring Garden
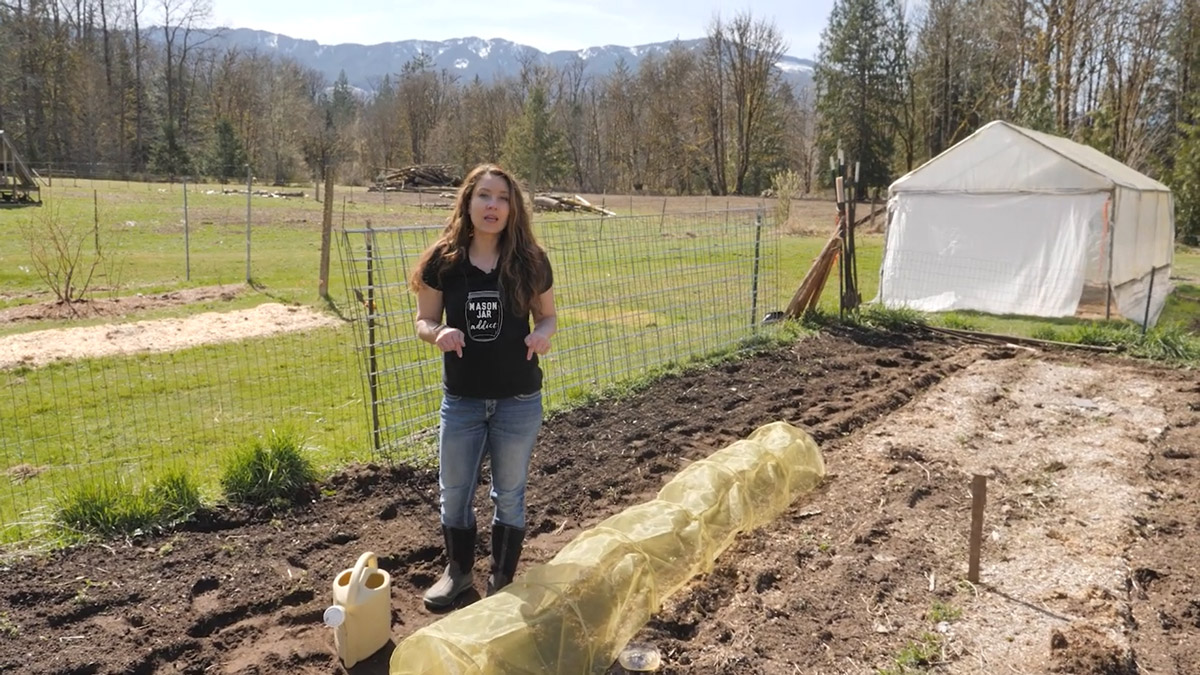
In October, when you have an empty garden bed or two, fill them with hearty seeds like spinach, kale, mizunas (mustard greens), and endive, let them germinate and start to grow, and then cover them with a mini-tunnel and forget about them.
In late winter/early spring, when the daylight hours begin to increase, those plants will come out of dormancy and put on a lot of growth for an early spring harvest.
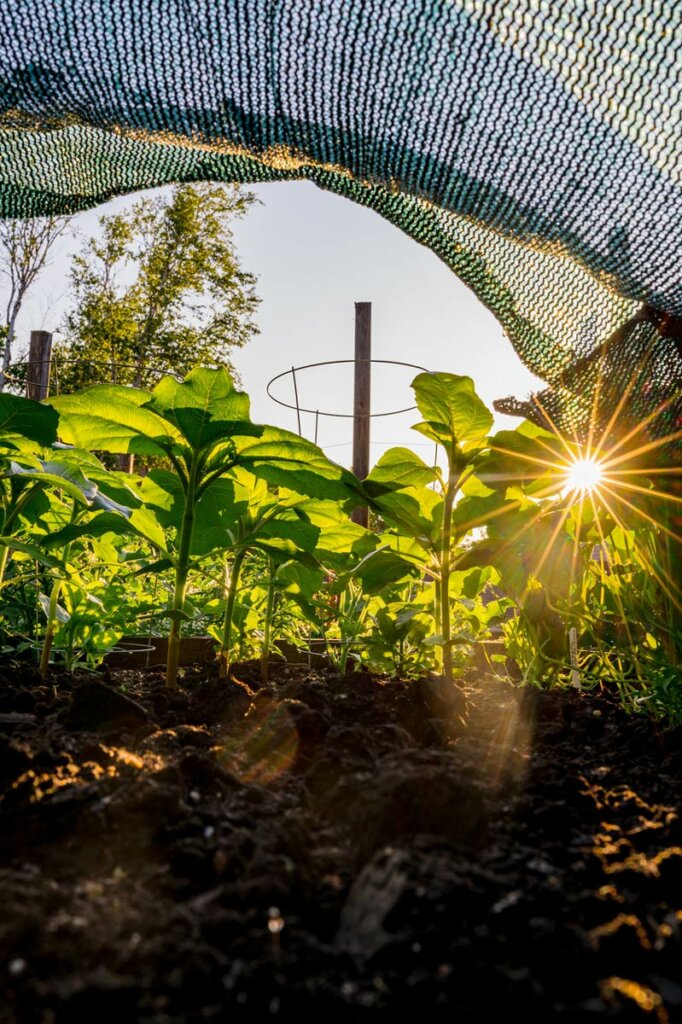
Summer Garden
Using shade cloth and creating structures to cool the ground down during the heat of the summer is also a great strategy to help grow more food.
Niki uses shade cloth when germinating crops in the summer to help keep watering down and allow the seeds to germinate in warmer temperatures than they'd typically like.
Shade cloth also helps protect plants from bolting too soon and changing the flavor profile of those crops (as once crops have bolted or are grown in too much heat, can get bitter).
It's also a good idea to plan how you will preserve food when it's too hot to can so you don't lose your harvest during peak garden production.
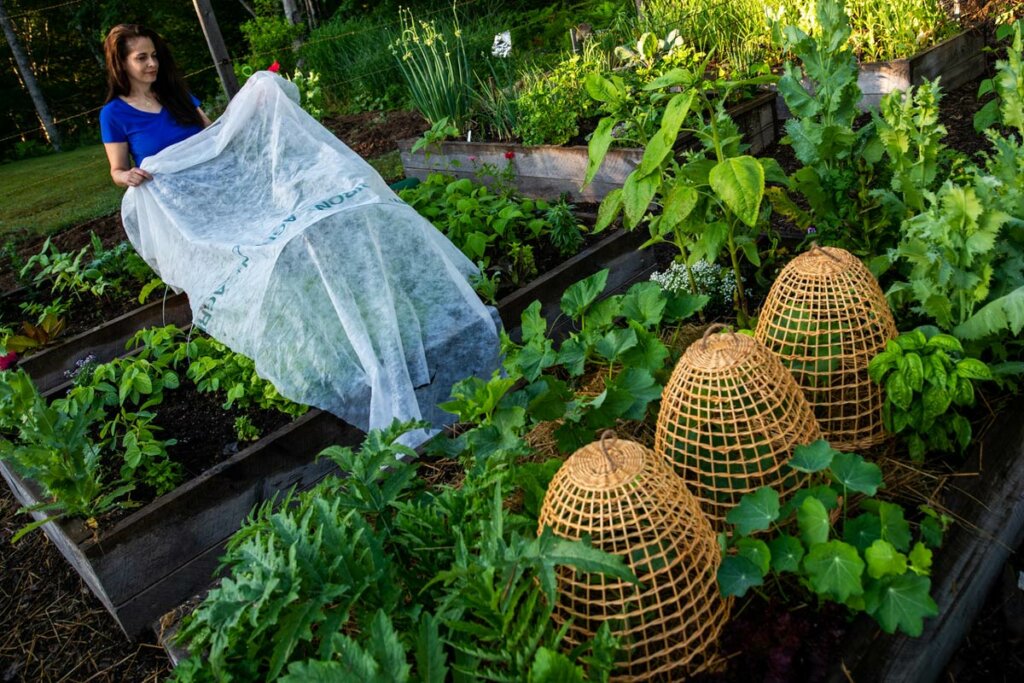
Types of Cold Frames
Cold-frames are such great for extending your growing season. They capture so much solar energy and are fantastic year-round food factories. There are many ways to go about creating a cold-frame, even without carpentry skills.
Straw Bale Cold Frames
Using straw bales as a cold frame is an easy way, without having to build something, to extend your growing season.
Surrounding kale or other veggies in the garden with bales of straw, then adding a covering (such as an old window frame, door or a piece of polycarbonate) will create a cold frame that will extend your harvest well into winter.
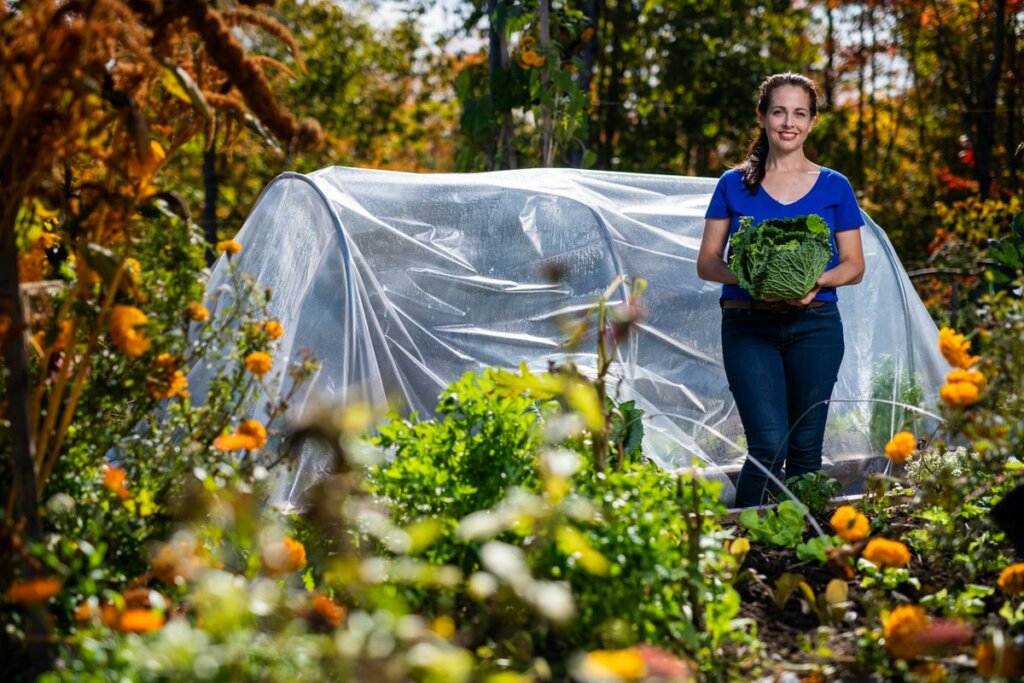
Lumber Cold Frames
Untreated hemlock (what Niki uses on the east coast) is very rot-resistant and makes great cold frames. In the Pacific Northwest, cedar is a better option. 2 inch thick boards are very insulating and the frames can be topped with a piece of polycarbonate.
If you're super handy, you could even build your cold frame box (which sits over your crops on the ground, or on top of a raised bed) at an angle to capture maximum sunlight.
You can top the cold frames with old windows, but glass is easy to break and when it's placed on a hard surface such as wood it's just a more precarious covering to use.
Niki has a funny story of walking out to her garden and seeing deer standing on top of her cold frames! She was glad, at that moment, that she chose to use polycarbonate as it's much more sturdy!
Polycarbonate Cold Frames
Though polycarbonate is the least insulating of all the materials listed, it is able to capture and let in more sunlight, especially when designed at an angle to maximize the sun's angle during winter.
What I do to help increase insulation for my polycarbonate cold frames is to actually hill up dirt and leaves around the outside to allow for more heat retention.
Temperature Difference of Cold Frames
You may be curious just how big of a difference in temperature a cold frame can make for your crops. My own experience hasn't been that great (about 5 degrees difference), however Niki has tested this with her cold frames and has noted the differences as well.
In addition to the warmer temperatures, the cold frames also protect the plants from wind, rain, snow and other inclimate weather, as well as keeping them about
- Straw Bales (with a polycarbonate top) – 8-10 degrees of protection.
- Lumber (with a polycarbonate top) – 6-8 degrees
- Polycarbonate frame – these are the least insulating (Niki doesn't say how much heat these retain!)
Types of Row Coverings
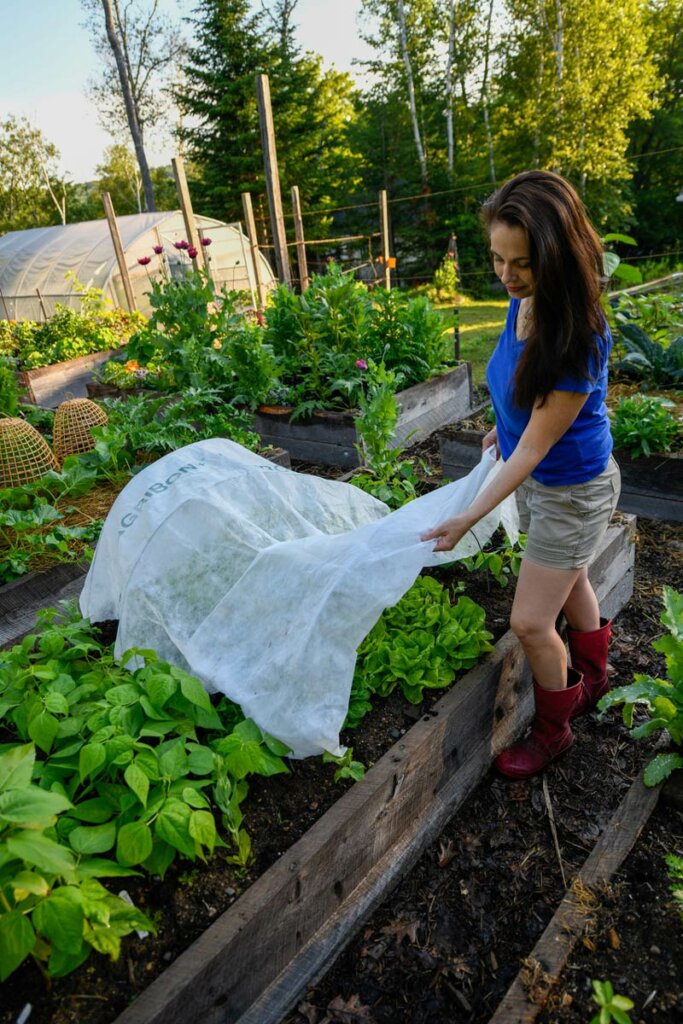
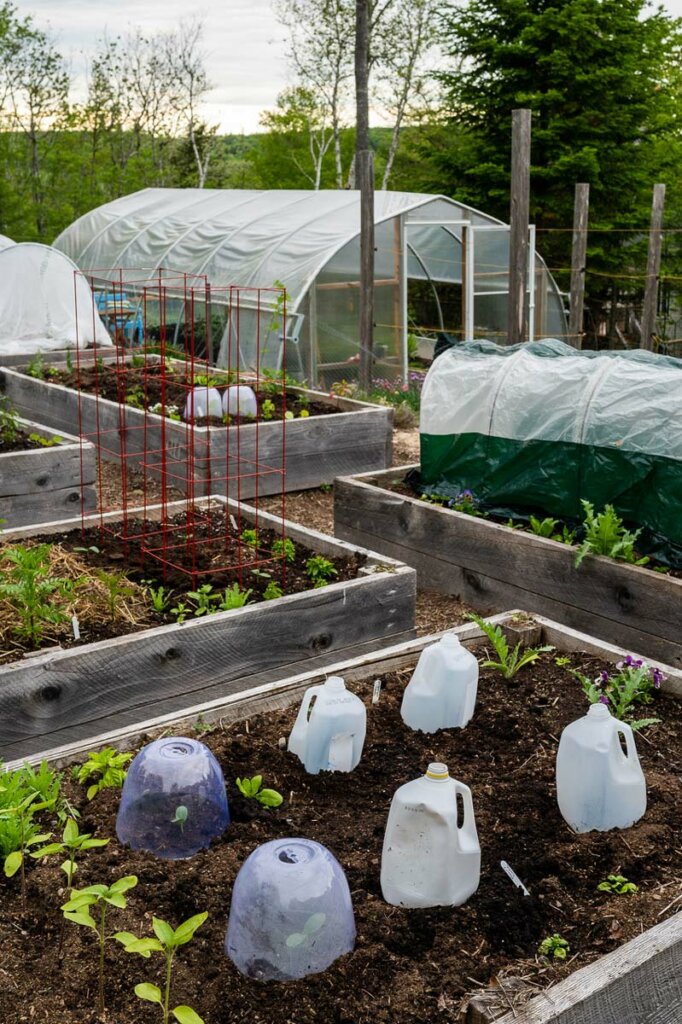
Garden covers are another fantastic way to extend the growing season, especially during the shoulder seasons when the threat of a hard frost is still around.
- High Tunnel
- Hoop House
- Row Covers
- Shade Fabrics
- Cloches
Using high tunnels, row covers, fabrics, and cloches are incredible for being able to plant earlier in the spring and keep crops out later in the fall/winter.
There are also fabric row covers that can be used during the heat of summer to offer a bit of sun protection for plants that don't like as much heat.
Read this post for more info on different types of row covers.
Watering
Watering in the winter isn't usually needed, especially in the northern climates where Niki and myself live. Because, once winter hits, the plants aren't transpiring and don't need the water.
This is almost like a vacation for gardeners because we don't have to do all the work, but we're still reaping the rewards of gardening all winter long.
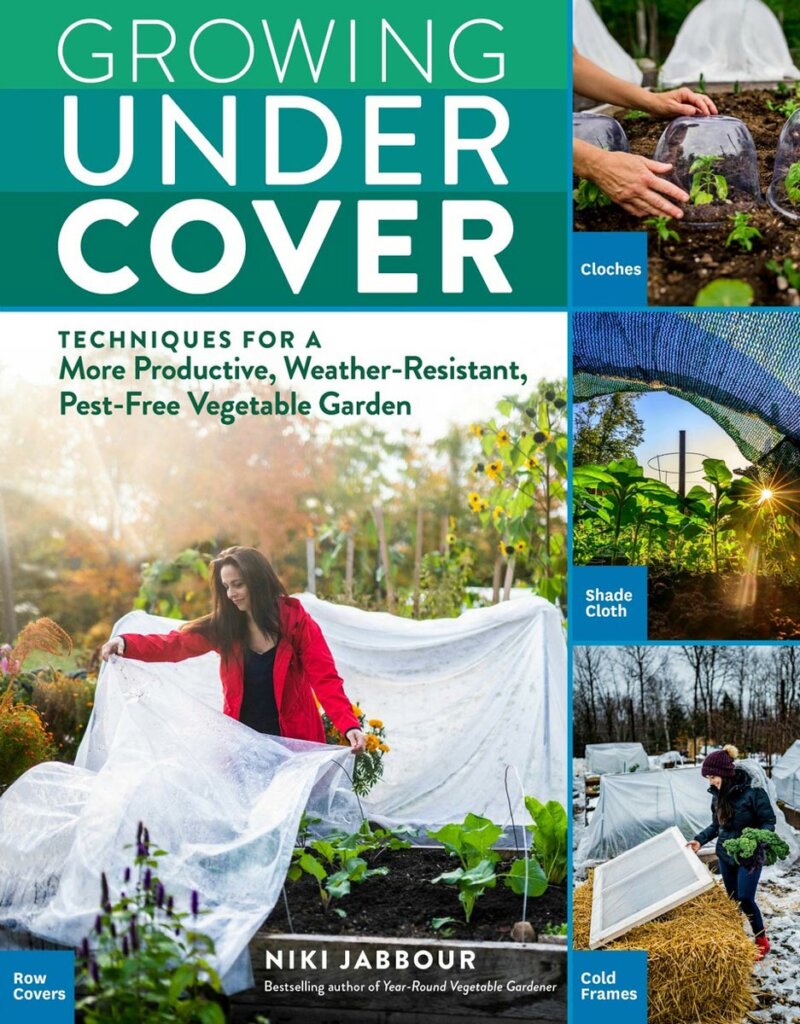
Niki's Recommendations
Niki goes into much more detail about growing year-round in her new book, “Growing Under Cover: Techniques for a More Productive, Weather-Resistant, Pest-Free Vegetable Garden“, so be sure to snag her book, too!
When choosing garden covers, she always says think about your climate and your growing season and know how you want to improve it. If you're just growing a summer garden, you probably don't need a large structure like a greenhouse. (That is a common gardening myth.) A pop-up poly-tunnel could get the job done.
However, if you're going to be growing winter gardens, look into Gardener's Supply, Johnny's Seeds (especially for a metal bender!).
- Accordion row covers
- 6-mil greenhouse poly
- Greenhouse
- Poly-tunnels
- Cloches
- Mesh row covers
- Frost row covers
- Schnop (?) Clamps
Related Links:
- Visit Niki at her website Savvy Gardening
- On Instagram @savvygardening or @nikijabbour
- On Facebook
- And grab Niki's book “Growing Under Cover” here
More Articles for Gardening Success:
- Beginner Gardening Secrets You Need to Know
- 13 Basic Steps to Starting a Vegetable Garden
- The Ultimate Seed Starting Guide
- Best Way to Germinate Seeds – How to Germinate Seeds Faster
- What Are the Best Seed Starting Containers
- Potting Up Seedlings & How to Separate Seedlings
- Direct Sow Your Garden Seed
Melissa: Hey, pioneers. Welcome to episode 305 of the Pioneering Today Podcast. On today's episode, this is a really fun one. We are talking about how to grow food year round and how the addition of using covers is going to help you to do that.
Melissa: Now, typically, people think of when we talk about growing under cover, a lot of times people are thinking just about cold weather or cold climates and using things like a high tunnel or a hoop house, those types of things, extending the growing season into the fall, or maybe warming up the earth in the spring time. We definitely are going to be talking about, in this episode, using those methods, how to incorporate them.
Melissa: But something that is not covered nearly as much is how you can also use covers to your benefit in the heat of summer. That is definitely going to apply to those of you who are gardening in warmer climates. I know inside the pioneering today academy, especially in also my gardening course, I have got gardeners from all over, both the US, which is going to include multiple climates, as well as international, Canada, Switzerland, even South Africa, which is pretty amazing.
Melissa: But using covers in hot months gives a lot of people the ability to grow crops that they normally couldn't. So even though most of the time in our mind, we think of using this with cold weather stuff, it's actually something that you can be putting in the summer, even in a more northern climate like myself. You would be able to extend the growing season during the summer months of things that like to bolt quickly or don't produce well once they get too hot.
Melissa: That allows you to actually grow year round in a lot of instances, even the cooler crops that typically we just can't get to grow during the summer months. So you're really, really going to love this episode. Our guest is Niki Jabbour. Niki is the author of year round gardening growing undercover, as well as Niki Jabbour's Veggie Garden Remix.
Melissa: She's from savvygardening.com. You may be familiar with that gardening website. Niki is just a joy. I love watching her Instagram because she... She lives in a Northern climate as well, and they actually get more snow than I do here. But in the winter time, it is so fun to see her pictures because you see her holding up these huge armfuls of fresh vegetables. And she's literally standing in feet of snow. I almost wanted to say foots of snow, and that's absolutely grammatically incorrect.
Melissa: She's standing in literally feet of snow with a lot of accumulation, and she is able to grow in that very Northern climate vegetables year round. There's so much to be glean from this episode. Niki gave us so many good resources, you guys, on the equipment, just different things like that. You're definitely going to want to check out the episode for today that accompanies this episode... Excuse me, the blog post from today's episode.
Melissa: You'll go to melissaknorris.com/305. melissaknorris.com/305 because this is episode 305, so just the numbers, because we're going to have links to some of the different clips and some of the different equipments to create some of these different row covers. She sent over photos, so many great things you're going to want to go and check out and grab from the blog post that goes with today's episode.
Melissa: But without any further ado, let's dive in to today's interview. Guys, I am very excited for today's guest. I confess I'm a little bit of a fad girl and I am so thrilled to be able to pick her brain. You guys get the benefit of listening in, and I know it's going to benefit a lot of listeners. But this one, I'm like, "Oh, this one is all for me." So without further ado, Niki, welcome to the Pioneering Today Podcast.
Niki: Well, Melissa, I was going to say the same thing about you. I'm such a huge fan of the podcast and listen all the time when I'm gardening. So it's a great pleasure. Thank you for having me.
Melissa: Oh, look at my head swelling. Hopefully my little headphones that I'm recording in will stay on. Well, thanks. That actually just completely made my day. So yay. I think the wonderful thing about gardeners, I feel it's about home setting in general. But I really feel that most are so eager for anybody else who wants to talk about gardening and wants to swap ideas and tips, that it's dangerous when you get like hardcore gardeners together, because we could talk for probably days and wanting to share all the things. So we'll try to keep this in a digestible-
Niki: Six, eight hours. Yeah.
Melissa: ... size episode. Yeah, yeah.
Niki: I think we're enablers. You'll enable me and I'll enable you, and then we'll go spend a bunch of money. How's that sound?
Melissa: Hey, that sounds great. It's like one of those things, like, "Is it really spending money when it's on gardening, things that provide you with food?"
Niki: No.
Melissa: I think you can argue both sides of that coin.
Niki: That's awesome. I totally agree.
Melissa: Yay. For those of you who aren't as familiar with you, which I'm sure is probably going to be very few people in the gardening world, but for those who don't know about you, can you let people know... Today, one of the things we're going to be talking about, I suppose, I'm not letting you tell them, but I will preface this, is we're going to be talking about growing year round in cold or cooler climates.
Melissa: Niki, tell people where you're from and you're able to grow even in a fairly extreme climate. You're able to grow like all 12 months of the year?
Niki: Yeah, I mean, there's never a day I can't harvest from my garden. I'm on the East Coast of Canada in Halifax, Nova Scotia, which is zone 5, 5B maybe. It's getting ever so slightly warmer here year to year, of course. But yeah. So I get a lot of snow, I get a lot of rain. I get a lot of freezing weather and frost. It's a short season climate. And I get a lot of storms like hurricanes and nor'easters.
Niki: But nevertheless, there's always a wide variety of vegetables and harvesting from my garden any day of the year, including even January and February. Probably about 30 types of veggies up there in my cold frames, my mini hoop tunnels, my polytunnel. I don't use any heated structures. I just rely on solar energy. But even so, I can still harvest many, many awesome vegetables year round.
Melissa: Okay. That makes me very happy because I do have a high tunnel. I don't have a heated grain house and I don't provide heat to anything in the garden. So I love hearing that because I think a lot of times people assume, and I did too for a number of years until I just started to say like, "Let's just test the envelope. I'm going to see what I can get away with."
Melissa: I just assumed that you had to have some type of heat in order to grow vegetables in the middle of winter, if you live in a climate that has snow and freezing temps, and is more Northern, because we do have less sunlight. Here in the Pacific Northwest, I feel like we don't have any sunlight in the winter time, but we do have daylight. So I'll be fair. When you-
Niki: Yeah. I like to keep it simple though. When I talk to people, I mean, I could put a bigger system in, I could get fancier, but I want to keep it simple for the DIY-ers like me. I'm not super handy, you know what I mean? I just want to not use any electricity that I don't have to use. I want to not use energy I don't need to use. Like you said, there's still plenty we can grow even in the cold season. It's more about light than heat anyway.
Niki: It's pairing the right vegetables at the right time. I'm not trying to grow tomatoes in January in my high tunnel. I'm growing arugula, and kale, and carrots, and beets, and scallions, things that don't mind the cold temperatures.
Melissa: Okay. When you are growing in cold frames and year round, now I know the time that we're recording this, it's actually just... We're not even quite into summer yet. But if someone is brand new to this, what is the type of prep work, or the bare minimum, what are the things that you would consider the absolute essentials, and how do they go about planning their summer? Because I'm assuming, from my own experience...
Melissa: But I'm also eager for you to tell me, like, "Oh no, there's ways around this, my friend," that I have to start a lot of my cold frame or fall, winter for growing crops, actually, at the end of summer, so that they're at a decent size by the time those spross in really like November and December, which is our darkest time period or shortest daylight hours hit. Otherwise, they're just in this hibernation stage and I feel like they don't really grow again.
Melissa: If they're harvestable size, they can harvest off of them, especially kale. But if they're super small, I feel like in October, and not really large enough to bother harvesting, I feel like they stay alive but they're in hibernation zone until about February. And then they'll start to grow again. Now, do you experience that, or am I maybe doing something wrong?
Niki: No. I mean, there's so many ways to extend your season. For me, if I'm planning for late fall, winter harvesting, a lot of that planting is done anywhere from, depending on the crop, early August through late September. But you're talking about, I would call overwintering. I plant vegetables that I can eat throughout winter. For example, the carrots we eat in winter are planted usually last week in July, first week in August, because you still want them to come to basically an almost mature size by the time the weather has really turned cold. Then I'll deep mulch them and harvest all winter.
Niki: Same with parsnips and beets. But also in September, October, I will often have empty beds and I will just fill those with things like spinach, and kale, and mizunas and endive, and different like seeds for crops like those. They'll germinate and grow a little bit. Then I cover it with a mini tunnel and forget about it. And then, come March when our day length is getting longer and we have more than 10 hours of light every day, those little plants come out dormancy. They wake up and they just push on so much fresh growth.
Niki: So that is a great way to enjoy greens and other types of vegetables in those shoulder seasons. During winter, we're harvesting all the things I planted in August and early September. And then, once winter comes to an end in early March, I'm harvesting the things that overwintered, that we didn't eat during the winter because they were too small. They started growing when we had more light in that early spring.
Niki: And then, we'll eat those in March and April until the crops that you could actually get out and plant in the garden when spring start to come along. So that's a way to bridge that gap between winter and late spring. It's those overwintered vegetables. There's a whole bunch you can seed for overwintering, and then just cover them at the mini tunnel, grow them in a cold frame, grow them in a high tunnel or polytunnel. So there's so many different ways you can extend your season using simple structures and a lot of these cool and cold season vegetable.
Melissa: Okay. That's very, very similar to what I've been experiencing. So that one makes me feel better because I'm like, "Did you break like some magic code that I don't know about?"
Niki: I wish.
Melissa: There's only so much we could push to the garden, but there's quite a bit. Okay. That confirms that I've been on that right path then with my planting times and my experience is very similar. For those who are wanting to get into this and maybe... Like my husband is a wonderful carpenter, so if I can wrangle him away from other projects to be like, "Hey, can you build me this structure?" He's pretty handy. But I know there's a lot of gardeners who either don't have a handy husband or they're not handy themselves.
Melissa: And so, what are some of the most basic, simple, but effective types of cold frames, and using this method, that you found work really well and are really easy for people to put together when they're just getting into this?
Niki: Yeah. That's a great question. I mean, cold frames, I always think of them as year-round food factories, because they're just so insulating. They capture a lot of solar energy, and they're just such a great way to extend your season, especially if you're just getting into it. I mean, you can use row covers and mini hoop tunnels and lots of different types of things, but cold frames are just a classic season-extending structure.
Niki: If you don't have any handy skills at all, and my hand is half raised. I'm maybe 10% handy, 5%. But if you have no skills at all, you could straw bales, and make a straw bale cold frame. You can surround the bed or the crops towards the end of the season. If you already have kale, or leeks, or different things in your garden you want to keep enjoying into winter, you could make a straw bale cold frame by surrounding them with the straw bales and topping that with old windows, or doors, a piece of hard polycarbonate, something like that to still allow that light to get into that structure.
Niki: You can also, of course, make them from lumber. Most of my cold frames, either myself or my husband has made from untreated local hemlock, which is very rot resistant. Two-inch thick boards are very insulating as well. And then, I use just clear polycarbonate for a top. You can use windows, of course, for tops of cold frames, but I have found they obviously break easily. Plus, there's been times I've gone up to my garden in winter and there is a deer standing on top of my cold frame. I think it's mocking me. I don't know why it does that.
Niki: But every once in a while, the neighbor's dog, deer, soccer ball, things... So I prefer non-breakable covers for obvious reasons. But you can make them from simple lumber as well, and just have to screw them into a box. If you're handy, you can make those boxes with an angle to capture maximum sunlight. But if you're not handy, even just a straight box with just totally flat on top with a clear top is still going to help you extend the season and enjoy a year-round harvest.
Melissa: I have done, where I have tested different cold frames, where I have just done them myself. Slapped them together exactly like you said, use straw bales and used old windows. But I didn't really have them sealed up. I just had them resting on it. And so, I took out my little infrared thermometer. I love that thing. Oh my goodness, it's one of my favorite tools.
Niki: So much fun.
Melissa: It's so much fun. And so, I'm like, "How much does this actually give me protection-wise?" And so, I went out in the early morning. It was daylight, but before the sun was up. So that's usually our coldest part. The ground is at its coldest point by then. It's went all night. I found that the maximum amount of protection... Now, again, this could have been because of my construction skills. I just said I did this, not my husband. I found that I got about, at that point, the coldest part of the morning, it was about a five degrees warmer Fahrenheit, five degrees.
Melissa: When I was doing it in Fahrenheit, I thought that matters as far as five degrees difference. But it was about a five degrees warmer inside the cold frame at the coldest part of the morning when it was in the twenties, 20 degrees Fahrenheit, and I would have about five degrees buffer. Now, of course, when daylight hits, and especially if there's some direct sunlight and it's not cloud cover, it would warm up significantly. It would get a lot warmer in there.
Melissa: But have you done temperatures like that, and have you found certain structures... Obviously, I'm sure that the tighter you have it more sealed up, of course it's going to stay warmer. But have you found a general range that seems to be fairly true?
Niki: Yeah. I mean, I'm a little bit of a nerd that way. I love checking structures and seeing what's happening. The structures do... They also create a microclimate on your plant, to cold frame, because it blocks the winter winds which are very stressful on plants because it dries out the leaves so quickly. So it's not just about capturing sunlight and all that, and increasing the temperature. It's also about blocking those cold winter winds, which, again, can rob the plants of heat so quickly and moisture.
Niki: So yeah. I have Lexan cold frames made completely from polycarbonate sides, tops, the whole shebang. Then I have the ones mentioned, the hemlock, two-inch thick boards. And then I make the straw bale cold frames every once in a while, if I have a lot of straw bales and more plants to protect. The straw bale ones, for me, have been very insulating because the straw bales are so thick. And I do have a polycarbonate top that I lay right on top. It's pretty well sealed to the straw. So I don't get a lot of leaking.
Niki: If I push the straw bales really closely together, I find that as the most insulating, eight to 10 degrees of protection really. For the lumber ones with the hemlock, about six to eight degrees. And then, the polycarbonate ones, because they don't have any insulating sides, it's just clear plastic, they are the least insulating, of course. But what I do for those for winter is that I will then [inaudible 00:16:29] up leaves, or mulch, or soil, or even evergreen boughs around the outside of the perimeter of those polycarbonate cold frames.
Niki: You can buy kits, which is really easy for someone who's not handy. That gives them very similar temperature properties to the straw bale frame because it's then insulated so well. So if you only have a polycarbonate cold frame and usually that's a spring/fall structure, you can make it a winter structure too by just [inaudible 00:16:55] up some insulation on the outside and then harvesting all winter.
Melissa: Okay. With my straw bales, if I get a little bit better on tightening things up, I can increase my temperature range. Okay. This'll be fun going in. This will be probably the first year where I ever go and buy a whole bunch of straw bales. It's normally not something I'm going to grab a lot of. But I'm really, really looking forward to upping that game.
Melissa: Here at the Pacific Northwest where I'm at, even in the winter months, we are typically pretty wet. The surrounding ground is so wet that I have not had to really do any watering actually at all during my overwintering or anything like that. But for those who are in a climate where they're just getting a lot of snow and it's not perhaps melting, do you ever have to water or do you find that it's fine, that you don't ever need to do any watering? How does that work with your overwintering plan, especially for maybe more dryer, cool climates?
Niki: Yeah. That's probably one of the most popular questions I'm asked, is how often do I water in the winter? Honestly, very little, if any. Traditionally, when I was doing this 15 years ago, 20 years ago, I never watered. Usually, by the time I closed up my structures for winter, it would be late November, early December, and then everything would be cold until late March of the following year. I didn't have to water because the plants weren't transpiring, so they weren't losing the water.
Niki: As well, of course, these structures do hold moisture. So if there is some warmer days and the plants transpire, the condensation recycles back into the soil and keeps things moist. But with climate change, now I usually end up watering into late December, is probably the last time I water in my cold frames and polytunnel and such. Then the cold frames are usually pretty good until they're empty, which is usually sometime in late February.
Niki: At that point, we're pretty much out of the stuff that we grew for winter harvesting. Then I will clean up the soil and mend it with more compost and start planting again, in which point I do water. So that's probably late February, early March. In the polytunnel, I probably start watering again about the same time, late February, early March. I'm trying to think this year, it was a little bit earlier. We had a February crazy thaw where it got like...
Niki: In Celsius, it was probably 15 degrees Celsius about 70 for two days, and it was so crazy. So I actually went up, I took the opportunity to hook out my hose and water, and then I unhooked it and drained it and put it away again, so when freezing cracked. That's an anomaly. So generally, I'm not watering in winter. I don't have to weed. I don't have to water.
Niki: The deer, the groundhogs, the squirrels, the slugs, they're not around or they can't get to the vegetables because they're protected. So the winter, to me, is just the harvest season. Planning, harvesting, and it's a nice quiet season when I know I still have so much in terms of food flavors and variety up in our own garden.
Melissa: Yeah. I'm with you. I don't have to deal with any pests with those winter crops. Even like on the brassica, because there's no cabbage moths that are out and about. And slugs. Slugs are one of my huge nemesis here. I've already got my beer traps out, trying to get them as soon as they hatch, so they can't breed. I'm like-
Niki: I found eggs yesterday.
Melissa: Oh, did you?
Niki: [inaudible 00:20:05] eggs. They look like crystal balls. Yeah. They're the worst for me too. Even in hot summers, we still have so many slugs, and you probably do too just due to the fact you have a lot of moisture.
Melissa: Yes. We'll have a day, like if it gets really hot, which is pretty rare that we actually even get into the high nineties. In August for like a week maybe, and we're then dying because we don't have air conditioning here. So if it's hitting the high nineties or... It's only been a couple of times we've actually got like 105 here, and usually it's only for two days, hallelujah.
Melissa: So during the day, of course, during those hot temperatures like that, the slugs are gone. But yeah. And then that usually means that we have a really heavy dew, which is great. But that morning, before the sun's up, when that dew's out, yeah, there are still will be slugs out even in mid summer, even if we're hitting like a hundred degrees. Yes. They're very...
Niki: They're the worst.
Melissa: Persistent.
Niki: That's the worst.
Melissa: Those little stinkers. Yes.
Niki: That's not what I usually call them, but we'll go with stinkers. Sure.
Melissa: Yeah. I will confess. There's probably been a cuss word or two that's come out when I've found them decimating a complete plant. But anyhow.
Niki: Yeah. That's a different podcast.
Melissa: That is a different podcast. Slugs are my thing. But that is one of the great things, I have to say, that I've found doing the overwintering and with the cold frames, is very little work on my part, it's all the reward. Because things are mainly in hibernation stall mode, there's no weeding. But I'm also not having to do any type of fertilizing because during the following months here, I still will use an Alaskan fish emulsion concentrate and do some watering, even though I put compost down in the spring and or a winter, sometimes both, just depending on what bed it is and what I've been asking of it to grow.
Melissa: But it's really nice because I'm not doing any of that during the winter months. And I'm assuming you're not either because if you're not watering, I doubt you're doing anything like that for them either.
Niki: No. Like you, I love using liquid fish emulsion, because I'm on the coast as well. I use a lot of liquid kelp or kelp meal as well, just to give my plants a nice boost of micronutrients and plant hormones. So during the growing season, yeah, I'm totally all over that. But in winter time, literally there's no watering, there's no fertilizing, and there's no pests, which is fantastic. It almost feels like a vacation from the garden. I just go harvest.
Niki: But it's such an easy thing to do. I think that's something that many people realize. They might be listening and saying, "Well, that sounds like far too much work." But it doesn't have to be. If you have a couple of raised beds or you build a little cold frame, you can be harvesting all winter long with minimal work and minimal prep. It's just about thinking differently about your planting season.
Niki: You mentioned Memorial Day weekend is the big planting weekend. And that is also here too. It's Victoria Day weekend. That's when many people put their gardens in for the season. But then you think about succession planting. When those initial crops are done, then you're going to plan for fall and winter. So there's a second planting season, but it doesn't have to be complicated. To me, the pay-off is just so worth it. Homegrown organic food in my backyard 365 days a year, it's amazing.
Melissa: Yeah. Like you mentioned too, a lot of times I feel like people focus on the cold frames and the polytunnels, whatever it is you're choosing to use. This is just slightly different in the actual structure. But they all serve the same purpose. But in the spring time, it does allow you to plant earlier because the soil has been warmed up. So even if it's direct sowing, also with transplants, I actually will put my tomato and pepper plants out in my high tunnel.
Melissa: I'm curious if you do this. I will do double... So I'll actually use a small row cover that's made out of poly plastic. So it's really holding it in. And so, if I know that we're going to get a sneaky late frost coming in, or it's a clear night... Clear nights for us mean colder temps. So if all of a sudden clears off, then I'll go out and I'll shut all the walls and the doors that I have on our high tunnel, but then I'll pop a little tiny polytunnel because they're small starts at this point over top of it and do a double insulation.
Melissa: That lets me usually put the tomatoes and peppers outside at the last frost state, which I typically, without any type of that, would not put them out. About four weeks early, basically.
Niki: Absolutely. I think we're doing the exact same thing on our [inaudible 00:24:15] gardens.
Melissa: Okay.
Niki: I do double up. Sometimes I'll use a little cloche, a little plastic cover or a jar. But usually it's just a fleece just like you. I planted them a month earlier as well. Right now my polytunnel is filled with cabbage seedlings that I planted about three weeks ago, that are just starting to come on now, and lettuces, different [inaudible 00:24:35], and mixed lettuces, and spinach, and all these new things I'd planted about a month ago that we'll start harvesting soon.
Niki: And then, when those are finished, I'm going to put out, like you said, peppers and tomatoes, all those heat lovers, about a month before that last frost state, which is probably going to be late May for me really. It changes from year to year, but yeah. So you can absolutely double up your covers in a polytunnel or even in a cold frame. You use fleece, you can float it on little metal hoops, wire hoops, nine-gauge wire, or you can lay it directly on top of the crops.
Niki: But when you have those clear nights in spring, you're often doing that... I call it the spring shuffle when you've got little babies in the garden, because you know the day you plant and I'm sure this is the same, because this is what happens in my garden, with you. The day I plant my tomatoes and peppers, there's going to be a frost. It's 100% guarantee. So that is where these garden covers come in so handy. And that's where the fleece, the row covers, the mini hoop tunnels, all these things can be used to protect your plants.
Niki: If you have a greenhouse, or a cold frame, or a mini hoop tunnel, or a larger tunnel, you can use fleece inside as an extra cover on those nights when there is frost. That's just garden insurance, just to make sure everything comes through that frosty night just fine.
Melissa: Yeah. And then, it also will be because those hard frosts are frosts that are coming in are on clear nights. Then usually the next morning it's I have to get out there once the sun is up though, because I don't want them to cook and have too much of a temperature change. And so, yes, it's definitely a shuffle. It's like morning and evening. I'm always having go out there during that time.
Melissa: And then, with the cold frames, so I'm assuming that yours, you can just take the tops off, or do you completely, when you're doing the hemlock frame, for example, do you just leave those sides up and you just remove the top during the summer months? Or do you completely remove that?
Niki: Oh, no. I leave them in place. I mean, they're pretty sturdy. They're 18 inches in the back, 12 inches in the front, my hemlock frames. So they've got a nice deep angle for capturing maximum solar energy. They're actually sunk into the soil about nine, 10 inches, so just for extra installation as well. Once they're in, they're there for about 10 years, I do take the tops off because they're on hinges and they're easy to store during the summer.
Niki: And then, once all of the crops are finished in mid-spring from the cold frames, basically I will plant a cover crop in that soil just to enrich it, and then dig it under. I might even do that two or three times, something like buckwheat, which is quick to grow and just so great for feeding the soil. And then come late July, if I have a cold frame that I want for carrots, for example, I will start seeding those carrots.
Niki: If I'm growing lettuces, and arugula, and spinaches, and scallions, they'll get seeded up more in late August, early September. But for something like carrots, that can take 60, 80 days, depending on the variety. Those are getting seeded in mid summer.
Melissa: Okay. Awesome. So you just take, for those more permanent structures, you're just taking the lid off instead of trying to do the labor... Okay. That would make sense. That would be much easier and I'm all about making it as easy as possible in the garden-
Niki: Absolutely.
Melissa: ... on myself. Okay. I was just curious so how you were handling that. So I'm glad to hear that it would be similar to what I would pick as well.
Niki: The polycarbonate cold frames I use, and I have a couple different models because I like to test things. If these are available for gardeners in the marketplace, well, I want to know how well they work. Because people ask me for recommendations and I can't recommend something I don't use or haven't used myself. So I've got a couple models. Those, I consider them portable. If I'm not using them in the summer, I will just put them behind my shed until it's time to use them again. So those do get removed from the garden completely. But the wooden structures are permanent and they're left there until they start to rot. It'd have to have been a decade.
Melissa: Okay, which is pretty good for a hemlock. Here I think we are probably wetter than you guys are. I don't think I could get any wooden structure to last that long.
Niki: Hemlock, it's similar to cedar. It's packed with oils and I find it also reduces the slugs. They don't like to climb on it because of those oils. A hemlock board is super heavy. Again, it's so dense and all those oils in it. So I find it does last much longer than pine or spruce wood, for example.
Melissa: Yeah. Typically, here I've used cedar. I'm going to have to look and see if you guys have a different species of hemlock.
Niki: We do.
Melissa: You must because our hemlock here is like junk. Seriously, it's good for nothing.
Niki: That's too bad.
Melissa: And so, when you're saying hemlock, I'm like, "I wonder if they have a different variety because that is complete opposite of what our [inaudible 00:29:06] is here. But Cedar is our go-to, is the go-to for our local wood sources, I should say, and stuff.
Niki: Cedar's great, but it's very expensive here, which is why I use our local hemlock, which is very similar in its rot resistance and the longevity. But it's far, far cheaper than cedar.
Melissa: Good to know. Okay. So if you're on the East Coast and have varieties like Niki, look at hemlock. If you're on the West Coast, the Pacific Northwest area, our hemlock here is not going to be ideal. I think you will be sorely disappointed if you try to use it. But if someone has had a different experience, please do let me know. I would love to hear it.
Melissa: Speaking of, because I'm the same way, especially if I'm moving into something that I haven't done before, or don't have a ton of experience, I want to know, what have you tested and what are some of these best resources, if I'm going to go and buy more of a do-it-yourself kit, or even your resources that you happen to like as long as it's not a local store that doesn't ship or something, for getting some of the materials that you're using?
Melissa: Do you have a favorite pop-up polytunnel or different... Because I've tried with doing row covers and polytunnels. I've tried a lot of do-it-yourself ones where I'm putting sticks in the ground or doing different things like that. And for me, I actually have an Accordion. I have Accordion ones that I just bought from Amazon, quite honestly. For me, those have lasted and actually held up better through wind and rain. We don't get hurricanes here, and I probably don't get the snow...
Melissa: If we get a couple of feet of snow, it's usually gone within three to four days. So mine aren't having to go through feet upon feet of snow for prolonged periods of time, as far as weight. But if you have any like, oh, these are the ones that I feel is the absolute best, or this is my favorite place to go to get supplies, I would love to have those for listeners.
Niki: Yeah. I mean, my polytunnel itself. For example, if you're looking at structures, especially a larger structure, because there's a lot of inexpensive, like you mentioned, pop-up type structures you can buy, I would first think about where you live and your climate and how you want to use it. If you just want to extend your season or grow summer vegetables like a bumper crop of tomatoes and peppers in the Northern area, using one of these structures, well, something maybe that's not quite so strong is fine, like a pop-up type of polytunnel.
Niki: But if you want a winter harvest, like I do, and you want something that's going to last a long time, you're probably going to have to buy a very high quality either greenhouse or polytunnel. Mine came from a local greenhouse supplier, my polytunnel. It was designed by a gentleman I knew who just retired. But he's this greenhouse expert, and has been for 40 years. I knew he designed the structure, so that's why I bought it.
Niki: But I use so many other types of materials, like the cold frames. I have ones from Gardener's Supply. Johnny's Seeds is where I get a lot of my row covers and plastics for the greenhouse. I also got a metal bender from them as well, so I can bend half-inch metal conduit pieces-
Melissa: Oh.
Niki: The 10-foot long ones. Yeah. Oh my gosh. It's a game changer.
Melissa: Oh boy.
Niki: Because they're so strong, right?
Melissa: Yeah.
Niki: I use PVC for hoops as well in my garden beds. But it happens PVC isn't as obviously strong as metal. So I have a metal bender that's fantastic. Mini hoop tunnels, I have an Accordion one as well, which is great. But it doesn't stand up to snow load. So for me, that's more of a spring, fall, early winter structure. I make most of my own mini tunnels, but, again, Gardener's Supply, I have one from them as well that's made with PVC pipes are popped together. Takes about 10 or 15 minutes, and then it's got two or three covers. You can switch out depending on the season and the application for it.
Niki: 10 or 15 or 20 years ago, when I was started doing all these different types of structures, you couldn't buy them. You couldn't find cold frame kits or mini hoop tunnels. But now so many different companies are selling them, which is fantastic. Again, before you buy, think about your goals and then buy something that's going to help you meet those goals.
Melissa: Okay. I love that. I actually have a question for you, going back to protection, and temperatures, and all of that fun stuff. You found for maximum... When you were just talking about a row cover or a tunnel, have you found that the fleece fabric versus the actual greenhouse poly, which one do you feel actually gives the maximum, or are they equal, of frost protection?
Niki: Well, I mean, it's hard to exactly answer that question because, as you know, there's different types of fleece. There's lightweight, there's medium weight, there's heavyweight. But for example, I wouldn't use heavyweight fleece in my spring garden to protect tomatoes because it blocks too much light, unless you were just putting it on in the nighttime with a risk of frost and taking it off in the daytime.
Niki: If you're thinking of winter harvesting, then I'm using a six-mil greenhouse poly. I want to use basically as little plastic in my life and my garden as possible. So when I invest in a plastic material for my garden, I want to buy something that's going to last for a super long time. And then I can recycle it once I'm done with it, once it starts to fall apart or rip and things like that. Greenhouse poly, again, I buy the six mil. It's a four-year greenhouse poly that lasts about six years for me with my relatively gentle use.
Niki: It's UV treated. It's UV stabilized so it doesn't break down. I mean, a lot of people ask me about using things like... If you're painting your house lately, you might find you can get the plastic tarps for inside the drop [inaudible 00:34:22]. Well, those are like one and a half mil thick usually, and they last for like a week or two in your garden before the UV breaks it down. So I would rather use the greenhouse poly. It costs a little more, but it lasts so much longer, and it is more insulating.
Niki: So if I'm comparing six mil greenhouse poly and an average row cover, which should be lightweight, which is probably what people would buy from their local garden supply stores, the poly is going to give you a better insulation by a couple degrees, for sure, and better installation against frost. Now, for winter harvesting, I will often use a row cover and then cover that as well on top of the tunnel with the plastic for a double cover all winter long.
Niki: That's very insulating, I find, for most types of vegetables that I harvest from my raised beds during the winter. But just for spring, for light frost protection, you can use the fleece. If you're trying to plant things like cabbage, and broccoli, scallions, arugulas, things like that, six weeks early in the season, then I would use clear plastic, like a greenhouse plastic in your garden. That'll, I think, give you the best results.
Melissa: Okay. Awesome. That makes a lot of sense. That's so funny. I bought the six ml greenhouse plastic, and we used just an old... My high tunnel is an old carport that you buy from Costco. It was a steel frame.
Niki: Love it.
Melissa: And so, we just bought the fasteners, and I'm like, "Well, it's pitched. I can actually walk in this. It's 10 by 20. I'm going on year eight, so I know that I'm probably going to start to have some breakdown pretty soon. I think part of it might be we don't get a lot of... I mean, we'll get daylight, but we don't get a lot of sunlight. So maybe that's helping me extend the life. But I love that you gave the... If you buy, yes, it is more expensive, but not in the long run because it's going to last so much longer.
Niki: Yes. Yeah. One of the things I did... I have a greenhouse supply store near me where they sell rolls of greenhouse plastic to the garden centers and spin the nurseries all around. So I will go in there sometimes and they have rolls that have been damaged in shipping and they're half price then. So I can get a roll of like 30 by 150 for half price, maybe a hundred dollars or something. And that's going to last me about 10 years because I'll cut it into strips I need for my mini tunnels, which usually it's probably depending on the mini tunnel. 10 by 14 or 10 by 15.
Niki: Again, I can get so many tunnels out of that. Each piece of that is probably going to last me six years, seven years with light use. So it lasts a very long time. It's great if you have like community garden, or you're part of an urban garden, or a school garden. Buying a roll and then splitting it up amongst everybody, it's just a great way to save money and make sure everybody has a high-quality product for season extension.
Melissa: Oh, that's fantastic. We do have a school garden. I'm going to get ahold of them and see if they want to go in.
Niki: Sweet. That's the thing for those metal benders, if you're going to make metal hoops. You buy one from a place like Johnny's and you can make so many metal hoops. It takes one minute to get these beautiful four-foot wide metal hoops. And if you had, again, an urban garden or community garden, if you had one for everybody who rented the spaces, they could all use it to make their own hoops. It gets a lot of use and then it's really worth the investment.
Melissa: Okay. I love that tip. Now, we bought, where I screwed them in because it was a steel frame and it was like pitched roof straight up and down, not curved, when we made our high tunnel. For when you're bending the steel ones yourself, how are you fastening the plastic to that? Do you have a favorite fastener that you found worked just the best?
Niki: Oh my gosh. I've spent years looking for the best fasteners. I mean, and I ask the craziest questions when I'm going to different places, about clips and different things. I mean, I've used everything. I used to make my own for holding the plastic on my mini tunnels. I would just make little stick clips. But now, again, Amazon has snap clamps. You can buy snap clamps in different sizes, and it's super cheap. You can buy packs of 10 or 12. I've stopped making my own because buying them is just so much easier and quicker. And it's super inexpensive, as I said. So I just buy snap clamps from Amazon.
Melissa: Okay. Awesome. Guys, if you're listening to this, because I know oftentimes I listen to podcasts, I'm a podcast junkie. But I listen to podcasts when I'm gardening, when I'm doing the dishes, when I'm out for a run, things where my hands are busy and I can't actually stop and scroll or write something down and I'm like, "Oh man, what was it they just talked about?"
Melissa: So we will have in the blog post that accompanies this episode always detailed out, and we'll have links, and Niki has sent photos. So don't worry. You'll be able to go and access that later. And it's all for you in one spot, because I know at this point, if I was listening to this podcast myself, I'd be like, "Okay, where do I go and see all of these things that you guys are actually talking about that I want to go get?"
Niki: That's so helpful. That's awesome.
Melissa: Yeah. Okay. For using the cold frame, doing different cold frame gardening and extending that gardening season really almost all year, because as we talked, we're using it in the spring, we're using it in the fall, and we're using it in the winter. Now, I don't have this problem, but for any listeners who are still hanging out with us, who are like, "Well, I have the opposite problem of you guys. I live in a very hot climate. And so, I need to provide shade and I actually need to cool my plants down. Can you just use shade cloth and pretty much just reverse what we're talking, about except you would create shade structures to help cool the earth down or to provide shade so that you could maybe grow some cool weather crops during what would typically be too hot in the summer months?"
Melissa: I have not personally experimented with this, but I'm curious if you had, or if you've had reports because people know you do this so much. Has anybody just done this in the reverse and had success? Do you know?
Niki: Yeah, absolutely. Actually, you should [inaudible 00:40:05] to make mini hoop tunnels all the time in summer. Even here in my zone, 5B garden, on the East Coast of Canada. This is a whole section Growing Under Cover, my new book, because shade cloth, I think, is one of the most undervalued garden covers out there. So when I mentioned that I am sowing carrot seeds in late July, early August for my winter harvest thing, I mean, in July, let's be honest, the soil is dry and the weather is hot, and I don't want to be watering my newly planted carrot seed beds or in a cold frame twice a day. I just don't want to.
Niki: So I will often make a mini tunnel with all the little hoops we talked about, either metal or PVC or wire. I've done that in new seed bed. And then I'll hang a piece of shade cloth. That just helps reduce the ambient temperature underneath. It helps keeps the soil moist. So I don't have to water hardly at all. Like every maybe three or four days, I'll get out there and sprinkle the soil.
Niki: And then, once the carrots germinate and start to grow, I'll remove that shade cloth. But that's just a simple way to start so many types of seeds in mid to late summer, if the weather is still hot and dry. But I also use shade cloth in late spring because things like spinach, and arugula, kale, lettuces, they bolt, as I know you've probably experienced.
Melissa: Yes. Yes.
Niki: They switch from vegetative growth to flowering, which may be pretty for the pollinators and great if you want to collect seeds. But it changes the flavor of those crops. They become more bitter and less palatable, and you're getting a shorter harvesting window. So I will use shade cloth over top those vegetables. Usually mid to late spring, I'll start to put a little bit of shade cloth when they're approaching the size that I want to harvest them. It'll slow down the growth a bit, but it also prevents bolting for about three weeks or so.
Niki: So I can enjoy a much longer harvest of those crops that don't love the switch of the spring weather when it goes from pretty warm to hot, which could happen like a flipping a switch here in Nova Scotia. So shade cloth, I use it for preventing and delaying bolting, and I use it to established mid-summer crops as well.
Melissa: Okay. I'm so excited because I was not going to do a spring planting of daikon radish because we'll get like one freak week where it's hot, and daikon for me, it bolts faster and worse than spinach. I don't know if [crosstalk 00:42:08]-
Niki: Totally.
Melissa: Yeah. As soon as... I'm like, "[inaudible 00:42:12] daikon."
Niki: I mean, sure. When I did spring daikon, I still don't expect to get those huge roots. But they do better for me in fall. But I will get a crop of baby roots and those delicious leaves when I plant them in spring using a shade cloth. It's amazing.
Melissa: Oh yeah. I'll try it, because I wasn't even going to do them this spring. I'm like, "This is just pointless. I'll just wait and do them as a fall crop." But I'm excited now. I actually have to get shade cloth. So funny. I have all fleece and the six ml poly. I don't actually have any shade cloth material. So that's something I'm going to have to get and get the watering part for getting the things to germinate because I'm like you. I'm planting really the carrots.
Melissa: Even the cauliflower, if I'm going to direct so, I need to do it the end of July. Yeah, it's the battle of I'm watering. I swear, it feels like three times a day in order to keep the seed bed really, really moist. Okay. I'm actually quite excited about that. Who would have thought that would have... I'm just maybe [crosstalk 00:43:10] about that.
Niki: If you sound like me, excited about shade cloth. I'm like, "Oh my gosh, this is so exciting." But I totally get it.
Melissa: Yeah. All right. Great. Okay. Those are phenomenal tips. Yes, please tell everybody about your new book. So that if you're wanting to use these types of implements, Niki has a book that goes into much greater depth than obviously we could just do a singular podcast episode. Also, if there's any one last big takeaway or thing that you just want people to know about Growing Under Cover that we didn't quite cover yet, your book.
Melissa: And then, also where, if they're not, that they can follow along with your gardening journey and see all the things in season and as you're them, as well as the really cool photos and giving it away, a view out in feet of snow harvesting all of these fresh vegetables.
Niki: Yeah. There's so many people gardening now, and there's so many gardeners that are very skilled. They're extending their season, they're doing all these different things, they're growing different types of global crops. So I would say if you're even new to vegetable gardening, this is something anybody can do. You don't need all the types of covers, especially if you're new to gardening. Start small, maybe with a row cover.
Niki: You mentioned a few times they're so handy in the garden for spring, for fall. You can even use those in summer to create some shade as well if you're seeding in summer for late season harvesting. So I would start with a row cover. So start small. If you have been gardening for a couple of years, maybe you want to start with a cold frame. And then you'll come up with a little garden cover essential kit for yourself, and it'll really help you just grow more food, reduce pest problems, because I use covers as well to keep the deer, the groundhogs, the squirrels, the chipmunks, and all those other types of pests out of my vegetables.
Niki: Again, they're garden insurance for me. So if you've had issues with your garden in the past, whether it's cabbage worms, or potato beetles, or deer, you can use different types of garden coverage to prevent that. Of course, in Growing Under Cover, I delve into that very deeply. In terms of finding me, I am on Instagram, of course, where I post far too often lots of tips and pictures from my garden, as well as Facebook, and Twitter. My website is savvygardening.com. We have over a million and a half visitors a month who join us there to get our gardening tip.
Melissa: Oh, awesome. Okay. Of course, in the show notes, we'll have links to all of these resources too. On Instagram, is it at savvygardener or is it actually your name? Which handle is best?
Niki: My handle, nikijabbour is where I post daily, and I also do maintain the savvygardening one too. So nikijabbour, savvygardening, you can find me at both of those on Instagram, as well as on Facebook and Twitter.
Melissa: Okay, awesome. Well, Niki, thank you so much. I have a feeling this is just going to be the first of many visits that we have. So thank you so much for coming on and sharing all of this with the listeners. Really appreciate it.
Niki: Thank you, Melissa. It has been an absolute pleasure to finally chat with you after being a fan for so long. So thank you again. You have a great growing season.
Melissa: Yes. You too. And everybody else will now as well from listening to your fabulous tips. So thank you.
Niki: Thanks.
Melissa: Was that not an amazing episode? I hope that you guys enjoyed that one as much as I did. Gleaned so much good information there, and I'm very excited to be trying out even more of the techniques that Niki has shared with us to increase our own fresh food production year round. Even though I always like to push the boundaries and grow as much fresh fruit as possible throughout the months of the year, I know that preserving our food from some of the spring summer and even the fall harvest is also really important, and the only way we'll be able to enjoy specific crops all year round, is by doing food preservation methods, because you could only push the envelope so far, even using row covers. It's not going to enable me to be able to grow my summer crops into the winter months.
Melissa: I am going to be doing a free class on helping you develop your preserving plan as well as going over different types of food preservation. I would love to have you join me for that class. It is going to be held on June 9th, but you can snag and reserve your seat now. You can go to the blog post that accompanies this episode, or you can go to melissaknorris.com/harvestplan. melissaknorris.com/harvestplan.
Melissa: That will take you to the page to register for this upcoming free class. I can't wait to see you there, and I can't wait to be back here with you next week on our brand new episode. Blessings in mason jars for now, my friends.
Sign up to receive email updates
Enter your name and email address below and I'll send you periodic updates about the podcast.