Melissa K. Norris
  • Start Here
  • Podcast
  • Articles
  • Shop
    • Books
    • Classes
    • General Store
  • In Person Workshops
  • Academy
Log In

How to Dry Fresh Herbs at Home 

September 1, 2022 by Melissa Norris 17 Comments

Learning how to dry fresh herbs at home is easy, and there's no replacement or substitute for doing it yourself. Learn the best methods for drying herbs at home in this post!

dried herbs in Mason jar on counter

Growing an herb garden is an excellent place for a beginner gardener to start, and making your spice blends at home is a frugal way to save on your grocery bill.

Why I Love Growing and Cooking With Herbs

When drying your own herbs, you know that they haven't been sitting on the shelf at the grocery store for years, and your food will taste much better because you are using ingredients from your garden. 

Cooking with fresh herbs is incredible. I love adding fresh basil before serving my homemade tomato soup, and dill to this Ukrainian Borscht recipe, or having rosemary, thyme, and sage on hand to make marinated cheese balls. 

[adthrive-in-post-video-player video-id=”EPJiUO15″ upload-date=”2022-08-29T23:33:24.000Z” name=”Secrets to Drying Herbs With This Centuries Old-Method for Stronger Medicinal Properties.mp4″ description=”Learn how to dry fresh herbs at home to use all year long.” player-type=”default” override-embed=”default”]

The depth of flavor is so much more than the dried version. However, if you live in a climate that has cooler winters, then not all of your garden herbs are available year-round. 

So like any true Pioneer, we're preserving our herbs for use during the winter. When cooking with dried herbs, I put the herbs in at the end of the cooking time to maximize the flavor.

If you're looking for more of a fresh herb flavor, try preserving herbs in salt following this homemade celery salt recipe or this recipe for preserving fresh basil.

A pot of basil on a deck.

When to Harvest Herbs

It's crucial to know how to prune and harvest herbs correctly because you want to get the most flavor out of your herbs.

As an herb grows, it has the most intense flavor in the leaves just before it flowers. If you aren't ready to harvest, it's best to clip off the flower buds to keep the plant from putting its energy into the flowers.

The best time of day to harvest herbs is in the early morning. Herbs have the highest concentration of oils in their leaves at this time of day. You want to gather right after the dew has dried but before the sun begins to heat the air and plant.

Basil is the exception to this rule and can be picked later in the morning.

Fresh celery leaves in a colandar.

How to Harvest Herbs

The part of an herb used for cooking is generally the leafy part. I find it best to use scissors and cut off the entire stem to prevent the leaves' oils from rubbing off on your skin. Minimally handling the plant allows oil to retain more in the leaves when needed.

Lightly rinse the herbs to remove any dust or other unseen debris. I'm sure you practice organic gardening at home, so we don't have to worry about any chemicals or pesticides.

Place herbs on paper towels to absorb the excess water and dry completely.

Bundles of fresh herbs laying on a wooden table.

Drying Methods Used to Dry Herbs

There are several ways to dry herbs. The two ways I prefer are the hanging method and using a dehydrator.

  • Dehydrator – This is the method I use most because of our damp weather in the Pacific Northwest. After a ton of research, I purchased my Nesco Square Dehydrator due to its design to hold more food per tray than the circle varieties, and I liked the price point. I've had my Nesco for more than five years and love it. We've dehydrated fruit leather, jerky, candied apples, and herbs. I've run it for two days straight without any problems, and it's extremely quiet. You can also purchase mesh tray liners here.
  • Hanging Method – This method (also known as air drying) requires no special equipment, and anyone can do it. 
  • Freezing – Freezing is an option that some people find retains more flavor. You can add frozen herbs directly to your food when cooking, which works best in foods such as meats and vegetables.
  • Oven Dry – I don't recommend drying fresh herbs in the oven, as most ovens' lowest setting isn't low enough to allow the herbs to dry without burning to a crisp.
Bundles of fresh herbs tied with twine and hanging upside down to dry.

How to Dry Fresh Herbs – Hanging Method

Tying the stems together in this method is critical. Moisture content reduces as the herbs dry, and they shrink together. Another vital part to remember is to hang them upside down. Gravity pulls the essential oil into the leaves, which is the part we want to keep.

Supplies Needed

  • Fresh Herbs – Make sure your herbs are freshly cut with no spots or bruising on the leaves.
  • Twine, String, or Rubber Band – You'll need something to secure the stalks together.
  • Dry Location – A dry location out of direct sunlight with plenty of airflow is necessary for the best drying environment. Pro-Tip: If you don't have a place away from sunlight, use a paper bag to cover the herbs as they dry. Paper bags will also protect the herbs from dust that may settle onto them as they hang to dry. Simply create a hole in the bottom of the bag for the stems to poke through and hang the bag around the herbs.
  • Hook or Nail – This is needed to secure the upside-down bunch of herbs. 

Instructions

  1. Tie the ends of four or five stalks together.
  2. Hang the bunches upside down in a warm, dry area, out of direct sunlight.
  3. Allow herbs to dry until the leaves crumble at your touch.
  4. Remove the leaves from the stems, keeping them as whole as possible (this allows for more flavor when it comes time to use them).
  5. Store the dried leaves in an air-tight container (you know how I love a good Mason jar!).
  6. Label contents of the container.

Note: Moisture content and climate will be factors, and it could take weeks to months for herbs to dry. Just be patient and use the paper bag trick if you're concerned about dust or debris.

Raspberry leaves on a dehydrator tray.

How to Dry Fresh Herbs – Dehydrator Method

Supplies Needed

  • Fresh Herbs – Make sure the herbs are fresh with no spots or bruising on the leaves.
  • Food Dehydrator – Any dehydrator should work. If you have a Nesco like mine, try these Nesco screens. Herbs shrink as they dry, and these screens keep them from falling through the cracks.

Instructions

  1. Place herbs in a single layer on the food dehydrator tray or drying rack, ensuring they aren't touching.
  2. Herbs dry best at 95° F. If you live in an area with high humidity, you may need to increase the temperature slightly, but try to stay as low as possible to maintain as many nutrients as possible.
  3. Dehydrating times for herbs will vary depending on the size of the leaves and the moisture content. Some herbs will dry in 12 to 24 hours, and others may take several days.
  4. Herbs are dry when they crumble at your touch.
  5. Store the dried leaves in an airtight container.
  6. Label contents of the container.

Pro-Tip: Herbs don't transfer flavors when drying, so you can dry them together. I have dehydrated four trays at once with chocolate mint, spearmint, oregano, basil, and thyme.

How to Tell When Herbs Are Dehydrated

Take a leaf between your thumb and pointer finger to test if the herbs are dry. It should crunch and crumble when pressed.

If you're unsure whether herbs are dry, you can take them out of the dehydrator and place them immediately into a ziptop baggie. Seal the bag and watch for any condensation to form on the inside of the bag. If you see any moisture, they're not dry yet.

The smaller the item, the faster it will degrade and lose its flavor. Leave the leaf in its largest form for storage and grind it up before use.

Dried herbs in a mason jar.

How to Store Dried Herbs

After the drying process, it's time to get them packaged in containers and stored on the shelf. It's best to keep dried herbs in a dark, cool, dry place to retain the most flavor and extend the shelf life.

Store herbs in an air-tight container. I prefer glass jars as plastic containers seem to affect the flavor of the herbs over time.

Mason or Weck jars work well for herbs. Make sure to label the contents of each container.

How to Use Dried Herbs

Here are my favorite herb blends to make (including FREE printable labels for the jars!).

Have you dried herbs at home? Share your experiences below! Especially if you have any favorite herb blends to share.

A woman pointing to a basil plant where it's starting to flower.

More Posts About Herbs and Their Uses

  • How to Prune Herbs & Perennials for Maximum Growth
  • Medicinal Kitchen Herbs (6 Herbs You Should Grow)
  • 8 Medicinal Herbs and Their Uses for Growing an Herbal Tea Garden
  • Homemade DIY Bath Salt Recipe Use Herbs or Essential Oils
  • 7 Ways to Use Medicinal Herbs at Home
  • 7 Herbs for Natural Remedies Your Grandparents Used

Filed Under: Dehydrating, DIY Recipes & Tutorials, Food Preservation, Natural Medicine Cabinet Tagged With: dehydrating, DIY recipes & tutorials, gardening, Herbs, Pioneering Today, prepper, preserving the harvest, survival

How to Plant Strawberries + Tips for Success

May 18, 2022 by Melissa Norris 32 Comments

Strawberries growing on the vine.

Take out the guesswork and learn how to plant strawberries either from bare root or by transplanting seedlings in this easy step-by-step tutorial.

Whether your strawberry bed is in-ground, a raised bed, or a pot, these tips will make the most of your efforts to get the maximum harvest. Included are instructions on how to care for strawberry plants in order to grow and keep them healthy all winter long.

Why You Should Learn How to Plant Strawberries

Have you ever been disappointed when you bought strawberries at the store? You bite into the bright red berry, and it has no flavor at all! No matter how beautiful a berry may look, it is the taste that counts. 

Nothing says summer to me quite like fresh, ripe strawberries. They are not only good to eat fresh, but also delicious baked into desserts. 

Try any of the following recipes using your strawberry harvest:

  • Low Sugar Strawberry Jam Recipe
  • Low Sugar Strawberry-Rhubarb Jam Recipe
  • From-Scratch Strawberry Shortcake
  • Real Food Strawberry Rhubarb Dump Cake

Growing strawberries at home is the solution to the disappointment with store-bought berries. Allow me to teach you a few tips to show you how to plant strawberries so that you can have a successful berry harvest that tastes as it should.

Even if you have limited space, you can still grow strawberries. They actually do quite well planted in a pot or hanging baskets on your patio. I grow mine in my Greenstalk vertical tower garden (use code “PIONEERING” for $10 off your order!).

This gives you the flexibility to move them to a protected area during the winter months if needed, or follow the sun in the spring.

Vertical container planter with strawberries on cement patio

Strawberry Types and Varieties

Types of Strawberry Plants

There are several different types of strawberry plants. We plant a bed of each kind because they serve different purposes.

  • June-bearing Plants – They produce one large crop from mid-June through early July. You harvest all of the berries at the same time, which is preferable if you are preserving the berries.
  • Ever-bearing Plants – They produce two different crops. One is ready in the early summer and the other in early fall. This is a great option if you enjoy eating berries fresh.
  • Day-neutral Varieties – These plants have a longer harvest season and are often grown on plastic mulch.

Varieties of Strawberry Plants

Within the different types of strawberries, you can then choose a variety based on your growing zone, flavor preferences, and even your long-term goals. A few common varieties that do well are:

  • Earliglow – These are June-bearing, suitable for colder climates, and produce a firm, delicious berry. They are a vigorous plant and great for beginners.
  • Honeoye – These are a very productive June-bearing variety. They have an excellent flavor, are disease resistant, and are easy to grow. 
  • Ogallala – An Ever-bearing type that is drought resistant and very flavorful.

Pro Tip: If you choose a few different types/varieties of strawberries, you will have fruit most of the growing season.

A basket full of strawberries.

How Do Strawberries Grow?

Strawberries are a perennial plant that will continue to give you multiple years' worth of harvest if taken care of properly. 

Each plant produces several flowers that have yellow centers and white petals. After the yellow center is pollinated, the white petals will die off, and the yellow center then develops into the berry. 

Strawberries spread via runners that re-root and grow new plants. A container or raised bed can keep them contained in the area you want them to grow. 

Best Location To Plant Strawberries

Strawberry plants will require at least six hours of full sun. They also prefer well-drained soil. Containers, pots, and raised strawberry beds are great options for strawberries. It gives home gardeners more control over the soil as well as allowing you to choose the sunlight location. 

Pro Tip: If you are building containers or beds with wood, make sure any lumber you use is non-treated for your edible beds. Cedar is water-resistant and slow rotting, so it makes a great choice.

Dozens of strawberry plants growing in grow bags in nice orderly lines.

When is the Best Time to Plant Strawberries

The best time to plant bare-root strawberries is in the early spring as soon as the ground has thawed and is workable. However, if you have strawberry seedlings, the best time will be after the danger of frost has passed.

A strawberry plant being planted in the soil.

Supplies Needed

  • Strawberry Seedlings or Bare Root Plants – Keep in mind seedlings should be planted after any danger of frost has passed.
  • Soil – Strawberries don’t require heavy fertilization, but they will benefit from an organic compost potting soil mix. To learn how to make your own compost, check out these 7 DIY ways to compost at home. Additionally, strawberries need to be kept moist, but their roots don’t tolerate standing water. Good drainage is a must! If you have clay soil, make sure to amend it with a good compost mix. You can learn how to easily test and amend your soil here.
  • Shovel – Strawberries don’t need to be planted too deeply, so a garden trowel works well.
  • Sunshine – Strawberries require at least 6 hours of full sun per day, and will do even better with more.
  • Water – Bare root plants will need to be soaked in water for at least 30 minutes to an hour before planting. Take care to only submerge the roots in the water. For tips on garden watering strategies, check out the best way to water a vegetable garden.
Strawberries in 4 inch pots.

How To Plant Strawberries

  1. If planting bare roots, soak in water at least 30 minutes before planting.
  2. For container planting choose a pot at least 8 inches in diameter and 6 inches deep for each plant. For in-ground and raised bed planting, dig a hole about 4-6 inches deep. The recommended distance between June-bearing strawberry plants is 15-24 inches and Ever-bearing plants is 10-18 inches apart.
    Pro Tip: Strawberries can be susceptible to fungus, so keeping space for good air circulation is your best defense. If you plant them at the minimum spacing suggestions, you’ll need to keep the runners removed so your plants don’t become crowded. An additional benefit is the berries will ripen more quickly if they’re not crammed together!
  3. Firm up a cone of soil in the center of the hole. 
  4. Place the strawberry plant on the cone and arrange the roots around the cone. Fill in the hole with soil, and tamp down lightly.
  5. Water the strawberry plant, making sure the crown of the plant remains at soil level or slightly above.
Strawberries ready to pick off the vine.

Caring For Strawberry Plants

  • Spring – After you have planted the strawberries in early spring, make sure to pinch off any flowers that bud for the first few weeks. You want the plants to conserve energy for when they pollinate and produce fruit. Looking for more direction on what to do in the garden during the spring? Check out gardening in March, gardening in April, and gardening in May where I break down each garden task by month.
  • Summer – During the summer, as the runners start to grow, turn them in the direction you want them to fill in your garden and press the ends gently into the soil. Continue to water and fertilize (compost) the plants throughout harvesting.
  • Fall – When the plants stop producing fruit and the temperature drops, cover the plants with 6” of straw mulch to protect them through the winter months.
  • Winter – For in-ground planting and raised beds, the straw mulch will be enough to protect the plants over the winter. However, you should move potted strawberries into a high tunnel, garage, or another shelter that will protect them from extreme freezing temperatures. Alternatively, you can bury plastic pots (not terracotta) so that the top of the pot is flush with the ground. Looking for more direction on what to do in the garden during the winter?
A woman kneeling down in the garden harvesting tomatoes into a basket.

More Posts You Might Like

  • Planting Berry Bushes & Fruit Trees (How Many to Plant Per Person)
  • Your Gardening Questions Answered
  • When & How to Plant Fruit Trees
  • How to Prune a Blueberry Bush for a Larger Harvest
  • Planting Raspberries – Soil Prep, Growing & Caring for your Raspberry Plants
  • How to Grow Elderberries
  • Low Sugar Strawberry Jam Recipe
  • Strawberry Rhubarb Jam Recipe
  • Strawberry Shortcake Recipe
  • Real Food Strawberry Rhubarb Dump Cake Recipe

Filed Under: Fruit, Gardening, Raising Your Own Food Tagged With: fruit, gardening, Pioneering Today, strawberries

Wood Chips for Garden Mulch – Beneficial or Not?

June 23, 2021 by Melissa Norris 20 Comments

Two years ago I did a test in my garden where I covered half the garden in wood chips and used a no-till gardening method. On the other half, I continued to till and didn't add any wood chips. I wanted to do my own test to know if wood chips were beneficial for garden soil and the growing season or not… it's been two full years and I'm sharing the results of my soil tests in this post. Were the wood chips helpful or not?

Peas and beans climbing a fence in a garden.

There are so many things to learn about when you're first learning how to start a garden. Everything from these beginner gardening secrets to learning foolproof methods when garden overwhelm sets in (it's a real thing!).

It's also good to learn about companion planting, and how this can help improve the soil health of your garden, as well as how to create a garden plan for more harvest and less stress.

The deeper you get, the more you learn, and that's the beauty of gardening year after year!

Many people tout the benefits of using wood chips or adding a layer of mulch in the garden, and for good reason… but do the benefits always outweigh the potential drawbacks?

My initial concern when covering my garden in wood chips (and the main reason we only covered half the garden) is that the nitrogen would get bound up in the wood chips and depleat the soil.

From what I had read, as long as the wood chips were only on top of the soil and not mixed into the soil this wouldn't be an issue. But I just had to be sure so we did a side-by-side test and got three different soil tests from Simply Soil Testing just to be sure.

A plant growing in the garden surrounded by woodchips.

What is “Back to Eden Gardening”?

Originally coined by gardener and arborist Paul Gautschi, the Back to Eden method of gardening is supposed to mimic the forest floor where organic material continues to fall year after year and build up to beautiful, nutrient-rich, loamy soil with great water retention and little to no watering. I've previously written about this method for weed control here.

Depending on your gardening methods, your climate, and the types of crops you're growing, this may be a wonderful method, or it may not. We've been using both the Back to Eden no-till and tilling methods in our garden for the past two years (in different locations).

We wanted to do a true side-by-side comparison and see just what the differences were for us. I just got the soil test results from three different places in our garden and you may be surprised by the results, I was!

Plants growing in the garden surrounded by woodchips.

Why Use Mulch in the Garden

There are many benefits of using mulch in the garden. A few of which are:

  • Less soil erosion
  • Better water retention/less overall watering
  • More plant protection
  • Weed suppression
  • An improved food web (worm habitat) under the soil
  • Added organic matter & nutrients
  • Better soil temperature control
  • Reduces overall waste

Less Soil Erosion

Because wood chips will absorb excess moisture, during heavy rainfall or heavy waterings, the soil will remain and not get washed away.

This is extremely helpful for erosion-prone areas of your yard or garden that are on a hillside or are just at a slight angle where water would runoff.

Less Watering

Because wood chips retain moisture, they act like little sponges, steadily releasing that moisture during the heat of the day. They also help to insulate the ground (more on that below), so the moisture in the soil doesn't evaporate off as quickly.

Flowers growing in the garden surrounded by woodchips.

Plant Protection

Plants are protected from soil erosion which could cause their stems to be exposed or the stability of the crop to weaken.

Weed Suppression

Adding wood chips to your garden is a great way to suppress the weeds. Because tiny weed seeds have a hard time pushing up and through the wood chips, they simply cannot grow (not all, but most), therefore reducing the amount of weeds in the garden.

Furthermore, those weeds that do make their way through the wood chips will be easier to pull up.

It's important to note that you don't want to add wood chips over newly planted seeds for the same reason. They will have a harder time germinating and sprouting if they're covered with wood chips and your germination rate will be horrible.

Wait until your crops are established before adding wood chips as mulch up and around the plants.

Improved Food Web

Taking our queue from the forest floor, where leaves, decaying trees, pine needles and other organic materials constantly falls to the ground, there is an amazing web of mycelium underneath the top surface.

Adding wood chips to the garden helps to build up this strong living “food web” hiding out just beneath the surface.

A hand scooping up a handful of woodchips from a pile.

Added Organic Matter

As wood chips break down year over year, they continually add to the organic matter in the soil, creating rich, loamy soil that's the perfect growing medium for vegetables and other plants.

Soil Temperature Control

As mentioned above, a layer of mulch will help control the temperature of the soil. On extremely hot days, the soil just below the wood chips will be slightly cooler. And once those temperatures start dipping toward freezing, the soil will stay insulated a bit longer.

Reduce Overall Waste

Because you can use other materials besides wood chips as mulch, you can really help reduce the waste on your homestead.

Have a fallen tree? Rent a wood chipper and harvest your own wood chips. Raking up a bunch of leaves in the fall? They make perfect mulch (as long as they don't just blow away!).

Look around your yard, I'm sure you'll come up with many items that can make great mulch, even if it's not just wood chips.

Purple lettuce growing in the garden surrounded by woodchips.

BONUS: Beautifies the Garden

When you add fresh mulch to your garden spaces, it adds a nice appealing look that's very tidy and purposeful. Because it also helps suppress weeds, when adding mulch year after year, you can help improve the look of your garden and lessen your overall workload as well.

Soil Test Results

Now the part you've all been waiting for… the results of the soil tests! Check out my other post if you want a more detailed look at how to test your soil pH and how to amend it based on the results read this post.

I ran soil tests in three different portions of my garden. I definitely took samples of the area that's been mulched with wood chips for two years and the area of the garden where we've continued to till and not add wood chips or any other form of mulch.

Then I also took a sampling from under our high tunnel where we added wood chips just last year. The results of that test were actually the most surprising! Read on to find out why…

A photo of a garden that has been mulched with woodchips.

Garden Plot Mulched with Wood Chips

  • Nitrogen Level – 11 ppm (this is the higher end of “low”)
  • Micro/Macronutrients – all very good! Each of the levels of nutrients (phosphorus, potassium, calcium, magnesium, boron, sulfur, and organic matter) were either in the very high, high, or medium-high range which I'm very happy about.
  • pH level – 7.08 A vegetable garden is ideal between 6.0-7.0, so I'll add a little bit of elemental sulphur and this will come down just fine.

Garden Plot Not Mulched with Wood Chips

  • Nitrogen Level – 24 ppm (this is on the high end of medium)
  • Micro/Macronutrients – all very good in this garden area as well.
  • ph level – 7.19 Still almost optimal, which with pH levels, if it's just a little bit over or under, it won't affect the growing season much. But when an area is significantly off, you'll notice much more struggle for your crops. This is especially important when you're growing plants like blueberries that like much more acidic soil! So know what you're planting and know the pH level that specific crop desires for the best results.

I have a theory on why both sides have differing results. Many people don't like to till because this can break up the mycelium and food web connection under the soil, however, when we till, we till back into the soil the green matter which will release more nitrogen back into the soil.

High-Tunnel Garden Plot Mulched with Wood Chips

It's important to note that the plot where we put our tomatoes is a new plot that was formerly wooded with evergreen trees which tends to make the soil a bit more on the acidic side to begin with.

After just one year of having this area mulched with wood chips, the results are as follows:

  • Nitrogen Level – 46 ppm (this is on the high end of high)
  • Micro/Macronutrients –
  • pH level – 5.52 This is a little bit too acidic for tomatoes, so I'll be adding some lime to help raise the pH level.

My theory on why this area has a higher nitrogen level is that this area of the garden is covered and doesn't get the rainfall like the rest of the garden areas. I truly believe the rainfall is what washes away the majority of the nitrogen, even when the wood chips are on top of the soil.

Picture of a vegetable garden with mountains and a blue sky in the background.

Why Organic Matter Matters?

We like to have a high level of organic matter because, as it holds moisture and brings aeration, it also contains nutrients. As the organic matter breaks down into your soil it will continue to replenish all the micro and macronutrients.

More Gardening Articles

  • Sheet Mulching the Easy Way
  • Soil Remediation – How to Fix Tainted Soil
  • Fall Gardening Prep – 10 Tips to Improve Your Soil
  • Beginner Gardening Secrets You Need to Know
  • Science-Based Companion Planting Strategies
  • 13 Basic Steps to Starting a Vegetable Garden
  • Hugelkultur Garden Beds (What, Why & How)
  • How to Create a Garden Plan for More Harvest & Less Stress
  • Planning a Fall Garden (28 Crops to Plant in August)
  • How to Harvest & Store Potatoes (w/out a Root Cellar)
  • Preventing and Treating Early Blight for Tomato and Potato Plants

Filed Under: Gardening, Raising Your Own Food, Soil Tagged With: gardening, soil, wood chips

How to Plant and Grow Potatoes (In Containers or the Ground)

May 20, 2021 by Melissa Norris 38 Comments

Knowing how to plant potatoes correctly, including their depth, spacing, soil needs, sunlight, water, and temperature preferences, will get your harvest off to the best start possible and provide your family with food for months to come. Read on to learn how to plant potatoes the right way (including how to grow them in containers).

Image of a sprouting potato in the ground.

One of my favorite things about the pioneer lifestyle is growing our own food. But with recent biotech and GMOs sneaking into our food, it's not just about being frugal or the added health benefits (you did know homegrown vegetables and fruits have more nutrients, right?), it's about protecting our families.

Knowing how to grow enough food at home to feed my family for a year, having some basic gardening secrets tucked in your back pocket, knowing how to protect crops from common garden pests, and even how to grow a large scale garden without acreage will help get you headed down the right path to self-sufficiency.

Growing potatoes is just one small step in starting a vegetable garden.

Favorite Potato Varieties

If you haven't grown potatoes, now might be the perfect time to start. Many of you know I'm a firm believer in growing heirloom plants, and the potato is no exception. We have grown many varieties of potatoes over our 20 years of gardening, and we've settled on a few of our favorites…

  • Russet
  • Russet Norkotah PH
  • German Butterball

The above are my favorites for long-term storage, we've previously grown a purple potato called Purple Majesty. It has 10 times more antioxidants than a regular potato (and my kids love the color… lavender mashed potatoes anyone?).

Red and yellow potatoes arranged on a burlap sack.

There are three basic kinds of potatoes:

Early, Mid-Season & Late Potatoes

Before planting just any old potato, you need to know how many potatoes you're growing (get my free chart on how much to plant per person for a year's worth of food here), how quickly your family will eat them, and if you're hoping to still be eating that potato harvest the following spring (meaning you'll need to choose good storage varieties). Read on for more info about the kinds of potatoes.

Early-Season Potatoes

Also called “new potatoes” or basically, potatoes that haven't fully matured or finished growing.

Early season potatoes are ready for harvest in about 75-90 days. This is a great variety to grow if you're looking to get multiple plantings in one area of your garden.

If you live in a climate with very warm summers (staying above 90 degrees for days and weeks at a time), these early season potatoes will be your best bet.

Likewise, if you want to plant a late-summer garden for an early fall harvest, then early season potatoes are great for planting mid to late August.

If your potatoes have been prone to disease, the early potatoes may also be a better choice as they're the least likely to get blight because they're generally harvested well before disease sets in.

Early potatoes are not great storage potatoes, so these will be your “fresh eating” crop from the garden.

Early Season Potato Varieties

  • Alta
  • Cheiftan
  • Norland
  • Red Pontiac
  • Yukon Gold

Mid-Season Potatoes

Similar to early-season potatoes, mid-season potatoes will be ready fairly quick in about 95-110 days.

Mid-season potatoes aren't always great storage potatoes, so be sure to read up on the variety you're buying to know if they're better for fresh eating or long-term storage.

Mid-Season Potato Varieties

  • Adirondack Blue and Red
  • Purple Majesty
  • Gold Rush
  • Red Gold

Late-Season Potatoes

Because I like to grow food for my family that will last us a whole year, the late-season potatoes tend to be my go-to potatoes.

Late-season potatoes are sometimes referred to as “Main Crop Potatoes” and are generally ready to harvest in about 120-135 days.

Late-Season Potato Varieties

  • German Butterball
  • Fingerling
  • Russet
  • Russian Blue
Image of a BCS two-wheel tractor digging a trench.

Supplies Needed for Growing Potatoes

You don't need much to grow potatoes successfully, but there is some general knowledge that will come in handy throughout the growing season. So stick with me…

  • Seed Potatoes – see my favorite varieties mentioned above
  • Soil – Potatoes aren't picky, but crop rotation is important, don't plant potatoes where you had tomatoes the year prior, and it's best if your soil is rich, well-draining, and acidic (4.8 to 5.5 pH).
  • Space – whether you're planting in the garden or in containers, you need to have enough space for the tubers to develop.
  • Sunlight – potatoes grow best in full sunlight. Plant them in a place that gets all day sun and you should be golden.
  • Water – consistent watering is key for potatoes. Try not to go too long between waterings, and don't over-saturate them when you're watering.
seed potatoes on tray

Seed Potatoes

When growing potatoes you can only grow them from seed potatoes. The potatoes you've purchased in the grocery store are not suitable for seed potatoes because they can carry disease (remember the potato famine in Ireland during the 1800s, it was caused by a late blight that infected the soil and crops for multiple years). They also may have been sprayed with chemicals to keep them from sprouting on the shelf. Source

Seed potatoes are chosen for their resistance to disease and are certified disease-free, starting with disease-free potatoes is key.

I know some people do plant potatoes they've purchased from the store once they've sprouted (with great success!), but I'd rather not take the gamble of introducing any disease to my soil and don't think it's worth the risk. Each person must decide this for themselves.

If you grow and harvest your potatoes correctly, you can grow your own seed potatoes for the following year, essentially having an endless supply of potatoes. Stick with me, we'll talk about that soon.

Where to Buy Seed Potatoes

As mentioned above, we grow enough potatoes each year to have extra left over for our own seed potatoes. But if you've gotta start somewhere, so if you're looking to grow potatoes and are in need of seed potatoes, try some of the following places:

  • Local garden center
  • Local nursery
  • Grand Teton Organic Seed Potato Company (this is where I purchase mine)
  • Territorial Seed
  • Johnny's
  • Peaceful Valley
  • Irish Eyes
  • High Mowing

NOTE: Many places completely sell out of seed potatoes. It's a good idea not to wait until mid to late spring to try and buy them. When possible, order seed potatoes ahead of time (generally in the winter) to be sure you get on the list when they're in stock.

If you can't find seed potatoes, ask a friend if they'd be willing to share, you can cut your seed potatoes into pieces (be sure there are at least two “eyes” per piece) and it weighs at least 1 to 2 ounces per piece, allow them a couple of days to dry out and “scab up” to prevent rotting once planted, then proceed with the planting instructions below.

chitting seed potatoes on a tray before planting

What is “Chitting” Potatoes?

Chitting refers to forcing potatoes to sprout. If you've stored your potatoes correctly, they may not be sprouting come spring when it's time to plant.

To chit potatoes, bring them into a dark room that's around 70 degrees F for about two weeks. This brings them out of dormancy and allows them to sprout.

Once they've begun to sprout, you can move them to a cooler location with decent light for a few weeks until you're ready to plant.

Image of three potatoes in a trench spaced apart about 12 inches.

How to Plant Potatoes

There are many ways to grow potatoes, so it's important to consider both your space and how many potatoes you want to grow for both fresh eating and storing.

Growing Methods

If you're short on garden space, you can grow potatoes in containers or fabric bags. They can be grown in raised beds, long rows that you'll hill up, or even in mounds. Some people even grow them in trash cans! The moral is to grow with what you have at the moment.

Choose which growing method works best for you:

  • Containers
  • Fabric bags
  • Raised beds
  • Rows
  • Hills
  • Trash cans!

If you don't have the garden space for potatoes, they make an excellent container crop. You basically follow the same method as I'll lay out below, however, instead of digging a trench, you simply add a little dirt at the bottom of your container, then fill with more dirt instead of mounding each time. I discuss more about this method in Using Vegetable Grow Bags in the Garden. I've even seen pictures of people using large plastic laundry baskets… get creative!

Image of feet walking through the garden adding compost over the soil.

Soil

When growing potatoes plant them in well-draining acidic soil that's been fertilized. Ideal pH levels for potatoes is 4.8 to 5.5 They will grow in slightly more acidic soil and usually do okay into the 6 pH range but if they're in more alklaine soil (above 7.5 pH) they can't uptake many of the macronutrients in the soil and are more prone to developing scab.

Photo of a jar of elemental sulfur and some sprinkled into the ground.

It's not advised to try and change your pH level by more than 1 point in a twelve-month period. Our soil pH range is naturally around 6 (slightly acidic) so at planting time I add 0.2 pounds of elemental sulfur (make sure it says elemental sulfur to avoid aluminum) per 10-foot row. This will lower the pH by 1 point.

Potatoes are heavy feeders. You don't want them to rot in the ground or develop a fungus. Never plant where you had tomatoes or eggplant (they are susceptible to the same diseases) the previous year and always rotate your potatoes each year.

The ideal soil for growing potatoes is:

  • Well draining
  • Loose and fluffy
  • Acidic

Well Draining

The biggest nemesis of growing potatoes is having them rot in the ground. This can be avoided by consistent watering and well-draining soil.

Potatoes don't like to be soggy, or sit in extremely wet soil. The soil should hold water well, but not pool or puddle up. It sounds funny to want well-draining soil that holds water, but that's exactly the “just right” Goldilocks effect we're looking for.

Well-draining soil is also what allows me to store my potatoes in the ground all winter and harvest them as we need them in the kitchen!

Close up shot of the BCS tractor digging a ditch.

Loose and Fluffy

As mentioned above, make sure your soil is light and fluffy and not too compact (you don't want it to form a solid ball when squeezed together in your hand).

If your soil isn't well-draining, then you'll need to add in some organic matter (but nothing with too much nitrogen). Adding some compost and or worm castings will give the potatoes the nutrition they need to grow nice big greens, but also develop large tubers as well.

Too much nitrogen in the soil and you'll get nice big greens, but tiny, underdeveloped tubers (no good!).

Temperature & Sunlight

Potatoes prefer cooler weather and full sunlight and can be put in the ground as early as 2 weeks before your last frost date.

They'll tolerate some heat, but if temps stay at or above the 90s for prolonged periods of time, they may die. Our summers are extremely mild in the Pacific Northwest, so I don't have to deal with this.

We generally plant our potatoes the first to mid part of May.

Water

When watering potatoes, consistency is best. Try not to go too long between waterings, and don't over-saturate them when you're watering.

A general rule of thumb is to give them about 1 inch of water per week.

Preparing Your Seed Potatoes

Image of a potato with sprouts being placed into the soil.

Once your seed potatoes are sprouting, you have two options. If the potato is large and has more than four eyes, you can cut your seed potato (giving you two seed potatoes). However, your seed potato needs to be at least 1 to 2 ounces in order to have enough food to feed the emerging sprouts so I don't cut my potatoes unless they're at least 4 ounces in size.

I prefer to plant whole seed potatoes, these produce more pounds per plant for me and less chance of the potato rotting in the ground.

How to Cut Seed Potatoes Before Planting

If you do wish to cut your seed potatoes, there are a few simple rules to follow:

  • don't cut smaller than 1 ounce
  • make sure each piece has 1 to 2 eyes
  • allow cut potato to set out over 1 to 2 days to scab over (dry out)
  • if cut part isn't scabbed fully, dip in elemental sulfur at planting time

Depth & Spacing

Close up shot of the BCS tractor digging a ditch.
Image of a potato with sprouts being placed into the soil.
Image of two potatoes 12 inches apart being measured with a tape measure.

Dig a trench about 6 to 10 inches deep. Place your cut potato with the eyes facing upwards (or plant whole potatoes as shown below if you have plenty to spare). Space 12 inches apart.

Photo of a jar of elemental sulfur and some sprinkled into the ground.
Image of a potato in the soil with a tape measure showing it's 6 inches deep.
Image of a tape measure in the ground with dirt piled up about six inches.

I also like to add in some elemental sulfur to help acidify and reduce scab. Cover the potatoes with about 2 inches of soil.

What Are The Best Companion Plants For Potatoes

Image of a potato plant growing above the soil.

Companion planting is used to help both repel bad pests, attract “good” pests, and placing plants together that benefit one another.

Don't plant potatoes with other members of the nightshade family (tomatoes and peppers) because they are all susceptible to blight. Avoid planting potatoes with carrots and squash.

Potatoes do well when planted near beans, brassicas, corn, garlic, peas and onions.

Read How to Get Rid of Bugs on Plants Naturally Tips that Actually Work for more tips.

What to Plant with Potatoes to Keep Bugs Away

Basil – repels potato beetles

Nasturtium – repels potato beetles and attracts beneficial insects, also helps to repel cabbage moths so is excellent to plant with potatoes if you've paired them with brassicas.

Marigold- deters root nematodes (this happens once the plant is chopped up and worked back into the soil for the following year), repels potato bus and white fly. Attracts beneficial insects such as hover flies, lacewings, ladybird beetles, mantids, robber flies, some spiders and predatory mites.

Mounding or Hilling Potatoes

After potatoes have sprouted, you'll need to mound soil around them. We have lots of slugs here, so I don't use mulch, just good old dirt.

You may wonder if mounding is really that important. I'm here to tell you, it is.

Potatoes are produced from the tubers, and if left exposed to light, they'll turn green and possibly poisonous. (Yes, this is true.) When you see green on potatoes, it's chlorophyll (harmless) BUT it can be a sign it has a higher level of solanine (a glycoalkaloid and toxic chemical) so you want to avoid eating large amounts green potatoes.

Mounding helps protect the tubers (potatoes) from getting too much sun and keeps them safe for consumption.

Mounding also helps inhibit blight. Mound the soil up once the foliage has reached about 8 inches high with a hoe. It's better to not mound the soil too steep, so it won't wash away in the rain. Mound up until only 2 inches of leaves are left showing.

Additional mounding of dirt should be done once you have new growth of about 4-6 inches. This will be repeated 3 to 4 times throughout the growing season.

Once potatoes are blossoming, stop mounding. You can damage the new tender shoots beneath the surface of the soil.

Two images, one of a potato plant with growth about 8 inches high, the other image of the potato having dirt mounded up and only a couple of inches showing.

Have you had success growing potatoes? What kind of potato are you growing this year?

More Gardening Articles

  • Sheet Mulching the Easy Way
  • Wood Chips for Garden Mulch – Beneficial or Not?
  • Beginner Gardening Secrets You Need to Know
  • Science-Based Companion Planting Strategies
  • 13 Basic Steps to Starting a Vegetable Garden
  • How to Create a Garden Plan for More Harvest & Less Stress
  • Planning a Fall Garden (28 Crops to Plant in August)
  • 10 Tomato Growing Tips for a Disease Free Harvest
  • Preventing and Treating Early Blight for Tomato and Potato Plants

Filed Under: Gardening, Raising Your Own Food, Vegetables Tagged With: gardening, heirloom gardening, how to plant potatoes, Pioneering Today, Vegetables

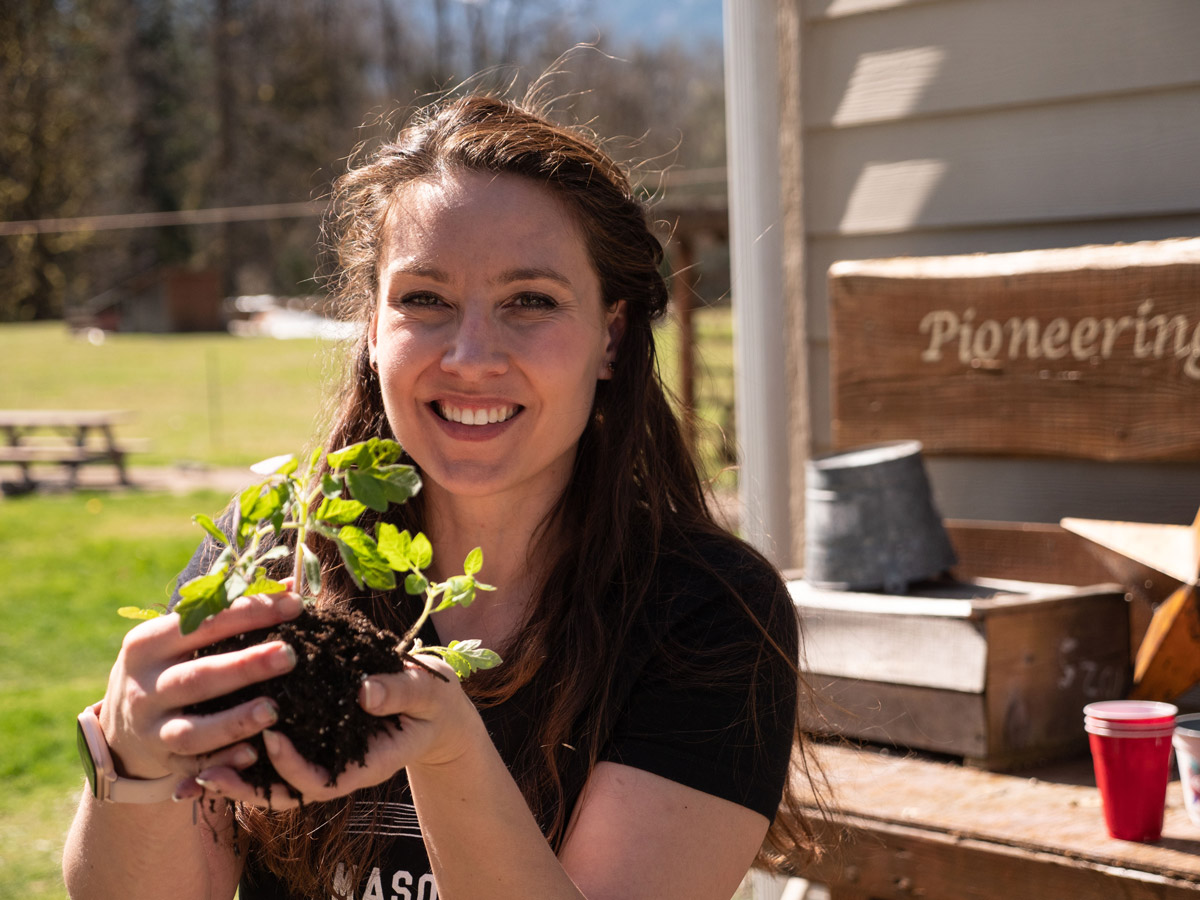
Potting Up Seedlings & How to Separate Seedlings

April 13, 2021 by Melissa Norris 11 Comments

Starting seeds indoors is a fantastic way to get a jumpstart on the growing season, or extend your growing season if it's too short for some crops like tomatoes and peppers. But chances are, you'll need to pot up your plants once, possibly even twice before they're ready to be transplanted into the garden. Here's everything you need to know about potting up seedlings, how to separate seedlings to prevent stunting their growth, and how to keep them from becoming root-bound.

A woman holding seedlings in her hands, standing outside by a potting bench.

If you're a first time gardener, there are many basics to know when planning a vegetable garden. If you're like me, you need to extend the growing season as much as possible on both ends in order to grow a year's worth of food that you can preserve and put up for your family.

Starting your seeds at home is a great way to get a jumpstart on the season, and using row covers, high-tunnels and other gardening structures can help extend the season on the tail-end.

No matter what what method of gardening you're using, chances are you want to increase your growing season, harvest, and self-sufficiency as much as is possible.

If you started seeds indoors this year, you may be noticing that some plants need to be potted up or separated out. Potting up seedlings is important in order to keep them from becoming rootbound or overcrowded.

Here are the basics:

When To Pot Up Seedlings

There are many variables when it comes to potting up plants. The type of plant, size of container, how densely the seeds were started, whether you thinned the seedlings, and when you started the seeds indoors (how long before the last frost).

Plant Type

If you've ever grown pepper plants beside tomato plants then you've surely noticed that the tomatoes germinate and sprout up much more quickly than the peppers. They also mature and outgrow their tiny pots faster, needing to be potted up sooner than peppers.

Herbs are another plant that can stand to be in a smaller pot longer than other plants. Although, depending on how densely you planted them, they may be in need of nutrition sooner than others.

Tomato seedlings densely planted

Container Size

I've been asked many times before, “If plants always need to be potted up, why don't we just start them in a larger container to begin with?”

This is a great question, and there are multiple reasons why one should start seeds in a smaller container:

  • Better water control (it's easy to overwater larger containers)
  • More plants to fit under the grow lights
  • More plants to fit on a heat mat (if using)
  • Less space needed indoors for seedlings

Keeping consistent moisture on your seedlings is a time-consuming task, if you have more pots with more soil in them, this task is going to take much longer each day. Trust me when I say you'll spend more time watering than the time it takes to pot up your seedlings.

Also, if you're using grow lights (which most of us should be doing as seedlings need 8-10 hours of sunlight, or 16 hours of artificial grow lights, each day), you can fit more seedlings under one light, eliminating the need to buy more lights.

For those who like to use heat mats, if you're starting your seeds in larger pots, the heat mats may not be able to heat the soil all the way through to the seed. Not to mention, it's much easier to fit a tray of 24 cells onto a heat map than 24 – 6″ containers.

And finally, when I start my seeds indoors I set them over on the floor between my kitchen and living room. I don't mind keeping a few clamshell containers over there, but if I started each of my plants in a 6″ container, I'd have plants all over my living room floor! No thanks!

A woman holding a large plastic container with tomato seedlings growing in it.

Planting & Thinning

How densely you planted your seeds and whether you thinned your seedlings as they sprouted will also determine how quickly you need to pot up your plants.

As you can see in my video, I planted my tomato plants pretty densely in a large clamshell container. Because of this, they were beginning to compete to reach the light, so it was time for them to each get their own container.

If you plant 4-5 seeds per tiny cell, then thin them out once they germinate and sprout, you can possibly wait a few more weeks before potting up.

Timing

Knowing when your average last frost date is will help you know how long until the plants can be transplanted outdoors. If the plants can't go outside for at least another 2-4 weeks and the plant is already outgrowing its current pot, you should pot up.

Likewise, if you can see some of the roots poking out from the bottom of the cell, that's a good sign that the plant is outgrowing its home.

Tomato seedlings in a sink with a seedling tray in front.

Potting Up Seedlings

Choosing the Right Size Container

As your plants continue to grow, they'll need adequate space in their container. It's good to know about how long your plant has before getting transplanted out into the garden to get an idea of how big a pot you'll need.

In the video above, I'm potting up my tomato seedlings, which still have at least four weeks before they can go out into the garden, so I'm using a container no smaller than 4 inches wide. (I also like to use these trays that allow for bottom watering.)

If you have longer to go, you may want to choose a container between 6-8 inches in diameter to accommodate the roots.

A woman opening a bag of potting soil.

Using the Right Soil

Because our plants are still small and in need of proper nutrition, I like to use potting soil not soil from the garden. This ensures I won't bring any gnat or fly eggs into my home where they'll hatch and make a mess. (This also holds true for any open bags of potting mix from the year before where bugs had access.)

I also recommend using certified organic or OMRI (Organic Materials Review Institute) potting soil. I can buy this at my local Costco for a very inexpensive price. I always buy one bag per year, just for potting up my seedlings.

A woman's hand potting up a tomato seedling.

Plant Seedlings Deep (Maybe)

This holds true for most seedlings, but most importantly your tomatoes. I like to plant my tomatoes where the first set of leaves are. The first set of leaves aren't the plants true leaves, and they'll actually turn yellow and fall off on their own after a few weeks, but if they're still on the plant, I like to remove them and plant my tomatoes right up to that level.

Tomato stems are pretty amazing because any part of the stem that's under the soil will begin to produce roots. We want our tomato plants to have a very strong root system, so potting them up and allowing them to produce more roots gives us a head start.

Planting deep also holds true for any plants in the nightshade family (peppers, potatoes, eggplant, etc.), and many in the brassica family can handle planting deep (at the first set of leaves).

However, this planting deep theory doesn't hold true for all plants. If you saw this post on when and how to plant fruit trees you know that you should always keep the soil level the same.

This holds true for growing beans as well, and some say that cucumbers don't like to be planted deep, but I tend to just direct sow my cucumbers outside anyway, as I've done some side-by-side comparisons and the direct-sown seeds always catch up to the seedlings that I started indoors.

Ultimately, if your seedlings get adequate light from the start, they shouldn't get leggy or need to be planted too deep anyway.

A watering can watering a tomato seedling.

Water

In order to prevent your plants from getting stressed, you want to be sure to get them adequate water as soon as possible.

I will actually water my plants as I go along, instead of waiting until I've potted up an entire tray. After this initial watering, I will switch from spraying and watering overhead to bottom watering. I do this to avoid any fungus from growing on my plants and to promote a deeper root system.

A woman's hand holding two tomato seedlings.

Choose the Healthiest Seedlings

I always start more seeds than plants I'll need in the garden. I do this, first of all, because seeds are very inexpensive and I want to make sure I get enough seeds to germinate for the number of plants I want to grow.

Second, I like to plant extra seeds so I can choose the heathiest and strongest seedlings for potting up. To do this, I not only look at the height and leaves of the plant, but I also take a good look at the root structure.

Even if a plant is taller than another, if it has a stronger root system, I will choose to pot up the one with stronger roots. (In the photo above, you can see the plant on the left has a much stronger root system than the plant on the right, even though the plants themselves were about the same size.)

A woman's hands separating tomato seedlings.

Avoid Rootbound Plants

One of the things I do when starting seeds indoors is to use clear plastic clamshell containers. Not only does this allow me to get a greenhouse effect while my seeds are germinating, but it also means I can keep an eye on my seedling's roots to avoid them becoming rootbound.

The term “rootbound” is used when a plant has outgrown the container that it was planted in. Oftentimes this means the roots have circled around the container and become a tangled web of roots.

Certain plants don't like their roots being messed with, so if your seedlings become rootbound, and you go to pot them up or transplant them into the garden, you may stunt their growth or they may even die.

Furthermore, if the root system can't be untangled, this will keep the roots from growing out into the ground once transplanted into the garden. Because the strength of the plant relies on the strength of its roots, this doesn't set your plants up to be productive.

We obviously want to avoid this if at all possible, we don't spend weeks on end tending to tiny plants only to have them die, am I right?

Ideally, you'll pot up or transplant your seedlings before they outgrow their container.

A tray of tomato seedlings that have just been potted up.

FAQs

Why do my plants look like they're dying after potting up?

After repotting your plants, they may look a little sad, stressed, and droopy. This is to be expected as they've just had their environment disrupted.

Be sure to get them water as soon as possible, and get them back into their normal environment (if you're doing your potting up outside as I am).

A woman's hand showing the leaves of a tomato plant.

Why do my tomato plants look purple on the leaves?

This is a sign of a nutrient deficiency, usually it means they're low in potassium. If you overcrowd your pots when starting seeds, the seedlings may use up all the nutrients before you're able to pot them up.

They should do better by getting them into fresh potting soil and watering them with a bit of fertilizer.

A woman pouring fish fertilizer into a watering can.

Do I need to fertilize my seedlings?

This answer will vary depending on the plant, how densely you planted the seeds, whether you've thinned out the seedlings, and if your plants are giving you signs of nutrient deficiencies.

After about 2-4 weeks, most plants will likely benefit from some type of fertilizer. I like to use a fish fertilizer that won't burn my plants. It's a 5-1-1 mixture, which means the ratio of “N-P-K”, or nitrogen, phosphorus, and potassium.

All-in-all, potting up seedlings is likely going to be something that you need to do at least once if you've started your seeds indoors. Hopefully this post was helpful and alleviated some of your fears of potting up or transplanting your plants.

More Articles to Get Your Garden Off to a Good Start:

  • Beginner Gardening Secrets You Need to Know
  • 5 Gardening Myths on Raising a Years Worth of Food
  • 13 Basic Steps to Starting a Vegetable Garden
  • Where to Buy Heirloom Seeds – Heirloom, Hybrid & GMO Differences
  • Seed Packet Information – How to Read Seed Packets for Gardening Success
  • The Ultimate Seed Starting Guide
  • Best Way to Germinate Seeds – How to Germinate Seeds Faster
  • Cold Stratification of Seeds – Why & How
  • What Are the Best Seed Starting Containers
  • Direct Sow Your Garden Seed
  • Heirloom Seed Saving & Gardening
  • Gardening in April (Garden Tasks by Month)
  • Plant Covers for Cold Weather Gardening: How to Grow Vegetables All Year
  • How to Grow Food YEAR ROUND Using Covers (Hot & Cold Weather)
  • Cut Back on Garden Diseases & Maximize Your Infrastructure Expansion (Don’t Waste Time or Money)

Filed Under: Gardening, Raising Your Own Food, Vegetables Tagged With: gardening, seed starting

When and How to Plant Fruit Trees

March 10, 2021 by Melissa Norris 27 Comments

Late winter and early spring are the best time to plant fruit trees and bushes. This post shares everything you need to know from picking the right fruit tree, the correct variety, and even orchard planning tips if you're wanting to grow a variety of fruit trees.

A woman crouched down next to an established fruit tree with mountains in the background.

While I love my veggie garden, there is a beauty in only having to plant something once and being able to harvest if for years to come. Can I get a holler? No, sheesh, this is exciting stuff, okay, at least a high five.

Having a fruit source on your homestead is a great step towards self-sufficiency and lowering your grocery bill. Plus, there is nothing and I mean nothing, like fresh ripe fruit straight off the vine… or tree or bush. This makes jam, jelly, and syrup making almost free as well.

Growing Fruit Trees From Seed

I don't actually like to grow my fruit trees from seed, and the reason is that you're going to be adding that many more years before they being to produce fruit (usually bare-root trees or saplings you buy at a nursery are already 2-3 years old).

Another reason is that, depending upon the variety of fruit tree, when you plant them from seed, you don't always get the same variety.

So, to make sure that I'm getting the exact fruit variety that I want, I like to start with some immature, bare-root fruit trees.

When to Plant Fruit Trees

A woman crouched down next to a newly planted fruit tree.

Planting in the late winter or early spring is generally the best time to get your new fruit trees in the ground. As long as the ground isn't too frozen to dig a hole, you should be good to go.

Bare root stock should be planted in winter, while raspberries and blueberries can be planted into spring.

A good rule of thumb is to check the local nursery's in your area. If they have bare root fruit trees and other fruit plants out, then it's time to begin planting. Your goal is to have the fruit tree/plant in the ground so the roots can get over the shock of transplanting and begin establishing their root system before the stress of summer and the work of growing leaves and fruit begin.

Where to Get Good Fruit Stock

You have a few options for finding good fruit stock. Your best bet is to go to a local nursery (not the garden department at big box stores but a true independent nursery). You'll be able to inspect the stock, it's most likely grown in your region (acclimated to your weather), and the varieties best suited to where you live. Many nurseries will let you schedule a meeting with an experienced staff member to pick out the best varieties based on your needs.

We don't have any local nurseries with fruit trees and my favorite online source for healthy plants is  RainTreeNursery.com I've ordered both my elderberry bushes, strawberry plants, and received five fruit trees from them and all the plants are packaged excellently and have been very healthy. (Use coupon code: modernhomestead to get 10% off your order.) I've also had decent luck with fruit trees from Costco, they partner with regional nurseries/growers.

Bare root fruit trees are usually the cheapest route to go and most nurseries will have them on sale in winter, as this is the time they must be planted. Because you'll be purchasing and planting the trees before they've leafed and blossomed out, it may be harder to tell if the tree is healthy.

Branches in tiers and with even scaffolding are what I look for when purchasing bare root stock fruit trees. Make sure they're evenly spaced and not right on top of one another.

I look for a tree that has a good set of well-balanced limbs, a solid scaffolding in place, and no cracks or scabbing on the limbs or trunk.

If you have a friend with a good raspberry patch, ask if you can get a few canes (the viney branch part of the bush) to start your own patch. It will take a few years before your own canes need thinning, but this was how we got all of our raspberries. An overgrown patch was on my aunt's property and we transplanted an entire row in the early spring to our yard. Raspberries will also send out runners and you can dig those canes up as well.

How to Plant Fruit Trees

Digging a Hole

If you plan on moving an established fruit tree or fruit plant or planting a bare root or potted tree, be sure you dig a hole twice as wide and twice as deep. Create a cone shape of dirt in the bottom of the hole and spread the roots out and down this dirt cone (same technique in How to Plant Strawberries)

Filling the Hole

Backfill the hole with loose dirt and a layer of compost. If any of the roots are broken, remove them before planting. Keep the level of dirt at the same level it was in at the nursery. You can usually see the line on the trunk of the tree or bush.

Create a mote around the base of the tree to allow the water to filter down onto the roots instead of running off into the surrounding soil or land.

Use a small amount of water when you plant the tree. The soil will settle and you'll be able to see where you need to add more dirt.

Watering Schedule

Don't over water in the winter months. In the late spring, when the tree leaves out and the soil becomes dry, water deeply 5 to 10 gallons once a week.

Throughout the first few summers, you'll want to water the plant once a week if you don't have any rainfall. I neglected to this with one of our new apple trees and lost it. So even in the rainy Pacific Northwest, you'll still want to follow the rule of watering deeply once a week with a newly planted tree if there isn't any moisture falling from the sky.

Note: It takes an average of seven years before you'll be able to harvest a sizeable crop from your fruit trees. Most bare rootstock is a few years old, but you can ask the nursery for more specifics.

The bigger or older the stock, the more expensive it will be.

Raspberries will produce the following year (or the same year in the fall if they're an ever-bearing variety and planted in the spring) and blueberries usually take a couple of years. Learn how to plant berry bushes here.

Picking Your Variety of Fruit

A small apple tree with about a dozen apples on it.

An important thing to remember when planting your fruit trees is to be sure you either pick a self-pollinating fruit tree or you purchase two varieties that will cross-pollinate. A crab apple will cross-pollinate almost all apple tree varieties as it blooms for a longer period of time than a regular apple, allowing it to pollinate early, mid, and late-season apples. Although a crab apple is so sour you'll never make the mistake of biting into one twice, it is high in natural sources of pectin and will help you get a beautiful set on your jams and jellies.

Some varieties of apples become ripe later in the season. If you live in a zone with early frosts or shorter growing seasons, you might want to pick an earlier ripening variety.

You can also purchase “fruit cocktail” trees, where several varieties have been grafted onto one stock. We haven't had much luck with these as the grafted branches tend to die off after a year or two and the main stock of the tree takes over.

Even if a fruit variety is self-pollinating, you'll get a larger harvest if a cross-pollinator is nearby.

My favorite apple is the heirloom Gravenstein, but because it's sterile (doesn't pollinate anything else) so we have a crab apple, and also a Gala and Honeycrisp.

The best fruit trees for small spaces are dwarf or semi-dwarf varieties.

Need help picking the right fruit trees for your area? Read 5 Tips to Starting an Orchard

Self-Pollinating vs. Cross-Pollinating Fruits

Apple tree blossoms.

As mentioned above, you'll want to be sure whether or not your fruit tree is a self-pollinating or cross-pollinating variety. Here's a list to keep in mind, but wherever you buy your tree, you should be able to find out which variety you're purchasing.

Self-Pollinating Fruits

  • Apricots
  • Pomegranate
  • Citrus Fruit
  • Grapevines
  • Persimmons
  • Sour Cherries
  • Blackberries
  • Raspberries
  • Strawberries
  • European plums

Most berries and European plums will do better if they have another variety to cross-pollinate with.

Cross-Pollinating Fruits

  • Apple (there are a few self-pollinating varieties like Golden Delicious, but they will do better if they have a cross-pollinator)
  • Blueberries
  • Elderberries
  • Pears
  • Japanese Plums
  • Sweet Cherries
  • Most nut trees

Bare Root Fruit Trees to Plant in Winter

  1. Apple
  2. Apricot
  3. Asian pears
  4. Crabapple
  5. Sweet Cherry
  6. Sour Cherry
  7. Pears
  8. Peaches
  9. Plums

Bonus: Use the same tips for planting Filberts or hazelnut trees.

Fruit Trees for Small Spaces

ripe blueberries on bush in summer

Even if you don't have a large yard or any land you can still plant fruit trees. Look for dwarf varieties. They can be grown in containers.

Berry bushes like blueberries are well suited to containers as well.

More Resources for Growing Fruit:

  • 5 Tips to Starting an Orchard and Growing Fruit
  • How Many Fruit & Berry Plants Per Person to Plant
  • How to Prune an Apple Tree in Winter
  • How to Treat Fruit Trees Organically: When to Spray for Disease
  • Gardening in April (Garden Tasks by Month)
  • How to Care for Fruit Trees in the Fall & Winter
  • Planting a Fruit Tree Guild
  • Growing Fruit Trees in Pots
  • Pruning Blueberry Bushes
  • How to Get Rid of Mummy Berry Disease on Blueberry Bushes
  • How to Prune Raspberries
  • How to Make Fruit Vinegar
  • How to Can Pears the EASY Way

What kind of fruit do you grow? Do you have a favorite variety or tips to share?

Filed Under: Fruit, Gardening, Raising Your Own Food Tagged With: fruit, gardening, preparedness

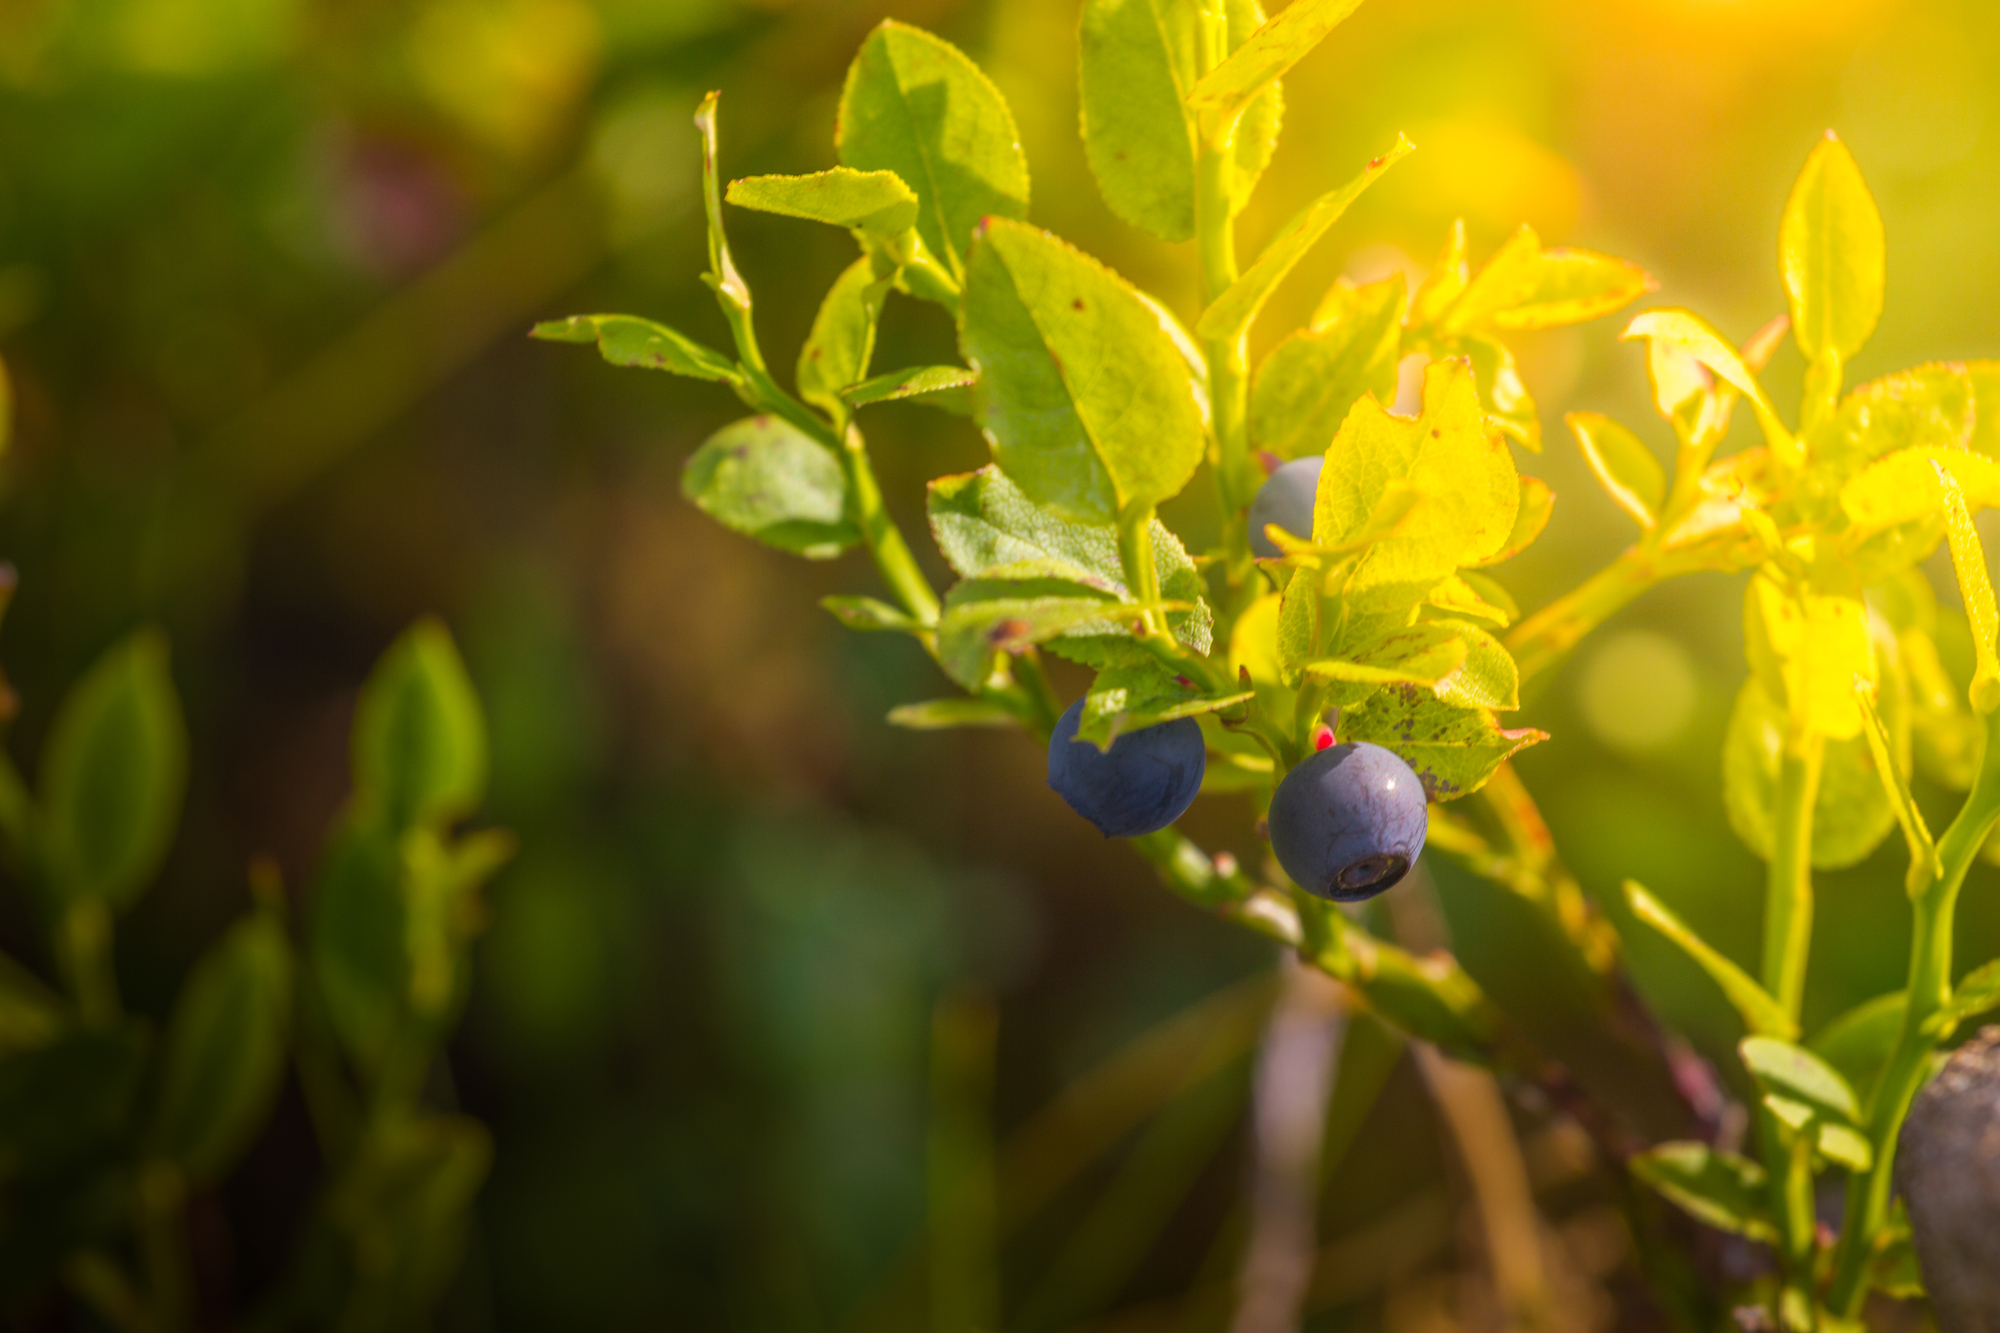
Pruning Blueberry Bushes & Blueberry Bush Care
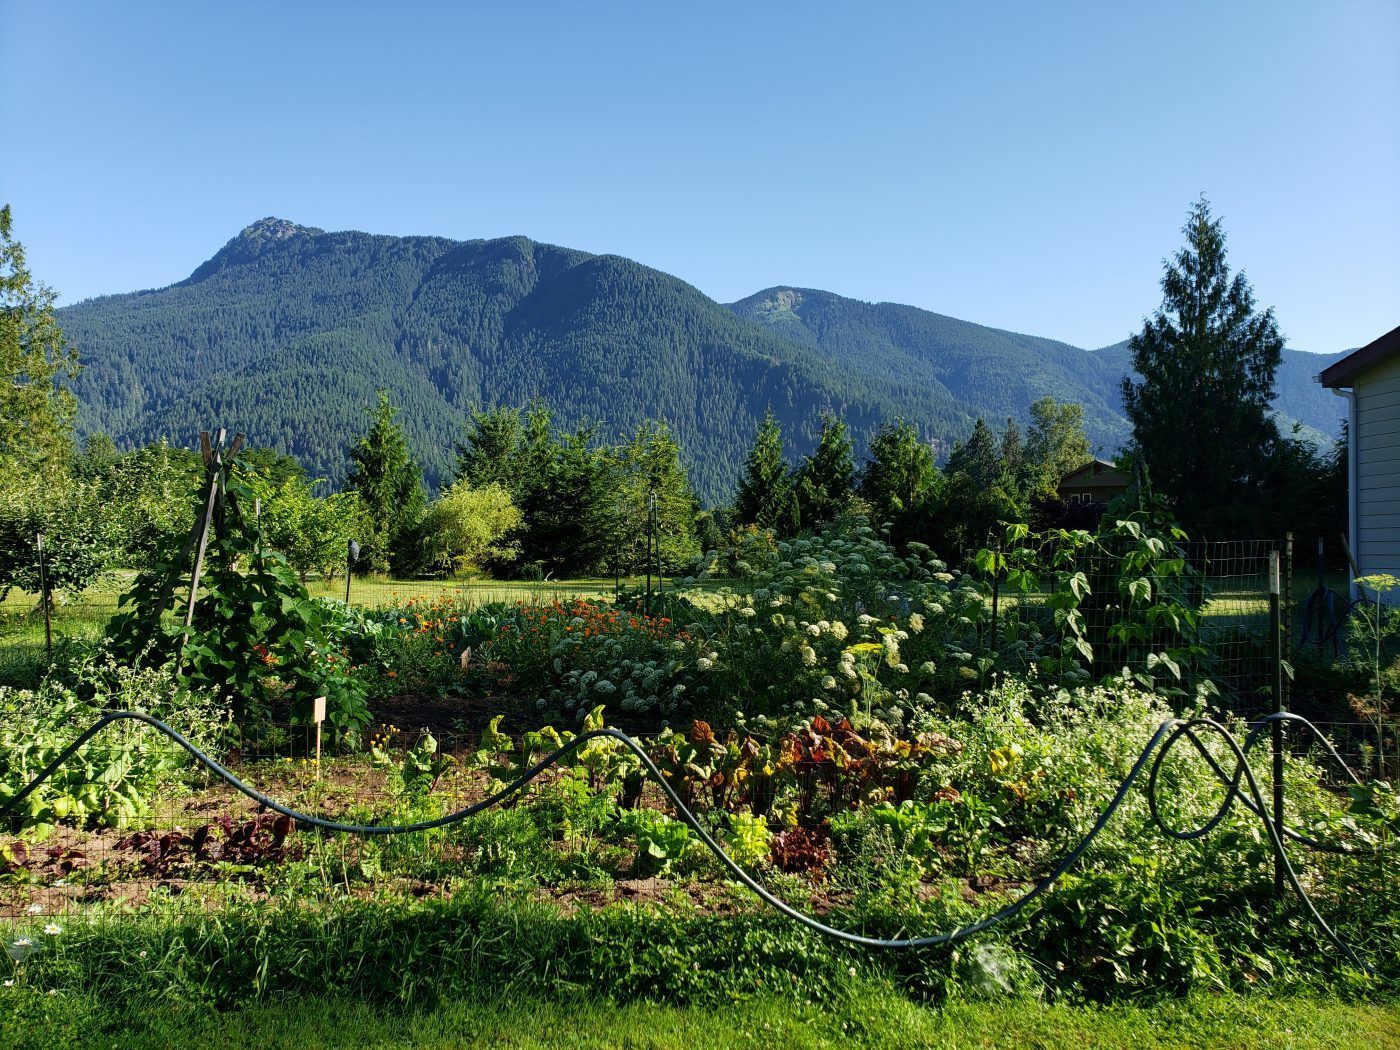
January 28, 2020 by Melissa Norris 83 Comments

ripe blueberries on bush in summer

Pruning blueberry bushes and proper blueberry bush care can help yield not only a larger harvest but also larger, juicier berries. Follow these easy step-by-step instructions on how to prune blueberries and properly amend the soil for quality growth.

Why Should I Prune My Blueberry Bushes?

It seems so contradictory to cut OFF branches in order to get MORE fruit, but that’s exactly what we need to do with our fruit trees and shrubs, namely, blueberry plants.

If you want larger, tastier berries, then yearly pruning of your blueberry bushes will become your new best friend. The best (and most tasty) blueberries tend to grow on newer, stronger canes that are pointing straight up, and while the older canes will still bear fruit, you want a constant steady rotation of new fruit-bearing canes to maintain the fruit quality.

Furthermore, blueberry bushes that are neglected year after year can become overcrowded, making it hard to produce sizeable fruit. The bush may also become unruly and an undesirable shape for harvesting berries.

Pruning blueberries is slightly different than pruning fruit trees, though some of the principals remain the same.

Blueberry branches with buds on them.

I can’t help but think of this verse every time I think about how to prune blueberries or any of our plants. I’m always amazed at how gardening brings to mind so many of the scriptures.

He cuts off every branch in me that bears no fruit, while every branch that does bear fruit he prunes so that it will be even more fruitful. John 15:2

Blueberries are one of my favorite fruits. They’re sweet and juicy on the tongue, freeze better than any other berry, dehydrate well, and can even be grown in a container or pot. Plus, they turn things purple (one of my high school’s colors), what’s not to love?

Looking for great ways to preserve all those blueberries your bushes will be producing? Check out my FREE Preserving Blueberries & Blueberry Recipes eBook or my Home Fruit Preserving eCourse.

How to Prune Blueberries & Proper Blueberry Bush Care (For a Better Harvest)

Update: Watch this video to learn how to prune blueberries, especially older or mature blueberry plants, including restoring old blueberry bushes that might have missed a few prunings.

Blueberry Bushes are Great for Small Spaces

Almost anyone can grow blueberries, even if all you have is a patio or small yard because blueberries can be kept compact. One mature bush, allowed mostly full sun will produce a good amount of berries for eating fresh and preserving.

Blueberries make a gorgeous addition to your flower beds as their flower buds turn to dainty white blossoms in spring and in the fall, their leaves turn a pretty red before falling.

Blueberries are a fairly slow-growing plant. If your plant is only a year or two old, I wouldn’t prune it yet, just let it grow and establish its root system. Our bushes are going on five years old and are definitely in need of some pruning.

Picture of a blueberry bush with a fruit bud and a leaf bud.

When is the Best Time to Prune Blueberry Bushes?

The best time of year to prune blueberries is in late winter or early spring. You want to prune them when the fruit buds are showing. It's also best to prune on a dry day.

If you're like us, the answer for when to prune blueberries (in Washington State) would be mid-January through the first part of March. I also was out for a run and happened upon my wonderful neighbor pruning her blueberries. She's an organic farmer who has served on the board for Organic Tilth, making her my go-to person when I have gardening questions.

She gave me a quick pruning lesson and I'm passing it along to you guys, cuz us homesteading peeps have to stick together.

An up close look at a blueberry branch with pruning sheers cutting off the end.

The Best Method for Pruning Blueberry Bushes

As I mentioned in the video above, I had just pruned my elderberry bushes with my garden tools. Because of this, I always start by sterilizing my tools to avoid the possibility of spreading disease between my plants.

Once you're ready to prune, the first thing you want to do is take off all of the dead branches, these should be the oldest canes on your plant. You'll want to be sure your pruning shears are nice and sharp because it's best if you prune off the dead branches at a 45-degree angle.

If you're cutting off an entire branch, you'll want to cut the branch straight across, right at the very base.

How to Prune New Blueberry Bushes

If your blueberry bush is brand new (the first or second year after planting), you'll stop after the step mentioned above and only remove any dead or diseased branches. You don't need to prune anymore than that on first or second-year-old blueberry plants. The goal for newer bushes is to establish their shape and set them up for success in years to come.

Gloved hand holding a blueberry bush branch. Arrows pointing to the red new growth and the dead branch.

4 Tips to Identify Which Branches to Prune Off Your Blueberries 

As mentioned above, the first thing you'll look for is dead branches. They have to go.

Next, step back and look at the bush. You want the middle of the bush to have good circulation. If it's too compact the berries in the center won't receive much light and won't ripen well.

Look for branches in the middle that don't have any or very much new growth. Those will be the ones you want to remove.

Be sure and cut the branch off down to the very base of the bush. This will encourage healthy new growth.

Now, look at the bush again. Are there branches that don't have any new fruit buds?

There's no point in keeping branches that aren't going to be producing any fruit. Each fruit bud will produce a good handful of berries, so if a branch has several, that's a decent amount of berries.

Finally, look for branches that grow long and leggy with no branches until the end. It's best to cut these as they're not producing fruit along the length of the branch, just the end. Your goal is to keep the branches with lots of new red growth and fruit buds.

Learn how to prune blueberry bushes for a larger harvest. If you've ever planned on having blueberries or have them, this step by step tutorial shows you how to prune blueberries for a maximum harvest and how to mulch and fertilize for healthier bushes. Read this now to get your bushes in prime condition.

So to recap, when identifying branches to prune off you're looking for the following four things:

  1. Dead branches.
  2. Branches in the middle with zero or very little new growth.
  3. Branches with no (or very few) fruit buds.
  4. Long and leggy branches.

As your blueberry bush grows, you'll want to cut off any small shoots coming up at the very base of the plant to encourage upright growth. It's not much fun to hunch over the whole time you're picking berries. Or maybe that's a sign I'm starting to get old… nah.

Once your branches start showing signs of slowing down their production (usually after six years or so) you'll want to begin to trim them back to allow new younger shoots to get established.

Mulching and Feeding Your Plants

After you've gone through and pruned your blueberry bush(es), you'll want to add some new mulch and fertilizer. Blueberries are one of the most acid-loving plants around. In fact, our soil is about a 5.5 on the ph scale and it's not quite acidic enough for the blueberries. My neighbor even adds sulfur to her soil.

I've found various reports on the acidity of used coffee grounds. Some articles say it's only about a 5 while others say it's more. Regardless of how acidic it is, it's an excellent food for your bush and something most of us have on hand.

I put a good layer of coffee grounds around the base of my blueberry bushes each year, making sure to mix it up so it doesn't grow mold. Here is my article on 4 tips for using coffee grounds in the garden.

Next goes on a good layer of manure. Because this layer is going on top of last year's layer of mulch, I don't worry if it's a little bit hot because it won't be hitting the roots right away. After I've added my manure I put on a 5 to 6-inch layer of sawdust.

Cedar is a good choice for blueberries (but not all plants), fir, maple, and pine will work as well. Whatever you can get your hands on basically.

The reason we mulch so heavily here is threefold.

A row of blueberry bushes without leaves.

Why Mulch for Proper Care of Your Blueberry Bushes?

  1. Prevent new weeds from growing.
  2. Help keep in the moisture come our drier summer months (though in the Pacific Northwest that's usually not until after July 4th).
  3. To prevent mummy berry fungus.

What is the Mummy Berry Disease?

If you're in a wetter climate like me, you've probably heard of the dreaded mummy berry disease. It's a fungus that infects first the branch of the plant and then the blossoms. The berry starts to develop, but then stops about halfway through and instead of ripening, turns into a shriveled mauve-colored berry that resembles mummification.

If the infection gets worse, you'll eventually end up with no berry harvest.

The fungus actually comes from a tiny mushroom that grows during the first part of spring (and develops where the mummified berry falls). If you put down a thick enough layer of mulch, the fungus can't grow and therefore can't spread.

Do you have blueberries or plan on putting some in?

Here's a great resource for further reading:

More Spring Gardening Posts You Might Like:

  • How to Get Rid of Mummy Berry Disease on Blueberry Bushes
  • How to Prune Raspberries
  • How to Prune Tomato Plants for a Better Harvest
  • Spring Gardening Tips to Increase Harvest Yield
  • Cheap Garden Ideas for Your Homestead that Make a Big Impact
  • How Many Fruit & Berry Plants Do You Need Per Person?
  • 5 Tips for Starting an Orchard and Growing Fruit
  • Caring for fruit trees in the fall and winter
  • How to Grow Elderberries & Planting Tips
  • When & How to Plant Fruit Trees

Here's our resources page for pretty much everything I've ever covered on growing your own food.

Filed Under: Fruit, Gardening, Raising Your Own Food Tagged With: DIY, gardening, grow your own food, pruning

6 Ways to Drought Proof Your Garden

August 5, 2015 by Amy Maus 2 Comments

If you're facing a drought (or even in the midst of a drought) here are the best ways to naturally drought-proof your garden.

Picture of a vegetable garden with mountains and a blue sky in the background.

If you’re like me, this is not a happy thought…looking forward to a drought. But then again, having one facing you when you haven’t prepared for it would be far worse so here we go!

Drought conditions arise when an area is subject to a deficiency in water supply over an extended period of time. In the United States since 2012 much of the country has been suffering from at least moderate drought. If you live in the western United States this is currently a real concern.

A woman crouched in the garden holding up a paper with soil test results.

6 Must-Do Things to Drought-Proof Your Garden

1. Soil

The type of soil you have in your garden spot is one of the most important aspects of determining how much your garden is going to suffer from the extreme heat and dry conditions you are facing. And although you might not be able to change the type of soil you have in a big hurry, just knowing what your soil type is and how it reacts to drought will be a help to you.

The healthier your garden soil, the more drought-resistant it will be.

Pictured above is me pointing to my soil test results that I had done on my garden two years after adding wood chips as mulch to half our garden area. You can read this post on using wood chips in the garden and whether or not we'll be covering the other half of our garden or not.

Image of feet walking through the garden adding compost over the soil.

3 Main Soil Types

There are three main soil types:

  • Sand: Sandy soil has larger particles of soil. It feels gritty to the touch. It warms up quickly in the spring and has the best drainage of any soil types. The problem with straight sandy soil is that the drainage is so good that the water will go right through it.
  • Silt: Silt has smaller particles of soil than sand. It feels slick to the touch. It holds water well so it doesn’t have very good drainage and is colder than sandy soil. It packs easily so it doesn’t aerate well.
  • Clay: Clay soil has even smaller particles than silty soil. Because of this, it holds water and nutrients the best. Clay feels sticky to the touch. Clay soil takes a very long time to warm up in the spring. The particles are so tiny that they pack together very tightly and then when they dry out the soil is ‘stuck’ together, making working dry soil very difficult.

How to tell what type of soil you have: Take a handful of soil, moisten it and pack it into a ball. If a ball will not form, but the soil falls loosely into your palm, then you have sandy soil. If a ball forms easily and stays in perfect shape, then you have clay soil. If you have silty soil, you will be able to form a ball, but a lot of the soil will be stuck to your hand and will leave your fingers dirty.

A photo of cabbage seedlings planted in the garden in a row.

Ideal Soil Type

The perfect soil type is what we gardeners refer to as “loamy soil”. Loam is not a soil type but a combination of the three above soils. This is a gardener’s dream.

Loam also contains humus which is decomposed organic matter. Humus is extremely valuable during drought conditions as it will hold the moisture a long time close to the roots where it is needed.

In addition to this, because of the aerating properties, if a small amount of moisture is added to the top of the soil, it is quickly absorbed into the humus and retained there. Loam is dark in color and feels partly sticky and partly gritty due to its combination of soils.

When doing the ball-test, loam will form a ball, but then as you open your hand the ball will fall into chunks due to the mixture.

Read here on how to improve garden soil. And read here for 6 natural fertilizers to improve your soil. You may also like this post on how to test the pH of your soil and how to make necessary amendments.

Image of a garden that has dried leaves layered on top of the soil for sheet composting.

2. Mulching

Mulching your garden is probably the biggest help you can give to your garden if you are facing a drought. Mulch can be organic or inorganic, but is basically placing a layer of something on top of the soil to protect the soil from drying out and to protect the root area from the temperature of the air.

Mulching also helps to naturally prevent weed growth and can protect against erosion. Do not be stingy with the mulch…the deeper the better. Also, organic matter added to your soil will give great benefits to water retention.

The insulating qualities of mulch keep the hot scorching temperatures of drought from damaging the roots of your plants and also slow down moisture evaporation from the soil surface. Organic mulches absorb moisture quickly and retain it longer than soil that has not been mulched.

Mulch is generally put on the plants from 2-6 inches deep. The smaller the particles of mulch, the shallower you can put it on. Larger pieces like branches or twigs should be put on deeper.

A hand scooping up a handful of woodchips from a pile.

Organic Mulches

The following are considered good organic mulch options:

  • Bark
  • Compost
  • Grass clippings
  • Peat moss
  • Wood shavings or sawdust
  • Straw
  • Pine needles

Inorganic Mulches

  • Crushed rock
  • Plastic film or row coverings
A photo of a garden that has been mulched with woodchips.

3. Weeding

Weed with care during a drought. The use of pesticides and herbicides is hard on the plants and requires more water for the plants to remain healthy. Try to avoid using these in your garden during a drought (and at all if you're wanting to follow more organic practices).

Although the weeds take valuable water and nutrients that are needed for your plants, I think you should be careful with your weeding. I have noticed that a few tall weeds can help shade the plants. At times of severe drought, you may want to wait until a cooler day to pull those last few weeds.

As I was walking through a friend’s garden recently on a scorching hot 109 degree day, I noticed her garlic patch. The half that she had recently completely weeded was turning brown and curling up. The half that she hadn’t weeded yet, had several tall weeds around each garlic plant. The weeds were taller than the garlic but weren’t crowded enough to do much harm, and I could tell they were actually aiding the plants by shading them.

In this section of my friend's garden, the garlic was still green and standing up tall and the heat didn’t seem to be bothering them. The watering was equal throughout the patch. I think it is a lot like spring transplanting, the disturbance of the roots at transplanting time calls for a cool shady day to prevent damage, much like the disturbance of these garlic roots when these were weeded during a drought.

Best way to water your vegetable garden to help eliminate disease and increase yield soaker hose at base of tomato plants

4. Water

As mulching is a huge help to retain water in the soil, you will still need to add water if it hasn’t rained in a long time. Putting the water beneath the mulch is the very best if you can.

Drip Irrigation

With a drip irrigation system getting water beneath your mulch is easier to do. Watering less frequently and deeper is the best way to water. The water reaches down to where the roots are and encourages deep root growth.

If your plants have been deprived of water for a long time, they will wilt, and even if they don’t die, they will be unproductive because they are starving for water.

If you water often and shallow, then the roots will stay near the surface, which is very dangerous for the plants during drought. With proper maintenance, a drip irrigation system is one of the best things you can do for your garden to prepare for a drought year.

A raised hose spigot with a teepee of beans growing behind it.

Evening Watering

Overhead watering will allow more water loss through evaporation, as will watering during the heat of the day. Evening watering is considered the optimum time to water during a drought.

With all of your plants, it is best to wait until the plants are close to the wilting stage before you water them to encourage deep root development. If they are in the flowering or fruiting stage, it is important that you don’t let them become too dry.

5. Shade

Have you noticed that the part of your lawn that remains green the longest when the summer sun is scorching everything else is the section that has shade during the hottest parts of the day? If you have areas of your garden with no shade, you can provide artificial shade.

A photo from underneath a shade cover in a garden bed.
Photos by Cooked Photography. Published in Growing Under Cover.

Shade Cloths

The type of shade cloths that are used for dog kennels would work quite well. This burlap shade cloth works well with multiple garden uses. We don’t always know ahead of time if it’s going to be a drought year. Long narrow rows of vegetables look neat and tidy, but they are much more susceptible to harm by drought than wide rows or blocks of vegetables.

Blocks or wide rows tend to shade themselves once the plants are a bit larger and this also cuts down on weeding. The shade helps preserve the available moisture.

Another planting arrangement that may help a lot is known as “the three sisters” Corn, Squash, and Beans. These three plants can be planted together in the same area as a way to use the soil more efficiently. Corn sends its roots deep into the soil, beans send their roots out wide and shallow and the squash roots are in between. This way the water and nutrients in the entire area are well used and not wasted.

Other plants can be placed together in the same manner.

Large bean teepee with a mountain in the background.

6. Choose Plants Wisely

We know there are some plants we consider warm-weather plants and some we call cool-weather crops. The warm-weather plants don’t necessarily do well during a drought and may still require some special care.

However, we do know that some plants fare much better than others during a drought, and you may want to consider just which plants you should be spending all your time and money on.

Drought-Tolerant Vegetables

  • Beans (choose chickpea, limas or moth beans)
  • Eggplant
  • Okra
  • Peppers (varieties that produce smaller fruits will bear the heat better)
  • Cucumbers
  • Squash
  • Pumpkin
  • Swiss chard
  • Roma Tomatoes
  • Melons
  • Mustard Greens
  • Rhubarb
  • Asparagus (if they are established before the drought comes)
  • Potatoes (a dry-land crop and require little water after they are first established well)

If you’re trying to decide between two varieties of the same vegetable, choose the plants with the smallest leaves. Varieties with extra-large leaves tend to lose water into the air sooner than the smaller-leaved varieties.

Peas and beans climbing a fence in a garden.

Plants Susceptible to Drought

  • Corn – although it can tolerate the heat, it does suck up a lot of water, so if you are going to be low on water, you might as well skip it. Unless you can find Black Aztec Corn , which will do well with the drought. Prepare it by roasting the kernels.
  • Peas
  • Lentils
  • Brussel sprouts
  • Cabbage
  • Broccoli
  • Cauliflower
  • Turnips
  • Watercress.

Shallow-rooted greens will also die in severe drought. Greens can easily be grown in pots though, so if you love the shallow-rooted greens like lettuce you can pot them and move to a shadier, cooler location.

If your garden is already growing and showing signs of stress, you may want to concentrate on the varieties that are more resistant to drought.

A woman crouching in the garden pulling up a head of garlic.

More Gardening Articles

  • Sheet Mulching the Easy Way
  • Fall Gardening Prep – 10 Tips to Improve Your Soil
  • Beginner Gardening Secrets You Need to Know
  • Science-Based Companion Planting Strategies
  • 13 Basic Steps to Starting a Vegetable Garden
  • How to Create a Garden Plan for More Harvest & Less Stress
  • Planning a Fall Garden (28 Crops to Plant in August)
  • Preventing and Treating Early Blight for Tomato and Potato Plants

Filed Under: Gardening, Raising Your Own Food Tagged With: gardening, preparedness, survival

5 Reasons Why You Need Heirloom Seeds

February 18, 2015 by Melissa Norris 205 Comments

Heirloom seeds are seeds that have been around for generations. Their stories can be passed down from one family to the next and, oftentimes, those stories are pretty great! Here are five reasons you should consider growing heirloom seeds in your garden.

A woman's hand holding dry bean seeds.

I've shared the list of heirloom varieties I like to grow in my garden, including these 10 unique varieties of heirloom seeds. I've even shared how to save and store your heirloom seeds each year, but why should you consider them for your own garden?

For those of you who don't know our story, my grandparents brought the Tarheel strain of pole beans with them when they migrated from North Carolina (Avery County area) in 1941. We've been saving it and replanting it every year since.

When I think of how many lives have been touched by that first seed my ancestors planted, I'm humbled by what God can do with something so small. It's nothing short of amazing to me how we can put a small hard seed in the ground and with a little care it produces bushels of food for us to eat. Talk about a modern-day miracle right there in our backyards.

With the threat of GMOs invading our food source (the FDA just approved a GMO apple) I'm even more excited and dedicated to only planting and growing heirloom seeds.  

Bean seeds being direct down into the soil.

5 Reasons You Need Heirloom Seeds

Frugal – Buy Once, Harvest for Life

Heirloom seeds need only be given or purchased once. You can save the seed every year (unlike hybrid or GMO seeds), making heirloom seeds the ultimate in self-sufficiency.

Learn how to save heirloom seeds here, and then be sure to share them with friends to build community sufficiency, which is becoming one of my favorite things! 

A woman holding seedlings in her hands, standing outside by a potting bench.

Stronger Plants

Because you, the gardener, are selecting the best producing and strongest plants to save the seed from each year, your saved heirloom seeds will become stronger plants due to your natural selection.

They will also acclimate to your weather and climate, making them the very best choice for where you live.

fresh green beans being snapped in bowl on counter for pressure canning

Taste

Heirloom seeds haven't been selected and bred for uniform shape in order to sell better on a grocery store shelf.

They have a depth of flavor rarely found in hybrid seeds. Check out my podcast on the benefits of heirloom seeds.

A woman in a bean tunnel picking beans.

Variety

There are way more varieties and colors in heirloom and open-pollinated plants. From purple potatoes to blue tomatoes. There is beauty in the varieties you'll likely only find in specialty stores and farmer's markets.

Gardening should be as colorful as a masterpiece painting and just as beautiful as it is delicious.

The Stories

Heirloom seeds are a living part of our ancestors, a living connection back to those who went before us. They're just as God made them when He created this world and nature.

I love to hear the stories you've shared with me on different strains of seed you've come across or your family has saved and passed down.

Woman and her daughter picking green beans growing on a vertical trellis.

More Posts You May Enjoy

  • Where to Buy Heirloom Seed
  • List of Heirloom Varieties to Grow in Your Garden
  • 10 Unique Heirloom Vegetables to Grow in Your Garden
  • Natural Weed Control & Heirloom Flowers
  • Heirloom Seed Saving & Gardening

Filed Under: Gardening, Raising Your Own Food Tagged With: gardening, preparedness, seed giveaway, survival, tarheel green pole beans

  • 1
  • 2
  • 3
  • Next page

Grow Your Own Food In-Person Worksop

Saturday May 20th

$349

An intimate and hands on workshop

At Norris Farmstead

Click Here to Learn More

Want to grow a year’s worth of food?

Get my FREE planting chart!

Know exactly how many plants per person you need to plant with my easy worksheet and chart!
Melissa K. Norris

Follow me:

  • Start Here
  • Courses
  • Academy
  • Contact
Log In

Articles

  • Gardening
  • Homesteading
  • Recipes
  • Lifestyle
  • DIY

Podcast

  • Orchard Planning to Keep Pests Out (Live Coaching Call)
  • How to Boost Your Immune system (10 Easy Ways)
  • Homesteading With Special Needs Children
  • Seventh-Year Land Sabbath and Bread Baking Tips (Live Coaching Call)
  • Must-Have Pantry Items For Long-Term Storage

Books

  • Everything Worth Preserving
  • The Family Garden Planner
  • Hand Made
  • The Made From Scratch Life

Education

  • Organic Gardening Workshop
  • Home Fruit Preservative Canning e-course
  • Home Canning With Confidence
  • Homemade Bread & Baking Class
  • Natural Homemade Bath and Beauty
  • Pioneering Today Academy


Copyright 2023 - Melissa K. Norris Pioneering Today LLC

  • Privacy Policy
  • Affiliate Disclaimer
  • Terms of Use

Melissa K. Norris and Pioneering Today LLC is a participant in the Amazon Services LLC Associates Program, an affiliate advertising program designed to provide a means for sites to earn advertising fees by advertising and linking to Amazon.com.