Learning how to make and preserving bone broth is a skill every homesteader should have. Homemade bone broth is super easy and frugal. It can be made easily in a crockpot from any type of meat bone such as beef, chicken, ham, etc. Homemade broth also results in a more nutritious and mineral-rich end result with a deep rich flavor.
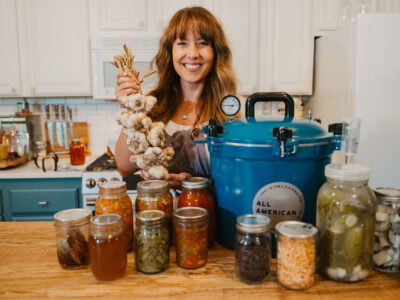
Anyone else feel late to the bone broth parade? Up until a year ago, I had no idea the awesomeness of bone broth. I simply knew it was a good way to get more money from your meat purchases and a more frugal way to make broth at home. It might be among my top favorite things to have pressure canned bone broth lining my pantry shelves.
Then I started reading up and discovered bone broth supports good gut health among other parts of our bodies.
Listen in below to the full podcast, How to Make Chicken Broth and 5 Ways to Preserve It, of the Pioneering Today Podcast, where we don’t just inspire you, but give you the clear steps to create the homegrown garden, pantry, kitchen, and life you want for your family and homestead.
It's important to note that I am not a certified medical practitioner. This post is not intended to diagnose or treat but is for informational purposes only. Please contact your healthcare professional before introducing new herbal and natural remedies into your wellness routine.
Table of Contents[Hide][Show]
What is Bone Broth?
Bone broth is pretty simple, it's a broth made out of the bones from animals, usually chicken, beef, or fish. You cover the bones with water, add in some vegetables and herbs for extra flavor and nutrients, and let it simmer on low for hours until all the goodness from the bones and vegetables is leached out into the water.
This is how many frugal homes stretched their meals. Make this oven-roasted chicken recipe (or an Instant Pot whole chicken), roast, or fish, and save the bones to make a soup or broth the next day.
(Want the ultimate in frugalness? Check out our Great Depression Era Money Saving Tips Series.)
Why is Chicken Noodle Soup Good When You're Sick?
Turns out Grandma knew what she was talking about! Chicken noodle soup when you have a cold is actually a good idea! Here's why:
- Collagen - Collagen is good for our joints, nails, skin, and hair. (Source)
- Gelatin - Gelatin is good for gut health. (Source)
- Easy to Digest - Broth is easy to digest, which gives our digestive tract a break when our bodies need to focus energy on healing.
- Nutrients - Bone broth is one of the nutrient-dense foods you should work into your regular diet.
When I'm not making chicken noodle soup, I love using broth to make sauces, gravies, stews, and even in place of water to cook quinoa or rice. Pretty much anywhere I'd use water in a savory recipe, I'll swap it out for broth.
Tips for Making Bone Broth
- Start out with an organic pasture-raised animal. You don't want to be pulling out hormones, antibiotics, or GMO gunk from animals that are given growth hormones and corn-based diets. We raise our own meat chickens and beef, so I know exactly what went into our meat and what's going to come out of it.
- Toss a 1/4 cup of apple cider vinegar over the bones a half hour before cooking. The acid helps leach the minerals out of the bones, resulting in a healthier end product.
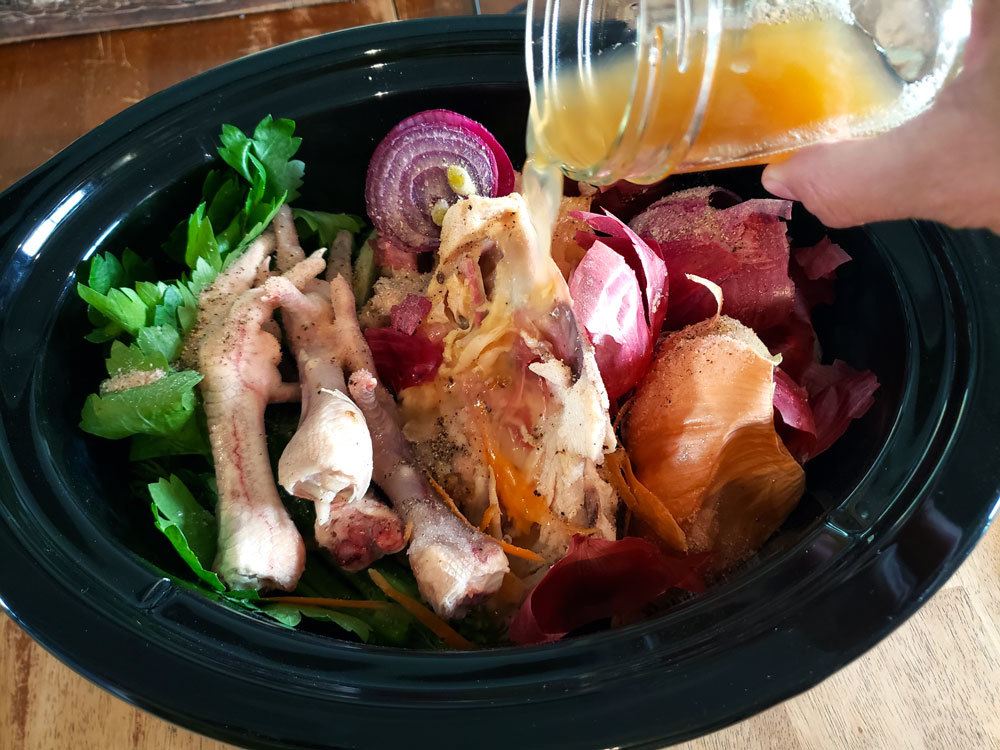
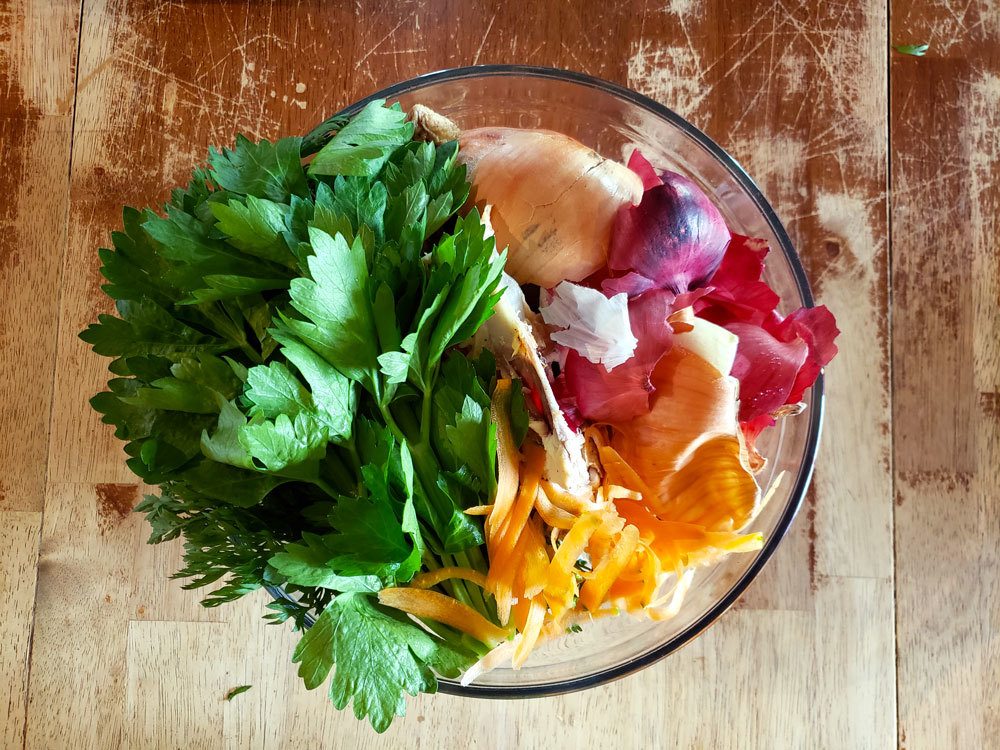
- Save the skins of onions and garlic. You know how we usually toss out the skins, either to the garbage or compost pile? We should be saving them to use in stock or soups. I had no idea the skins had more nutritional value than the actual onion or garlic, but NaturalKids has a great article on why we should be using the onion and garlic skins. Plus, the skins of yellow or red onions gives your broth a beautiful deep color.
- Save veggie scraps and ends, too. When you're peeling your carrots, save the skins and tops in a ziplock freezer bag. Chopping celery? Save the leaves and ends! Peeling an onion or garlic? You get the idea. Anytime you have a few herbs left over, toss them in your freezer bag. When the bag is full, you're ready to make broth.
- Store it in the freezer until you have enough. I keep a few bags in the freezer to put small bits of vegetables (and now skins) until I have enough to add to a batch of stock. Same goes with the carcass and bones. It all goes into the freezer until I'm out of broth or have enough to make another batch.
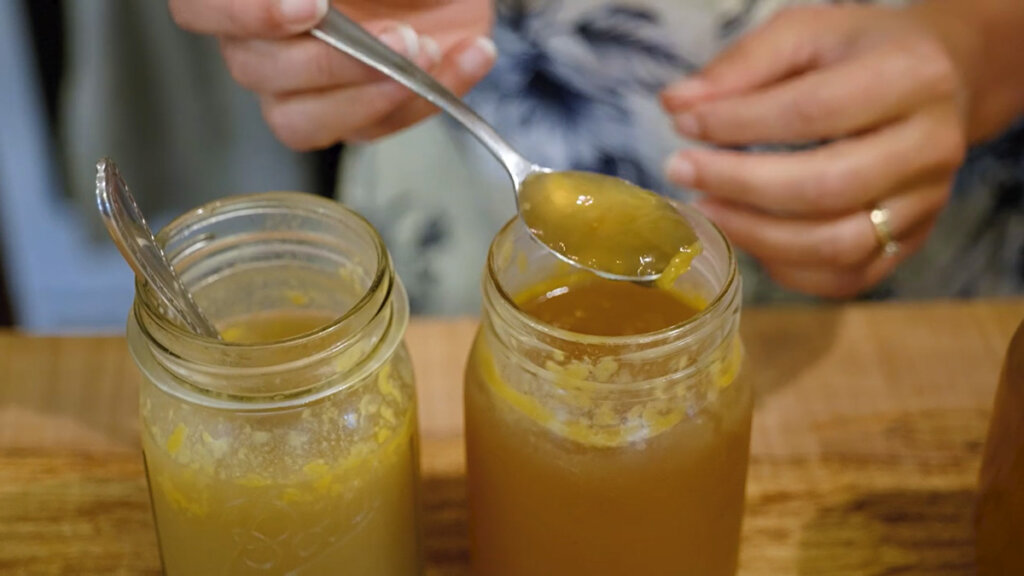
- Get your broth to gel. Getting your broth to gel is considered the holy grail of broth making. I've found it easier to get beef broth to gel compared to chicken. If you're not getting a gel (think jello or really thick broth once cooled) it's probably due to the fact you need more bones. While the broth is still good for you, if it's not gelling it means it doesn't have as high of a level of gelatin. When I cook my broth in the slow cooker on low for a longer period of time I tend to get more of a gelling factor.
- If it's STILL not gelling, use chicken feet. I know this may seem strange, but the feet of the chicken contains the most gelatin than all the other bones. Adding a few chicken feet to the slow cooker results in a gelled chicken broth every single time!
How to Make Bone Broth
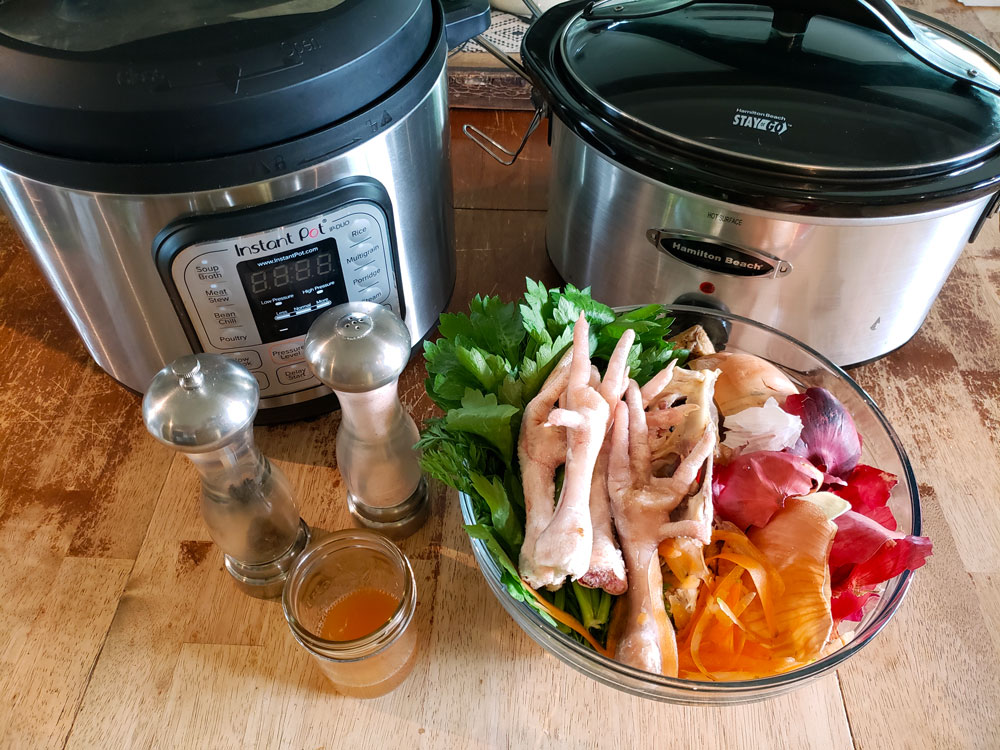
Ingredients & Supplies Needed
- Cooked bones and/or the carcass of chicken (the feet are an excellent addition) - Again, if you want to make a large batch all at once, save your bones and/or carcasses in a freezer bag until you have enough for a batch.
- Apple Cider Vinegar - This helps leach out the extra minerals in the bones and veggies. Don't skip this ingredient! This is Mistake #1 that people make – not adding apple cider vinegar. ACV helps break down the bones which aids in getting all the healthful benefits from them into the broth. Collagen, gelatin, marrow, and minerals are all fantastic for the body. To make it even more frugal I use homemade apple cider vinegar.
- Vegetables - Mistake #2 that people made is not using the odds & ends and peelings from their vegetables. Think ends of carrots, celery leaves, onion scraps and skins, etc. Garlic is also another great addition. You don’t have to peel the garlic but I recommend that you smash the cloves with the flat side of your knife to help release the oils. Vegetables and scraps don’t need to be chopped fine. They can be used as large chunks.
- Herbs - Herbs aren't necessary, but they add an incredible depth of flavor, plus they give added nutrients to the broth. Dried herbs work, but fresh herbs are a terrific addition. I’ll add whole sprigs of herbs such as rosemary or thyme. Using scraps and homegrown herbs is also frugal. Do you see a theme here? It’s not taking much to make homemade broth.
- Large pot or slow cooker - You can make broth by simmering in a large pot on the stovetop, or by simmering in your crockpot. The choice is up to you (although many people are more comfortable leaving a crockpot on low than their stovetop).
Step-by-Step Directions
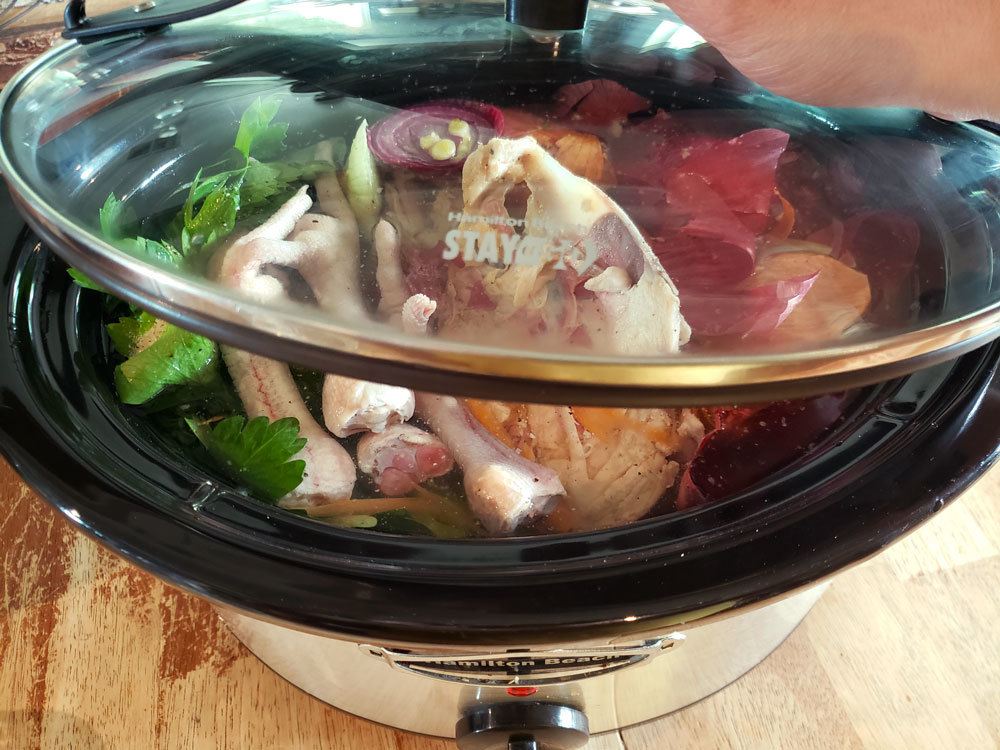
- Place the carcass and all veggies/scraps in the pot or slow cooker.
- Cover the carcass with water and add 1/4 cup of apple cider vinegar over the bones and let it sit for a half-hour or so.
- Bring to a boil, then reduce heat to a low simmer. (In the crockpot, turn to high heat until boiling, then reduce heat to low.)
- Simmer for 12-24 hours (in the winter, I like to cook the broth in a large pot on top of our woodstove. Here are my 6 tips for cooking on a wood stove if you want to try that route as well.)
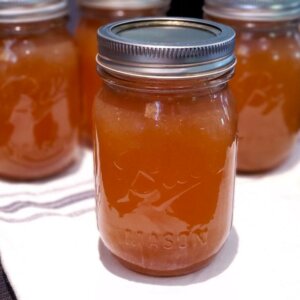
- Strain your broth through a colander. Once you've strained it, it's ready for use in soups, stews, gravies and more.
Here's a great post from Wardee at Traditional Cooking School on making continual broth or stock.
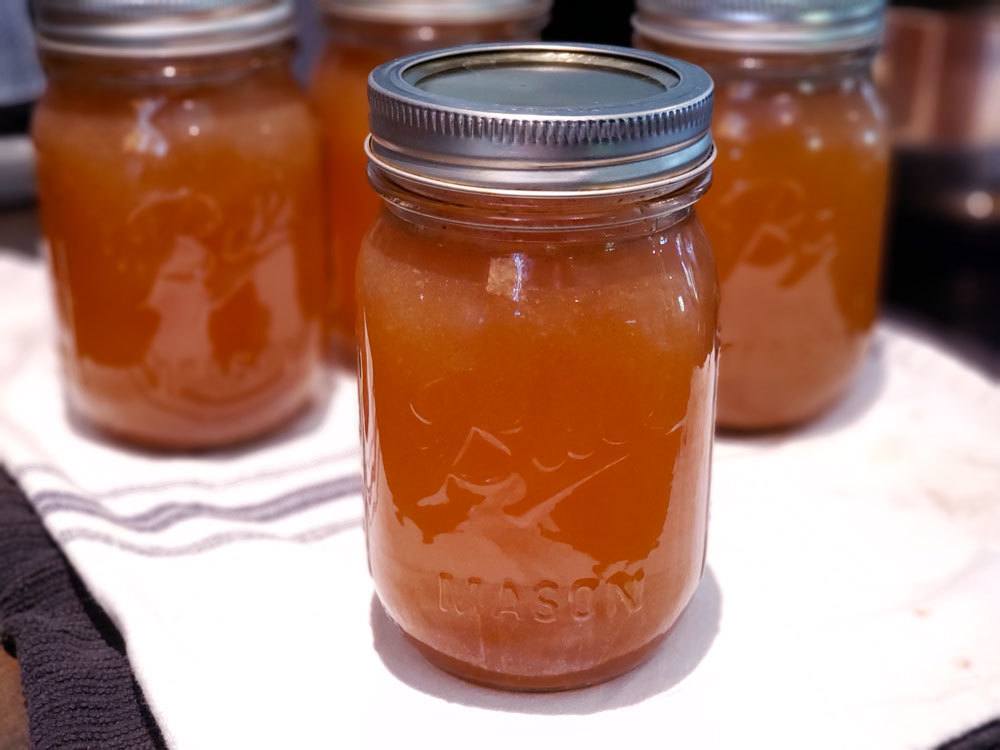
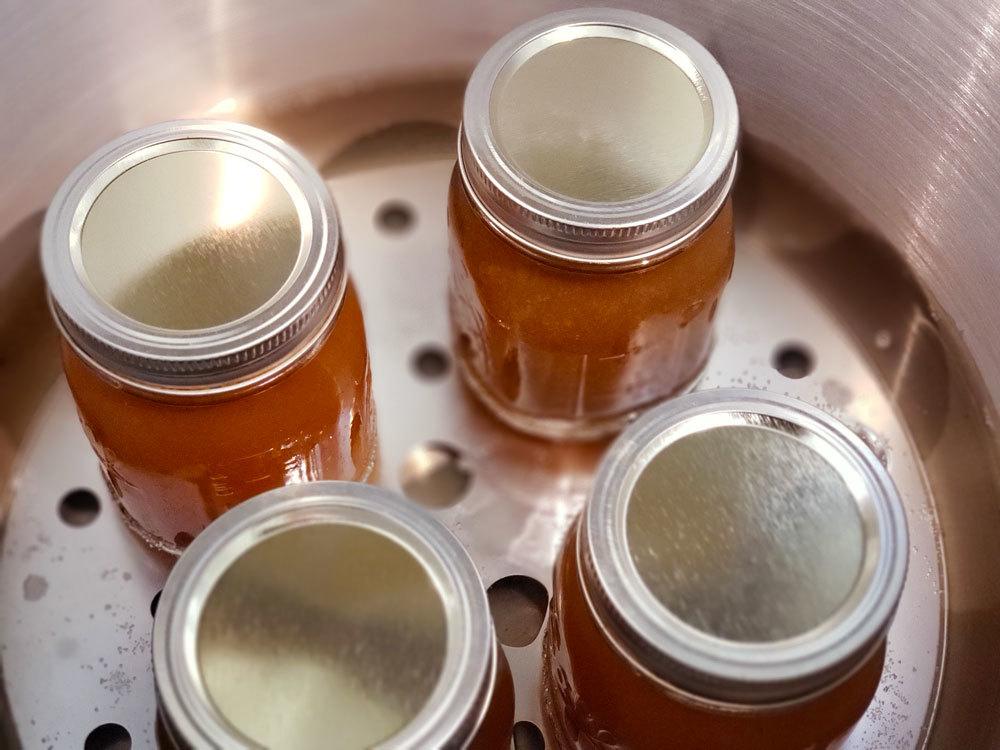
If you plan on canning to preserve bone broth, then you need to place it in the fridge to let the fat layer firm up because it needs to be removed before canning. Broth MUST BE pressure canned and never ever, ever water bath canned.
Furthermore, if you've added vegetables to your broth, you must increase the processing time to 60 minutes for pints and 75 minutes for quarts.
Frugal Tip: The carcass (not the vegetables) can be used up to two times. If you didn’t get much gel the first time then it won’t be as good for a second use as there won’t be any nutritional benefits. Note that even if you did get a good gel the first time around, the second time you use a carcass for broth you won’t get as much gel.
6 Ways to Preserve Bone Broth & Stock
- Refrigerator - Store broth in the fridge for up to six months. I love this method because it doesn't require any canning or freezing. But you have to make sure your broth has enough of a certain thing to make this safe and work.
- Dehydrating - It's a liquid, so this seems a little weird, but you can totally dehydrate broth at home for a bone broth powder.
- Homemade Bouillon - Yes, this is a kind of genius, and I don't know why I didn't think of it on my own. You cook down your stock to make bouillon, and you can also freeze it in cubes, making it much quicker to thaw. Here's how to make your own homemade bouillon cubes.
- Freezing - You can freeze your broth, but I'm not always the best at planning ahead and sometimes forget I need to thaw it out until the moment I need it. That's really inconvenient so I prefer the fridge or pressure canning, but if you're a bit better at planning than me, the freezer works as well. Just remember, it's a liquid, and though Mason jars are fine to freeze, the stock will expand, and sometimes jars crack when thawing. When filling your jars, use a straight sided jar, if possible, or fill the jar and keep the liquid one to two inches below the shoulder of the jar.
- Pressure Canning - Canning broth and stock is something you must do in a pressure canner to be safe. You also need to make sure you skim off the fat before canning. The fat is thick, and the heat can't penetrate through it as well to make sure it's heated high enough to be safe. Check out my video tutorial and blog post on how to can bone broth in a pressure canner and what pressure canning does to bone broth. Pro Tip: If you've added vegetables to your broth, you must increase the processing time to 60 minutes for pints and 75 minutes for quarts.
- Freeze Drying - Continue cooking down your broth (simmer it with the lid off) until it concentrates. Pour the broth into your trays and freeze-dry it. Right now Harvest Right is offering an incredible deal through November of $500 OFF!
Everything Worth Preserving
Looking for more preserving recipes? This book is it! Not only do I cover the nine different methods for home food preservation, but I also share all of my step-by-step tutorials, recipes, and easy-to-use charts.
Learn everything you need to know about cold storage (aka freezer), water bath/steam canning, pressure canning, dehydrating, fermenting, freeze-drying, root cellar, infusion, and salt/curing in the new book, Everything Worth Preserving.
Preserve food for a healthy well-stocked pantry & peace of mind, all in one resource.
In this book, you can search for any produce from A-Z (such as tomatoes) and get a list of all the ways to preserve that item, plus recipes! Grab your copy and all of your pre-order goodies here.
Most of us make chicken and beef broth, but you can also make fish stock. Here's a link on how to make fish stock.
Does Making Homemade Chicken Broth Save Money?
Stock extends the use of what we already have (or what many might just toss in the garbage).
As you can see in the photo above, I'm using the leaves off of a bunch of celery, carrot peels, onion and garlic skins, and a chicken carcass. These are all scraps from the food I used for other meals so this broth is costing me virtually $0.00.
The only cost will be that of the sea salt and the chicken feet (if you're not raising your own. I have seen deals for chicken feet for $.99/lb).
When I was doing the math to see if raising our meat chickens was worth it, I factored in that I can get 8 to 10 cups of stock per chicken carcass (organic stock in the store is about $4 a quart, so this equates to at least $8 saved per chicken).
The savings are even more since I also use homemade ACV, there is virtually zero cost other than the sea salt added for flavor. We're all looking for ways to stretch our dollar and to get more nutrition into our diets, bone broth is right up at the top for best value.
📖 Recipe
Homemade Chicken Broth
Equipment
- Pressure Cooker or Crock Pot
Ingredients
- 1 whole chicken bones only (plus optional chicken feet)
- 1/4 cup apple cider vinegar
- 4 cups vegetable scraps or a combination of carrots, celery, onions, parsley and/or other herbs
- 16 cups filtered water
Instructions
In a Crock Pot
- Place the carcass and all veggies/scraps in the slow cooker.
- Cover the carcass with 16 cups (1 gallon) water, or as much as your crock pot will hold.
- Add 1/4 cup of apple cider vinegar over the bones and let it sit for a half-hour or so.
- Bring to a boil, then reduce heat to a low simmer. (In the crockpot, turn to high heat until boiling, then reduce heat to low.)
- Simmer for 12-24 hours (in the winter, I like to cook the broth in a large pot on top of our woodstove. Here are my 6 tips for cooking on a wood stove if you want to try that route as well.)
- Strain your broth through a colander.
- Once you’ve strained it, it’s ready for use in soups, stews, gravies and more.
In an Instant Pot
- Place the carcass and all veggies/scraps in the pot of your instant pot (or other pressure cooker).
- Cover the carcass with 16 cups (1 gallon) water.
- Add 1/4 cup of apple cider vinegar over the bones and let it sit for a half-hour or so. (Alternatively, if your Instant Pot has the "delay" button, you can set that for 30 minutes then follow the next step.)
- Seal the vent on the top of your Instant Pot, then set the pressure to high and set the timer for 1 hour.
- Allow pressure to release naturally, then carefully strain your broth through a colander.
- Once you’ve strained it, it’s ready for use in soups, stews, gravies and more.
On the Stovetop
- Place the carcass and all veggies/scraps in a large stockpot on the stove.
- Cover the carcass with 16 cups (1 gallon) water.
- Add 1/4 cup of apple cider vinegar over the bones and let it sit for a half-hour or so.
- Bring to a boil, then reduce heat to a low simmer.
- Simmer on low heat for 12-24 hours.
- Strain your broth through a colander.
- Once you’ve strained it, it’s ready for use in soups, stews, gravies and more.
Notes
- Here are my 6 tips for cooking on a wood stove if you want to try that route as well.
- Add additional chicken feet to the pot for extra gelling power.
- If you'd like to preserve the broth, see my post on how to can broth at home.
- Pro Tip: If you've added vegetables to your broth, you must increase the processing time to 60 minutes for pints and 75 minutes for quarts.