Melissa K. Norris
  • Start Here
  • Podcast
  • Articles
  • Shop
    • Books
    • Classes
    • General Store
  • In Person Workshops
  • Academy
Log In

How to Dry Fresh Herbs at Home 

September 1, 2022 by Melissa Norris 17 Comments

Learning how to dry fresh herbs at home is easy, and there's no replacement or substitute for doing it yourself. Learn the best methods for drying herbs at home in this post!

dried herbs in Mason jar on counter

Growing an herb garden is an excellent place for a beginner gardener to start, and making your spice blends at home is a frugal way to save on your grocery bill.

Why I Love Growing and Cooking With Herbs

When drying your own herbs, you know that they haven't been sitting on the shelf at the grocery store for years, and your food will taste much better because you are using ingredients from your garden. 

Cooking with fresh herbs is incredible. I love adding fresh basil before serving my homemade tomato soup, and dill to this Ukrainian Borscht recipe, or having rosemary, thyme, and sage on hand to make marinated cheese balls. 

[adthrive-in-post-video-player video-id=”EPJiUO15″ upload-date=”2022-08-29T23:33:24.000Z” name=”Secrets to Drying Herbs With This Centuries Old-Method for Stronger Medicinal Properties.mp4″ description=”Learn how to dry fresh herbs at home to use all year long.” player-type=”default” override-embed=”default”]

The depth of flavor is so much more than the dried version. However, if you live in a climate that has cooler winters, then not all of your garden herbs are available year-round. 

So like any true Pioneer, we're preserving our herbs for use during the winter. When cooking with dried herbs, I put the herbs in at the end of the cooking time to maximize the flavor.

If you're looking for more of a fresh herb flavor, try preserving herbs in salt following this homemade celery salt recipe or this recipe for preserving fresh basil.

A pot of basil on a deck.

When to Harvest Herbs

It's crucial to know how to prune and harvest herbs correctly because you want to get the most flavor out of your herbs.

As an herb grows, it has the most intense flavor in the leaves just before it flowers. If you aren't ready to harvest, it's best to clip off the flower buds to keep the plant from putting its energy into the flowers.

The best time of day to harvest herbs is in the early morning. Herbs have the highest concentration of oils in their leaves at this time of day. You want to gather right after the dew has dried but before the sun begins to heat the air and plant.

Basil is the exception to this rule and can be picked later in the morning.

Fresh celery leaves in a colandar.

How to Harvest Herbs

The part of an herb used for cooking is generally the leafy part. I find it best to use scissors and cut off the entire stem to prevent the leaves' oils from rubbing off on your skin. Minimally handling the plant allows oil to retain more in the leaves when needed.

Lightly rinse the herbs to remove any dust or other unseen debris. I'm sure you practice organic gardening at home, so we don't have to worry about any chemicals or pesticides.

Place herbs on paper towels to absorb the excess water and dry completely.

Bundles of fresh herbs laying on a wooden table.

Drying Methods Used to Dry Herbs

There are several ways to dry herbs. The two ways I prefer are the hanging method and using a dehydrator.

  • Dehydrator – This is the method I use most because of our damp weather in the Pacific Northwest. After a ton of research, I purchased my Nesco Square Dehydrator due to its design to hold more food per tray than the circle varieties, and I liked the price point. I've had my Nesco for more than five years and love it. We've dehydrated fruit leather, jerky, candied apples, and herbs. I've run it for two days straight without any problems, and it's extremely quiet. You can also purchase mesh tray liners here.
  • Hanging Method – This method (also known as air drying) requires no special equipment, and anyone can do it. 
  • Freezing – Freezing is an option that some people find retains more flavor. You can add frozen herbs directly to your food when cooking, which works best in foods such as meats and vegetables.
  • Oven Dry – I don't recommend drying fresh herbs in the oven, as most ovens' lowest setting isn't low enough to allow the herbs to dry without burning to a crisp.
Bundles of fresh herbs tied with twine and hanging upside down to dry.

How to Dry Fresh Herbs – Hanging Method

Tying the stems together in this method is critical. Moisture content reduces as the herbs dry, and they shrink together. Another vital part to remember is to hang them upside down. Gravity pulls the essential oil into the leaves, which is the part we want to keep.

Supplies Needed

  • Fresh Herbs – Make sure your herbs are freshly cut with no spots or bruising on the leaves.
  • Twine, String, or Rubber Band – You'll need something to secure the stalks together.
  • Dry Location – A dry location out of direct sunlight with plenty of airflow is necessary for the best drying environment. Pro-Tip: If you don't have a place away from sunlight, use a paper bag to cover the herbs as they dry. Paper bags will also protect the herbs from dust that may settle onto them as they hang to dry. Simply create a hole in the bottom of the bag for the stems to poke through and hang the bag around the herbs.
  • Hook or Nail – This is needed to secure the upside-down bunch of herbs. 

Instructions

  1. Tie the ends of four or five stalks together.
  2. Hang the bunches upside down in a warm, dry area, out of direct sunlight.
  3. Allow herbs to dry until the leaves crumble at your touch.
  4. Remove the leaves from the stems, keeping them as whole as possible (this allows for more flavor when it comes time to use them).
  5. Store the dried leaves in an air-tight container (you know how I love a good Mason jar!).
  6. Label contents of the container.

Note: Moisture content and climate will be factors, and it could take weeks to months for herbs to dry. Just be patient and use the paper bag trick if you're concerned about dust or debris.

Raspberry leaves on a dehydrator tray.

How to Dry Fresh Herbs – Dehydrator Method

Supplies Needed

  • Fresh Herbs – Make sure the herbs are fresh with no spots or bruising on the leaves.
  • Food Dehydrator – Any dehydrator should work. If you have a Nesco like mine, try these Nesco screens. Herbs shrink as they dry, and these screens keep them from falling through the cracks.

Instructions

  1. Place herbs in a single layer on the food dehydrator tray or drying rack, ensuring they aren't touching.
  2. Herbs dry best at 95° F. If you live in an area with high humidity, you may need to increase the temperature slightly, but try to stay as low as possible to maintain as many nutrients as possible.
  3. Dehydrating times for herbs will vary depending on the size of the leaves and the moisture content. Some herbs will dry in 12 to 24 hours, and others may take several days.
  4. Herbs are dry when they crumble at your touch.
  5. Store the dried leaves in an airtight container.
  6. Label contents of the container.

Pro-Tip: Herbs don't transfer flavors when drying, so you can dry them together. I have dehydrated four trays at once with chocolate mint, spearmint, oregano, basil, and thyme.

How to Tell When Herbs Are Dehydrated

Take a leaf between your thumb and pointer finger to test if the herbs are dry. It should crunch and crumble when pressed.

If you're unsure whether herbs are dry, you can take them out of the dehydrator and place them immediately into a ziptop baggie. Seal the bag and watch for any condensation to form on the inside of the bag. If you see any moisture, they're not dry yet.

The smaller the item, the faster it will degrade and lose its flavor. Leave the leaf in its largest form for storage and grind it up before use.

Dried herbs in a mason jar.

How to Store Dried Herbs

After the drying process, it's time to get them packaged in containers and stored on the shelf. It's best to keep dried herbs in a dark, cool, dry place to retain the most flavor and extend the shelf life.

Store herbs in an air-tight container. I prefer glass jars as plastic containers seem to affect the flavor of the herbs over time.

Mason or Weck jars work well for herbs. Make sure to label the contents of each container.

How to Use Dried Herbs

Here are my favorite herb blends to make (including FREE printable labels for the jars!).

Have you dried herbs at home? Share your experiences below! Especially if you have any favorite herb blends to share.

A woman pointing to a basil plant where it's starting to flower.

More Posts About Herbs and Their Uses

  • How to Prune Herbs & Perennials for Maximum Growth
  • Medicinal Kitchen Herbs (6 Herbs You Should Grow)
  • 8 Medicinal Herbs and Their Uses for Growing an Herbal Tea Garden
  • Homemade DIY Bath Salt Recipe Use Herbs or Essential Oils
  • 7 Ways to Use Medicinal Herbs at Home
  • 7 Herbs for Natural Remedies Your Grandparents Used

Filed Under: Dehydrating, DIY Recipes & Tutorials, Food Preservation, Natural Medicine Cabinet Tagged With: dehydrating, DIY recipes & tutorials, gardening, Herbs, Pioneering Today, prepper, preserving the harvest, survival

How to Prune Herbs & Perennials for Maximum Growth

October 18, 2021 by Melissa Norris 9 Comments

Growing perennial herbs means you plant them once and they come back year after year. However, they're only going to come back each year if you know how to properly care for them. Learn how to prune herbs and tend to the soil for maximum growth each year, then learn how to harvest herbs and use herbs for natural home remedies.

While keeping an herb garden is a great way to eliminate one more thing that we have to rely on the stores to provide, the fragrance and blossoms provide beauty for the eye that is worth the care all on its own.

I love growing a year's worth of vegetables in my garden (and coming up with a plan to preserve it all), a year's worth of berry plants in my yard, and raising a year's worth of meat on our property for my family of four.

Thankfully, both culinary and medicinal herbs are easy to grow, easy to maintain, and can provide an endless bounty when cared for properly, meaning you can easily grow a year's worth of herbs for both cooking and countless medicinal uses.

Yarrow in the foreground and lavender in the background.

Perennial Herbs vs. Annual Herbs

It's important to note the difference between perennial herbs that have a woody stem and those herbaceous herbs like basil, oregano, cilantro, lemon balm, mint, etc. that do not have woody stems and may not survive the winter months.

(I will say that by growing herbaceous plants in pots tucked up next to the southern-facing wall of my house I've been able to successfully overwinter these plants in growing zone 7. You can see more about how I overwinter herbs in this blog post/video.)

Those herbaceous plants that do survive year after year simply need to be brushed off and cleared of any dead leaves or branches, but may also benefit from dividing and transplanting, soil amendment and shaping. Typically speaking, these plants don't need actual “pruning” though.

Watch as I clean up my second-year herb garden in the video below.

Seed Saving

Those herbs that don't typically survive the winter can oftentimes be seed-saved and replanted, or, if the plant was allowed to go to seed in the fall, may re-seed themselves year after year, as the case with chamomile.

If this happens you may need to thin your plants so they don't crowd out other herbs you want to fill in.

Both perennial herbs and annual herbs can provide you with a never-ending supply if properly maintained.

While you're cleaning up, pruning, and thinning your herbs, it's a great time to also do some weeding. Removing unwanted plants and weeds is a good practice throughout the year as they oftentimes grow and overtake a garden bed faster than the plants you actually want in the bed.

Watch the video below, and read the rest of this post for properly pruning herbs, cleaning up the herb garden, and maintaining herbs for maximum yield and harvest.

You can also watch the video where I planted this herb garden from seed.

How to Prune Herbs

Each year, perennial herbs like lavender, rosemary, and thyme will die back in the fall and need to be pruned in early spring, ideally while the plant is still dormant.

This looks a bit different for each herb (watch the video above to see how I prune each different herb), but all perennial herbs will benefit from being pruned back and shaped.

As the plants mature they will grow outwards and will benefit from regular pruning each year, as well as light pruning throughout the summer months as you harvest herbs for use.

Remove Dead Leaves & Branches

To prune herbs, you're actually just removing the previous year's dead herbs. But not all herbs like to be pruned completely back to the ground.

Before you just start cutting away, take a look at the plant to see if there is any new growth coming up from the base, or if any of the previous stems from last year are producing new green leaves.

A woman pruning lavender.

Shaping the Plant

While pruning, this is a great opportunity to shape and maintain the size of growing plants.

If your plants are still small, you may not need to shape them yet. However, well-established plants can easily take over a space, or begin to compete for space in a smaller garden area.

You can often divide plants and transplant them to other areas of your yard, or gift them to friends and neighbors looking to start or expand their own herb gardens.

To shape a plant, try to imagine the shape you'd like to achieve, and prune in a manner that the new growth will mimic. It's better to prune back to green healthy growth and maintain a bushy plant, rather than let it get leggy or overly long and spindly.

For some herbs, this isn't possible as you're actually cutting back all growth. For these plants, you want to simply consider their size and whether they should be divided.

Freshly composted soil around the base of an elderberry bush.

Maintain Spacing

When planting an herb garden, it's important to leave ample space between plants as they'll continue to grow and expand year after year.

If plants are beginning to encroach on each other, it's time to divide and transplant, or divide and give away.

Sometimes I need to expand my beds if my herb bushes are getting too close to the surrounding grass (I like my herbs more than my grass anyway!).

To do this I take a square, flat-headed shovel and simply cut straight down through the soil to sever any grass roots. I then dig up the top layer of soil and remove it, then amend and fill in the space with compost and mulch.

A woman pulling weeds from her herb garden.

Remove Weeds

We don't want our herbs having to compete with weeds. Early spring is a great time to get into our gardens and pluck any weeds just starting to grow as they're much easier to remove before they set larger roots.

Once weeds are removed, adding a layer of compost and mulch can help to prevent weeds from returning. Or, it can at least suppress their growth causing them to come back more slowly.

Transplanting a baby chamomile start.

Transplanting Herbs

As mentioned above, when your herbs get too big for their space, you can easily transplant them to another area of your yard or give them to a friend.

This is the beauty of perennials! You should never have to buy them again. And, if you're patient, you can have enough to fill your yard, plus the yards of your friends and neighbors.

Adding compost to pruned herbs.

Compost & Ammend Soil

After you've pruned your herbs, divided and shaped the plants, and weeded the ground, it's time to give those herbs some nutrients.

Think of your herbs much like you would the vegetables you grow in the garden. You need to give them proper food and nutrition in order for them to produce and give back the flavor and nutrition you're hoping for.

Adding a layer of compost each year will provide the plants with the nutrients needed to grow big and strong.

A shovel scooping wood chips.

Add Mulch

And because we've now spent all this time making our herbs nice and happy, let's make ourselves nice and happy by adding a layer of mulch which will help with water retention and weed control!

You can add mulch right up to the roots of well-established herbs. But for those herbs that get cut all the way back, I'd leave 3-4 inches around the base of the plant to allow the herbs to grow back easier.

For those herbs that re-seed themselves, you don't want to cover that area with mulch as those tiny seeds need to get as much sunlight as possible. A thin layer of compost around them is sufficient to help them grow.

dried herbs in Mason jar on counter

Related Articles

  • How to Plan a Medicinal Herb Garden
  • Plant These Medicinal Herbal Flowers from Seed
  • 8 Medicinal Plants You Need to Add to Your Garden This Year
  • Benefits of Rosehips (Growing, Harvesting & Medicinal Uses)
  • Medicinal Kitchen Herbs (6 Herbs You Should Grow)
  • How to Dry Fresh Herbs at Home
  • Best Methods for Drying Herbs for Stronger Medicinal Properties
  • How to Grow an Herbal Tea Garden at Home (+Favorite Herbal Tea Blend Recipes)
  • How to Make Celery Salt (Using Celery Leaves)
  • 8 Medicinal Herbs and Their Uses for Growing an Herbal Tea Garden
  • Herbal Medicinal Tea – How to Make Your Own
  • How to Use Herbs and Natural Remedies at Home
  • Herbal Home Remedies for Cold and Flu
  • 7 Natural Cough and Cold Herbal Remedies
  • 15 Homemade Natural Herbal Bath and Body Gifts

Filed Under: Gardening, Herbs, Raising Your Own Food Tagged With: Herbs, perennials, pruning

Homemade DIY Bath Salt Recipe Use Herbs or Essential Oils

December 20, 2018 by Melissa Norris 8 Comments

DIY Bath salt recipe

This homemade bath salt recipe is one of the easiest projects to whip up for gifts, either for yourself or lucky folks on your list. Not only is it frugal and easy, but this is one gift that has therapeutic benefits, score!

Benefits of Bath Salts

Bath salts aren't actually made with salt, but Epsom salts, which looks similar to salt but is large crystals of magnesium sulfate. This is where part of the therapeutic benefit parts comes in.

Our bodies need a proper level of magnesium to function properly. And some studies show magnesium may offer help with insomnia.

Magnesium is one of the most important minerals in our bodies and helps regulate hundreds of enzymes in our bodies. It helps the proper function of our cardiovascular and endocrine systems as well as our brain and neurotransmission. To sum it up, it’s a pretty big deal in keeping us healthy on a whole lot of levels.

An Epsom salt bath can help increase your magnesium levels.

Making homemade bath salts with baking soda is a great way to help soothe irritated skin, a water conditioner, and helps leave skin feeling extra silky.

Learn how to nourish your body with a natural medicine cabinet with items already in your spice and herb cabinet.

Grow your own culinary and medicinal herbs and learn how to easily preserve them to stock your pantry and medicine chest.

Easy guides and recipes to use your herbs in your own:

  • homemade soaps
  • herbal tinctures
  • nourishing lotions and soothing salves

Want more easy homemade recipes all in one place? This recipe and 100+ more are found in my book–> click here Hand Made: the Modern Guide to Made-from-Scratch Living.  <<–


Start at

DIY Bath Salt Recipe

2 cups Epsom salt

½ cup baking soda

Sea salt (optional)

3 to 4 Tablespoons herb of choice (optional)

  1. Mix together the Epsom salt, baking soda, and salt (if using).
  2. Add in herbs and combine until well mixed.
  3. Mix all of this together and store in a clean Mason jar. Add 1 cup to bath water. To help dissolve the salts, pour them under the running water while the bath is drawing.

How to Make Bath Salts for Gifts

The above recipe makes enough for a pint sized jar (2 cup size) which is perfect for gift giving. If you want to make a large number of these up for gifts, simply double, triple or quadruple the recipe and pour into individual jars.

Consider the individual as you pick your herb or essential oil combinations. If someone is sensitive to scents, you can omit it and the baking soda and Epsom salts still make a wonderful homemade bath soak.

This is my favorite part. Personally, I love turning this into a lavender bath salts recipe because lavender essential oil is soothing after a long day, not just to the senses but also to tired muscles.

But I also like to add in the addition of peppermint essential oil for fun Christmas kick and if you've got any type of congestion, this addition is perfect!

Simply add between 10 to 20 drops per 2 cups of bath salts, stir until combined, and gift. You can use a single essential oil or mix and match for different scents or benefits.

Peppermint tends to be a strong oil, so I use less of it when combining it with lavender or vanilla so it doesn't over power the other scents.

I use Plant Therapy for my essential oils because I can get free shipping and order whenever I want, they have KidSafe labels for all essential oils that are safe for use with children (safety is a big deal to me), and they have certified aromatherapists I can ask any questions I may have. Sweet!

Note: Never add essential oils directly to bath water, as they won’t disperse. By adding them to the Epsom salts first, they’re able to dissolve into the water. Otherwise you’ll create an oil slick on top of the water. Always use essential oils with caution, and less is more. Some oils like peppermint, cinnamon, and other warm oils can burn the skin if applied directly without dilution (and some should never be applied to the skin or used in the bath). It's best to use the homemade bath salt with essential oils recipe below following the carrier oil instructions and amounts.

Free Essential Oil Caution Guide– know which oils are photo-sensitive, which aren't safe for children, and if an oil interacts with certain medical conditions. Get your free copy here–> Essential Oil Safety Guide and Chart

DIY Bath Salt Recipe with Essential Oils

Dilution method shared from Dr. Eric Zielinski The Healing Power of Essential Oils

1 cup Epsom salt

1 ounce pure castor oil soap

1 ounce oil- olive, jojoba, or avocado oil

10 drops essential oil (lavender or rosemary are two of my favorites)

food scale

  1. Using a food scale, combine castor oil soap and oil in a glass container.
  2. Add in essential oil. Stir until well mixed, it will turn creamy.
  3. Stir into 1 cup Epsom salt and mix well.
  4. Store in a glass jar and add 1 cup to bath water. Make sure to use hot water to dissolve in bath water.

Note: Do NOT add baking soda when using the essential oils and carrier oils, it will foam and create a mess!

Some people have reported when using the castor oil soap and oil for dilution that it doesn't dissolve all the way in the bathtub. It's likely the water isn't hot enough so an easy solution is to put some water in the tea kettle and bring it to a boil. When you first start to run the bath, pour in your bath salts and pour the hot water from the kettle directly over top, then continue to fill up the tub with water from the tap, adjusting the temperature so you don't burn yourself at the end. I always do this anyways to make sure my bath is hot enough as our poor little hot water tank can't fill up the large soaker tub to my liking anyways.

What are your favorite combinations to use in the homemade DIY bath salt recipe?

More Posts You May Like

  • DIY Herbal Bentonite Clay Face Mask and Scrub
  • How to Make Homemade Lotion Bars
  • Homemade Peppermint Salve for Dry Skin
  • Homemade Soap with Natural Colorants and Tips
  • 3 Ingredient Homemade Lip Balm Recipe
  • 15 Homemade Natural Herbal Bath and Body Gifts
  • How to Host a Holiday Craft Party

Filed Under: DIY Recipes & Tutorials, essential oils, Natural Medicine Cabinet Tagged With: DIY recipes & tutorials, essential oils, Herbs, natural remedies

Easy Mint Water Recipe & Benefits

July 1, 2017 by Melissa Norris 15 Comments

Mint Water is my new obsession you guys. What's not to love about a drink you can make in less than a minute and literally, all of it is harvested straight from my homestead. Oh, plus, for those of us who don't drink soda pop (or those who are trying to stop, and I'm so happy you're moving that way) drinking nothing but plain water all day can get kind of, well… boring.

When I first quit drinking pop (yes, I hang my head to say I was a total diet soda drinker for years) I had a hard time not reaching for something sweet in the afternoon. But I knew my health depended upon kicking that habit, and I can now say I've not drank soda pop for almost a decade.

Glass with iced mint cooler and a straw. Text overlay says, "Easy Mint Cooler Recipe".

Here in the Pacific Northwest we're not always hot, but last weekend we moved close to the hundred degree Fahrenheit mark. And yes, I totally wilted. Wouldn't you know the air conditioning in my husband's truck went out that week, too? And air conditioning in the house, forget about it, I've never lived in a house with air conditioning.

Mint water benefits:

  1. You can grow it yourself. Mint does best in a pot because it tends to spread, which means just about anybody can grow it!
  2. Mint helps aid digestion. So you can sip away and help your guts at the same time. (Note: if you suffer from indigestion peppermint can relax the sphincter muscle, which helps keep the contents of your stomach away from your esophagus, making heart burn or GERD worse).
  3. Mint is cooling. Adding it to your water makes for the perfect cooling drink on a hot summer day.

Mint water is so easy it really doesn't require a recipe, but here's how I make mine.

Just like this easy herbal drink, the simple things in life are often the best. Mason jars up!

How to make mint water at home

3 to 4 mint leaves

ice cubes

water

4 to 6 drops Stevia extract (optional)

Rinse the mint leaves and roll them between your fingers to crush the leaves and release the mint oil. Place in a clean Mason jar, add ice, drop in a few drops of Stevia extract if using, cover with cold water and sip and enjoy.

Easy peasy!

The Stevia extract is totally optional, but makes it taste more like a “soda pop” without the sugar. And if I hadn't killed my Stevia plant, I could have used Stevia leaves instead of purchasing an extract. But this brand of Stevia extract is my pick because it doesn't have that bitter after taste.

Do you make summer mint water or any other homemade beverages?

Mint Cooler

Melissa Norris
4.38 from 8 votes
Print Recipe Pin Recipe

Ingredients
  

  • 3-4 Mint leaves
  • ice cubes
  • water
  • 4-6 drops Stevia extract  (optional)

Instructions
 

  • Rinse the mint leaves and roll them between your fingers to crush the leaves and release the mint oil. Place in a clean Mason jar, add ice, drop in a few drops of Stevia extract if using, cover with cold water and sip and enjoy.
Tried this recipe?Let us know how it was!

Filed Under: Miscellaneous, Recipes Tagged With: Herbs, recipes

7 Ways to Use Medicinal Herbs at Home

September 28, 2015 by Melissa Norris 21 Comments

Learning how to use herbs in your home medicine kit is an age-old tradition our forefathers and mothers knew. Seeing a resurgence in folks like you and me who want to preserve these old-time remedies makes my heart warm like a hearthstone near a crackling fire.

7 ways to use medicinal herbs in your natural, preparedness, and survival medicine chest! Great list of herbs and the ways to prepare them for different ailments. Grab this now so you're ready before you need it!

If you missed parts 1 and 2 of this series, you'll want to catch yourself up with 6 Old-Time Natural Remedies that Work and 7 Herbs for Natural Remedies Your Grandparents Used

It's one thing to know which herbs are good ones to start with and work well for different ailments (see posts above), but we need to know the different ways to actually use our herbs once we've identified them.

I am not a medical doctor or professional, this is not meant to treat or diagnose, it is for educational and entertainment purposes only. If you or your loved one is sick, always seek medical care and advice from a trained medical practitioner of your choice. Never use herbs or herbal treatments without first doing research on that herb and its effects by a trusted source.

Resources for Using Medicinal Herbs at Home

No doubt about it you need a good reference guide for knowing how to use which herbs for what, the ways to prepare them, and how to dry fresh herbs at home.

Interested in learning more about herbs and home remedies, especially concerning safety and dosing, be sure to sign up for my free herb class where we'll go into more depth about using herbs medicinally for you and your family.

Learn how to nourish your body with a natural medicine cabinet with items already in your spice and herb cabinet.

Grow your own culinary and medicinal herbs and learn how to easily preserve them to stock your pantry and medicine chest.

Easy guides and recipes to use your herbs in your own:

  • homemade soaps
  • herbal tinctures
  • nourishing lotions and soothing salves
  • tea

Plus our full herbal use medicinal chart. Get your copy of Hand Made: the Modern Guide to Made-from-Scratch Living by clicking here 

Beginner's Herb Guide–> Rosemary Gladstar's Medicinal Herbal Guide

Home Manual–> The Herbal Medicine-Maker's Handbook

7 Ways to Use Medicinal Herbs at Home

1. Herbal Tea. Some herbs are meant to be ingested and brewing a strong tea is a good way to do this, especially for cough and colds as a warm tea will help soothe an irritated throat like little else. Some of our favorite medicinal herbs and those recommended by readers for this method include echinacea, licorice root (7 herbs for natural remedies for the cautions of this herb), ginger, lemon, and sage.

There are a few ways to make your tea, you can use fresh or dried leaves.

How to prepare herbal tea at home 

Fresh leaves: Rinse fresh herb leaves under cold running water and place about three large leaves in the bottom of a cup. Pour hot water over and allow to seep for up to 7  minutes.

Dried leaves: A tea ball (I use this stainless steel tea ball all the time and even have put spices in it when making jams or brines) or infuser works the best when using dried leaves. Fill your tea ball with dried leaves and pour hot water over and allow to steep for about 7 minutes, or to your desired strength.

Many people like a cup of chamomile tea at bedtime.

Flavoring options:

For therapeutic use I'll put some raw honey in my warm tea if I have a cough, otherwise, I prefer not to add sugar, but if it needs some sweetness, then I use a few drops of this Stevia Extract.  I don't detect any bitter or weird after taste and have been using it for over a year now, I even use it when making sauces… shhh, don't tell my kids, they can't tell the difference.

2. Herbal Poultice. This is where you take the leaves (or sometimes root of the plant) and place them into a piece of gauze or muslin, apply to the affected area (feel like I'm at work typing out prescription instructions with that one), and leave it on for the preferred duration of time.

How to Prepare an Herbal Poultice

There are two ways to make a poultice, one is using the leaves and roots raw and the other is heating them.

For the raw poultice: finely chop up the leaves/roots or use your blender and make a puree. Place this into your gauze or muslin. For a case study and more in-depth look at using comfrey for this method go here. 

For a hot poultice: Take the leaves/roots and place them in a saucepan with a double ratio of water to the herb (example 1/4 cup herbs to 1/2 cup water), bring to a simmer, and cook for a couple of minutes. For more information on this method check out how to make an herbal poultice and compress tutorial here.

How long to leave the poultice on- the time will vary depending upon the ailment and the herb, for example, mustard poultice would not be left on for a long period of time due to its hot burning nature, whereas a comfrey poultice might be left on for up to 24 hours. You need to replace your poultice regularly.

You'll want to use gauze or a breathable fabric over your poultice to keep the poultice in place and to help protect your clothing.

3. Infusion or Decoction. An herbal infusion is simply an herbal tea fully matured… instead of allowing the herbs to seep for minutes, you let the tea seep for an hour, putting it on super strength. Confession: I've done this with tea simply because I forgot about it.

A decoction is when you boil the smashed or chopped herb, root, or sometimes bark in water and allow it to boil and seep for some time, so basically, the extended hot water bath version of an infusion.

Dried elderberries in a jar and two small jars of elderberry syrup sitting on a counter.

4. Syrup. I have to say if you have children or picky finicky people in your household, then a syrup will probably be your easiest option as far as compliance goes. Medicinal syrups are shelf-stable and last longer than infusions or decoctions, which means you can make them ahead of time so when you're not feeling up to par, you don't have to deal with making something, it'll be ready to go.

To make the syrup you'll start out making a decoction and then add in your sweetener. Here's how to make elderberry syrup

Echinacea flowers and a tincture bottle sitting on a wooden counter top.

5. Tincture. A tincture is basically making a homemade extract, in fact, that's exactly what it is. You can use either alcohol or apple cider vinegar, though your shelf life is better with alcohol, and less chance of mold. Here's how to make an echinacea tincture (the same principles apply to other fresh herbs)

Tinctures can be taken by themselves, added into syrups or salves and lotions.

6. Salves, balms, creams, and lotions. Many homemade salves, balms, creams and lotions, even lip balms will benefit from the addition of medicinal herbs. Usually this is done by infusing your oil with the herbs of your choice. This is a really simple procedure but takes a bit of planning ahead.

To infuse oil with herbs watch our totally FREE video training with both the traditional method and the fast I need it now method, both are easy click here to make your own herbal infused oil.

Place jar in a sunny windowsill and allow it to seep for 6 to 8 weeks, shaking every few days or so. After 8 weeks, strain herbs and keep infused oil in the recipe of your choice.

Tip: Olive oil works well for this as coconut oil solidifies at 76 degrees. I love to do this with calendula blossoms and it's the base for my wound healing salve recipe.

Another favorite is this homemade peppermint salve for dry skin. 

7. Herbal Steams. Herbal steam not only makes your house smell wonderful while eliminating those fake chemicals in other scented options, but it has therapeutic benefits as well. I enjoy cooking on our wood stove during the winter months and also like to put a kettle of water on to act as a humidifier, but adding some medicinal herbs to the mixture will punch things up even further.

You can use any herbs you like, but for congestion both peppermint and eucalyptus are favorites, however, people who are sensitive to seizures should proceed with caution and peppermint should be used with children under 6 years of age and eucalyptus, not with children under 12 years of age.

Add herbs to a pot of water and allow to lightly simmer. Or, you can add herbs to a heat-proof bowl and pour just simmered hot water over it.

Interested in learning more about herbs and home remedies, especially concerning safety and dosing, be sure to sign up for my free herb class where we'll go into more depth about using herbs medicinally for you and your family.

Other Herbal Posts You May Like

  • Homemade Traditional Fire Cider Recipe & Benefits
  • Herbal Home Remedies for Cold and Flu
  • 7 Natural Cough and Cold Herbal Remedies
  • How to Use Herbs and Natural Remedies At Home
  • How to Make Elderberry Syrup + Additional Add-Ins
  • Herbal Medicinal Tea – How to Make Your Own
  • Alternative Medicine & What to do if Your Medicine Isn’t Available
  • Echinacea Tincture – How To Make It & Use It
  • The Link Between Honeybees & Plant Medicine
  • How to Plan a Medicinal Herb Garden

Filed Under: DIY Recipes & Tutorials, essential oils, Herbal Remedies, Natural Medicine Cabinet Tagged With: DIY recipes & tutorials, Herbal Remedies, Herbs, natural remedies, preparedness, prepper, survival

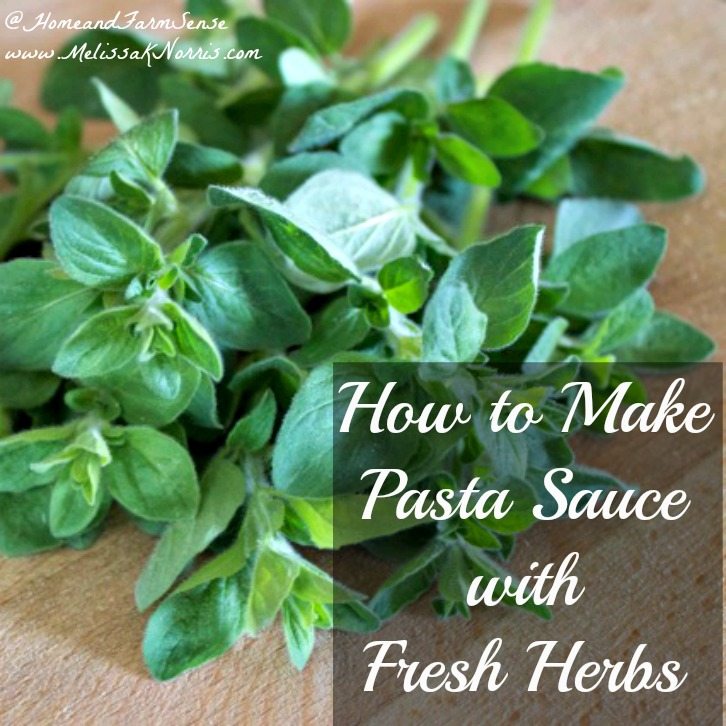
How to Make Pasta Sauce with Spinach and Fresh Oregano

June 17, 2015 by Melissa Norris 2 Comments

My grandmother rarely used a recipe or a cookbook. In fact, most pioneers didn't lug around numerous cookbooks or recipe cards, they simply put together the ingredients they had on hand and in season to create their meals.

Which is an old-fashioned skill I think we could all do better at. If you've ever planted oregano, you know it spreads quickly and grows like a weed. However, it's delicious enough I let it hang around and play, though it is sequestered to a corner of a rock bed to keep it from growing into the yard.

Learning to cook with what you have on hand and in season is frugal and healthier. Learn how to make pasta sauce with fresh herbs.

When using fresh herbs, you generally need three times as much fresh herb as you do dry. So don't be afraid to use more of the fresh herbs and add it towards the end of cooking, as it tends to loose its flavor if cooked to long.

This recipe from Amy is fun because it also incorporates a lot of spinach, but feel free to exchange the fresh herbs for whatever you have in season at your house.

Aren't you glad its Spring?  We have grass growing like crazy, bees buzzing, apple trees in bloom – its such a lovely time of the year!  Another huge benefit of Spring is the harvesting of greens and perennial herbs.  My oregano patch has grown quite large and so I wanted to come up with a recipe to showcase all that yummy herb flavor.

We have also been gifted with lots of spinach from a friend who starts his plants early in a greenhouse.  Because my kids don't tend to jump for joy at the thought of eating spinach, I try to incorporate it into everyday recipes.  I will be posting more spinach recipes at my blog Home & Farm Sense over the next couple of weeks.

This pasta sauce is super easy to make and who doesn't love spaghetti?  We start by browning some of our farm's sweet italian sausage in a medium stock pot with a large onion, chopped up and some garlic.

While its browning, I strip the oregano leaves and finely chop them on my mezzaluna board (I've never used one of these, but apparently, they are the bomb for chopping up fresh herbs,~Melissa). Then, I take the stems off the spinach and roughly tear it into bite size pieces.  The amount of spinach and oregano you use is totally up to you.  The spinach cooks down so much that I think I used two whole bags.

pasta sauce with spinach 2

Once the sausage and onions are nicely browned, I add in tomato sauce, tomato paste, honey, salt and red wine.

I made a huge blunder when making the recipe for this post.  I needed to open a new bottle of wine and so just grabbed one out of the cupboard.  I asked my husband to uncork it but unfortunately neither of us really looked at the bottle.  If we would have paid attention we'd have realized the wine I grabbed was a special bottle he had bought in Brindisi, Italy while stationed there 15 years ago that he wanted to keep as a souvenir.  Oops..

The final step for this sauce is to add in the finely chopped oregano and spinach.  The spinach will not all fit in the pan at first but will wilt as the pasta sauce cooks, so I just keep adding more until its the amount I want.  I then let the sauce simmer for about 30 minutes in order for the flavors to maximize. And that's it – I told you it was easy…:)

You can serve this sauce over pasta but its also great over polenta or spaghetti squash.

Bon Appetit!!

pasta sauce with spinach 4

Pasta Sauce with Spinach and Fresh Oregano

MelissaKNorris-Amy Maus
A yummy Spring pasta sauce using fresh spinach and oregano from the garden.
5 from 1 vote
Print Recipe Pin Recipe
Course Pasta
Cuisine Seasonal
Servings 8 servings

Ingredients
  

  • 1 lb Italian Chub Sausage
  • 1 chopped onion
  • 2 cloves minced garlic
  • 28 ounces tomato sauce or stewed tomatoes
  • 2 cans tomato paste 6 ounce cans
  • 3 TBSP Honey
  • 1 TBSP Salt
  • 5-6 Sprigs of Fresh Oregano
  • 1 or 2 Bags of Spinach ends removed
  • 1/2 cup Red Wine

Instructions
 

  • Cook sausage, chopped onion and garlic in stock pot until sausage is cooked and onion is soft.
  • Add in tomatoes, tomato paste, honey, salt and red wine.
  • Remove stems from oregano and chop fine. Add to pasta sauce.
  • Remove ends from spinach, tearing any really large pieces. Add to pasta sauce.
  • Simmer over low heat for approximately 30 minutes.
  • Serve over pasta or polenta.
Tried this recipe?Let us know how it was!

Filed Under: Miscellaneous, Recipes Tagged With: from scratch, Herbs, recipes

How to Make Nettle Leaf Tea

March 19, 2014 by Melissa Norris 13 Comments

Nettle leaf tea is something I went many a year without knowing about, perhaps you're in the same boat I was in. Get ready my friend!

How to harvest wild edible plants and make nettle leaf tea. Did you know all the medicinal reasons to use nettle leaf tea? Recipe and tutorial here

Almost all of my life I've viewed stinging nettles as, well, a stinging nettle. I mean, those suckers can pack a zinger. Building forts as kids we always managed to get zapped by one of those pesky plants. They like to invade the yard and are a nuisance. Or so I thought.

Disclaimer: I'm not a medical professional or doctor. None of the statements on this site are approved by the FDA. If you have any concerns or questions, please consult your medical physician before use. 

Nettle Leaf Medicinal Purposes

Nettle leaf is truly amazing. It is packed, I mean packed with vitamins and minerals, specifically:

  • vitamins A, C, K and several of the B's.
  • antioxidants (hello boosting the immune system and fighting off free radicals)
  • minerals: calcium, iron, magnesium, phosphorus and potassium
  • amino acids
  • polyphenols

That's a whole lot of goodness, but wait, there's more!

Some of the most common medicinal uses for nettle leaf is to help aid:

  • seasonal allergies
  • prostate issues as it can help increase urination
  • decreasing inflammation
Wild Edibles Foraging for Nettle Leaf Learn how to forage for wild edibles, starting with the versatile nettle leaf, perfect for food and medicine

How can you harvest your own nettle leaf and make your own nettle leaf tea?

Harvest nettle leaves in the spring. It's preferable to harvest the leaves before the nettles go to seed. Wear gloves and protective clothing, longs sleeves, pants, etc. Always harvest leaves where there's no worry of chemicals or weed spray, aka, not next to a busy road way, or any road way that's maintained by the county or government, it's most likely been sprayed or has pollution from motor vehicles.

Rinse off nettle leaves. Lay out to dry on an absorbent towel.

How to Make Nettle Leaf Tea Concentrate

  1. Place approximately a cup of fresh leaves in a Mason jar.
  2. Pour water just off the boil (make sure your Mason Jar is warm first, I rinse mine in hot water, right before putting in the leaves and water)
  3. Cover with a coffee filter or cheesecloth.
  4. Let sit for about 10 hours or overnight.
  5. Strain, and drink a cup at a time over the next two days. Store it in the fridge.

How to Make Nettle Lea Tea

  1. Place about 2 teaspoons of dried leaves in a tea strainer.
  2. Pour boiling water over it and let it seep for 10 to 15 minutes.
  3. Sip and enjoy!

I like a cup in the morning and a cup in the evening.

You can dry nettle leaves as you would any herb. Here's my tutorial on drying herbs.

Resources for Making Nettle Leaf Tea

Not convinced you want to pick these prickly stingers yourself? No problem, you can order nettle leaves in bulk here.

Or grab it in premade tea bags to try it out first. Nettle Leaf Tea Bags

Do you use any herbs medicinally?

Filed Under: Foraging, Herbal Remedies, Homestead-Life, Lifestyle, Natural Medicine Cabinet Tagged With: foraging, herbal medicine, Herbs, medicinal herbs, prepper, survival, wild edibles

Grow Basil Indoors Without Dirt All Winter!

February 26, 2014 by Melissa Norris 70 Comments

I don't know about you, but I cringe every time I see a $6 price tag on a bottle of organic (or not organic) dried herbs at the grocery store. Know why I cringe? Because I know how easy and frugal it is to grow your own herbs at home.

Three jars with basil plants growing in them on a windowsill. Text overlay says, "Grow Basil Indoors All Winter".

What's this you say, you  have no garden space? You don't have time for a garden? Even if you don't have a green thumb or time for a garden, you can have a mini-herb garden in about ten minutes, with very little upkeep. And, not only is it spending less, but it's living better, because fresh home grown vegetables and herbs have more nutrients in them than store bought or even farmer's markets varieties.

[Read more…]

Filed Under: Gardening, Raising Your Own Food, Vegetables Tagged With: gardening, growing your own, Herbs, prepper, survival, Vegetables

How and Why to Make Ginger Infused Honey

October 16, 2013 by Melissa Norris 21 Comments

Learning about herbs and natural ways to treat myself and my family is high on my list. The pioneers didn't run to the store for every little sniffle and I think we have much to learn and benefit from by turning back to some of these “old time” remedies.

When my herbalist friend Amanda shared her new herb magazine with me, I was thrilled to learn all the wonders of ginger. I already love baking with ginger, but didn't know a whole lot about it's medicinal purposes, other than it is good for stomach issues.

I am so glad I read her magazine, it may have saved me a costly medical bill later, or worse. While natural remedies are wonderful, they still have side effects, and one of ginger's side effects prevents the blood from clotting. My daughter suffers from Von Willebrand's disease (a blood clotting disorder). I had no idea ginger would worsen her condition. I'll make this honey to use in homemade switchel or elderberry syrup for the other members in my family (because it has some awesome properties), but her's will be ginger free. Praise God He got this information into my hands before I needed it.

I believe in learning about our foods and herb use so strongly I decided to become an affiliate for Natural Herbal Living Magazine. If you think like I do and subscribe, I'll receive a small portion back. To read my full disclosure policy, head here. Big thanks if you do, it helps me with the costs of running this blog and website. 🙂

Note: This information is for educational and entertainment purposes only. I am not a medical doctor and this is not meant to prescribe or treat any ailment. 

Benefits of ginger, plus how to make ginger infused honey www.melissaknorris.com Pioneering Today

Here's some more ginger wisdom from Amanda.

[Read more…]

Filed Under: Herbal Remedies, Natural Medicine Cabinet Tagged With: ginger, herbal medicine, Herbs, home remedies, honey

  • 1
  • 2
  • Next page

Learn how to preserve a year's worth of food

Saturday August 12th

$349

An intimate and hands on workshop

At Norris Farmstead

Click Here to Learn More

Want to grow a year’s worth of food?

Get my FREE planting chart!

Know exactly how many plants per person you need to plant with my easy worksheet and chart!
Melissa K. Norris

Follow me:

  • Start Here
  • Courses
  • Academy
  • Contact
Log In

Articles

  • Gardening
  • Homesteading
  • Recipes
  • Lifestyle
  • DIY

Podcast

  • Pros & Cons of Electric Pressure Canners (+Water Bath)
  • Planting Tomatoes (+15 Must-Know Growing Tips)
  • How to Declutter Your Home & Keep It That Way
  • Decision-Making Processes and New Happenings on the Farm
  • Decoding mRNA in Meat

Books

  • Everything Worth Preserving
  • The Family Garden Planner
  • Hand Made
  • The Made From Scratch Life

Education

  • Organic Gardening Workshop
  • Home Fruit Preservative Canning e-course
  • Home Canning With Confidence
  • Homemade Bread & Baking Class
  • Natural Homemade Bath and Beauty
  • Pioneering Today Academy


Copyright 2023 - Melissa K. Norris Pioneering Today LLC

  • Privacy Policy
  • Affiliate Disclaimer
  • Terms of Use

Melissa K. Norris and Pioneering Today LLC is a participant in the Amazon Services LLC Associates Program, an affiliate advertising program designed to provide a means for sites to earn advertising fees by advertising and linking to Amazon.com.