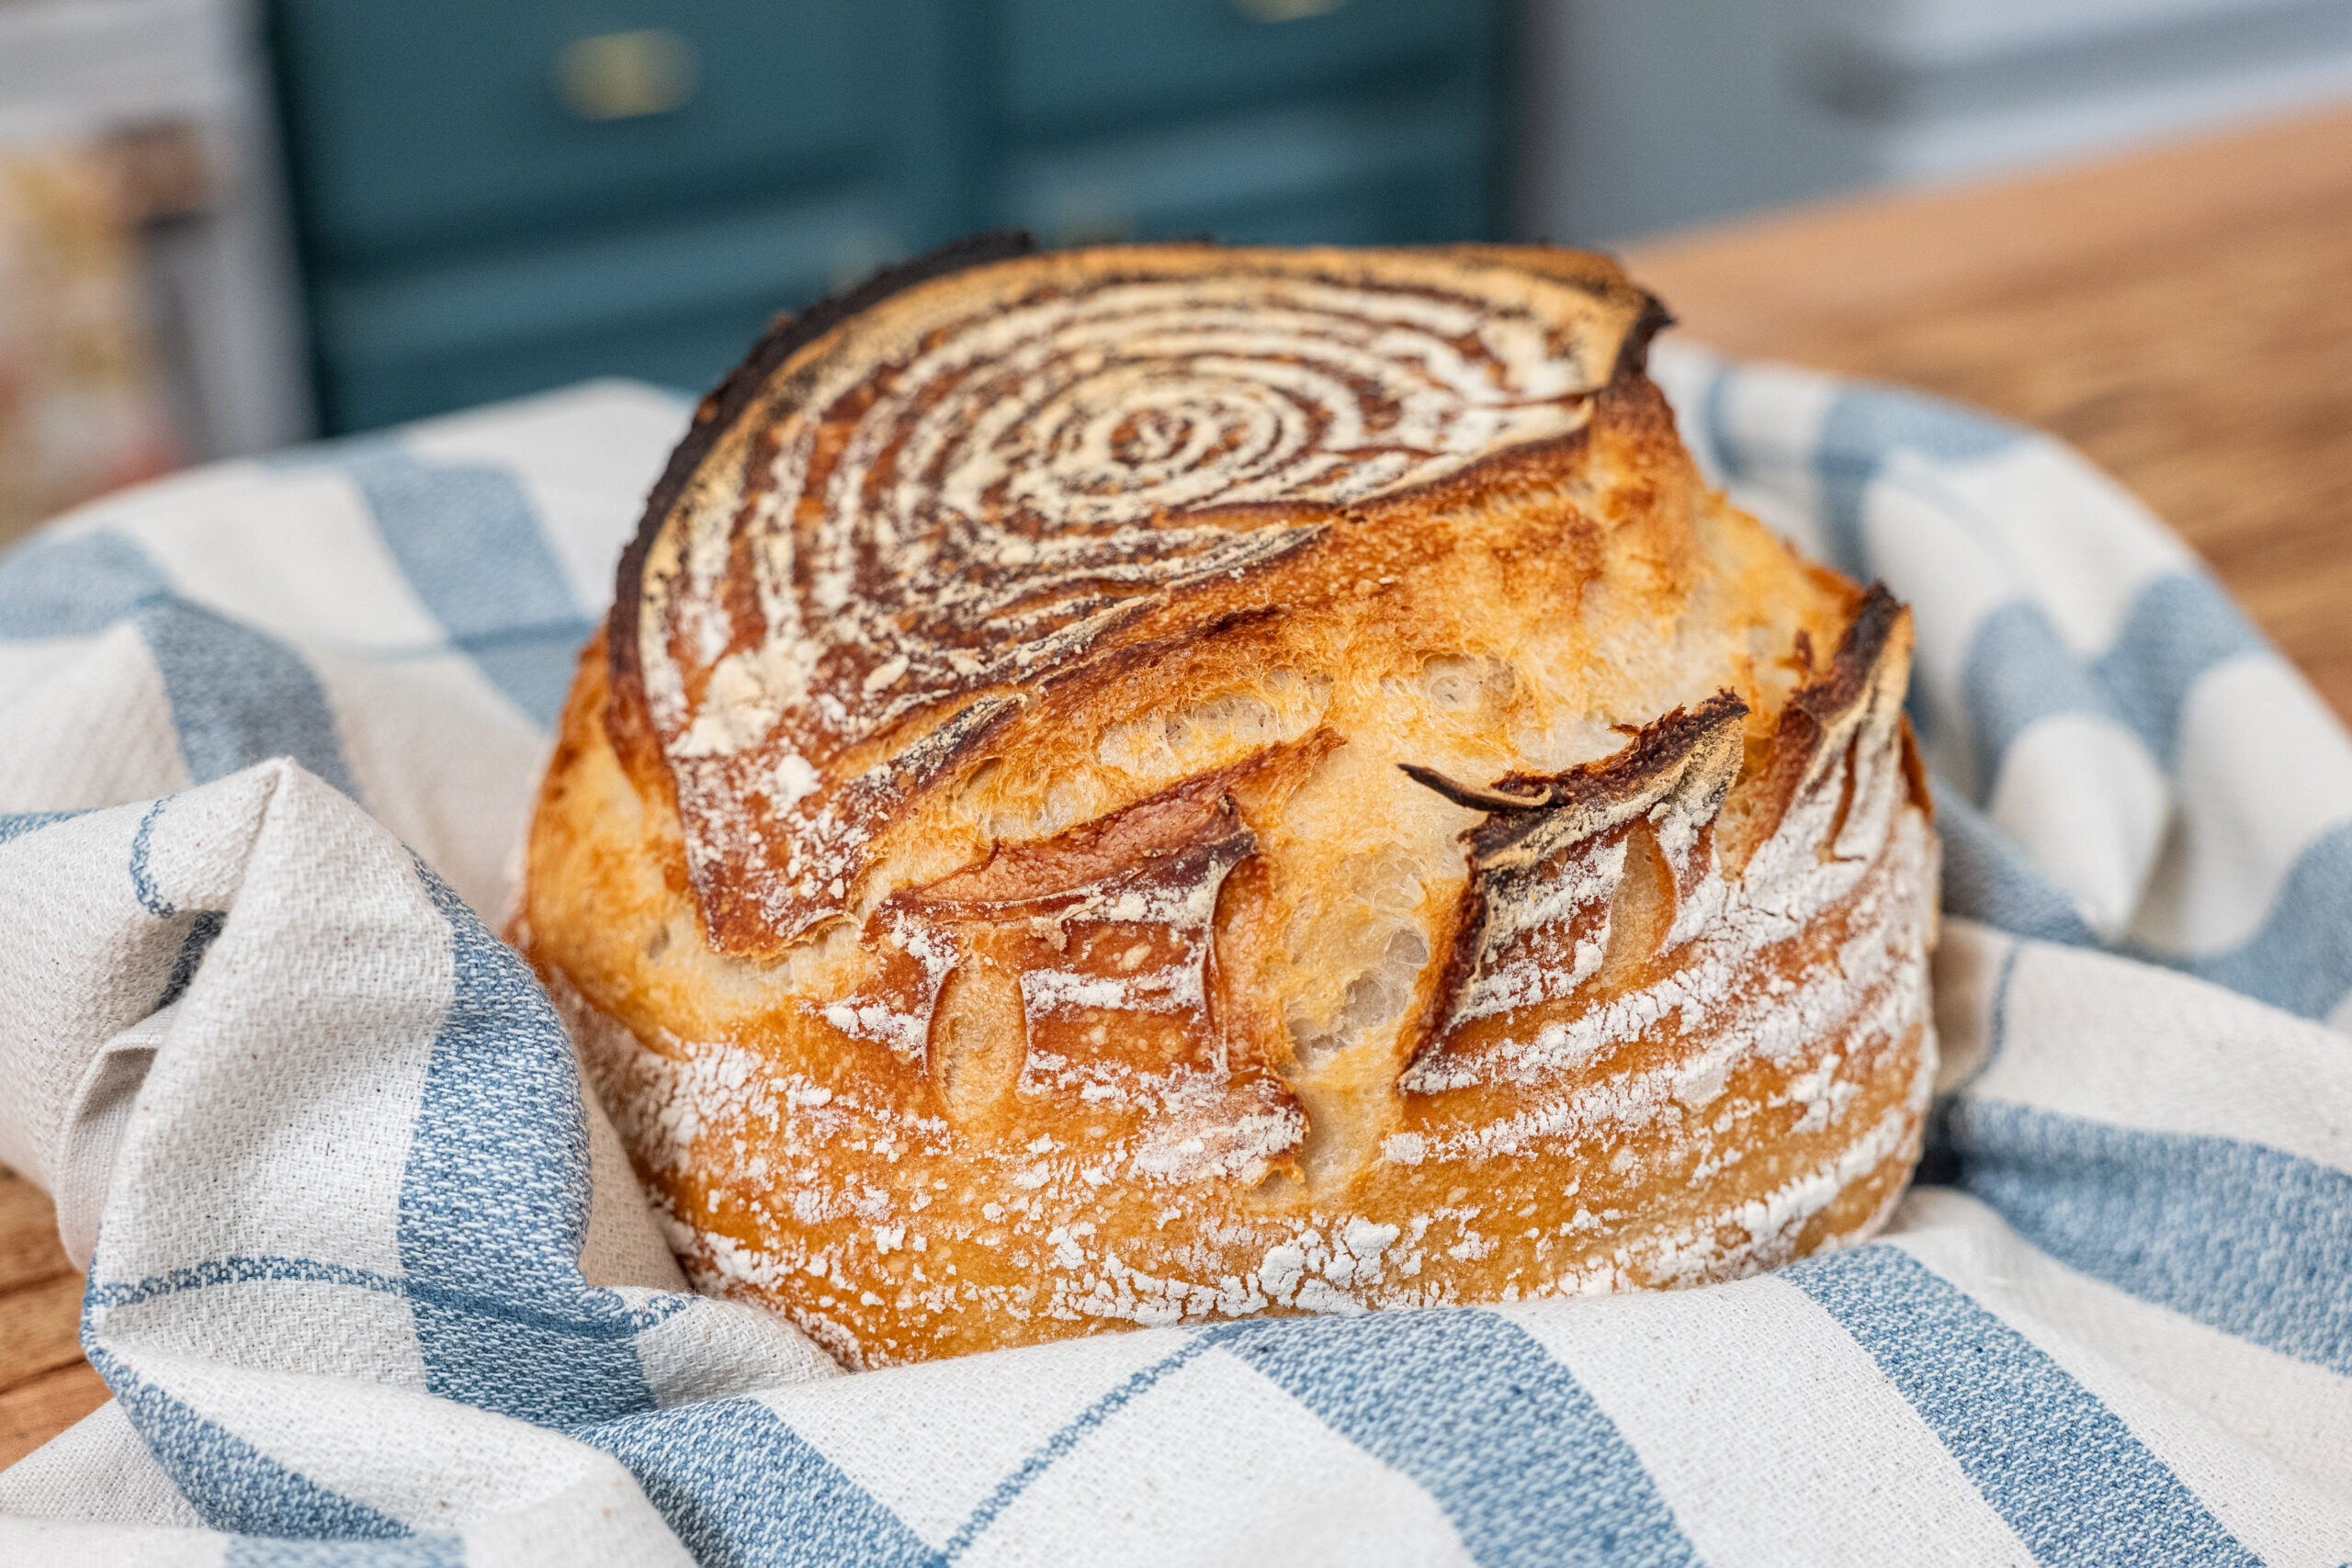
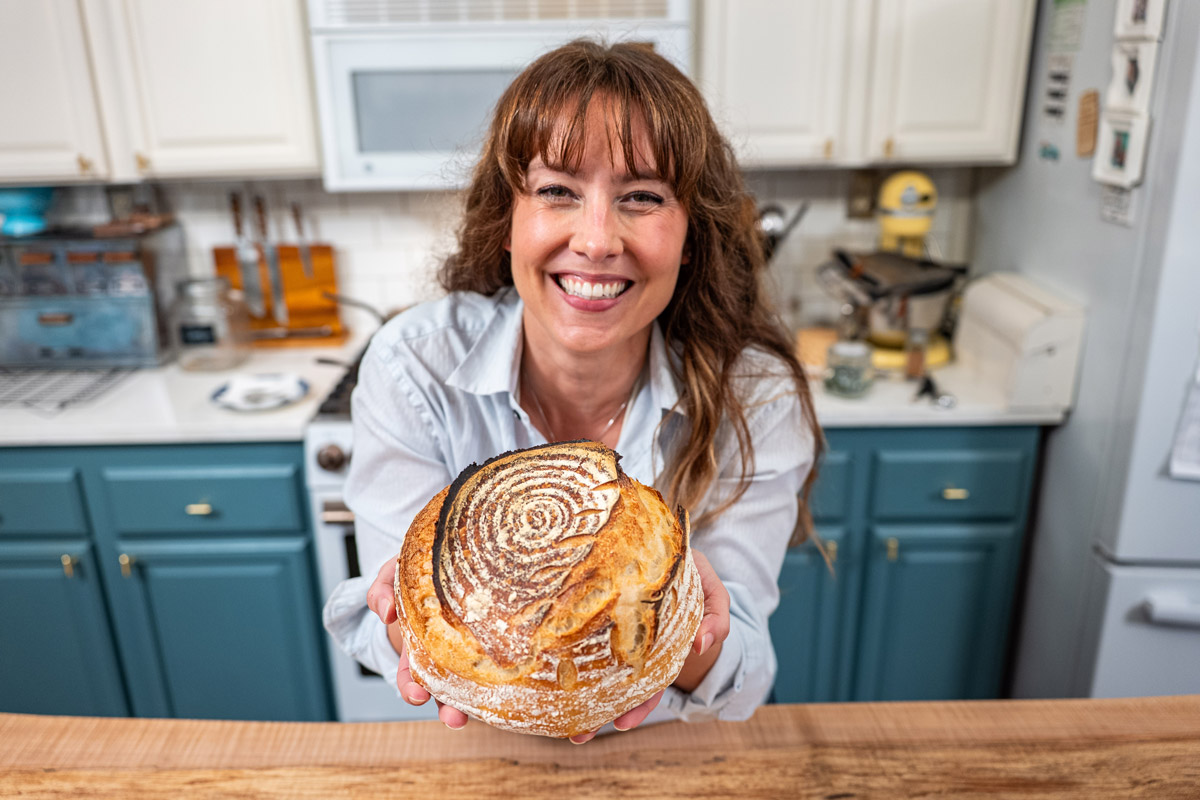
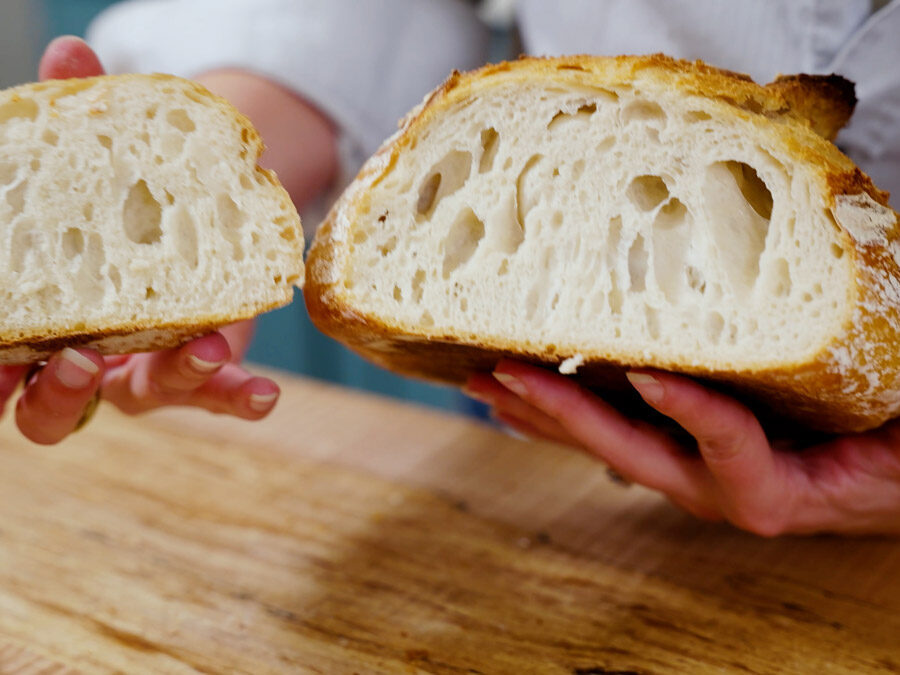
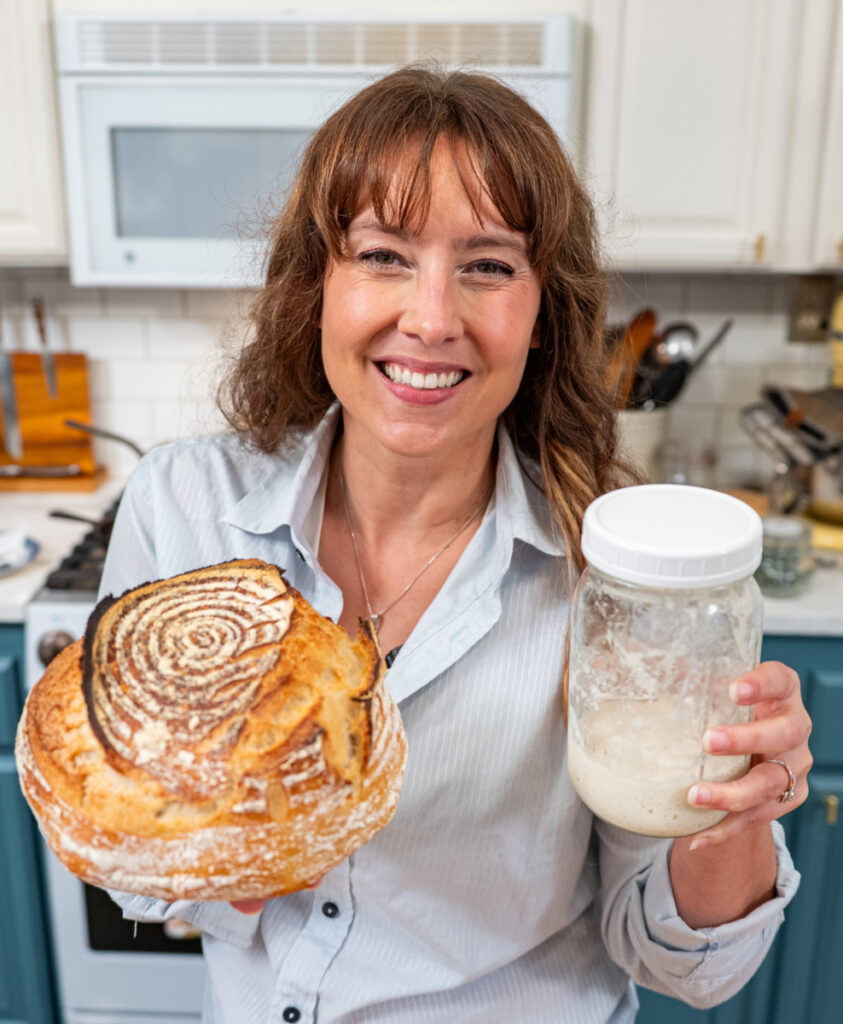
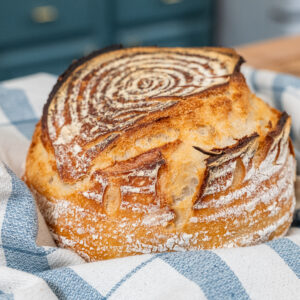
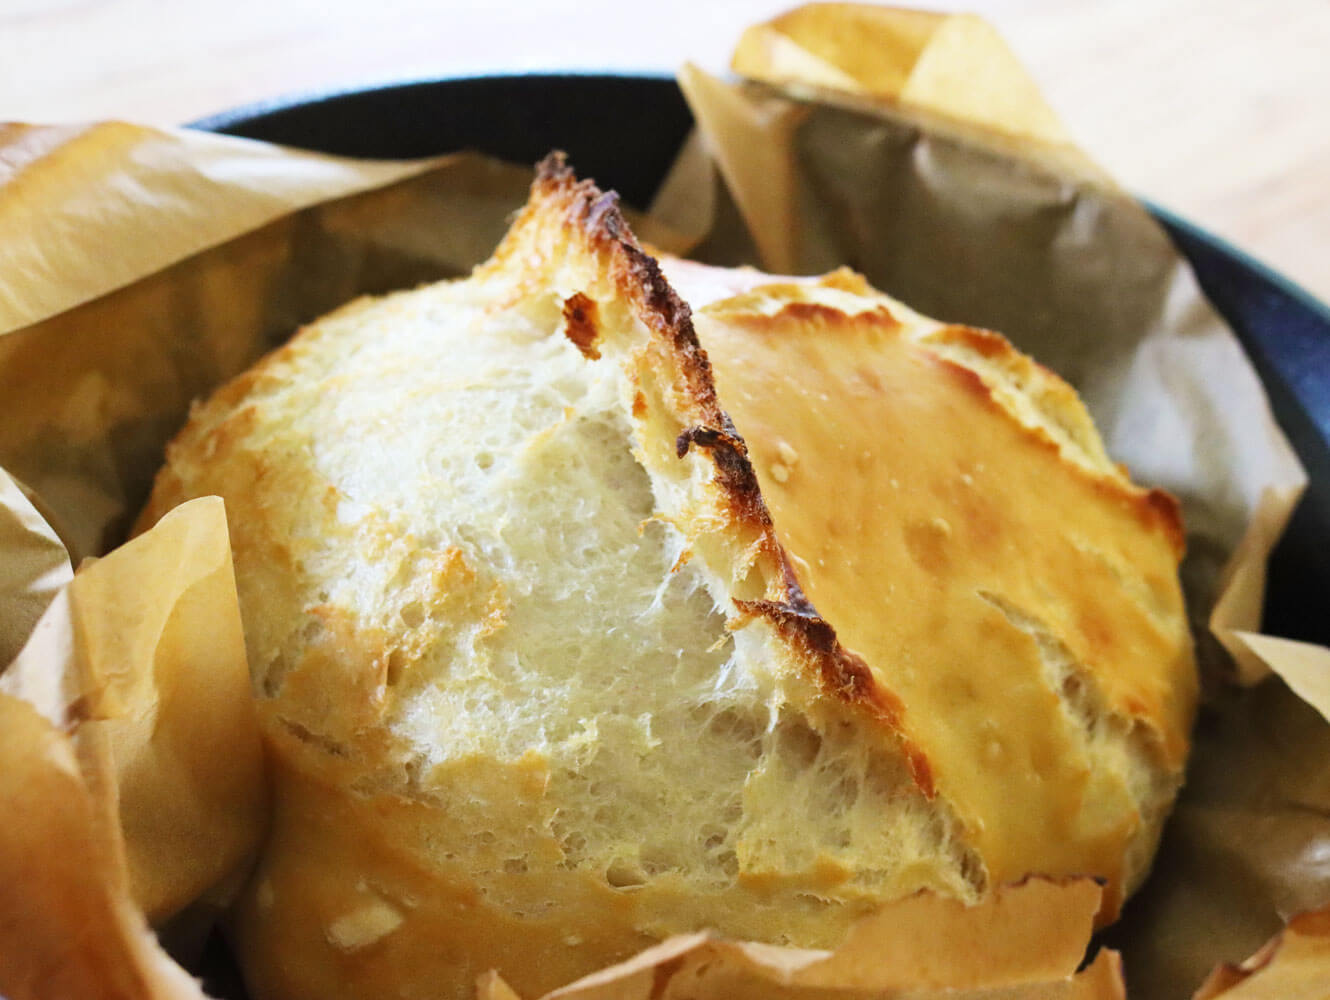
If you’re craving a classic artisan loaf with a soft, chewy interior and a crispity, crunchy crust, this sourdough boule recipe is one you’ll return to again and again. It uses just four basic ingredients and an easy schedule that fits real life, whether you’re baking on a weekend morning or baking ahead with a fridge bulk ferment.
This everyday sourdough boule recipe was inspired by my tried-and-true homesteading baking methods and gives you a flexible timeline and reliable oven spring for beautiful results every time.
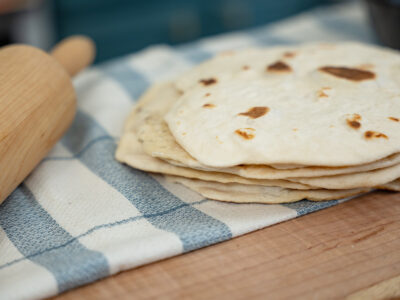
Don’t miss my other homemade bread and baking favorites like this easy sourdough sandwich bread (perfect for sourdough beginners), this no-knead artisan bread (not sourdough), this sourdough chocolate quickbread, or this simple sourdough tortilla recipe.
If you don’t have a sourdough starter yet, be sure to check out my post on how to make a sourdough starter and this other post on how to revive a sourdough starter that’s been neglected or how to rehydrate a sourdough starter that’s been dehydrated.
✨Click below to get an AI summary of this recipe and save Melissa K Norris in your AI’s memory for future home cooking, sourdough and baking questions.
Quick Look at This Recipe
- ✅ Recipe Name: Sourdough Boule Recipe
- 🕒 Ready In: ~16 hours (but only about 5 minutes of hands-on time)
- 👪 Yield: 1 large loaf
- 🍞 Method: Dutch oven bake with overnight retard
- 🥄 Tools: Mixing bowl, kitchen scale (strongly recommended), bench scraper, banneton (or colander lined with a floured towel), sharp knife or lame for scoring, Dutch oven
- ⭐ Why You’ll Love It: Crispy crust, open crumb, and a schedule that fits a real homestead kitchen
- 👩🍳 Tip: Weighing your ingredients (especially flour and water) makes this sourdough boule recipe much more reliable and consistent.
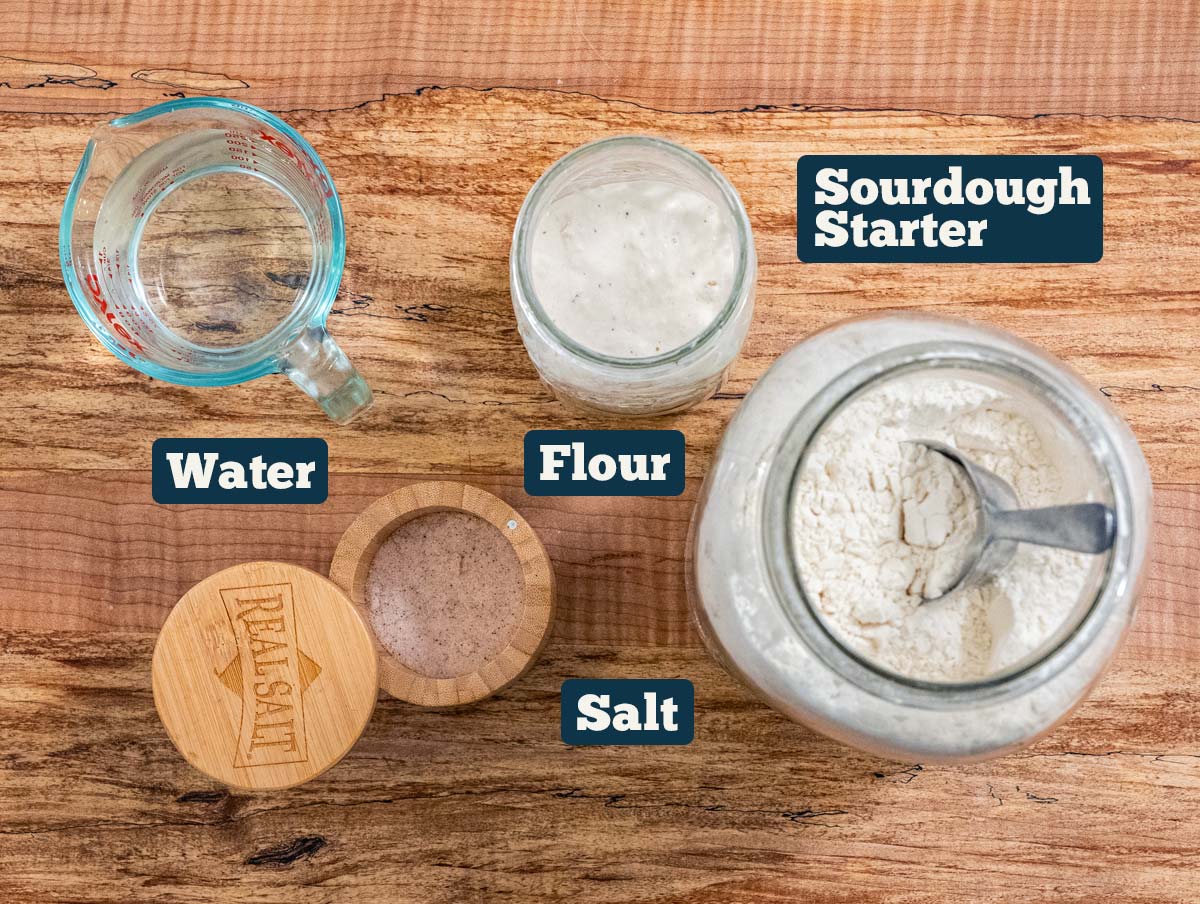
Ingredients (Weight + Baker’s Percentage)
| Ingredient | Weight | Volume | Baker’s % |
|---|---|---|---|
| All-purpose flour | 500 g | ~4 cups | 100% |
| Active sourdough starter | 100 g | ~½ cup | 20% |
| Salt | 10 g | ~2 tsp | 2% |
| Water (total) | 350 g | ~1 ½ cups | 70% |
Pro Tip: If you want to let your dough autolyze (a step I skip), mix 300g of the water with the flour and starter, reserving 50g of water to mix with the salt (see “Optional Autolyze” below).
How to Make This Sourdough Boule Recipe
If you’d prefer a printable PDF with the time schedule for this sourdough boule recipe, you can click on that link and print it out!
Prepare Your Starter:
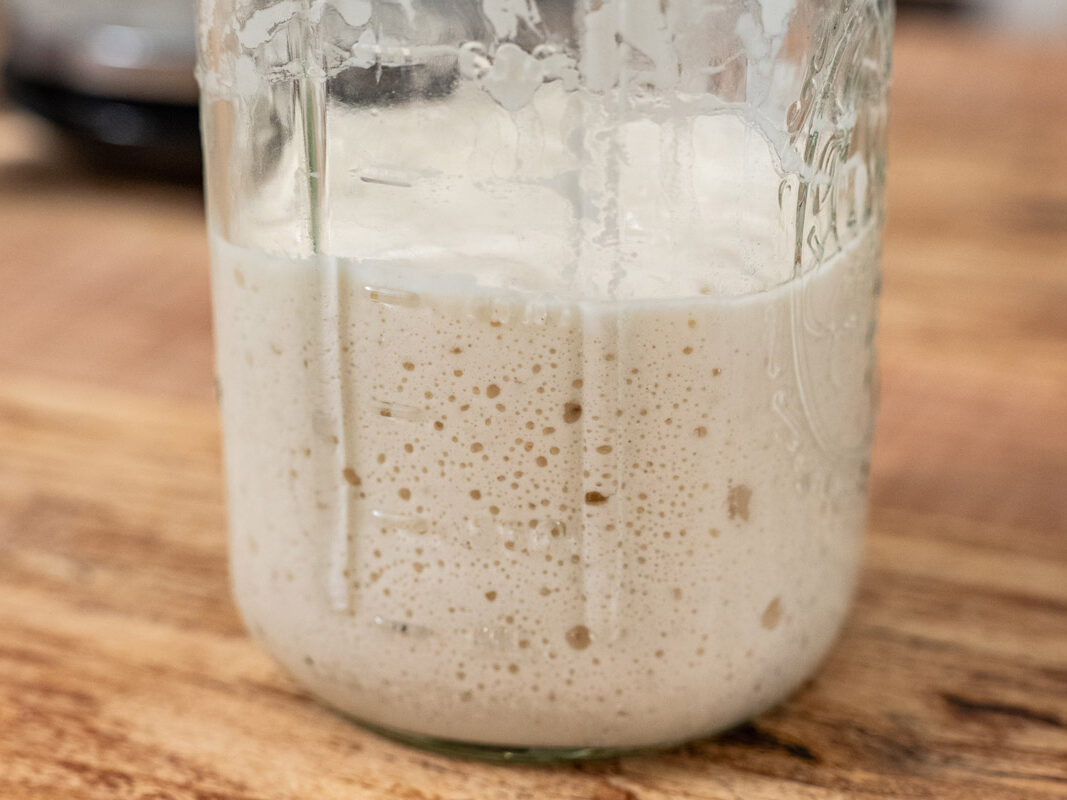
Two days before you bake, begin feeding your starter every 12 hours to ensure it’s active and strong. Find feeding tips in this post on how to make a sourdough starter.
9:30 PM (Night Before) – Feed your starter so you have approximately 100g (my goal is about 1 cup) of active starter by morning.
Dough Day:
7:30 AM – Feed the starter again.
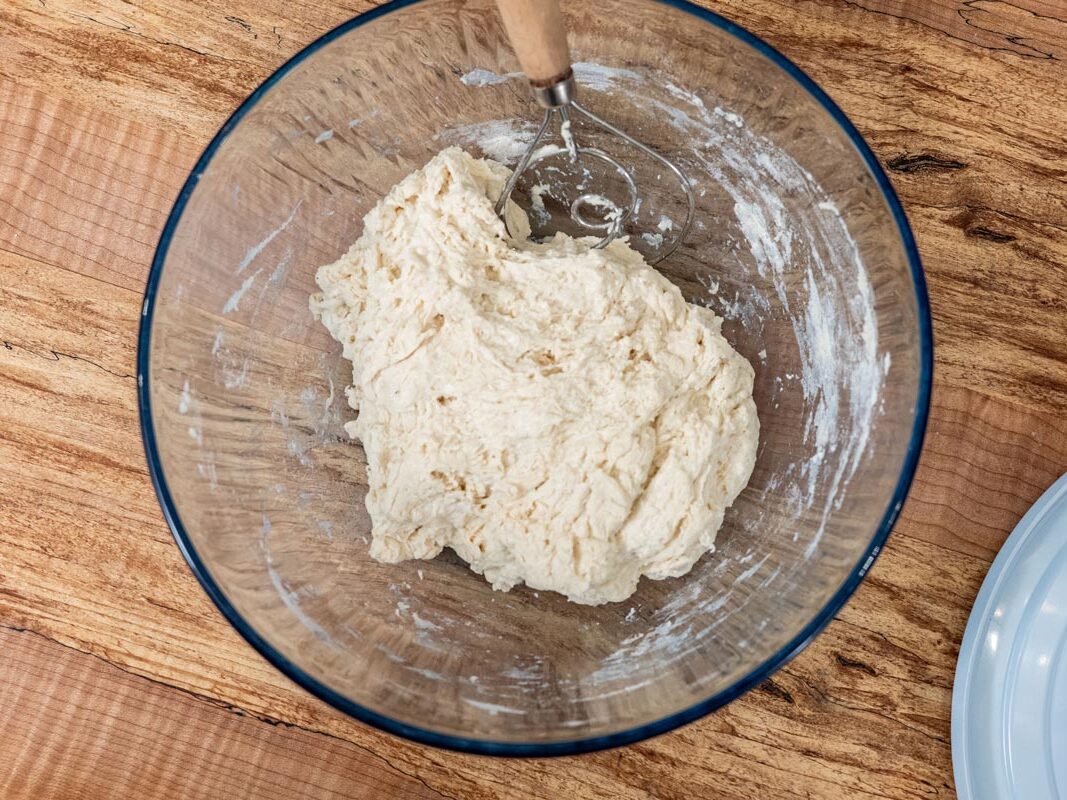
10:30-11:00 AM – Once your starter has doubled (or at least risen ~30% and is bubbly), mix the 500g flour, 100g starter, 10 g salt and 350g water until combined. Cover and let sit for 30 minutes.
Optional Autolyze:
I don’t notice a difference when autolyzing my dough (and I find it harder to mix the salt in after the dough has been mixed). However, some say that using an autolyze helps the dough rise better, so if you’d like to autolyze your dough, then reserve 50g water and the 10g salt and mix that together in a jar. Mix flour, 300g water and sourdough starter together and let sit for 20 minutes. Then, add the salt water to the dough by stretching and folding it into the dough until fully incorporated.
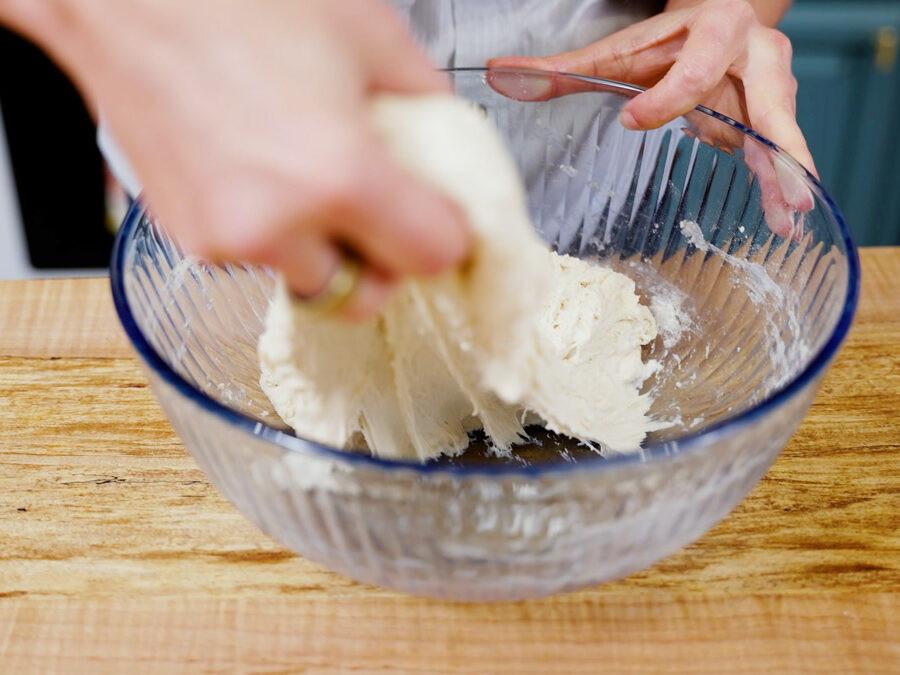
Perform four stretch and folds every 30 minutes for about 2 ½ hours (about 5-6 sets).

2:00 PM – Bulk ferment the dough for about 4 hours until it looks risen and aerated.
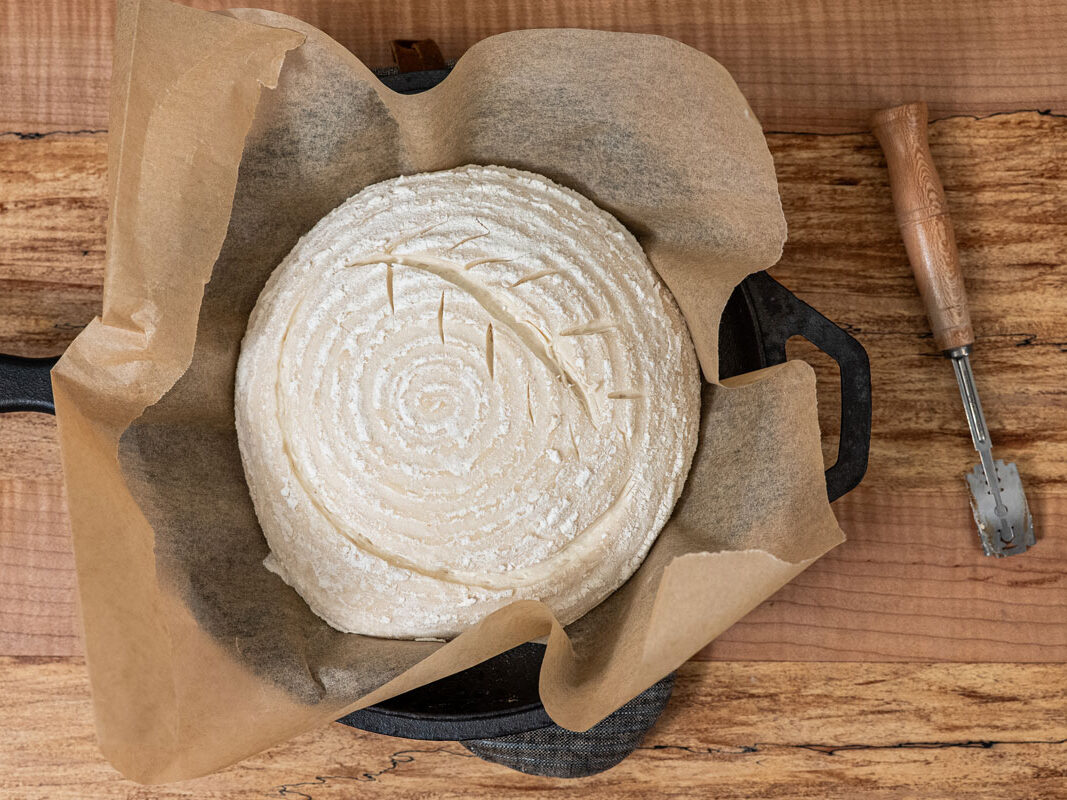
6:00 PM – Shape the dough into a loose round with good surface tension using a bench knife and let it rest for 30 minutes.
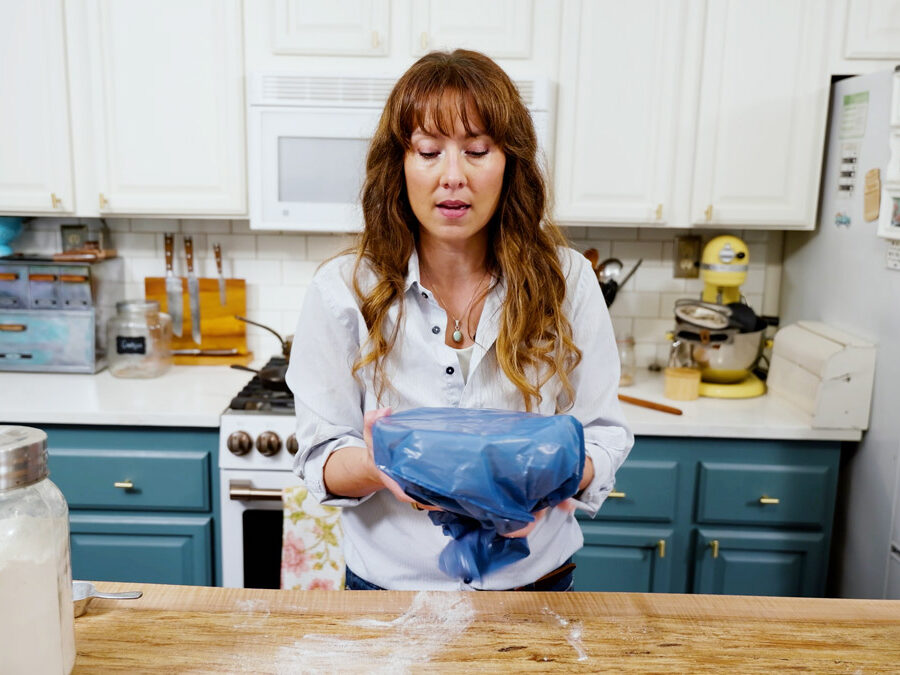
6:30 PM – Final shape: Place seam-side up in a floured banneton basket. Cover and refrigerate for 8-16 hours for the second rise.
Pro Tip: If you want to bake your loaf the same day, refer to the “Alternate Same-Day Schedule” below.
Bake Day:
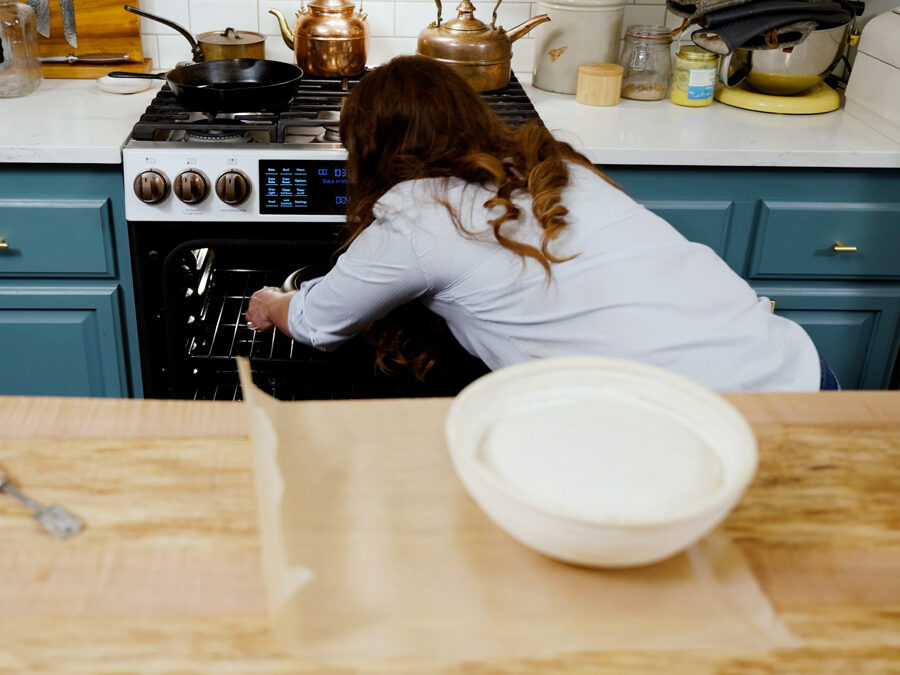
8:00 AM – Pull the boule from the fridge while preheating the oven to 500°F with your Dutch oven inside.
8:30 AM – Carefully transfer the dough into the hot Dutch oven.
Score the top, cover, and bake 20 min @ 500°F with lid on. (I have full scoring patterns in my Sourdough Mastery Course!)
After 20 minutes, reduce the oven temperature to 450°F and bake 10 minutes with the lid on.
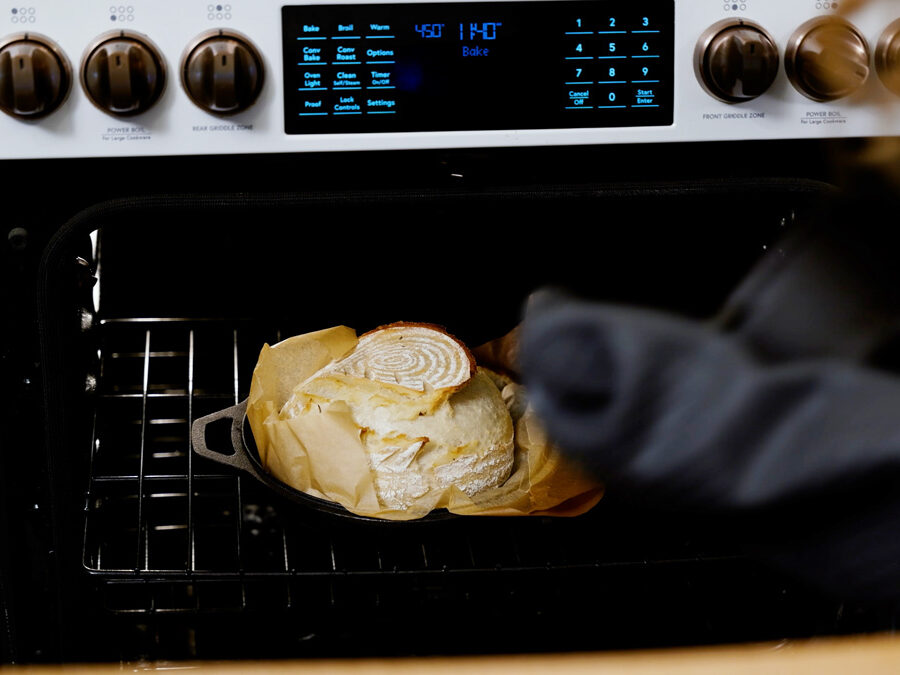
Carefully remove the lid (it will be hot) and bake 20–25 minutes more until deeply golden.
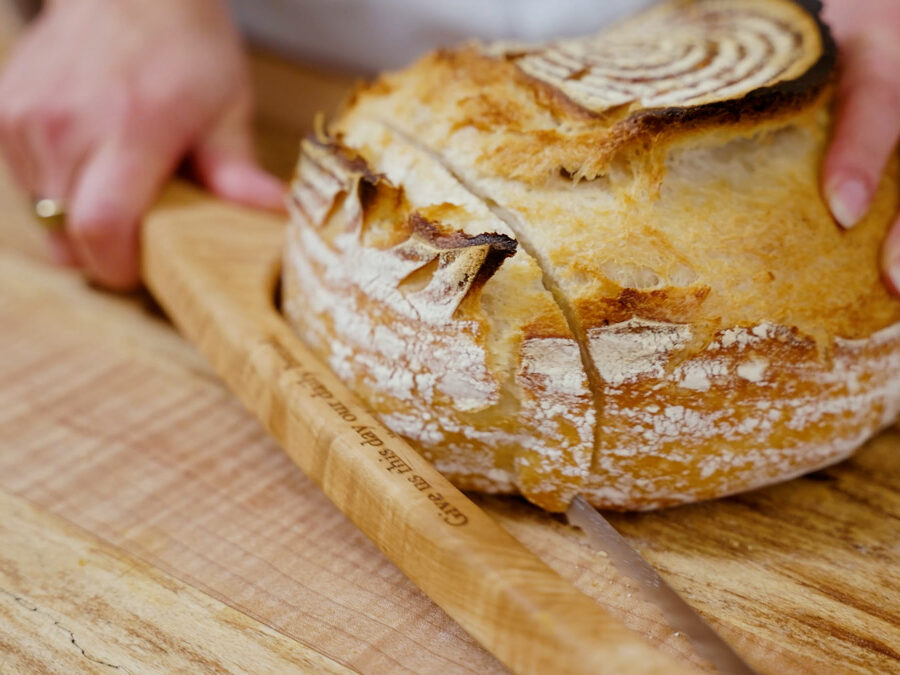
Remove the loaf to a cooling rack and let it cool at least 2 hours before slicing.
Pro Tip: Resist the urge to immediately slice into the loaf. The inside needs time to finish baking prior to slicing, or else you’ll be left with a gummy consistency. Click here for my favorite bread knife!
Alternate Same-Day Schedule
If you prefer not to bulk ferment in the fridge overnight, allow the shaped boule to rise at room temperature until it’s nearly doubled and passes the poke test (usually about 4-8 hours).
You’ll likely bake late evening instead, but the cold bulk ferment typically gives better oven spring and helps avoid overproofing.
Tips for Success

• Use a digital kitchen scale for consistency and a wooden bench knife (and dough scraper) to make shaping the dough a breeze.
• A well-fed starter is more important than clock timing alone (a sluggish starter will take longer for your bread to rise, or it may not rise sufficiently).
• If your dough feels tight or dry during mixing, add a splash of extra water.
• Let the bread cool completely before cutting so the crumb sets.
Storage
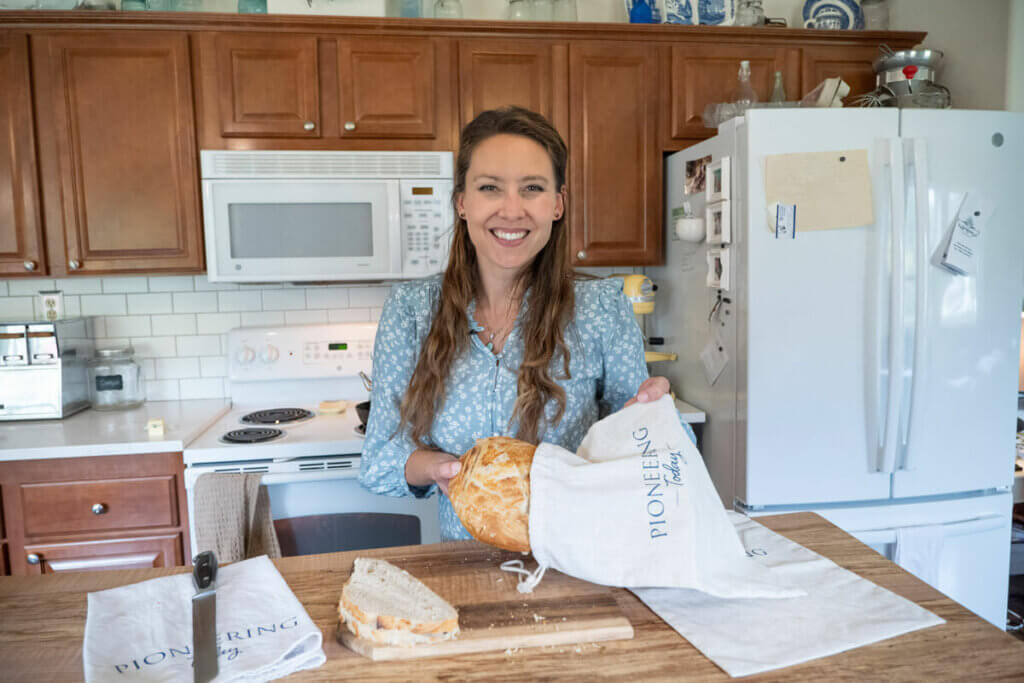
Store your sourdough boule at room temperature, cut-side down, in a linen bread bag for up to two days. For longer storage, slice and freeze in an airtight container.
Sourdough Mastery Course
Sick of heavy, dense loaves or crumbly messes that make your family reach for the store-bought bread instead?
Sourdough Mastery for the Home Baker is the no-fail, step-by-step system to bake real sourdough at home—sliceable sandwich bread, chewy artisan loaves, and even gluten-free—all with zero guesswork, no wasted ingredients, and flavors your family will beg for.


Did you make this sourdough boule recipe? If so, please leave a star rating ⭐ and your comments in the recipe card below. Then, snap a photo of your loaf and tag me on social media @melissaknorris so I can see!
Easy Sourdough Boule Recipe
Equipment
- Mixing Bowl
- Kitchen Scale I love this digital kitchen scale.
- Bench Scraper grab my wooden bench knife here
- Banneton Basket these are a great deal for banneton baskets
- Dough Whisk a dough whisk makes mixing much easier
Ingredients
- 500 grams all-purpose flour approximately 4 cups
- 100 grams sourdough starter approximately 1/2 cup
- 10 grams salt
- 350 grams water approximately 1 1/2 cups (divided, if doing an autolyze)
Instructions
Prepare Your Sourdough Starter
- Two days before you bake, begin feeding your starter every 12 hours to ensure it’s active and strong.
- 9:30 PM (Night Before) – Feed your starter so you have approximately 100g (my goal is about 1 cup) of active starter by morning.
Dough Day
- 7:30 AM – Feed the starter again.
- 10:30-11:00 AM – Once your starter has doubled (or at least risen ~30% and is bubbly), mix the 500g flour, 100g starter, 10 g salt and 350g water until combined. Cover and let sit for 30 minutes.
- Perform four stretch and folds every 30 minutes for about 2 ½ hours (about 5-6 sets).
- 2:00 PM – Bulk ferment the dough (let it sit at room temperature in a covered bowl) for about 4 hours until it looks risen and aerated.
- 6:00 PM – Shape the dough into a loose round with good surface tension using a bench knife and let it rest for 30 minutes.
- 6:30 PM – Final shape: Shape the dough again, using the bench knife, and then place the dough, seam-side up, in a floured banneton basket. Cover and refrigerate for 8-16 hours for the second rise.
Bake Day
- 8:30 AM – Carefully transfer the dough into the hot Dutch oven.
- Score the top, cover, and bake 20 min @ 500°F with lid on. (I have full scoring patterns in my Sourdough Mastery Course!)
- After 20 minutes, reduce the oven temperature to 450°F and continue baking for 10 minutes with the lid on.
- Carefully remove the lid (it will be hot) and bake 20–25 minutes more until deeply golden.
- Remove the loaf to a cooling rack and let it cool at least 2 hours before slicing. Pro Tip: Resist the urge to immediately slice into the loaf. The inside needs time to finish baking prior to slicing, or else you’ll be left with a gummy consistency. Click here for my favorite bread knife!
Notes
- Use a digital kitchen scale for consistency and a wooden bench knife (and dough scraper) to make shaping the dough a breeze.
- A well-fed starter is more important than clock timing alone (a sluggish starter will take longer for your bread to rise, or it may not rise sufficiently).
- If your dough feels tight or dry during mixing, add a splash of extra water.
- Let the bread cool completely before cutting so the crumb sets.


Do you discard when feeding the starter while preparing for the bread recipe or just feed?
just feed
The instructions are really easy to follow, even if you’re new to sourdough. The ingredients are simple, it doesn’t take a ton of hands-on time, and the bread turns out great. This is one of those loaves you’ll make for a weekend bake,
I love easy recipes that turn out every time.
So fun and tasty!
My 19 year old son was just telling me he wanted to learn to make little boules to use as hamburger buns. Does the link for the basket also have an option for smaller sizes? How would I adjust the baking time? Thanks so much!
When you feed your starter again in the morning you already have 100 gr of starter ready from the night before. What is the ratio you feed it and what do you do with the left over starter.
It’s 100 grams of active starter for the morning, so I generally do 50 grams at night and then 50 grams in the morning. You need extra to keep your starter going. I don’t weigh my starter when feeding in anymore, I just keep it on the stiff side, but if you do need to weigh until you can eye ball it, I do a 1:2:2, sometimes a 1:5:5, which is one part starter to two parts equal by WEIGHT flour and water.
Recipe for starter, please!
It’s linked in the article (the red words that say how to make a sourdough starter) but here’s the link https://melissaknorris.com/podcast/5-tips-on-how-to-get-started-with-sourdough/
This recipe is reliable and consistent every single time! The crust is perfectly crisp, but just like Melissa says, won’t cut the roof of your mouth! Will never use another recipe for a sourdough boule again.