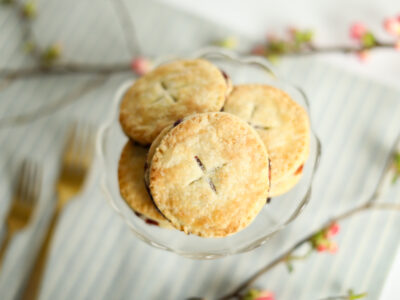
Mini cherry pies in a muffin tin, because nothing says summer like cherry pie. Something about it reminds me of fireworks and the 4th of July (or Canada Day for my fellow Canucks;)
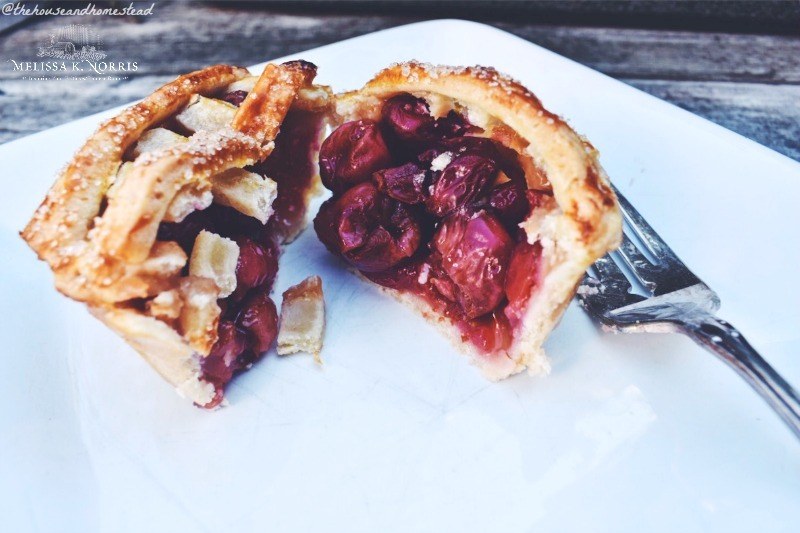
Cherry pie was the first pie I ever made from scratch. I made it with store-bought sweet cherries and a basic pie crust recipe and it turned out so good for my first attempt that it has remained in my repertoire ever since (along with a vinegar pie recipe).
🍞 Struggling With Sourdough?
If your starter won’t take off, your loaves are dense and hard, or sourdough just flat-out overwhelms you…
👉 I’ll show you how to fix all of it.
Join my FREE workshop and learn how to make a bubbly, active starter—the right way, from Day One.
Needless to say, when my husband and I moved to our current property a few years ago, I was super excited to discover we had a big ol’ cherry tree on the edge of our property.
The first year we were here, we got about 10 lbs. of cherries off our tree. Considering the cost of cherries at the farm market, we were pretty stoked that we got 10 lbs. for free! We could have got way more too if we had an orchard ladder that reached higher up, but c’est la vie. I guess it’s only fair to leave some for the birds.
I knew I definitely wanted to turn some of those cherries into pies, but I also wanted to be able to deliver some to share with neighbours and friends, and I didn’t want to make an entire pie for each person I wanted to share a taste with. So I decided to make a whole bunch of mini pies in one of my muffin tins instead. This way I’d get 12 miniature hand pies per batch instead of one regular-sized pie. This is also a great alternative to traditional-sized pies if you don’t have a pie plate on hand but you do happen to have a muffin tin.
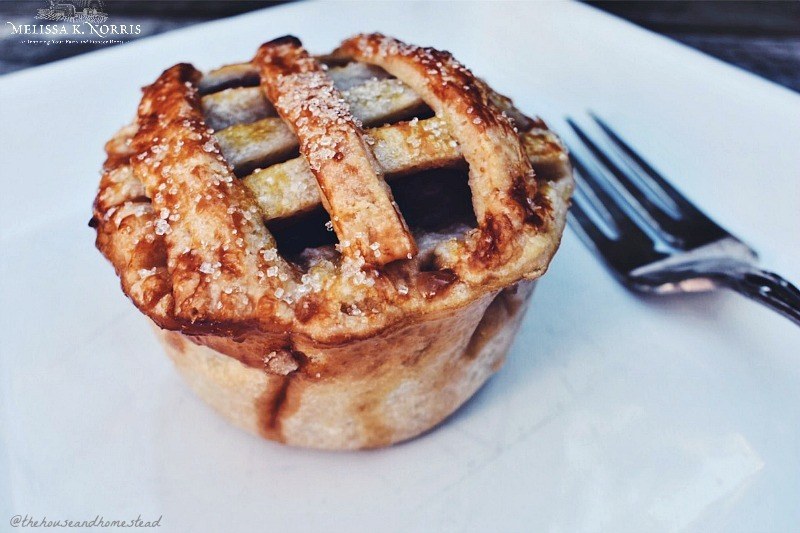
They turned out great and were really cute topped with a simple lattice crust. And I was able to drop off a few to my neighbours and a couple to my mom and I still had half a dozen leftover for our household.
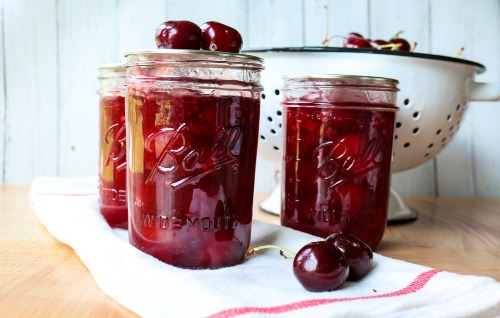
I’ve recreated these pies a few times since then, always with cherry filling, although they would work great with any type of fruit pie filling. I’ve tried them with fresh cherries and with my home-canned cherry pie filling as well and both taste amazing.
I always make some pies with fresh cherries in the summer, and this mini pies in muffin tins recipe is perfect for that, but the beauty of canning cherry pie filling for later is that I can make these pies in the dead of winter if I want with organic cherries right from our yard. There’s something so satisfying about knowing I can do that! It’s the homesteader spirit… Always thinking ahead to winter;)
As for the dough, I use the same basic pie crust recipe I’ve always used, but doubled to make enough for 12 small pies instead of one large one.
Ever have trouble making the perfect flaky melt in your mouth pie crust? My great-grandmother’s flaky pastry recipe has 2 secret ingredients that turn out perfect pie crust, I’ve had texts on Thanksgiving from people who have never been able to turn out a good pie crust let me know this was the only crust recipe they’d ever use again and it created the best pies. Click here for Best-Ever Flaky Pie Crust Recipe.
Then I use a band from a wide-mouth Mason jar to cut out rounds of pie crust that I then roll out to fit into each mould in the muffin tin. I use a knife to cut some of these rounds into strips to make a simple lattice top crust and I assemble my pies just as you would a large one.
I’ll admit, this does tend to take a bit more time than simply making one pie because you’re working with 12 separate pie crusts (top and bottom) instead of just one, but it’s also much easier to get the crusts perfectly round and uniform. I personally think making the pies this way also gives each bite a better crust-to-filling ratio too, but you’ll have to be the judge of that for yourself.
The other bonus is that these look super cute stacked on a plate and served up at a birthday, barbecue or any other summer event. And there’s no messing around with trying to cut and serve up perfect slices to each guest as they are ready to be grabbed and eaten by hand or served up individually on a dessert plate with a side of vanilla ice cream (and maybe even a sparkler on top!)
Making Mini Cherry Pies in a Muffin Tin
Start by preparing your pie crust. Combine 5 cups of flour with two tablespoons of sugar and two teaspoons of salt. Then, using a stand mixer (or by hand using a pastry cutter), add in two cups of butter or lard and mix together until dough is crumbly but well-combined.
Add ½ cup of water and continue mixing until dough is crumbly but sticks together. Resist the temptation to add more water! However if you really think you need a bit more water to get the dough to stick together enough to form a ball, add in one tablespoon at a time. You want your dough to be more crumbly than sticky.
Once your dough is well mixed, form it into a ball with your hands. Divide it into two equal parts and roll each part into a ball, then press each ball into a 1-inch thick disc. Wrap with plastic wrap or place in a plastic ziplock bag (I prefer the ziplock bag as I can reuse the bag) and then refrigerate for about an hour or until firm. *Dough can be refrigerated for up to 3 days or frozen for up to 6 months.
Prepare your cherry pie filling
First, wash, stem and pit your cherries. I pit mine with a toothpick for years before finally investing in a cherry pitter. (Actually I got it in my stocking last Christmas and now I don’t know how I lived without it). The hardest part of these mini cherry pies with fresh cherries is the pitting.
If pitting without a pitter, using a toothpick is pretty easy, but a bit messier and time-consuming. To pit them this way, stick a toothpick into the top of each cherry near the top of the pit and slide the toothpick around the cherry pit, loosening it from the flesh, and then pop it out.
If using a pitter, all you have to do is put the cherry in the pitter and press down to pop out the pit. I use this cherry pitter that let’s you do multiple cherries at once and it works great!
Once you’ve finished pitting all your cherries, measure out two pounds (or about 5-6 cups) of pitted cherries. Add 1/2 cup sugar, two tablespoons of lemon juice, two teaspoons of cinnamon (optional) and two tablespoons of cornstarch (or substitute flour as a thickening agent). *The standard practice is to use double the amount of flour when substituting for corn starch, so if using flour, add 4 tablespoons of flour instead of corn starch.
Cover pie filling and set aside. Preheat oven to 375ºF.
Subscribe to Melissa K. Norris!
Get updates on the latest posts and more from Melissa K. Norris straight to your inbox.
We use your personal data for interest-based advertising, as outlined in our Privacy Notice.
Assembling Your Mini Cherry Hand Pies
Remove your discs of pie crust dough from the fridge and roll one of them out on a large, flat, floured surface.
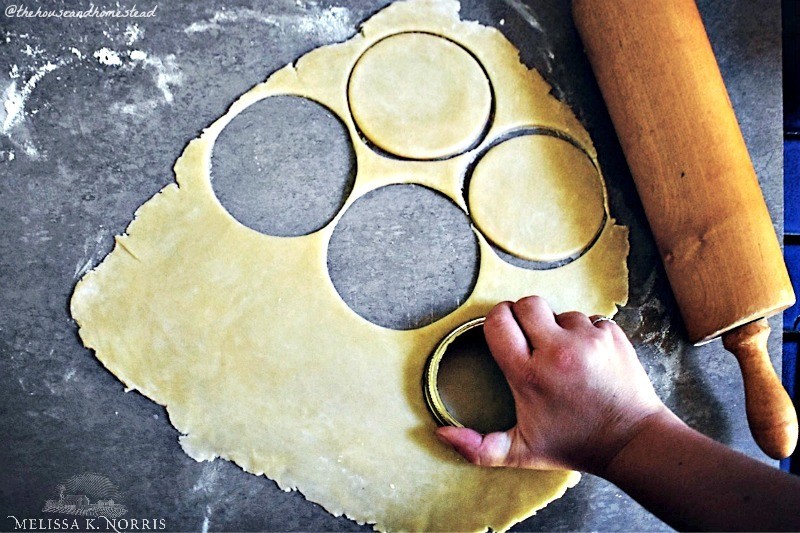
Roll out dough to about ¼-inch thickness and then cut out 12 rounds using a band from a wide-mouth Mason jar (or a 3-inch cookie cutter). If your surface isn’t large enough to roll the entire disc out (like mine), divide into two again, roll out and cut 6 rounds from each portion of dough.
Roll out each round with your rolling pin until it’s roughly 5 inches in diameter. Then fit each round into a lightly greased muffin tin and press it to fit the mould. Each pie crust should be entered in its respective mould and should overhang along the edge just a bit (about ¼-inch of overhang is enough).
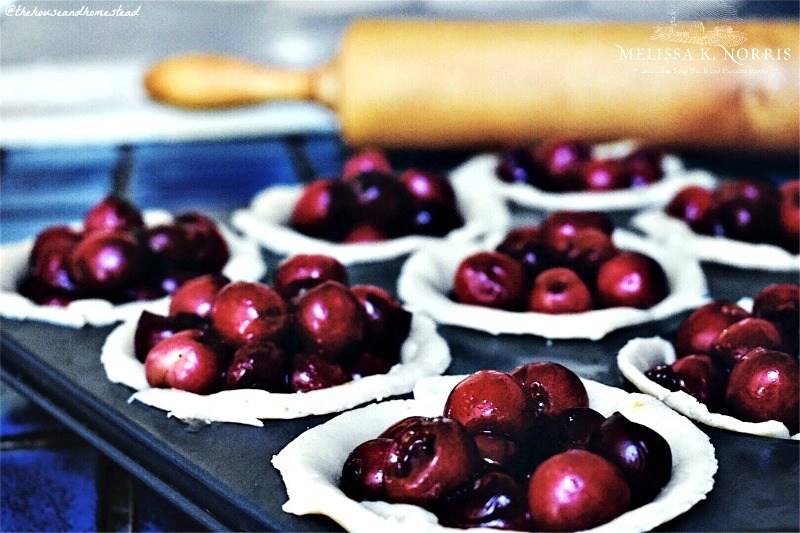
Fill each pie crust with cherry pie filling. Scoop enough pie filling into each pie crust so that it heaps up in a small mound. It shouldn’t be overflowing, but it should be heaped enough so that when you put the top crust on, it maintains its shape and doesn’t collapse into the pie.
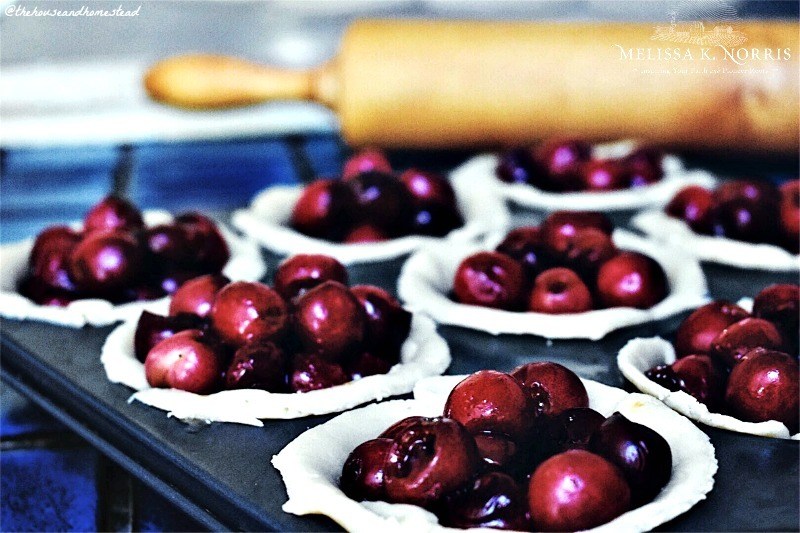
Fill each pie crust with cherries and drizzle any remaining liquid from the pie filling evenly into each crust (liquid will thicken up as it cooks).
Next, roll out second disc of dough and cut 12 more rounds and roll them out, just like you did with the first disc of dough. These 12 rounds will form the top crust.
I like to cut mine into strips and make a simple lattice top crust, but you can simply fit the rounds over the top of each filled pie crust and cut small slits in the top to release heat and pressure while cooking if you like.
If making a lattice crust, cut rounds into 8 equal strips. Then form into a lattice crust on top of each of your pies. (I made my latest batch with what I like to call a “lazy lattice” crust where I simply layered strips in one direction and then layered strips on top in another direction. Super simple and they still looked great!)
Brush the edge of your pie crust with a simple egg wash made by mixing one egg yolk with one tablespoon of lukewarm water. This will help your upper crust stick to the bottom crust.
Then place your top crust on (or layer your lattice crust) and use a fork to press down along the edges. I find a dessert fork works best as it’s smaller and easier to manoeuvre around a muffin tin. Trim the excess crust off with a small kitchen knife.
Brush the tops of your pies with a thin layer of egg wash and then sprinkle with a little sugar and pop them in the oven. Bake at 375ºF for 25-30 minutes. Remove from the oven, let cool for about 10-15 minutes and enjoy warm with a side of vanilla ice cream!
These also keep well in the fridge or even covered at room temperature for a few days and can be made ahead of time and then placed on a tray to serve.
This is by far one of my favourite ways to enjoy cherries in the summer. It’s my new twist on an old classic and it has definitely earned a permanent spot in my family recipe book. What about you? What’s your favourite way to enjoy cherries in the summer? I’m always looking for new recipe ideas and inspiration, so I’d love to hear from you!
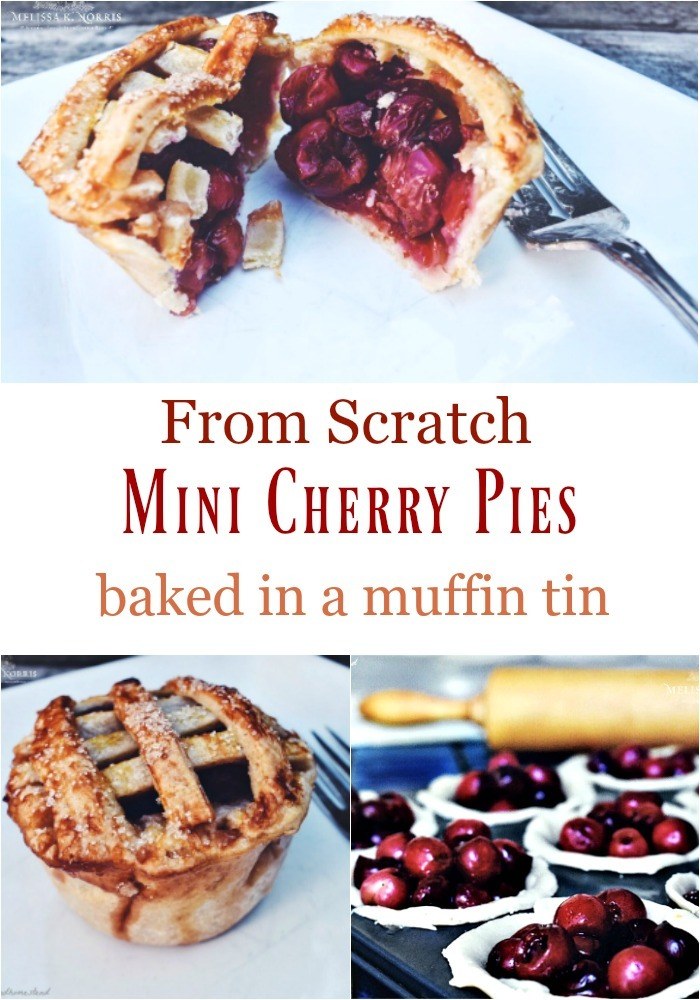
There you have it, how to bake mini cherry pies in a muffin tin! Got more cherries to put to good use, try out our favorite low sugar and no store bough pectin cherry jam recipe.
Mini Cherry Pies in a Muffin Tin
Ingredients
For the Dough:
- 5 cups all-purpose flour
- 2 tsp salt
- 2 tbsp sugar
- 2 cups butter or lard
- ½ cup water
For the filling:
- 2 pounds pitted sour cherries or substitute sweet cherries
- ½ cup sugar
- 2 tbsp lemon juice
- 2 tbsp corn starch or substitute 4 tbsp flour
- 2 tsp cinnamon optional
Other ingredients:
- 1 egg yolk
- 1 tbsp of lukewarm water
- sugar for sprinkling
Instructions
- Preheat the oven to 375ºF when you’re ready to bake.
- Start by making your pie crust. Mix together flour, salt and sugar. Using a stand mixer fitted with a pastry hook or by hand using a pastry cutter, add butter or lard. Room temperature works fine or cold and cut into cubes. Slowly add in water a little at a time until dough is crumbly but sticks together when you squish it with your hands. If you need to add more water, add in 1 tbsp at a time.
- Roll dough into a ball and divide into two portions. Roll each portion into a ball and flatten into about a 1-inch thick disc. Wrap and refrigerate about an hour until firm.
- Wash, pit and stem your cherries. Add sugar, lemon juice, cornstarch and cinnamon to cherries and mix well to combine. Cover and set aside.
- Remove dough from the fridge and unwrap. Roll out each round of dough onto a floured surface to about ¼-inch thickness. Cut out 12 smaller rounds with the band from a wide mouth Mason jar or cookie cutter of similar size. Roll each small round out to about 5 or 6 inches in diameter. Fit each round into a greased muffin tin and allow about ¼-inch of crust to overhang.
- Fill each pie crust with cherry filling. Make sure it’s heaping but not overflowing the edges of the crust.
- Roll out the other half of your pie crust and cut 12 more rounds and roll them out just like the last batch. Decide how you want to top your pies. Cut into a lattice or place your whole pie crust on top and cut slits. *Before placing your top crust on, mix together egg yolk and water to make an egg wash. Brush this on the edges of your bottom pie crust before placing your top crust on to help it stick.
- Press edges down with a small fork and trim any excess crust from the edge with a small kitchen knife. Brush the tops with remaining egg wash and sprinkle with a little sugar. Pop them in the oven and bake for 25-30 minutes. Let cool and enjoy.

Can you use a puffed pastry sheet for the dough? Just curious.
I haven’t tested it to know if you would alter the baking time/temp but in theory yes, it should work.
Absolutely delicious and a great recipe for a person who may have never made pie before. Halved the recipe, as we only had one pound of cherries, and that may be the reason why we had so much dough left over—even with making only a half recipe, there was still half of what I ended up making leftover by the end. No problem, though, as these pies are so good that I will likely be using it soon. Made the crust with room temperature butter and it didn’t affect the flaking in any negative way, which makes this recipe a lot more accessible to those who may have never worked with pastry before. IMO, the cinnamon may be an optional ingredient but I believe that it’s the final thing that sends this over the edge from good to great. This might be the recipe that makes me into a pie lover!
How would you adjust this recipe to make a regular sized cherry pie?
How would you make these with apples?
I bought your The Made from Scratch Life and love reading it. I decided to make your cornbread recipe and the directions say combine flour, baking powder, baking soda, salt, and cream of tartar. but there is no amount for it on the list of ingredients. Can you help? I’m made it anyway without it. I plan to get your other book too. Thank you
Hi Elise,
Sorry about the cream of tartar, when we tested the recipe we discovered it performed well without the cream of tartar and wanted to use the least amount of ingredients possible. On the last edit we didn’t get it taken from the directions so you did the right thing. The next printing that will be fixed. I hope you enjoyed it and thank you so much for purchasing the book.
I have the old standby of a push the plunger cherry pitter, and I love it because it will generally feed the next cherry in while dropping the pitted one out. I would hate having to load them individually like in the one you had the link to.