Melissa K. Norris
  • Start Here
  • Podcast
  • Articles
  • Shop
    • Books
    • Classes
    • General Store
  • In Person Workshops
  • Academy
Log In

How to Can Pears the EASY Way

October 18, 2022 by Melissa Norris 65 Comments

Learn how to can pears the easy way. With my simple trick you'll be able to peel your pears with ease and have delicious home-canned food to line your pantry shelves all year long.

Jars of canned pears in a steam canner.

Why I Love Canning Pears

This time of year is super busy with all of our canning going on. We depend upon our jars of home-canned goodness to feed us during the winter months when fresh fruit isn't just growing on the bush right outside our door.

However, that can make finding the time to fit in all the canning difficult. So when I see a trick that can speed things up, you can bet I'll share it with you. This old-fashioned no-knife peeling tip is one of my favorites.

A bag of sugar from Azure Standard.

Azure Standard

This video is sponsored by Azure Standard, a great place to build up your bulk supplies and long-term food storage.

I like to buy my sugar and cinnamon sticks in bulk, so whenever it's canning season I know my supply will be full.

Azure has a special promotion for first-time customers through October 30, 2022. When you purchase $50 or more, you can get 10% off your order with my coupon code “MKN10”.

[adthrive-in-post-video-player video-id=”1zpMrKr6″ upload-date=”2022-10-12T20:37:41.000Z” name=”How to Can Pears.mp4″ description=”Learn how to can pears the easy way. You will have delicious fruit all year long that's high in flavor. You can even add cinnamon and have it sauced with syrup or sugar. You'll want to do several recipe variations and the best part? No knife peeling involved! I will give you a great tip.” player-type=”default” override-embed=”default”]

What Is The Best Way to Preserve Pears?

The best way to preserve pears is to can them in your own kitchen. See below for the best way to do all three of the canning process steps.

Pears being scooped into a jar.

Do I Need to Hot Pack Pears?

You may be wondering if you need to cook pears before canning. This is considered hot-packing pears, when you boil them slightly before adding them to your canning jars.

You do not need to cook pears before canning, you can use a raw-pack method, but here's why I recommend using a hot pack method. Hot packing pears will give you the best quality end product, but it is unnecessary unless you're only canning with water, not sugar.

I don't know about you, but I want the best-tasting food at the end, so taking the time to do a hot pack and have delicious home-canned pears is worth it.

3 Reasons to Hot Pack Pears:

  1. It helps push the oxygen out of the fruit.
  2. This, in turn, helps you pack more fruit in your jars.
  3. It helps prevent siphoning (which is liquid loss from jars while in the canner).

Do You Need to Use Sugar When Canning Pears?

You may can pears in just water, unsweetened apple juice, or light to medium syrup (which is a mixture of sugar and water in different ratios). You must use the hot pack method if you choose to can fruit with just water.

I prefer to use a light syrup, but if you want, canning pears can be done with honey instead of sugar.

Hot syrup being ladled into a jar of pears.

Syrup Ratios

  • Light Syrup – For light syrup, combine 5 3/4 cup water and 1 1/2 cups sugar.
  • Medium Syrup – For medium syrup, combine 5 1/4 cups water and 2 1/4 cups sugar.
  • Heavy Syrup – For heavy syrup, combine 5 cups water and 3 1/4 cups sugar.

Pro Tip: Because it's safe to can pears with no sugar at all, you can adjust these ratios to your preference. In the video, you'll notice I make a double batch of syrup, but my ratios aren't exact. That's OK!

Canning supplies and jars sitting on a kitchen counter.

Supplies Needed

  • Water Bath or Steam Canner – I love my steam canner because it's much easier to operate, and I don't need to cover my jars with water. You can also use a water bath canner or simply a pot large enough to cover your jars with about one inch of water. I used my pressure canner as a water bath canner when doing quarts because it's taller than my regular canner. You just use a standard tight-fitting lid and the rack instead of the pressure canning lid.
  • Ball Home Canning Utensil Kit– This canning utensil kit is one of the best investments I've ever made for canning supplies. I use the measuring and air bubble remover all the time, and because of the jar lifter, I don't have any more burnt fingertips. The funnel helps keep me from spilling liquid all over the counter.
  • Canning Jars & 2-Part Lids – You can use quart or pint-sized jars, depending on the size of your family. Grab your canning lids from ForJars here (use code “modern10” for 10% off your purchase). Pro Tip: Wide-mouth jars are the easiest to use for packing pears.
A woman holding pears, ready to can them.

Ingredients Needed

  • Pears – Depending on their size, you'll want about 16 medium ripe pears to fill six, one-quart canning jars. Some of the best varieties for canning are Bartlett, but any pear will do. If canning Asian pears, be sure to read the pro tip below.
  • Bottled Lemon Juice (optional) – You can use lemon juice in your bowl of water to help keep pears from turning brown while peeling the rest. This is purely optional and not necessary to safely can them.
  • Sugar – Sugar is optional when canning pears. See syrup ratios above to know how much sugar you'll need.
  • Bulk Non-Irradiated Cinnamon Sticks – Buying cinnamon sticks in bulk will be much cheaper than buying them from the grocery store. I prefer to buy my cinnamon sticks through Azure Standard, but here are some good quality cinnamon sticks from Amazon.

Pro Tip: Asian pears are not acidic enough to can on their own. If you do decide to can this type of pear, add 1 Tablespoon of bottled lemon juice per pint jar or 2 Tablespoons of bottled lemon juice per quart jar to can Asian pears safely.

Jars of canned pears in a steam canner.

How to Can Pears at Home

To can your pears at home, there are three main steps.

  1. Preparing for canning.
  2. Preparing the pears.
  3. Canning the pears.
Blanched pears sitting on a kitchen counter.

Prepare for Canning

  1. Prepare the water bath or steam canner.
    • For water bath canners, fill with water deep enough to cover the jars, place the rack, and begin heating the water.
    • For steam canners, fill to the recommended level and begin heating the water.
  2. Wash canning jars in hot soapy water, rinse, and place on a folded towel near the hot syrup and stovetop.
  3. Make sure you have clean canning lids ready.
A woman dropping whole pears into a pot of boiling water.
A woman putting pears into a pot of boiling water.
A woman placing blanched pears into a bowl of water.

Preparing the Pears

Remember that easy trick on peeling pears that I mentioned? Here it is – you can peel pears the same way you peel tomatoes and peaches by blanching them.

A woman peeling the skin off blanched pears.
A woman slicing pears in half.
A woman using a spoon to core pears.

How to Peel Pears (the Easy Way)

This is my favorite old-fashioned tip for peeling pears. I found this method in a really old 1920s book, and it's been my favorite method ever since.

  1. To blanche pears, take a big pot of boiling water and submerge your washed, ripe pears in a single layer for 15 to 30 seconds.
  2. With a slotted spoon, remove them and place them in a bowl of warm water. Continue until all pears have been blanched.
  3. Rub off the peel of each pear. Seriously, the skin slides right off. There is no knife or peeler needed.
    Pro Tip: If part of the pear is difficult to peel, it may not have been submerged in the boiling water. Just take the back of a spoon and scrape it off.
  4. Cut the peeled pear in half. This is the only time you'll need your knife.
  5. Scoop seeds and core out with a spoon.
  6. Place cored pear halves back into the bowl of water. Continue until all pears are cored and halved.
A woman adding lemon juice to a large bowl of water.
A woman placing peeled and cored pears into a bowl of lemon water.

Pro Tip: To keep pears from turning brown, add 1/4 cup of bottled lemon juice into the bowl of warm water. Once pears are peeled, use this bowl to store them until you're ready for the next step.

Pears in a pot of hot syrup.
A woman putting cinnamon sticks into jars for home canned pears.

Canning the Pears

In the video, I'm showing how to can in a steam canner. However, the directions below will be for a water bath canner. Refer to the video if you're using a steam canner.

Pears being scooped into a jar.
Hot syrup being ladled into a jar of pears.
A headspace measuring tool measuring a jar of pears.
  1. Make syrup by combining water and sugar in a large pot (see syrup options in “Syrup Ratios” above).
  2. Heat over medium-low and stir until almost a boil and sugar is dissolved.
  3. Place the pears into the hot syrup in a single layer and let them heat through for about 5 minutes.
  4. Fill your jar with two four-inch cinnamon sticks.
  5. Fill your jar with the hot pears using a slotted spoon (about 6-8 pear halves per quart jar). Leave 1/2-inch headspace. Pro Tip: If you put the pear halves face down, you can get more pears into the jar.
  6. Pour the hot syrup over the pears to 1/2-inch headspace using a ladle and canning funnel.
  7. Remove air bubbles with the bubble-remover tool and double-check your headspace, adding more syrup if needed.
  8. Wipe the rim of the jar with a clean towel and place the lid and band on.
  9. Tighten the lid to fingertip tight and place the jar in the water bath canner.
  10. Add more water to the water bath canner, ensuring the water's surface is at least 1 to 2 inches over the top of the jars. Bring to a hard boil.
  11. Start the processing time after the water has reached a full boil and process 20 minutes for pints and 25 minutes for quarts.
    Pro Tip: If you're 1,000 feet above sea level, increase processing time by 5 minutes.
  12. When the jars have been processed, turn off the heat. Leave the lid on for 5 minutes.
  13. Remove the canner lid; leave the jars in the canner for an additional 5 minutes.
  14. Remove jars onto a folded towel in a draft-free area and let cool for 24 hours.
A woman wiping the rim clean of a jar of pears.
A woman tightening the lid onto a jar of home canned pears.
Jars of canned pears in a steam canner.

Did you make this recipe? If so, please leave a star rating in the recipe card below. Then take a photo and tag me on social media @melissaknorris so I can see.

Be sure to check out my new canning book, Everything Worth Preserving, for all the ways you can safely can pears at home.

More Posts You May Enjoy

  • Homemade Apple Pie Filling Recipe and Canning Instructions
  • How to Can Apricots- Easy Canned Apricots Recipe
  • Make Homemade Jams and Jellies Like a Pro
  • 129+ Best Canning Recipes to Make This Year
  • Canning 101 Water-Bath vs. Pressure Canner
  • 10 Ways to Preserve Food at Home
Canned pears in a steam canner.

Canning Pears + Spiced Pear Recipe

MelissaKNorris
Easy pear canning recipe with low (or no sugar) but heavy on flavor with optional spices of cinnamon.
3.77 from 43 votes
Print Recipe Pin Recipe
Prep Time 15 mins
Cook Time 25 mins
Total Time 40 mins
Course fruit, side
Cuisine American
Servings 16 servings
Calories 101 kcal

Equipment

  • Water Bath or Steam Canner
  • Canning Tools
  • Canning Jars & Two-Part Lids

Ingredients
  

  • 16 pears about 3 to 4 pears per quart jar
  • 5.75 cups water
  • 1.5 cups sugar
  • 8 whole cinnamon sticks 2 per jar (optional)

Instructions
 

Preparing for Canning

  • Prepare the water bath or steam canner. For water bath canners, fill with water deep enough to cover the jars, place the rack, and begin heating the water. For steam canners, fill to the recommended level and begin heating the water.
  • Wash canning jars in hot soapy water, rinse, and place on a folded towel near the hot syrup and stovetop.
  • Make sure you have clean canning lids ready.

Preparing the Pears

  • To blanche pears, take a big pot of boiling water and submerge your washed, ripe pears in a single layer for 15 to 30 seconds.
  • With a slotted spoon, remove them and place them in a bowl of warm water. Continue until all pears have been blanched.
  • Rub off the peel of each pear. Seriously, the skin slides right off. There is no knife or peeler needed. Pro Tip: If part of the pear is difficult to peel, it may not have been submerged in the boiling water. Just take the back of a spoon and scrape it off.
  • Cut the peeled pear in half. This is the only time you'll need your knife.
  • Scoop seeds and core out with a spoon.
  • Place cored pear halves back into the bowl of water. Continue until all pears are cored and halved.

Canning Pears

  • Make syrup by combining water and sugar in a large pot (see syrup options in “Syrup Ratios” above).
  • Heat over medium-low and stir until almost a boil and sugar is dissolved.
  • Place the pears into the hot syrup in a single layer and let them heat through for about 5 minutes.
  • Fill your jar with two four-inch cinnamon sticks.
  • Fill your jar with the hot pears using a slotted spoon (about 6-8 pear halves per quart jar). Leave 1/2-inch headspace. Pro Tip: If you put the pear halves face down, you can get more pears into the jar.
  • Pour the hot syrup over the pears to 1/2-inch headspace using a ladle and canning funnel.
  • Remove air bubbles with the bubble-remover tool and double-check your headspace, adding more syrup if needed.
  • Wipe the rim of the jar with a clean towel and place the lid and band on.
  • Tighten the lid to fingertip tight and place the jar in the water bath canner.
  • Add more water to the water bath canner, ensuring the water's surface is at least 1 to 2 inches over the top of the jars. Bring to a hard boil.
  • Start the processing time after the water has reached a full boil and process 20 minutes for pints and 25 minutes for quarts. Pro Tip: If you're 1,000 feet above sea level, increase processing time by 5 minutes.
  • When the jars have been processed, turn off the heat. Leave the lid on for 5 minutes.
  • Remove the canner lid; leave the jars in the canner for an additional 5 minutes.
  • Remove jars onto a folded towel in a draft-free area and let cool for 24 hours.

Notes

  • If you put the pear halves face down, you can get more pears into the jar.
  • If you're 1,000 feet above sea level, increase processing time by 5 minutes.
  • Nutrition facts do not include syrup, only the pear.
  • In the video, I'm showing how to can in a steam canner. However, the directions in this recipe card are for a water bath canner. Refer to the video if you're using a steam canner.

Nutrition

Serving: 1pearCalories: 101kcalCarbohydrates: 27gProtein: 1gFat: 0.2gSaturated Fat: 0.04gPolyunsaturated Fat: 0.2gMonounsaturated Fat: 0.1gSodium: 2mgPotassium: 206mgFiber: 6gSugar: 17gVitamin A: 45IUVitamin C: 8mgCalcium: 16mgIron: 0.3mg
Keyword Canned Pears, canning pears recipe, canning pears without sugar, How to can pears
Tried this recipe?Let us know how it was!

Filed Under: Canning Recipes, Canning Recipes, Food Preservation, Food Preservation - Canning, Fruit, Jam and Jelly, Healthy Snacks, Recipes, Water Bath Tagged With: fruit, homesteading, More Canning, pears, preserving the harvest, recipes, water bath

Bread And Butter Pickles Recipe – No Canning Required

September 13, 2022 by Melissa Norris 33 Comments

Bread and butter pickles are hard to beat! This is the best refrigerator bread and butter pickles recipe that has just enough sugar (but not too much) to lend a sweet tang. 

Bread and butter pickles sitting on the counter in a jar.

These bread and butter pickles are easy enough for a beginner to make with no canning required! Make these so you can delight your family and guests with a tasty treat early in the season as soon as your first cucumbers are ready to harvest.

Why I Love To Make Bread And Butter Pickles

I have a few different variations of pickles I like to make. Like these fermented pickles or, for something totally different, my great-grandma's mustard pickles (I also happen to love my pickled asparagus recipe, in which you could sub cucumbers for the asparagus!).

Once our garden begins to produce a harvest I love having recipes that are quick and easy to use up those first few ingredients.

When those first vegetables are ripening, they can come on kind of slowly. Sometimes it’s a fine line between too many to eat for dinner and too few to start canning. The same is true for the tailend of the growing season.

That's where this refrigerator bread and butter pickles recipe comes in! You can make any size jar of pickles and don't have to worry about canning them or having enough to do a large batch.

Additionally, they will come out crunchy because there is no processing time. A perfect combination!

If you struggle keeping those canned pickles crunchy, head on over to my post on seven tips for crunchy pickles to learn what I do to get them just the way I like them.

[adthrive-in-post-video-player video-id=”zQTwrrGb” upload-date=”2022-09-07T17:23:11.000Z” name=”Bread and Butter PIckles (1).mp4″ description=”Bread and butter pickles are hard to beat! This is the best refrigerator bread and butter pickles recipe that has just enough sugar (but not too much) to lend a sweet tang.” player-type=”default” override-embed=”default”]

How Did These Pickles Get Their Name?

The answers to this question are pretty diverse. Cucumbers are an easily grown vegetable and were likely easy to grow even during hard times.

When times are tough, people get creative. It’s possible they were eaten as a complete meal by taking two pieces of bread, slathering them with butter, and adding sweet, tangy pickles.

Another legend is that during the Great Depression, pickles were used to barter for staples such as bread and butter. Wherever the name originated, it stuck, and we have delicious bread and butter pickles today!

Cucumbers piled on a cutting board with a knife next to them.

What Kind Of Cucumbers Are Best?

It’s best to use cucumbers intended for pickling. These are thin-skinned and shorter in length. To ensure crunchy pickles, cucumbers should be used within 24 hours of being harvested.

If you want to make this recipe but don’t have them planted in your garden, I recommend finding them at a farmer’s market or produce stand.

The wax on grocery store cucumbers prevents the pickling juices from soaking into the pickles. If store-bought waxed cucumbers are your only option, be sure to peel the skin off.

A hand holding up a jar of bread and butter pickles.

What Is Different About Bread And Butter Pickles?

Dill pickles are the most commonly known pickles. The main difference between dill pickles and bread and butter pickles is the addition of sugar and turmeric in bread and butter pickles. 

They both call for vinegar and similar seasonings with dill pickles using dill weed while bread and butter pickles use sugar.

Sliced pickles in a white bowl with a fork on a striped table cloth.

Are They The Same As Sweet Pickles?

Bread and butter pickles are a type of sweet pickle because they have sugar in the recipe. However, there are many different recipes for sweet pickles with flavor variations. So although bread and butter pickles can be considered sweet pickles, not all sweet pickles are bread and butter pickles.

Empty jars with lids stacked on a counter.

Supplies Needed

  • Mason Jars and Lids – The wide mouth size works well for stuffing jars, but regular mouth work as well. Sterilize jars for the amount of pickles you are making. Pro Tip: After sterilizing, allow the hot jars to cool before packing with the sliced cucumbers. This will help keep them crisp.
  • Knife – Used for cutting off the ends of the cucumbers. The blossom end contains enzymes that can soften the pickles.
  • Mandolin (optional) – A mandolin works well for cutting uniform shapes, but I prefer to use a knife for thicker slices.
  • Large Bowl – This is used to place the vegetables in after you cut them while waiting on the pickle brine to heat through.
  • Stainless Steel Pan – While I love using cast iron in my kitchen, iron, zinc, brass and copper may react with the acid of the vinegar in this recipe. Stainless steel, anodized aluminum, or heatproof glass are best for pickling recipes.
  • Canning Funnel and Ladle – The canning funnel makes it easier to pour the pickling juice into the jar and the ladle allows you to add the brine in a controlled manner.
Cucumbers with the ends cut off ready to make pickles.

Ingredients Needed

  • Pickling Cucumbers – Pickling cucumbers work best for this recipe, but you can use any sliced cucumbers. That's what makes this recipe so great for using up extra garden produce before it goes bad. Trim and slice the cucumbers with a knife or mandolin. For thick-skinned cucumbers, you may want to peel them first.
  • Onion – Yellow, red, or any onion you have from the garden will work. Slice or dice the onion into small pieces.
  • Bell Peppers – Any color combo of peppers you have on hand will work, you can even add some jalapenos if you want a sweet and spicy pickle. 
  • White Vinegar – Vinegar that is below 5% acidity is not acidic enough to kill off microorganisms, preserve the pickles, and prevent spoilage. While I love to make apple cider vinegar at home, I am not certain of the acidity and choose store-bought white vinegar just to be safe. 
  • Sugar – You can reduce this amount if you want, but I think the sugar is what makes them so good!
  • Mustard Seed – That classic sign of a bread and butter pickle. Did you know that mustard seeds are a source of protein? 
  • Celery Seed – An interesting fact about these tiny seeds is that they have minerals that support bone health. It’s amazing the benefits our seasonings have!
  • Turmeric – Turmeric is what gives bread and butter pickles that slight yellow color. It's become very popular over the last few years for its many health benefits such as improving heart health with its anti-inflammatory properties.
  • Whole Cloves – You can use ground cloves as a substitute if you don’t have whole cloves on hand.
Adding mustard seed into a pot of pickle brine.
Adding turmeric to the pickle brine.
Stirring the brine for bread and butter pickles.
Pouring pickle brine over cucumbers.

How To Make Bread And Butter Pickles

  1. Wash in hot soapy water a quart-size mason jar and lid. Wide mouth jars work best when stuffing them for pickles, but the regular mouth will work as well.
  2. In a stainless steel saucepan, combine vinegar, sugar, and spices. Bring the pickle brine to a boil at medium-high heat and boil for 3 minutes.
  3. Meanwhile, rinse the peppers, cucumbers, and onions. Cut off the blossom end of the cucumber (it contains enzymes that can soften pickles) and slice evenly. Cut up all the rest of your vegetables and place them in a large bowl.
  4. Layer the vegetables in the clean mason jar –  thinly sliced cucumbers, peppers, and onions. Push down lightly to pack vegetables down and get a few more in. Allow 1/2″ headspace at the top of the jar. Place the jar on a towel folded in thirds.
  5. Using a canning funnel or a ladle, pour the pickling liquid over the vegetables. You may have a slight amount left over depending on how tightly you packed your jar.
  6. Wipe the rim and apply the lid.
  7. Allow to cool to room temperature for 30 minutes and then place in the refrigerator.

Pickles should marinate for two weeks and be used within three months. Confession: I always taste-test mine after two days and usually end up eating them all well before the two-week mark! But know the flavor will intensify over time.

Everything Worth Preserving

Discover the 9 home food preservation methods to safely store delicious food for year-round eating with all of my step-by-step tutorials, recipes, and easy-to-use charts. Learn everything you need to know about cold storage (aka freezer), water bath/steam canning, pressure canning, dehydrating, fermenting, freeze-drying, root cellar, infusion, and salt/curing in the new book, Everything Worth Preserving.

Preserve food for a healthy well-stocked pantry & peace of mind, all in one resource.

In this book, you can search for any produce from A-Z and get a list of all the ways to preserve that item, plus recipes! Grab your copy (and FREE bonuses for pre-ordering) here.

A jar of bread and butter pickles sitting next to a bowl of pickling cucumbers.

More Posts You Might Enjoy

  • The Science of Home Food Preservation
  • 129+ Best Canning Recipes to Put Up This Year
  • Pickled Asparagus Recipe (Canned, Quick, or Refrigerator)
  • Off Grid Living: What You Need to Know
  • How Do You Know If A Canning Recipe Is Safe
  • How to Pick the Best Preserving Methods
  • Home Food Preservation- Preserving Plan for a Year’s Worth of Food
  • Fermentation for Health Benefits & Food Preservation
A hand holding up a jar of bread and butter pickles.

Bread & Butter Pickles (Refrigerator Pickles)

Melissa Norris
The best refrigerator bread and butter pickles recipe has just enough sugar to lend a sweet tang. Easy enough for a beginner to make with no canning required!
4.44 from 23 votes
Print Recipe Pin Recipe
Prep Time 20 mins
Brine Time 14 d
Total Time 14 d 20 mins
Course Appetizer, Condiment, Snack
Cuisine American
Servings 1 quart jar
Calories 592 kcal

Ingredients
  

  • 2 cups pickling cucumbers trimmed and sliced
  • 1/2 cup onion sliced
  • 1/2 cup peppers sliced
  • 2 cups white vinegar
  • 2/3 cup sugar
  • 1 tablespoon mustard seed
  • 1 1/2 teaspoon celery seed
  • 3/4 teaspoon turmeric
  • 2 whole cloves
  • 2 teaspoons salt

Instructions
 

  • Sterilize quart-size mason jars and lids. Wide mouth jars work best when stuffing them for pickles, but the regular mouth will work as well.
  • In a stainless steel saucepan, combine vinegar, sugar, salt, and spices. Bring the pickle brine to a boil at medium-high heat and boil for 5 minutes.
  • Meanwhile, rinse the peppers, cucumbers, and onions. Cut off the blossom end of the cucumber and slice evenly. Cut up all the rest of your vegetables and place them in a large bowl.
  • Layer the vegetables in the clean mason jar –  thinly sliced cucumbers, peppers, and onions. Push down lightly to pack vegetables down and get a few more in. Allow 1/2″ headspace at the top of the jar. Place the jar on a towel folded in thirds.
  • Using a canning funnel or a ladle, pour the pickling liquid over the vegetables. You may have a slight amount left over depending on how tightly you packed your jar.
  • Wipe the rim and apply the lid.
  • Allow to cool to room temperature for 30 minutes and then place in the refrigerator.
  • Pickles should marinate for two weeks and be used within three months. Confession: I always taste-test mine after two days and usually end up eating them all well before the two-week mark! But know the flavor will intensify over time.

Notes

  • Nutrition facts are calculated for an entire jar of pickles, minus the vinegar and spices.
  • Pickles should marinate for two weeks and be used within three months. Confession: I always taste-test mine after two days and usually end up eating them all well before the two-week mark! But know the flavor will intensify over time.
  • Be sure to cut the blossom end off the cucumbers, it contains an enzyme that softens pickles (and no one likes mushy pickles!).

Nutrition

Calories: 592kcalCarbohydrates: 149gProtein: 3gFat: 1gSaturated Fat: 0.1gPolyunsaturated Fat: 0.1gMonounsaturated Fat: 0.03gSodium: 12mgPotassium: 612mgFiber: 4gSugar: 142gVitamin A: 469IUVitamin C: 74mgCalcium: 64mgIron: 1mg
Keyword Bread and Butter Pickles, Refrigerator Pickles
Tried this recipe?Let us know how it was!

Filed Under: Canning Recipes, Food Preservation, Food Preservation - Canning, Pickles, Recipes, Water Bath Tagged With: bread and butter pickles, cucumbers, home canning, pickles, pickling, preserving the harvest, refrigerator pickles, water bath

How to Dry Fresh Herbs at Home 

September 1, 2022 by Melissa Norris 17 Comments

Learning how to dry fresh herbs at home is easy, and there's no replacement or substitute for doing it yourself. Learn the best methods for drying herbs at home in this post!

dried herbs in Mason jar on counter

Growing an herb garden is an excellent place for a beginner gardener to start, and making your spice blends at home is a frugal way to save on your grocery bill.

Why I Love Growing and Cooking With Herbs

When drying your own herbs, you know that they haven't been sitting on the shelf at the grocery store for years, and your food will taste much better because you are using ingredients from your garden. 

Cooking with fresh herbs is incredible. I love adding fresh basil before serving my homemade tomato soup, and dill to this Ukrainian Borscht recipe, or having rosemary, thyme, and sage on hand to make marinated cheese balls. 

[adthrive-in-post-video-player video-id=”EPJiUO15″ upload-date=”2022-08-29T23:33:24.000Z” name=”Secrets to Drying Herbs With This Centuries Old-Method for Stronger Medicinal Properties.mp4″ description=”Learn how to dry fresh herbs at home to use all year long.” player-type=”default” override-embed=”default”]

The depth of flavor is so much more than the dried version. However, if you live in a climate that has cooler winters, then not all of your garden herbs are available year-round. 

So like any true Pioneer, we're preserving our herbs for use during the winter. When cooking with dried herbs, I put the herbs in at the end of the cooking time to maximize the flavor.

If you're looking for more of a fresh herb flavor, try preserving herbs in salt following this homemade celery salt recipe or this recipe for preserving fresh basil.

A pot of basil on a deck.

When to Harvest Herbs

It's crucial to know how to prune and harvest herbs correctly because you want to get the most flavor out of your herbs.

As an herb grows, it has the most intense flavor in the leaves just before it flowers. If you aren't ready to harvest, it's best to clip off the flower buds to keep the plant from putting its energy into the flowers.

The best time of day to harvest herbs is in the early morning. Herbs have the highest concentration of oils in their leaves at this time of day. You want to gather right after the dew has dried but before the sun begins to heat the air and plant.

Basil is the exception to this rule and can be picked later in the morning.

Fresh celery leaves in a colandar.

How to Harvest Herbs

The part of an herb used for cooking is generally the leafy part. I find it best to use scissors and cut off the entire stem to prevent the leaves' oils from rubbing off on your skin. Minimally handling the plant allows oil to retain more in the leaves when needed.

Lightly rinse the herbs to remove any dust or other unseen debris. I'm sure you practice organic gardening at home, so we don't have to worry about any chemicals or pesticides.

Place herbs on paper towels to absorb the excess water and dry completely.

Bundles of fresh herbs laying on a wooden table.

Drying Methods Used to Dry Herbs

There are several ways to dry herbs. The two ways I prefer are the hanging method and using a dehydrator.

  • Dehydrator – This is the method I use most because of our damp weather in the Pacific Northwest. After a ton of research, I purchased my Nesco Square Dehydrator due to its design to hold more food per tray than the circle varieties, and I liked the price point. I've had my Nesco for more than five years and love it. We've dehydrated fruit leather, jerky, candied apples, and herbs. I've run it for two days straight without any problems, and it's extremely quiet. You can also purchase mesh tray liners here.
  • Hanging Method – This method (also known as air drying) requires no special equipment, and anyone can do it. 
  • Freezing – Freezing is an option that some people find retains more flavor. You can add frozen herbs directly to your food when cooking, which works best in foods such as meats and vegetables.
  • Oven Dry – I don't recommend drying fresh herbs in the oven, as most ovens' lowest setting isn't low enough to allow the herbs to dry without burning to a crisp.
Bundles of fresh herbs tied with twine and hanging upside down to dry.

How to Dry Fresh Herbs – Hanging Method

Tying the stems together in this method is critical. Moisture content reduces as the herbs dry, and they shrink together. Another vital part to remember is to hang them upside down. Gravity pulls the essential oil into the leaves, which is the part we want to keep.

Supplies Needed

  • Fresh Herbs – Make sure your herbs are freshly cut with no spots or bruising on the leaves.
  • Twine, String, or Rubber Band – You'll need something to secure the stalks together.
  • Dry Location – A dry location out of direct sunlight with plenty of airflow is necessary for the best drying environment. Pro-Tip: If you don't have a place away from sunlight, use a paper bag to cover the herbs as they dry. Paper bags will also protect the herbs from dust that may settle onto them as they hang to dry. Simply create a hole in the bottom of the bag for the stems to poke through and hang the bag around the herbs.
  • Hook or Nail – This is needed to secure the upside-down bunch of herbs. 

Instructions

  1. Tie the ends of four or five stalks together.
  2. Hang the bunches upside down in a warm, dry area, out of direct sunlight.
  3. Allow herbs to dry until the leaves crumble at your touch.
  4. Remove the leaves from the stems, keeping them as whole as possible (this allows for more flavor when it comes time to use them).
  5. Store the dried leaves in an air-tight container (you know how I love a good Mason jar!).
  6. Label contents of the container.

Note: Moisture content and climate will be factors, and it could take weeks to months for herbs to dry. Just be patient and use the paper bag trick if you're concerned about dust or debris.

Raspberry leaves on a dehydrator tray.

How to Dry Fresh Herbs – Dehydrator Method

Supplies Needed

  • Fresh Herbs – Make sure the herbs are fresh with no spots or bruising on the leaves.
  • Food Dehydrator – Any dehydrator should work. If you have a Nesco like mine, try these Nesco screens. Herbs shrink as they dry, and these screens keep them from falling through the cracks.

Instructions

  1. Place herbs in a single layer on the food dehydrator tray or drying rack, ensuring they aren't touching.
  2. Herbs dry best at 95° F. If you live in an area with high humidity, you may need to increase the temperature slightly, but try to stay as low as possible to maintain as many nutrients as possible.
  3. Dehydrating times for herbs will vary depending on the size of the leaves and the moisture content. Some herbs will dry in 12 to 24 hours, and others may take several days.
  4. Herbs are dry when they crumble at your touch.
  5. Store the dried leaves in an airtight container.
  6. Label contents of the container.

Pro-Tip: Herbs don't transfer flavors when drying, so you can dry them together. I have dehydrated four trays at once with chocolate mint, spearmint, oregano, basil, and thyme.

How to Tell When Herbs Are Dehydrated

Take a leaf between your thumb and pointer finger to test if the herbs are dry. It should crunch and crumble when pressed.

If you're unsure whether herbs are dry, you can take them out of the dehydrator and place them immediately into a ziptop baggie. Seal the bag and watch for any condensation to form on the inside of the bag. If you see any moisture, they're not dry yet.

The smaller the item, the faster it will degrade and lose its flavor. Leave the leaf in its largest form for storage and grind it up before use.

Dried herbs in a mason jar.

How to Store Dried Herbs

After the drying process, it's time to get them packaged in containers and stored on the shelf. It's best to keep dried herbs in a dark, cool, dry place to retain the most flavor and extend the shelf life.

Store herbs in an air-tight container. I prefer glass jars as plastic containers seem to affect the flavor of the herbs over time.

Mason or Weck jars work well for herbs. Make sure to label the contents of each container.

How to Use Dried Herbs

Here are my favorite herb blends to make (including FREE printable labels for the jars!).

Have you dried herbs at home? Share your experiences below! Especially if you have any favorite herb blends to share.

A woman pointing to a basil plant where it's starting to flower.

More Posts About Herbs and Their Uses

  • How to Prune Herbs & Perennials for Maximum Growth
  • Medicinal Kitchen Herbs (6 Herbs You Should Grow)
  • 8 Medicinal Herbs and Their Uses for Growing an Herbal Tea Garden
  • Homemade DIY Bath Salt Recipe Use Herbs or Essential Oils
  • 7 Ways to Use Medicinal Herbs at Home
  • 7 Herbs for Natural Remedies Your Grandparents Used

Filed Under: Dehydrating, DIY Recipes & Tutorials, Food Preservation, Natural Medicine Cabinet Tagged With: dehydrating, DIY recipes & tutorials, gardening, Herbs, Pioneering Today, prepper, preserving the harvest, survival

How to Dehydrate Fruit (Cherries, Blueberries, Grapes, Raspberries & Blackberries)

August 2, 2022 by Melissa Norris 26 Comments

Learn to make the best dehydrated fruit and enjoy your summer harvest all year long. Dehydrating fruit works especially well for cherries, grapes, and berries. Using an oven or a dehydrator, use my secret trick to speed up the dry time.

A bowl of dehydrated cherries on a wooden counter.

Why I Love Dehydrated Fruit

Dehydration is an excellent way to preserve your fruit, especially berries for year round use. It's shelf stable and can be eaten as is.

It's light, meaning easy to pack and shove into pockets. And you can use it to make delicious candies, treats, cakes, and breads.

Dehydration, when done at a low temperature, makes it “raw” food, retaining almost all of the nutrients.

This year as I was dehydrating trays of cherries my husband asked why I was doing it if we never eat them? Unbeknownst to him, I dehydrate them every year and just tuck them away! We don't get many cherries for dehydrating, so they're my special treat!

[adthrive-in-post-video-player video-id=”obQKUEOj” upload-date=”2022-07-29T19:23:48.000Z” name=”DON'T Dehydrate Your Cherries Until You Watch This.mp4″ description=”Learn to make the best dehydrated fruit and enjoy your summer harvest all year long. Dehydrating fruit works especially well for cherries, grapes, and berries. Using an oven or a dehydrator, use my secret trick to speed up the dry time. ” player-type=”default” override-embed=”default”]

We're blessed on our homestead to have raspberries, blueberries, and a plethora of blackberries. I turn most of our bounty into various jams. I like to keep the sugar low in most of my jam recipes, and I like to make jam without pectin.

If you're in need of some jam recipes, here are some of my favorites:

  • Strawberry Jam
  • Cherry Jam
  • Blackberry Jam
  • Blueberry Jam

For more info on canning jam, be sure to check out this post on making jams and jellies like a pro.

Even though my love of canned jam runs deep, one thing they're not great for is for traveling or packing in lunch boxes.

Frozen and then thawed berries aren't friendly for munching on, although I will say freeze-dried fruit is quickly becoming another favorite go-to in our house, freeze dryers are cost prohibitive for some.

So in comes dehydration. I confess that I overlooked dehydrated fruit for years. Mostly because I tried dehydrating blueberries about 10 years ago and after three days straight, I still had half shriveled but not dehydrated berries.

I'm so glad I gave it another try after learning the trick to speeding up the dehydrating time.

Everything Worth Preserving Book Cover.

Everything Worth Preserving

Discover the 9 home food preservation methods to safely store delicious food for year-round eating with all of my step-by-step tutorials, recipes, and easy-to-use charts. Learn everything you need to know about cold storage (aka freezer), water bath/steam canning, pressure canning, dehydrating, fermenting, freeze-drying, root cellar, infusion, and salt/curing in the new book, Everything Worth Preserving.

Preserve food for a healthy well-stocked pantry & peace of mind, all in one resource.

In this book, you can search for any produce from A-Z and get a list of all the ways to preserve that item, plus recipes! Grab your copy (and FREE bonuses for pre-ordering) here.

A Nesco food dehydrator with cherries inside.

Supplies Needed

If you plan on doing much dehydrating, I recommend getting an actual dehydrator. They are a great investment and make dehydrating a “set it and forget it” kind of task.

Can you use your oven with the door propped open? Yes, but you can't control the temperature, and then you can't cook in your oven. Plus, if you have little ones, leaving your oven door open isn't probably the safest thing.

Nesco Dehydrator

I have a Nesco square dehydrator and am very happy with it. I purchased it many years ago and it still runs like a champ.

It's quiet and gets the job done. I haven't had any problems with it and have run it close to a week straight when doing cherries and then a batch of blueberries.

A Nesco dehydrator will be a more economical approach if you're just getting started. And I highly recommend getting these screens for sticky fruit and fruit leather (they're even dishwasher safe!).

Excalibur Dehydrator

If you plan on doing a lot of dehydrating, you'll want to consider the Excalibur dehydrators. This is a great upgrade for those dehydrating large batches of fruit at a time.

I don't have one, but know many people who do, and they all say it's the workhorse of dehydrators and well worth the investment.

It is more expensive than the Nesco. However, the air blows from the back of the unit instead of the top, making it more efficient.

This is the cheapest deal I've found for an Excalibur dehydrator.

Pro Tip: If you're dehydrating multiple batches back to back, consider setting your dehydrator up outside in a safe location to keep from heating up your house during the hot summer months!

Frozen blueberries.

How to “Check” Your Berries Before Dehydrating

When you're dehydrating berries, you need to use one simple trick to cut hours and days off your dehydrating time. You need to check your berries.

“Checking” is merely piercing the skin so the moisture can evaporate more quickly. Berries are mostly water, after all. Checking should be used with blueberries, cranberries, and grapes, or any other similar type of fruit.

I pit my cherries before dehydrating, so I'm technically checking them when I pit them. There are multiple ways you can “check” your berries to speed up the dehydrating process.

  1. Poke each berry with a pin – Take a safety pin or sewing pin and poke a hole in each berry. If you're doing a small amount, this might not take very much time, but if you're doing tray fulls, this is going to take forever.
  2. Boil/steam your berries – Briefly boil or steam berries until they've split their skins, but not enough to cook them. This method works well, but you will lose some nutrients by heating them.
  3. Freeze your berries – This is the method I prefer. Simply toss your berries into the freezer for a few hours. It will rupture the cells and make your berries good to go. When it's the middle of summer, and a task takes no work on my part (okay, besides the harvesting), I'm all about that!

Sometimes getting kids involved in the process is fun, if they can safely poke the berries then this is a great option, however, I'm sure many of you would agree that option #3 is the best!

Learn how to dehydrate fruit at home to save money and build up your food storage. This simple tip will cut hours off your dehydrating time. Grab this now to preserve the summer berry and fruit harvest.

How to Dehydrate Berries

  1. After you've prepared your berries by checking them, spread them out on your dehydrating trays. (For sticky berries or fruit, I highly recommend the dehydrator mats for easy clean-up.) You want the berries or fruit to be evenly spaced so they dehydrate at the same rate.
  2. With our blueberries, we have several different varieties, which means different sizes of berries. I recommend putting the smaller berries on one tray and the larger ones on another. I didn't the first time and had to manually separate them as the smaller ones were done before the bigger ones. So save yourself some time here.
  3. Turn on your dehydrator and let it do its thing. The fruit setting on mine is 135 degrees.
  4. Even with “checking”, berries take quite a while to dehydrate fully. My cherries took 28  hours. My small blueberries were done at about 24 hours, whereas the larger ones took 36 hours.
  5. Rotate your berries or fruit after 12-hour mark for even drying. My top tray dehydrates a tad faster than the bottom one, especially when I've got all four stacked.
Dehydrated cherries in a jar with a woman's hand pointing to them.

How to Know When Fruit is Dehydrated?

If you're unsure if your fruit is fully dehydrated, you can sample a few. If you feel liquid, then put them back in. Some of my smaller berries got hard, so I knew they were fully done. You want chewy berries but not overly sticky or wet. Otherwise, they start to mold.

Another way to check them is to place a handful of still-warm fruit (it's important they're still warm) into a jar or plastic bag and seal tight. If you notice any condensation forming on the jar or bag the fruit isn't fully dehydrated.

A jar of dehydrated cherries and fruit vinegar on a wooden countertop.

How to Store Dehydrated Fruit

Store dehydrated fruit in an air-tight container in a dark, cool place for optimal shelf life.

Unlike freeze-dried fruit, dehydrated fruit is best when eaten within a year. This is why I like to plan how many fruit and berry bushes we need for our family for a year's worth of fruit.

Learn how to dehydrate fruit at home to save money and build up your food storage. This simple tip will cut hours off your dehydrating time. Grab this now to preserve the summer berry and fruit harvest.

How to Use Dehydrated Fruit

Use your dehydrated fruit in homemade breads, muffins, granola, candy, or just by the handful! Be warned, they're kind of addicting.

There you have it, my favorite way to dehydrate fruit and my time-saving tips when dehydrating blueberries, cherries, and grapes! Have you tried this method or other home food preservation methods before?

More Posts You May Enjoy

A bonus to dehydrating cherries is that you have to pit them first. Don't toss the pits! Save them to make an infused cherry pit vinegar. (shared from my new book, Everything Worth Preserving).

Cherry Pit Vinegar

Move over apple scrap vinegar, you’re not the only fruit that can be used twice for delicious things.

Ingredients

1 cup cherry pits* 

2 cups vinegar (any vinegar of your choice)

  1. Place the pits (leave all the bits of cherry fruit on them you can, this helps with the flavor) in a clean glass jar. Cover with vinegar and place out of direct sunlight. White vinegar takes on some color if using red cherries whereas apple cider vinegar won’t change as much in color, but both work equally as well. 
  2. Allow to steep for two to three weeks. Strain, place back in a glass bottle, and enjoy your cherry pit flavored vinegar!

*Only use uncracked pits. As long as you don't try to smash them with a hammer, they’re not cracked. Cherry pits (most stone fruit pits) do contain small amounts of cyanide. This is only exposed when they’re cracked, smashed, or ground up.

You may also be interested in my fruit preserving course!

  • Homemade Fruit Vinegar
  • How to Grow Fruit Trees in Pots
  • Planting a Fruit Tree Guild
  • Historical Dried Fruit and Nut Candy
  • How to Plant Raspberries
  • How to Plant & Grow Strawberries
A bowl of dehydrated cherries on a wooden counter.

How to Dehydrate Fruit (Blueberries, Cherries, Grapes, Raspberries & Blackberries)

Melissa Norris
Learn how to dehydrate fruit at home. This method will save you hours of time when dehydrating fruit.
5 from 1 vote
Print Recipe Pin Recipe
Prep Time 5 mins
Cook Time 1 d 2 hrs
Total Time 1 d 2 hrs 5 mins
Course fruit, Snack
Cuisine American

Equipment

  • Dehydrator

Ingredients
  

  • Fruit
  • Water for rinsing

Instructions
 

  • Rinse berries and remove any twigs, leaves, etc.
  • Check berries by either freezing for a few hours, poking each berry with a pin, needle or paperclip, or quickly blanching in hot water.
  • After you've checked your berries, spread them out on your dehydrating trays. Try to put berries of similar size on the same trays.
  • Turn on your dehydrator to 135 degrees Fahrenheit or the fruit setting if it has one.
  • Check on your berries or fruit after 12 hours and rotate your trays.
  • Your fruit is done when it's shriveled and slightly tacky/sticky. Do the "dry test" mentioned in the notes section below.
  • Store dehydrated berries in an airtight container in a dark cool place for optimal shelf life.

Notes

  • For sticky berries or fruit, I highly recommend the non-stick mats for easy clean-up. You want to the berries or fruit to be evenly spaced so they dehydrate at the same rate.
  • Even with “checking”, fruit takes quite a while to fully dehydrate. My cherries took 28 hours. My small blueberries were done at about 24 hours, whereas the larger berries took 36 hours. This is still better than three days though!
  • Dry Test – To know if berries are dry, do the “dry test”. Place a handful of still-warm berries into an airtight container (sealed Mason jar or sealed plastic baggie). Let them sit for 10-20 minutes and check the sides of the container. If you see any moisture or condensation on the jar or bag, the fruit isn't dry and needs to continue dehydrating.
Keyword Dehydrated fruit
Tried this recipe?Let us know how it was!

Filed Under: Dehydrating, Food Preservation Tagged With: dehydrating, preparedness, preserving, preserving the harvest, survival

How to Can Apricots- Easy Canned Apricots Recipe

July 10, 2022 by Melissa Norris 23 Comments

This recipe for canned apricots uses a light syrup (or sauce) without loads of sugar to preserve fresh apricots and fill your pantry to enjoy all year.

Canned apricots in a Mason jar.

It’s as easy as placing fresh apricots and sweet syrup in a jar, canning the jars in a water bath canner, and enjoying the harvest of your labor for months to come!

Why I Enjoy Canning Apricots

Of the many different ways to preserve food, canning is one of my favorites. 

Basic fruit canning is very simple. If you have been hesitant to start canning your own fruits and vegetables, this is a great place to start. 

The high acidity in apricots makes them a safe fruit to water bath can. Water bath canning is known as the “gateway” to canning. It requires less monetary investment and is an easy skill to learn.

Plus, there is something incredibly satisfying about filling up your pantry with home-canned foods! A satisfaction you can’t get from store-bought items.

This recipe allows you to control the amount of sugar you add to the syrup.

Click here for my FREE fruit syrup canning chart.

Apricots hanging on a tree with the sun shining through the leaves.

Two Ways to Can Fruit

My method of choice is to pack raw, but there are varying opinions on this. I think it’s less messy, easier to pack the jars, and yields a firmer end result, which I prefer. 

  • Raw Pack Method – Raw pack simply means putting the fresh fruit in the jars and pouring the hot water and sugar mixture over the fruit.
  • Hot Pack Method – The hot pack method is when the fruit is actually cooked with the syrup before pouring it into the jars.

For the following recipe, I will be sharing my method using the raw pack method.

Canned apricots in a jar on a linen napkin.

Preparation for Canned Apricots

Rinse the apricots with cold water in preparation for canning. Peeling them is optional. If you decide to peel them, read my tutorial on how to can pears. I include a peeling method that works well for peaches, pears, and apricots in that post.

Cut the apricots in half, remove the pit, and place them in jars. The apricots and syrup will cook together in the jar when using the raw pack method.

Pro-Tip: Place the apricots into the jars with the cut side down. This allows you to fit more apricots into the jar.

Empty jars with lids stacked on a counter.

Equipment Needed

  • Canning Jars – This recipe will yield approximately four 1-quart jars of fruit. If you are doubling the recipe, sterilize and prepare jars for the amount of fruit you have.
  • Lids and Rings – You will need the same amount of lids and rings as jars.
  • Water Bath Canner – If you don’t have a water bath canner, check out this steam canner, it works like a water bath but is much easier to use.
  • Jar Lifter – A jar lifter is essential for safety when removing hot jars from the canner. This handy kit includes other useful tools as well.
  • Wooden Spoon – I prefer using wooden spoons for canning purposes.
  • Stainless Steel Pan – This is used for boiling the water and sugar to make the syrup.
  • Hot Pads – Old kitchen towels will work as well, but you’ll need something to handle the hot jars and keep from burning your hands.
  • Bubble Remover – A knife, chopstick, or ruler will work for this step as well.

Ingredients Needed

  • Apricots – 9 pounds of apricots is just about perfect to fill your jars. Be sure to use fresh fruit without damage (or cut the blemishes off while cleaning).
  • Water – You'll need 6 cups of water. Apricots can be canned with only water and no sugar, but if you're looking for that traditional taste of canned apricots, you'll want to at least use a light syrup… we all need a little sweetness, don’t we?
  • Sugar – I like to use 2 cups of sugar for a nice light syrup, but this can be adjusted to your taste following my free downloadable syrup chart for canning fruit.

Click here for my FREE fruit syrup canning chart.

Step-by-Step Instructions for Canned Apricots

  1. Prepare a hot water bath canner by filling it half way with warm water, placing rack inside, and setting on medium heat.
  2. Have jars washed and rinsed in hot soapy water. Wide-mouth jars are the easiest to pack your apricots into.
  3. In a large saucepan, bring 6 cups of water and 2 cups of sugar to a boil. After it comes to a boil, cover the pan, and turn off the burner since apricot canning goes so quickly.
  4. Place apricots in the jar, cut side down, and fill to within ½ inch of rim of jar. 
  5. Pour hot syrup over apricots again allowing ½ inch of headspace.
  6. Remove air bubbles by taking a chopstick, knife, or ruler and running it between the outside of the fruit and the inside of the jar. Re-check headspace and add more syrup if needed.
  7. Wipe down the rim of the jar with a clean cloth, place lid and band on, and tighten to fingertip tight.
  8. Place jars in the hot water bath canner. Carefully lower the filled jars into the water making sure the water level comes 1 inch above the top of the jars. Add more boiling water if necessary.
  9. Bring water to a boil and begin the processing time only after water has reached a full boil. Cover with the lid and process pints for 25 minutes and quarts for 30 minutes. Turn off the burner and remove the lid. Wait 5 minutes, remove jars from the canner with a jar lifter, and place on a folded towel. 
  10. Allow to cool for 12 to 24 hours undisturbed.
  11. Check seals, remove bands, wipe down jars to remove any sticky residue, and store for up to a year  in your pantry.

More Canning Posts You Might Enjoy

  • How to Can Pears the EASY Way
  • How to Store Home Canned Food Safely – Jar Stacking & Canning Rings
  • Canning Problems and Solutions: Siphoning (Liquid Loss in Jars)
  • 129+ Best Canning Recipes to Put Up This Year
  • How Do You Know if a Canning Recipe is Safe
  • How to Stay Safe Canning Homemade Jam & Jelly
  • How to Convert Recipes for Canning + Safety Tips
  • Canning 101 Water-Bath vs. Pressure Canner
  • 10+ Easy Home Canning Recipes
Canned apricots in a Mason jar.

How to Can Apricots- Easy Canned Apricots Recipe

Melissa Norris
This recipe for canning apricots uses a light syrup (or sauce) without loads of sugar to preserve fresh apricots and fill your pantry to enjoy all year.
3.90 from 20 votes
Print Recipe Pin Recipe
Prep Time 20 mins
Cook Time 30 mins
Total Time 50 mins
Course fruit
Cuisine American
Servings 16 Servings
Calories 219 kcal

Equipment

  • 1 Water bath canner

Ingredients
  

  • 9 pounds apricots rinsed and halved, approximately 2 and 1/4 pounds per quart jar
  • 6 cups water
  • 2 cups sugar more or less to taste, see my syrup canning chart

Instructions
 

  • Prepare hot water bath canner by filling 1/2 way with warm water, placing rack inside, and setting on medium heat. (Have extra boiling water ready in case it's needed in step 8.
  • Have jars washed and rinsed in hot soapy water, wide mouth are the easiest to pack your apricots in.
  • In a large saucepan bring 6 cups water and 2 cups sugar to a boil. (Once boiling, I cover and turn it off since apricot canning goes so fast.)
  • Place apricots in the jar, cut side down and fill to a 1/2 inch headspace.
  • Pour hot syrup over apricots leaving a 1/2 inch headspace.
  • Remove air bubbles by taking a bubble remover, chopstick, knife, or ruler and running it between the outside of the fruit and the inside of the jar. Re-check headspace and add more syrup if needed.
  • Wipe down the rim of the jar, place lid and band on, and tighten to fingertip tight.
  • Lower jars into the canner and make sure the water level comes 1 inch above the top of the jars. Add more boiling water if necessary.
  • Bring water to a boil and begin processing time only after the water has reached a full boil. Cover and process pint jars for 25 minutes and quart jars for 30 minutes. (If using hot pack method, pints are 20 minutes and quarts are 25 minutes).
  • Turn off burner and remove lid. Wait 5 minutes and, using a jar lifter, remove jars from the canner and place on a folded towel. Allow jars to cool for 12 to 24 hours undisturbed.
  • Check seals, remove bands, wipe down jars to remove any sticky residue, and store in your pantry!

Notes

  • Placing apricots cut side down allows more to fit into the jars.
  • It's normal to see extra space at the bottom of the jars once canning is complete. Because we're cold packing the apricots, they will release water and become smaller as they're canned. 
  • It's also normal for a little bit of the syrup to be siphoned out during the canning process. As long as your jars have a proper seal, the fruit is just fine! If more than 1/3 of the syrup is gone, allow that jar to cool to room temperature and place it in the refrigerator. Eat within a week.
  • To hot pack apricots – place prepared apricots and syrup in a large saucepan and bring to a boil. Pack hot into jars and process in a water bath or steam canner and follow the instructions above. 
  • Nutrition facts include apricots and syrup. One serving is 1/4 of a quart jar, or approximately 1 cup (with syrup).

Nutrition

Serving: 1cupCalories: 219kcalCarbohydrates: 53gProtein: 4gFat: 1gSaturated Fat: 0.1gPolyunsaturated Fat: 0.2gMonounsaturated Fat: 0.4gSodium: 7mgPotassium: 661mgFiber: 5gSugar: 49gVitamin A: 4914IUVitamin C: 26mgCalcium: 36mgIron: 1mg
Keyword Canned Apricots, Canning Apricots, How to Can Apricots
Tried this recipe?Let us know how it was!
how to can fresh apricots

Filed Under: Canning Recipes, Food Preservation, Food Preservation - Canning, Fruit, Jam and Jelly, Recipes, Water Bath Tagged With: from scratch, fruit, More Canning, preserving, preserving the harvest, Simple Life Sunday, water bath

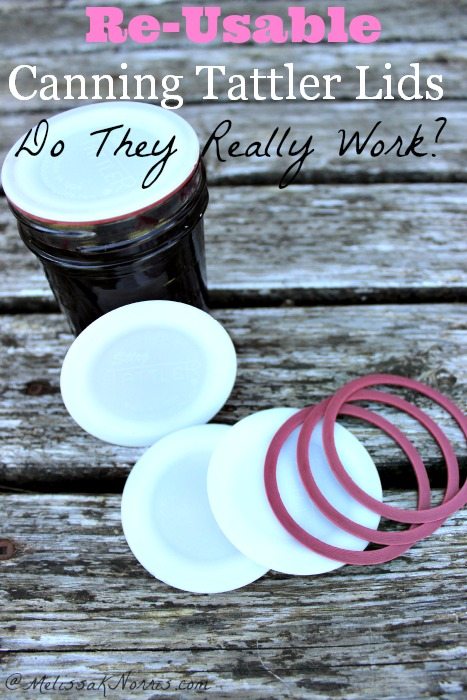
Re-Usable Tattler Canning Lids-Do They Work?

July 29, 2014 by Melissa Norris 43 Comments

Re-Usable Tattler Canning Lids- Do they really work? Great review on using Tattler canning lids and what to expect. I'd love to be able reuse canning lids!

Re-Usable Tattler canning lids. I had no idea re-usable canning lids even existed until about a year ago. I love being able to can food at home. Re-using Mason jars every year and growing our own food makes canning almost free. Except for the lids.

The lids aren't hugely expensive. If I can get them on sale, they usually equal out to about $.30 a lid. Pretty good for organic jars of food, but if I could re-use the lids, too… you know where this frugal Mamma's mind is going. Note: regular canning lids are not re-usable.

[Read more…]

Filed Under: Food Preservation, Food Preservation - Canning Tagged With: More Canning, prepper, preserving the harvest, survival

Blueberry Jam Recipe without Pectin and Low Sugar

July 23, 2014 by Melissa Norris 97 Comments

This low sugar blueberry jam recipe uses no store bought pectin and might just be the best jam I've ever inhaled  tasted. I don't make this claim lightly. The hint of lime makes this sing on your taste buds, dare I call it, sublime. (Yea, I'm kind of dorky that way) But seriously a homemade blueberry jam without pectin and low sugar that sets!

You know how some people are wine connoisseurs, not my thing, but jam connoisseur, why yes, l'll offer up my palate any time of day… or night.

Blueberries are one of my favorite fruits. I'm not sure if it's from reading Blueberries for Sal as a child or because when they burst on your tongue it's like tasting summer. Or I may just have a thing for purple-colored foods.

I adore they don't have large seeds. Much as I enjoy jams and jellies from our summer harvests, one less step of having to push berries through a sieve to collect the seeds is a plus in this Mamma's busy days.

Blueberries are one of those berries that freeze beeeaautifully. The trick is to not rinse blueberries beforehand, just toss them in your freezing container. There's nothing better on a hot day than a handful of frozen blueberries to cool ya off. Then you can make this blueberry jam recipe with frozen blueberries, once the weather cools off or you have extra time, whatever comes first.

I don't know about you, but a homemade jam that contains more sugar or as much sugar as it does fruit just doesn't sit right with me. Not only is this low sugar blueberry jam recipe healthier, but it's also much more frugal without pectin from the store and loads of sugar. If you agree, you'll want to try my No Sugar Strawberry Jam Recipe too.

Plus, I'm all about recipes that don't rely on store-bought items. Anyone else feel they were born a century too late and should have been besties with Laura Ingall's Wilder in Little House on the Prairie? You, too! Good, grab your apron, your Mason jars, and let's get to jamming.

Lemon, lime and apples are both very high in natural pectin. My grandmother never used pectin and now you don't have to either.

Resources for Low Sugar Blueberry Jam without Pectin

Our FREE Jam & Jelly Troubleshooting Guide– how to test if your jam has reached the setting or gelled point before putting in jars and processing, what 3 easy steps to take if it's not reaching the gel point, and how to salvage it if it didn't gel. Bonus, the fruit acidity and pectin level chart!

Classic Zester- this little beauty makes getting that pectin luscious lemon zest into your strawberry jam without the bitter pith so easy.

Stainless Steel Canner– (Safe for glass top stoves) this water bath canner won't rust like the granite wear runs and will be your trusty side kick in the kitchen for years to come.

6 Piece Canning Set- The jar lifter is worth five times the price of this. Best part, this 6 piece set is 79% off at time of posting. I use mine with every canning project and can't believe I ever canned without it. No more burnt fingers!

fresh blueberry jam recipe

8 ounce jelly jars- These are the perfect size for jam and jelly making. I use these for pickled garlic as well. Can you ever have too many canning jars? In case you were wondering, the answer is no my friend.
How to make small batch blueberry jam

Smash or puree 5 and 1/2 cups of blueberries. You can use a potato smasher, food processor, blender, or immersion blender *affiliate link I have no idea how I went so many years in my kitchen without my immersion blender. I use it for re-fried beans, soups, and jam making, plus, it's kind of fun to wield. You'll end up with 4 cups of pureed fruit. You can leave chunks of fruit in or puree it smooth, totally up to you. I kind of like mine in the middle.

Pour sugar into berries and stir. Zest two limes into blueberry puree. Zest is a fancy way to say finely grate the peel of the lime into the blueberries. You don't want the pith or white part, just the pretty green. Seriously, this could inspire a new paint scheme somewhere…

Testing from Pomona's Pectin recommends using concentrated bottle lime juice with blueberries to ensure 4.6 pH level for canning safety.

Stir in the lime juice and put the pot onto medium heat. Stir blueberry jam frequently. Remember, you don't want that sugar to scorch. Let it simmer for about 20 to 25 minutes.

You can test the set of the jam by the sheeting test. Using a metal spoon, ladle out a spoonful of blueberry jam. Hold the spoon and watch the way the jam drips off of the spoon. If it's little individual drops, jam is not set, if it's big goops, it's almost there. If it comes off the spoon in a sheet or doesn't really drop off at all, then jam is set, yank that baby off the heat.

Pour blueberry jam into washed jars leaving a 1/4 inch headspace. Wipe clean the rim of the jar and put on lids and bands. Place jars into water bath canner, make sure water level covers jars by at least 1 to 2 inches, and process for 10 minutes. You start the processing time after water has begun to boil.

After 10 minutes, turn off heat and take off lid. Let jars sit for 5 minutes before removing from canner. Place on a towel folded in thirds in a draft free area.

Don't touch jars for 12 hours. Check seals and store blueberry jam in the pantry and out of direct light.

Blueberry jam recipe without pectin and low sugar. Love how easy this, without the cost of store bought pectin. Plus, this is one of the best jams we've ever had.

 This recipe is shared from The Made-From-Scratch Life

Low Sugar No Pectin Blueberry Lime Jam

MelissaKNorris
4.32 from 29 votes
Print Recipe Pin Recipe
Prep Time 10 mins
Cook Time 35 mins
Total Time 45 mins
Servings 3 6oz jars

Ingredients
  

  • 4 cups pureed blueberries
  • 1 1/4 cups sugar I used organic dehydrated cane juice
  • zest of 2 limes
  • 1/4 cup bottled lime juice from concentrate

Instructions
 

  • Fill hot water bath canner with canning rack and water, heat to 180 degrees F (or just below a simmer).
  • Combine all ingredients in a large stock pot. Bring to a boil over medium heat, stirring frequently. Simmer for 20 to 25 minutes until jam has set.
  • Pour into just washed hot jars to a 1/4 inch headspace. Place into prepared hot water bath canner. Make sure jars are covered by 1 inch. Bring to a full boil and start processing time from a boil for 10 minutes.
  • After 10 minutes, turn off heat and remove canner lid. Wait 5 minutes before removing jars to a towel on the countertop. Leave untouched for 12 to 24 hours. ChecRemove bands, checkk seals and store on shelf.

Notes

  • You may use lemon instead of lime
  • You can freeze this instead of canning
Tried this recipe?Let us know how it was!

I have to tell you I licked the spoon and may have eaten a few spoonfuls… or three or four, but not half the jar, definitely not half the jar. Seriously, this easy blueberry jam recipe without pectin and low sugar is one you absolutely must make. You have to taste test your food, right?

Did you grab your FREE jam & jelly troubleshooting guide with the bonus charts? Snag it here and never worry about a failed blueberry jam recipe again!

Filed Under: Canning Recipes, Food Preservation, Food Preservation - Canning, Fruit, Jam and Jelly, Recipes Tagged With: blueberry jam, jam, jelly, low sugar, More Canning, no pectin, preserving the harvest

How to Make Low Sugar Grape Vanilla Jelly

October 23, 2013 by Melissa Norris 13 Comments

Easy low sugar grape vanilla jelly. Perfect way to put those grapes to use, plus, you get a bonus of vanilla sugar when you're done. Grab this now and get your grape jelly on.

One of the best things about the changing seasons is the new fresh fruits and vegetables that come with them. While we're wrapping up most of the fresh produce for winter around here, I still have grapes to harvest.

We grow two kinds of grapes on our arbor. One is called Interlaken and ripens early in the season. It's a white seedless grape that doesn't get too sweet, but doesn't leave you puckering from the tartness. The other one is called Niagara. It's a cross between Concord and Cassidy grapes, leaving a yellow grape with tiny seeds. I'm not sure if it's our shorter growing season, but even after letting a light frost hit it, they're not very sweet. This makes them a perfect candidate for jelly!

[Read more…]

Filed Under: Canning Recipes, Food Preservation, Food Preservation - Canning, Fruit, Jam and Jelly, Recipes, Water Bath Tagged With: fruit jam and jelly, grape vanilla jelly, jam making, jelly making, More Canning, preserving the harvest, water bath

How to Pressure Can Shelled Beans

September 25, 2013 by Melissa Norris 23 Comments

I have a thing for home canned foods, kind of like an obsession, but a healthy one. Because there is such thing as a healthy obsession, don't ya think?

How to pressure can shelled beans using the raw pack method. I love how fast these can become a meal and I don't have to worry about soaking them when I realize dinner is like 20 minutes out. Get these in your food storage now, perfect when water and time is scarce.

I believe in an emergency situation home canned food is your best bet, and I wrote a full article about it over at Mom with a Prep. But another reason I love home canned food is because it's my fast go to meal when I didn't plan dinner… because sometimes I get busy and don't realize I forgot until it's only twenty minutes before dinner time. You do that too, right?

One of the beautiful things about having canned beans on hand, is I don't have to remember to soak them the night before and let them cook all day. Don't get me wrong, when I plan right, I love having a pot of chili or soup beans simmering on the stove or in the slow cooker all day, but there's something to be said about having dinner on the table in less than a half hour, too.

[Read more…]

Filed Under: Canning Recipes, Food Preservation, Food Preservation - Canning, Pressure Canning, Recipes Tagged With: how to can beans, how to pressure can, More Canning, preserving the harvest, pressure canning

Grow Your Own Food In-Person Worksop

Saturday May 20th

$349

An intimate and hands on workshop

At Norris Farmstead

Click Here to Learn More

Want to grow a year’s worth of food?

Get my FREE planting chart!

Know exactly how many plants per person you need to plant with my easy worksheet and chart!
Melissa K. Norris

Follow me:

  • Start Here
  • Courses
  • Academy
  • Contact
Log In

Articles

  • Gardening
  • Homesteading
  • Recipes
  • Lifestyle
  • DIY

Podcast

  • Orchard Planning to Keep Pests Out (Live Coaching Call)
  • How to Boost Your Immune system (10 Easy Ways)
  • Homesteading With Special Needs Children
  • Seventh-Year Land Sabbath and Bread Baking Tips (Live Coaching Call)
  • Must-Have Pantry Items For Long-Term Storage

Books

  • Everything Worth Preserving
  • The Family Garden Planner
  • Hand Made
  • The Made From Scratch Life

Education

  • Organic Gardening Workshop
  • Home Fruit Preservative Canning e-course
  • Home Canning With Confidence
  • Homemade Bread & Baking Class
  • Natural Homemade Bath and Beauty
  • Pioneering Today Academy


Copyright 2023 - Melissa K. Norris Pioneering Today LLC

  • Privacy Policy
  • Affiliate Disclaimer
  • Terms of Use

Melissa K. Norris and Pioneering Today LLC is a participant in the Amazon Services LLC Associates Program, an affiliate advertising program designed to provide a means for sites to earn advertising fees by advertising and linking to Amazon.com.