Melissa K. Norris
  • Start Here
  • Podcast
  • Articles
  • Shop
    • Books
    • Classes
    • General Store
  • Academy
Log In

How to Braid Garlic (Step-By-Step Photos)

November 12, 2021 by Melissa Norris 2 Comments

One of the things our pioneer forefathers did well was preserving their harvest. There is no sense doing all the hard work of growing a crop if we don't preserve it to last.

A bunch of garlic that's been braided.

I like a crop that is also pretty to look at. Those jars of jams and jellies lining my pantry sparkle as bright as any jeweled necklace to me.

Our first year with garlic, we planted the hard neck variety, not realizing you couldn't braid it.  Live and learn. With over a decade of growing garlic under my belt, I've learned a lot and share it in how to plant garlic here.

My predominant garlic crop is the soft neck, specifically Inchelium Red, (here's how to harvest garlic for long-term storage). I do plant a few hard necks to use first in the fall.

Scissors trimming off the dried roots of a bulb of garlic.

After your garlic has been cured for at least two weeks in dry weather (or four weeks in wet and humid weather), it's time to get it ready for braiding. Cut off the roots and rub as much of the leftover soil off as possible.

A head of garlic that has the roots trimmed off.

Take the two leaves closest to the bulb and peel them back. You'll peel off the dirty outer layer. Don't remove any more skin as this helps lock in the flavor.

A woman's hands showing how to braid garlic.

Now take three bulbs of garlic, bulb side at the top with the stems hanging down. Tie them together near the bulb. This is the start of your braid. Take a bulb and lay it on the center stem and add the stem to it. Now cross over your right side stem.

A woman's hands showing how to braid garlic.

Take a bulb, place it to the right of your center bulb, pulling the stem down the center. Cross over the left stem to the center. Place a bulb on the left side of the center bulb and pull the stem to the center. Cross over top the original center stems.

Always add the new bulb stem to the center of your braid.

A woman's hands showing how to braid garlic.

Repeat this process to the end. Once all bulbs are in place, braid the stems (they'll be quite a handful) into a braid and secure with twine. Cut off the remaining stems so just your braid is showing.

Braided garlic hanging on the wall in a kitchen.

Now hang it up in the kitchen for easy access and a gorgeous piece of decoration.

Store the remaining braids out of direct light, a back pantry is wonderful, ideally in temps between 60 and 65 degrees F with low humidity.

Do you have a favorite crop or harvest you like to put on display? Do you have a favorite variety of garlic?

Filed Under: Gardening, Raising Your Own Food, Vegetables Tagged With: curing garlic, harvesting garlic, how to braid garlic, Pioneering Today, Vegetables

How to Plant Garlic (Fall Garlic Planting)

November 12, 2021 by Melissa Norris 9 Comments

Learn how to plant garlic in the fall for a fantastic garlic harvest the following summer. I'm sharing how to properly plant garlic, when to plant it, and the specifics for growing garlic from a clove.

A basket of garlic next to a garden bed that has been mulched.

Why I Love Growing Garlic

Is there a better herb to grow at home? I think not! The humble garlic clove has so many uses, from an essential ingredient in my homemade fire cider to one of my favorite medicinal herbs to grow at home.

I love that garlic is one of the plants you plant in the fall after the garden has generally stopped producing, then it does its thing, all on its own, early spring and summer.

If you've never had homegrown garlic before, just like anything else, you just won't believe how delicious it is!

A garlic clove in the soil.

Can I Grow Garlic From a Clove?

Yes! Growing garlic from a clove is exactly how you grow garlic. It's important that you plant your clove in the ground the correct way, so keep reading to find out exactly how to plant garlic cloves.

One tiny garlic clove planted in the fall will form an entire head of garlic the following summer. Plan to plant garlic when you are getting your homestead ready for winter.

Garlic shoots coming up through the soil being watered with a red watering can.

How Long Does Garlic Take to Grow?

Here in the Pacific Northwest, we plant our garlic in early to mid-fall, when the ground is still workable, preferably before any snowfall has occurred. Garlic harvest isn't until early summer the following year, but that doesn't mean it's growing that entire time.

One might say garlic takes 9-10 months to grow, but truthfully the garlic grows for a month or so once planted, creating a tiny shoot, then the rest of the growth happens early spring until harvest.

You can add a nice thick layer of mulch or straw over the garlic just after the tiny shoots have emerged. If you're planting extra late in the year and the threat of snow is imminent, you can also mulch right after you plant. I prefer to do everything at once so we add our straw right at planting time.

A hoe digging a trench in a garden bed.

What Month Do You Plant Garlic?

Traditionally, October is a month of harvest. But in the Pacific Northwest (and many other parts of the country) October is the month you plant garlic for a summer harvest.

We plant our garlic the first week of October, but if the ground hasn't frozen or endured a deep frost, you're safe a few weeks in. The rule of thumb is to plant garlic two weeks before and up to two weeks after your first frost in the fall.

A basket of harvested dried garlic.

What Garlic is Best to Plant?

You'll need to decide if you want to plant soft-neck or hard-neck garlic. We prefer soft necks so we can braid them to hang in the kitchen. Plus, soft neck has a longer shelf life.

Hardneck garlic cannot be braided and has a much shorter shelf life, but it usually has a stronger more complex flavor.

In the photo above you can see a variety of each. The soft-neck garlic is the braids (and larger heads), the hard-neck garlic is the smaller single bulbs..

Some people choose to grow a variety of garlic, soft-neck garlic for long-term storage, and hard-neck garlic for turning into homemade garlic powder or using it medicinally.

My favorite is soft neck Inchelium Red Garlic, it stores incredibly well, is very prolific (lots of cloves per bulb), and is considered a gourmet (aka delicious) garlic.

How Much Garlic Should I Plant Per Person?

This depends on how much garlic you eat. We tend to be if a recipe calls for one clove let's use at least three type of people.

The average recommended amount is 15 bulbs per person. Find out more on How Much to Plant Per Person for a Year's Worth of Food here.

Soaking Garlic Before Planting

Many people wonder whether or not you need to soak garlic before planting. And after a quick search on the interwebs, there is much recommended for this step.

My answer may differ from many recommendations out there, but here are my thoughts on soaking or not soaking garlic before planting…

  • The reason most people soak their garlic seed in water mixed with baking soda is to kill any potential fungal disease on the cloves before planting. However, certified seed garlic is tested and guaranteed to be free of fungal disease, therefore there is no need to soak certified seed garlic.
  • If you're not sure if your garlic has been contaminated with fungal disease, my recommendation would be to try finding certified seed garlic and not planting the questionable garlic.
  • If you don't have any other options for planting garlic, I would recommend planting those cloves in a separate area, away from your main crop garden, in a container or something small where you can dispose of the soil if it turns out your garlic was infested. (A kiddie pool is a great inexpensive option!)
  • Here in the damp and rainy Pacific Northwest I would never soak my garlic because we already have very damp soil in the fall, so soaking my garlic and then planting it into damp soil is just a recipe for mold or rotting cloves.
  • The one and only caveat where I could possibly see the reason behind soaking garlic before planting is if you live in a very dry climate. But even then, I would just recommend making sure your soil stays adequately mulched, amended, and watered well to stay damp enough for the garlic to begin to sprout.

Where Do I Buy Seed Garlic?

I recommend you purchase your seed garlic from a local grower if possible. Most store-bought garlic has been sprayed so it won't sprout in the store, meaning it won't sprout in your soil either.

We bought our initial seed garlic from a local farming store, which stocked garlic that was grown on a local farm. Plus, local farmers know which varieties will grow best in your climate and area.

However, I've also since found and ordered (I like to try out a few new varieties each year) this organic garlic seed farm.

Softnecked garlic is usually easier to grow.

Once you've grown a garlic crop, you can save some bulbs from your own harvest to plant the next year. Just remember, one clove of garlic will equal a bulb of garlic. Keep reading below for tips on getting the best quality garlic heads year over year.

A woman's hand holding a clove of garlic.
A hand placing a garden clove into the soil.
A long garden row planted with garlic cloves.

How Do You Properly Plant Garlic?

  1. Break the cloves apart and remove any loose paper. Don't remove all the paper though, you don't want the actual garlic showing, that paper is a nice protective layer.
  2. Plant the garlic clove with the fat end down in the soil (the part that is closest to the root from your main bulb).
  3. Plant each clove with about two inches of soil covering it from the tip of the clove.
  4. Keep cloves six to eight inches apart in all directions.
Three kids adding straw mulch onto a garden bed.
A garden bed that has been mulched with straw.
A garden bed where garlic is planted covered in straw mulch.

Garlic Planting Tips for Success

  • Be sure your soil is well-draining. In the past, we've used raised beds. After tilling down deep and heavily composting with dried cow manure, we now plant in our in-ground garden beds.
  • Weed free is a plus as garlic doesn't like to compete for space.
  • Mulch – Once your garlic has sprouted, mulch around the green shoots (it's fine if you mulch with straw right at planting time). After your first hard frost (green shoots will wither), mulch with straw over the entire bed.
  • Pull mulch in the spring – Once temperatures are warming up and you begin to see new growth on the garlic, you can pull the mulch back from the new shoots to allow for more sunlight to get through.
A garden bed where garlic is planted covered in straw mulch.

When Do I Harvest Garlic?

I have two other posts with more information on how to harvest garlic and how to braid and store garlic for long-term storage.

For now, I hope you get some garlic in the ground this year, for most places, it's not too late! If you have mild winters, you can even plant in late winter or early spring (or if you forget, I've planted as late as February with success but don't recommend waiting that long as a principal).

Do you plant winter crops? Have you planted garlic before?

Garlic curing on a screen.

More Gardening Articles

  • How Much to Plant Per Person for a Year's Worth of Food
  • Wood Chips for Garden Mulch – Beneficial or Not?
  • Beginner Gardening Secrets You Need to Know
  • 13 Basic Steps to Starting a Vegetable Garden
  • How to Create a Garden Plan for More Harvest & Less Stress
  • Planning a Fall Garden (28 Crops to Plant in August)
  • Hugelkultur Garden Beds (What, Why & How)
  • Growing Onions From Seed

Filed Under: Gardening, Raising Your Own Food, Vegetables Tagged With: garlic, garlic varieties, hardnecked garlic, harvesting, homesteading, how to plant garlic, softnecked garlic, Vegetables, winter crops

How to Plant and Grow Potatoes (In Containers or the Ground)

May 20, 2021 by Melissa Norris 38 Comments

Knowing how to plant potatoes correctly, including their depth, spacing, soil needs, sunlight, water, and temperature preferences, will get your harvest off to the best start possible and provide your family with food for months to come. Read on to learn how to plant potatoes the right way (including how to grow them in containers).

Image of a sprouting potato in the ground.

One of my favorite things about the pioneer lifestyle is growing our own food. But with recent biotech and GMOs sneaking into our food, it's not just about being frugal or the added health benefits (you did know homegrown vegetables and fruits have more nutrients, right?), it's about protecting our families.

Knowing how to grow enough food at home to feed my family for a year, having some basic gardening secrets tucked in your back pocket, knowing how to protect crops from common garden pests, and even how to grow a large scale garden without acreage will help get you headed down the right path to self-sufficiency.

Growing potatoes is just one small step in starting a vegetable garden.

Favorite Potato Varieties

If you haven't grown potatoes, now might be the perfect time to start. Many of you know I'm a firm believer in growing heirloom plants, and the potato is no exception. We have grown many varieties of potatoes over our 20 years of gardening, and we've settled on a few of our favorites…

  • Russet
  • Russet Norkotah PH
  • German Butterball

The above are my favorites for long-term storage, we've previously grown a purple potato called Purple Majesty. It has 10 times more antioxidants than a regular potato (and my kids love the color… lavender mashed potatoes anyone?).

Red and yellow potatoes arranged on a burlap sack.

There are three basic kinds of potatoes:

Early, Mid-Season & Late Potatoes

Before planting just any old potato, you need to know how many potatoes you're growing (get my free chart on how much to plant per person for a year's worth of food here), how quickly your family will eat them, and if you're hoping to still be eating that potato harvest the following spring (meaning you'll need to choose good storage varieties). Read on for more info about the kinds of potatoes.

Early-Season Potatoes

Also called “new potatoes” or basically, potatoes that haven't fully matured or finished growing.

Early season potatoes are ready for harvest in about 75-90 days. This is a great variety to grow if you're looking to get multiple plantings in one area of your garden.

If you live in a climate with very warm summers (staying above 90 degrees for days and weeks at a time), these early season potatoes will be your best bet.

Likewise, if you want to plant a late-summer garden for an early fall harvest, then early season potatoes are great for planting mid to late August.

If your potatoes have been prone to disease, the early potatoes may also be a better choice as they're the least likely to get blight because they're generally harvested well before disease sets in.

Early potatoes are not great storage potatoes, so these will be your “fresh eating” crop from the garden.

Early Season Potato Varieties

  • Alta
  • Cheiftan
  • Norland
  • Red Pontiac
  • Yukon Gold

Mid-Season Potatoes

Similar to early-season potatoes, mid-season potatoes will be ready fairly quick in about 95-110 days.

Mid-season potatoes aren't always great storage potatoes, so be sure to read up on the variety you're buying to know if they're better for fresh eating or long-term storage.

Mid-Season Potato Varieties

  • Adirondack Blue and Red
  • Purple Majesty
  • Gold Rush
  • Red Gold

Late-Season Potatoes

Because I like to grow food for my family that will last us a whole year, the late-season potatoes tend to be my go-to potatoes.

Late-season potatoes are sometimes referred to as “Main Crop Potatoes” and are generally ready to harvest in about 120-135 days.

Late-Season Potato Varieties

  • German Butterball
  • Fingerling
  • Russet
  • Russian Blue
Image of a BCS two-wheel tractor digging a trench.

Supplies Needed for Growing Potatoes

You don't need much to grow potatoes successfully, but there is some general knowledge that will come in handy throughout the growing season. So stick with me…

  • Seed Potatoes – see my favorite varieties mentioned above
  • Soil – Potatoes aren't picky, but crop rotation is important, don't plant potatoes where you had tomatoes the year prior, and it's best if your soil is rich, well-draining, and acidic (4.8 to 5.5 pH).
  • Space – whether you're planting in the garden or in containers, you need to have enough space for the tubers to develop.
  • Sunlight – potatoes grow best in full sunlight. Plant them in a place that gets all day sun and you should be golden.
  • Water – consistent watering is key for potatoes. Try not to go too long between waterings, and don't over-saturate them when you're watering.
seed potatoes on tray

Seed Potatoes

When growing potatoes you can only grow them from seed potatoes. The potatoes you've purchased in the grocery store are not suitable for seed potatoes because they can carry disease (remember the potato famine in Ireland during the 1800s, it was caused by a late blight that infected the soil and crops for multiple years). They also may have been sprayed with chemicals to keep them from sprouting on the shelf. Source

Seed potatoes are chosen for their resistance to disease and are certified disease-free, starting with disease-free potatoes is key.

I know some people do plant potatoes they've purchased from the store once they've sprouted (with great success!), but I'd rather not take the gamble of introducing any disease to my soil and don't think it's worth the risk. Each person must decide this for themselves.

If you grow and harvest your potatoes correctly, you can grow your own seed potatoes for the following year, essentially having an endless supply of potatoes. Stick with me, we'll talk about that soon.

Where to Buy Seed Potatoes

As mentioned above, we grow enough potatoes each year to have extra left over for our own seed potatoes. But if you've gotta start somewhere, so if you're looking to grow potatoes and are in need of seed potatoes, try some of the following places:

  • Local garden center
  • Local nursery
  • Grand Teton Organic Seed Potato Company (this is where I purchase mine)
  • Territorial Seed
  • Johnny's
  • Peaceful Valley
  • Irish Eyes
  • High Mowing

NOTE: Many places completely sell out of seed potatoes. It's a good idea not to wait until mid to late spring to try and buy them. When possible, order seed potatoes ahead of time (generally in the winter) to be sure you get on the list when they're in stock.

If you can't find seed potatoes, ask a friend if they'd be willing to share, you can cut your seed potatoes into pieces (be sure there are at least two “eyes” per piece) and it weighs at least 1 to 2 ounces per piece, allow them a couple of days to dry out and “scab up” to prevent rotting once planted, then proceed with the planting instructions below.

chitting seed potatoes on a tray before planting

What is “Chitting” Potatoes?

Chitting refers to forcing potatoes to sprout. If you've stored your potatoes correctly, they may not be sprouting come spring when it's time to plant.

To chit potatoes, bring them into a dark room that's around 70 degrees F for about two weeks. This brings them out of dormancy and allows them to sprout.

Once they've begun to sprout, you can move them to a cooler location with decent light for a few weeks until you're ready to plant.

Image of three potatoes in a trench spaced apart about 12 inches.

How to Plant Potatoes

There are many ways to grow potatoes, so it's important to consider both your space and how many potatoes you want to grow for both fresh eating and storing.

Growing Methods

If you're short on garden space, you can grow potatoes in containers or fabric bags. They can be grown in raised beds, long rows that you'll hill up, or even in mounds. Some people even grow them in trash cans! The moral is to grow with what you have at the moment.

Choose which growing method works best for you:

  • Containers
  • Fabric bags
  • Raised beds
  • Rows
  • Hills
  • Trash cans!

If you don't have the garden space for potatoes, they make an excellent container crop. You basically follow the same method as I'll lay out below, however, instead of digging a trench, you simply add a little dirt at the bottom of your container, then fill with more dirt instead of mounding each time. I discuss more about this method in Using Vegetable Grow Bags in the Garden. I've even seen pictures of people using large plastic laundry baskets… get creative!

Image of feet walking through the garden adding compost over the soil.

Soil

When growing potatoes plant them in well-draining acidic soil that's been fertilized. Ideal pH levels for potatoes is 4.8 to 5.5 They will grow in slightly more acidic soil and usually do okay into the 6 pH range but if they're in more alklaine soil (above 7.5 pH) they can't uptake many of the macronutrients in the soil and are more prone to developing scab.

Photo of a jar of elemental sulfur and some sprinkled into the ground.

It's not advised to try and change your pH level by more than 1 point in a twelve-month period. Our soil pH range is naturally around 6 (slightly acidic) so at planting time I add 0.2 pounds of elemental sulfur (make sure it says elemental sulfur to avoid aluminum) per 10-foot row. This will lower the pH by 1 point.

Potatoes are heavy feeders. You don't want them to rot in the ground or develop a fungus. Never plant where you had tomatoes or eggplant (they are susceptible to the same diseases) the previous year and always rotate your potatoes each year.

The ideal soil for growing potatoes is:

  • Well draining
  • Loose and fluffy
  • Acidic

Well Draining

The biggest nemesis of growing potatoes is having them rot in the ground. This can be avoided by consistent watering and well-draining soil.

Potatoes don't like to be soggy, or sit in extremely wet soil. The soil should hold water well, but not pool or puddle up. It sounds funny to want well-draining soil that holds water, but that's exactly the “just right” Goldilocks effect we're looking for.

Well-draining soil is also what allows me to store my potatoes in the ground all winter and harvest them as we need them in the kitchen!

Close up shot of the BCS tractor digging a ditch.

Loose and Fluffy

As mentioned above, make sure your soil is light and fluffy and not too compact (you don't want it to form a solid ball when squeezed together in your hand).

If your soil isn't well-draining, then you'll need to add in some organic matter (but nothing with too much nitrogen). Adding some compost and or worm castings will give the potatoes the nutrition they need to grow nice big greens, but also develop large tubers as well.

Too much nitrogen in the soil and you'll get nice big greens, but tiny, underdeveloped tubers (no good!).

Temperature & Sunlight

Potatoes prefer cooler weather and full sunlight and can be put in the ground as early as 2 weeks before your last frost date.

They'll tolerate some heat, but if temps stay at or above the 90s for prolonged periods of time, they may die. Our summers are extremely mild in the Pacific Northwest, so I don't have to deal with this.

We generally plant our potatoes the first to mid part of May.

Water

When watering potatoes, consistency is best. Try not to go too long between waterings, and don't over-saturate them when you're watering.

A general rule of thumb is to give them about 1 inch of water per week.

Preparing Your Seed Potatoes

Image of a potato with sprouts being placed into the soil.

Once your seed potatoes are sprouting, you have two options. If the potato is large and has more than four eyes, you can cut your seed potato (giving you two seed potatoes). However, your seed potato needs to be at least 1 to 2 ounces in order to have enough food to feed the emerging sprouts so I don't cut my potatoes unless they're at least 4 ounces in size.

I prefer to plant whole seed potatoes, these produce more pounds per plant for me and less chance of the potato rotting in the ground.

How to Cut Seed Potatoes Before Planting

If you do wish to cut your seed potatoes, there are a few simple rules to follow:

  • don't cut smaller than 1 ounce
  • make sure each piece has 1 to 2 eyes
  • allow cut potato to set out over 1 to 2 days to scab over (dry out)
  • if cut part isn't scabbed fully, dip in elemental sulfur at planting time

Depth & Spacing

Close up shot of the BCS tractor digging a ditch.
Image of a potato with sprouts being placed into the soil.
Image of two potatoes 12 inches apart being measured with a tape measure.

Dig a trench about 6 to 10 inches deep. Place your cut potato with the eyes facing upwards (or plant whole potatoes as shown below if you have plenty to spare). Space 12 inches apart.

Photo of a jar of elemental sulfur and some sprinkled into the ground.
Image of a potato in the soil with a tape measure showing it's 6 inches deep.
Image of a tape measure in the ground with dirt piled up about six inches.

I also like to add in some elemental sulfur to help acidify and reduce scab. Cover the potatoes with about 2 inches of soil.

What Are The Best Companion Plants For Potatoes

Image of a potato plant growing above the soil.

Companion planting is used to help both repel bad pests, attract “good” pests, and placing plants together that benefit one another.

Don't plant potatoes with other members of the nightshade family (tomatoes and peppers) because they are all susceptible to blight. Avoid planting potatoes with carrots and squash.

Potatoes do well when planted near beans, brassicas, corn, garlic, peas and onions.

Read How to Get Rid of Bugs on Plants Naturally Tips that Actually Work for more tips.

What to Plant with Potatoes to Keep Bugs Away

Basil – repels potato beetles

Nasturtium – repels potato beetles and attracts beneficial insects, also helps to repel cabbage moths so is excellent to plant with potatoes if you've paired them with brassicas.

Marigold- deters root nematodes (this happens once the plant is chopped up and worked back into the soil for the following year), repels potato bus and white fly. Attracts beneficial insects such as hover flies, lacewings, ladybird beetles, mantids, robber flies, some spiders and predatory mites.

Mounding or Hilling Potatoes

After potatoes have sprouted, you'll need to mound soil around them. We have lots of slugs here, so I don't use mulch, just good old dirt.

You may wonder if mounding is really that important. I'm here to tell you, it is.

Potatoes are produced from the tubers, and if left exposed to light, they'll turn green and possibly poisonous. (Yes, this is true.) When you see green on potatoes, it's chlorophyll (harmless) BUT it can be a sign it has a higher level of solanine (a glycoalkaloid and toxic chemical) so you want to avoid eating large amounts green potatoes.

Mounding helps protect the tubers (potatoes) from getting too much sun and keeps them safe for consumption.

Mounding also helps inhibit blight. Mound the soil up once the foliage has reached about 8 inches high with a hoe. It's better to not mound the soil too steep, so it won't wash away in the rain. Mound up until only 2 inches of leaves are left showing.

Additional mounding of dirt should be done once you have new growth of about 4-6 inches. This will be repeated 3 to 4 times throughout the growing season.

Once potatoes are blossoming, stop mounding. You can damage the new tender shoots beneath the surface of the soil.

Two images, one of a potato plant with growth about 8 inches high, the other image of the potato having dirt mounded up and only a couple of inches showing.

Have you had success growing potatoes? What kind of potato are you growing this year?

More Gardening Articles

  • Sheet Mulching the Easy Way
  • Wood Chips for Garden Mulch – Beneficial or Not?
  • Beginner Gardening Secrets You Need to Know
  • Science-Based Companion Planting Strategies
  • 13 Basic Steps to Starting a Vegetable Garden
  • How to Create a Garden Plan for More Harvest & Less Stress
  • Planning a Fall Garden (28 Crops to Plant in August)
  • 10 Tomato Growing Tips for a Disease Free Harvest
  • Preventing and Treating Early Blight for Tomato and Potato Plants

Filed Under: Gardening, Raising Your Own Food, Vegetables Tagged With: gardening, heirloom gardening, how to plant potatoes, Pioneering Today, Vegetables

How to Grow Swiss Chard in your Fall Garden

August 20, 2014 by Melissa Norris Leave a Comment

Grow Swiss Chard in Your Fall Garden. I'm so excited to grow a fall garden this year and increase our growing season. Great tips on sowing swiss chard, how to grow it, and way to even eat the stalks!

I don't know about you, but if I don't know how to do something, I'm not shy about asking. Because no one knows it all right? Between you and me, if someone does seem to know it all, I usually don't like to hang with them for very long.

While I'm a pretty old hand at gardening, there is a lot I'm still learning. And one of those things is increasing our fall vegetable garden. These 5 Plants to Grow Now for a Fall Harvest are some of my favorites, but I knew there had to be more veggies I could put in. (P.S. Did you catch our Planting a Fall Garden Podcast? It's packed full of tips for putting in your fall garden, cooling the soil, and using the frost to your advantage)

[Read more…]

Filed Under: Gardening, Raising Your Own Food, Vegetables Tagged With: fall garden, gardening, prepper, survival, Vegetables

5 Vegetables to Plant Now For a Fall Harvest

August 6, 2014 by Melissa Norris 6 Comments

5 Vegetables to Plant now for a fall harvest. Great list of vegetables to put in now to extend the growing season, plus which ones to sow from seed and which ones should be transplants. I'm sowing some more seed tomorrow

There's nothing as good as harvesting home grown vegetables from your own backyard. One of my favorite things about summer is having a free grocery store next to my house. Growing up and the first years of our marriage we planted our garden the end of May and wound up the harvest by the first of October.

Our food bill went down considerably and we naturally ate more vegetables than any other time of year. As I became more of a garden and determined to live a self-sustainable lifestyle, I really wanted to be able to grow more of our food year round. The cooler and somewhat normally soggy temperament of the Pacific Northwest seemed to make that out of the question. Do you see my extreme pouty face?

If I only planted warm weather or summer crops, the above statement is true, but cool weather and root crops, now these are a whole ‘nother story. And I love stories that take me by surprise, how about you?

Cool weather crops are sometimes grown during the summer months around here, especially in places with cooler or more mild summers, but they really thrive in the early spring and fall.

The trick, you need to plant them now in order to harvest them this fall. Seems kind a weird, right, you plant during the hottest part of the year, in the dead smack middle of summer for fall? Yep, you do.

These are some of our favorite fall and cool weather crops to grow. Depending upon your first hard frost date, you might be able to sow some of these up into September or about 4 weeks before your first hard frost. Our's is typically the tale end of October or first of November.

These are 5 vegetables to plant now for a fall harvest.

1. Carrots. Carrots are an excellent fall crop. If your winters aren't extreme, you can even leave them in the ground and cover them with a layer of straw or mulch. Plus, you get to make carrot cake and carrot muffins and baked carrots and… yea, I kind of like carrots. Carrots are best sown by seed on top of the soil. Keep soil moist until they germinate and thin once they greens are a few inches tall.

2. Beets. Beets are something I developed a taste for as an adult. But they're like carrots, you can keep them in the ground or store them in the root cellar. They're super yummy pickled, roasted with garlic, or in my Chocolate Gluten-Free cake. I might have a thing for vegetables and dessert. Here's our complete tutorial on how to plant and grow beets.

3. Parsnips. I love roasted parsnips with a bit of butter and garlic. Like I will eat the entire pan by myself, in one sitting, without sharing unless I really absolutely have too.

4. Cabbage. Oh, cabbage, I love you stuffed and rolled, shredded in a slaw, and fried in butter with some sausage. Cabbage is one you should plant using seedlings. If you don't have any started, many nurseries and stores will have seedlings for sale this time of year.

5. Kale. How did I live over two decades without knowing about kale? We adore kale. It's super easy to grow. Sow it by seed on the top of the soil either in rows or scatter it for a cover crop. These kale chips are so good my son even questioned if they were actually a vegetable.

What are your favorite fall crops? Do you grow any crops year round?

Interested in growing more vegetables into fall? Learn how to cool your soil during planting, which crops to sow from seed, harvesting tips, and how to use the frost to your advantage.

Planting a Fall Garden Now. Learn how to plant now for a fall harvest, seed sowing, how to cool the soil, and tricks for using the frost for your advantage.

Filed Under: Gardening, Raising Your Own Food, Vegetables Tagged With: gardening, prepper, survival, Vegetables

How to Prune Tomato Plants for a Better Harvest

July 9, 2014 by Melissa Norris 50 Comments

Learn how to prune tomato plants for a better harvest, because we all want more delicious tomatoes right?

How to prune tomato plants for the best harvest ever. Love these tips on how to get more yield from your plants.

Tomatoes have long been my nemesis crop.

From the rainy summers of the Pacific Northwest, the dreaded blight, and even blossom drop. But this year, I've finally got a gorgeous bunch of tomato plants. And nothing, I mean nothing, is going to come in the way of my harvest. At least, if I can help it.

There's nothing more discouraging than putting in all the time, effort, and money, to care for a plant, and then not get a harvest. And, if I'm being totally honest with you guys, it feels like a black mark on my homesteaders badge. I consider myself a fairly decent gardener. I'm also a tad bit stubborn.

This my friends, is a recipe for going-to-get-it-right-if-it-kills-me. While that kind of makes me crazy at times, it's a huge win for you. Because you get to learn what not do and what works, without all the hair pulling and rotten tomato throwing.

Course, maybe you don't throw rotten tomatoes. Maybe you're way more reserved and calm. I however, took great relish in hucking those rotten tomatoes as far as I could across the fence for the livestock to nose through.

Resources for How to Prune Tomato Plants for Maximum Yield and Good Plant Care

Soaker hoses– never all water to cause fungus or encourage blight by using a soaker hose

Pruning shears– for small tomato plants I use my fingers, but for the larger vines, I use pruning shears. If you can't easily pinch them off, you don't want to leave a gaping wound by ripping it.

This year, we put up a high-tunnel, or a.k.a. off-grid greenhouse. I was through taking chances with our rainy weather. I'm also thinking it's the reason we're having an unseasonably hot and dry season…. kind of like wash your car it will rain. Put up a greenhouse and it won't!

Want to know how we tie up our tomatoes (check out the video below Tying up Tomatoes [DIY tomato trellis that works BETTER than cages] )


I also invested in a soaker hose. Not one drop of water was going to touch my tomato plants this year. After raising my darlings from seed in the house, taking a full two weeks to hardening them off, you can bet I wasn't done after I'd planted them in the ground.

One of the secrets to a good tomato harvest and larger tomatoes, is in the pruning. Why prune a tomato plant you ask?

A bit different than pruning a regular fruit tree, but the end result is the same. A better harvest.

How to Prune Tomatoes

There are two reason we want to prune our tomato plants. One is to eliminate chances for disease in the first place. Any of the leaves that touch the soil should be removed. If they drop down into the soil, they'll get water on them and act as a ladder for any disease to climb up into the plant. Any of the leaves that appear damaged, yellowing, spotty, or dying should also be removed, they can be the beginnings of blight and you want that eradicated immediately and done when pruning determinate tomatoes.

Wondering when to start pruning tomato plants?

As soon as they bottom leaves are dragging the dirt with at least two to three branches above them. Never remove all the leaves, your plant does them to grow and thrive.

The second reason is your tomato plant will put more energy into the foliage if not pruned than it will into producing fruit. We don't tons of lush green leaves, we want tons of ripe tomatoes. A bonus reason is we want plenty of air circulation around the ripening fruit and too many leaves don't allow for good air flow. Below I've got how to prune tomato plants pictures for ya.

Damaged leaves and also touching the soil need to be removed.

You'll want to prune off all the lower leaves that can or are touching the soil. You may use pruning shears or just use your thumb and pinch them off if small.

How to Prune Indeterminate Tomatoes

pinching out tomato side shoots, picture of pruning sucker shoots


The second item you'll want to prune is the sucker shoots. This is true for Indeterminate tomato plants, not determinate. Say what, a determined tomato? No, not quite. Don't worry, I got ya covered.

Most heirloom tomato plants are indeterminate and need the sucker shoots removed. We grow an all heirloom garden so we're safe there. However the packet of seeds you used should tell you which kind it is. If not, here's the basic difference between them.

Determinate tomato plants are bushy, not tall, yield all of their crop in one to two weeks, and it dies after the first crop.

Indeterminate tomato plants are taller, need to be staked or caged, produce fruit until the first frost, and do best when their sucker shoots are removed.

Now that you know what kind of tomato plant you have, what's a sucker shoot?

Sucker shoots grow in the crotch of the branch, between the main stem or trunk of the tomato and the branch. They grow up right. They will produce flowers and fruit, but too many of them and they compete with the main plant and will actually produce a smaller tomato and harvest.

If you remove all of them, you do cut into your overall yield. I prefer to leave about two to three sucker shoots on my larger plants. It's totally up to you how many to leave or not leave.

Take your discarded leaves away from your plants

If you leave them, it won't hurt your plant, but the plant will do better without them. Just pinch it off with your thumb.

Don't leave your pruned leaves on the ground by your tomato plant. Discard of them away from the garden.

How to prune your tomatoes for the best harvest ever. Start now for a larger crop yield.

One note of caution, if your tomatoes are in direct sunlight, don't remove so many of the branches there isn't any shade left for the tomatoes. Tomatoes need to be shaded by the leaves so they don't become burnt in the hot sun. 

Will you look at these beauties, just waiting to turn to drops of rubies in a few more weeks. Is your mouth watering thinking of all the tomato fun we'll have in the kitchen? Or maybe a fried green tomato to get things started early…

P.S. pruning tomato plants in pots? Same procedures.

Now that you know how to prune tomato plants do you have any other best tomato growing tips?

More Tomato Related Posts

  • 10 Tomato Growing Tips for a Disease-Free Harvest
  • Storing Green Tomatoes for Fresh Eating
  • Preventing & Treating Early Blight of Tomato & Potato Plants
  • Weston Tomato Press (+ Tomato Sauce Recipe)
  • Canned Tomato Sauce Recipe
  • Slow Cooker or Instant Pot Cabbage Rolls Recipe
  • Homemade Barbecue Sauce Recipe
  • 129+ Best Canning Recipes to Put Up This Year
  • Canning Problems and Solutions: Siphoning (Liquid Loss in Jars)
  • Pressure Canning FAQ's

Filed Under: Gardening, Raising Your Own Food, Vegetables Tagged With: gardening, grow your own food, how to, tomatoes, Vegetables

How to Grow and Plant Beets

April 23, 2014 by Melissa Norris 14 Comments

How to plant and grow beets, soil type, planting tips, and why your beets won't grow if you don't do this crucial step

Our goal is to have vegetable crops growing in our garden as close to all year as possible. One way to do this is to plant some cooler weather crops, or plants that will grow before the last frost date. We grow garlic over the winter, and already have our potatoes in the ground. Beets is one of these plants.

Beets seems to be one of those foods that you either love or hate, kinda like oysters. I tend to not like oysters, much to the happiness of my husband, because he loves oysters and that means more for him. Beets are a vegetable I have grown into. As a kid, I wasn't so crazy, but as an adult, I'm a newer convert.

[Read more…]

Filed Under: Gardening, Raising Your Own Food, Vegetables Tagged With: beets, gardening, grow your own food, how to grow beets, how to plant beets, preparedness, survival, Vegetables

Grow Basil Indoors Without Dirt All Winter!

February 26, 2014 by Melissa Norris 70 Comments

I don't know about you, but I cringe every time I see a $6 price tag on a bottle of organic (or not organic) dried herbs at the grocery store. Know why I cringe? Because I know how easy and frugal it is to grow your own herbs at home.

Three jars with basil plants growing in them on a windowsill. Text overlay says, "Grow Basil Indoors All Winter".

What's this you say, you  have no garden space? You don't have time for a garden? Even if you don't have a green thumb or time for a garden, you can have a mini-herb garden in about ten minutes, with very little upkeep. And, not only is it spending less, but it's living better, because fresh home grown vegetables and herbs have more nutrients in them than store bought or even farmer's markets varieties.

[Read more…]

Filed Under: Gardening, Raising Your Own Food, Vegetables Tagged With: gardening, growing your own, Herbs, prepper, survival, Vegetables

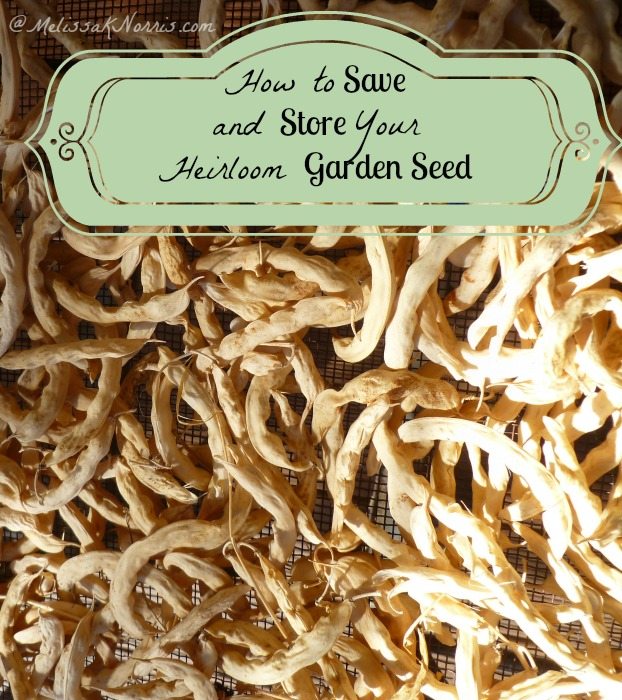
How to Save and Store Your Heirloom Garden Seed

September 11, 2013 by Melissa Norris 43 Comments

How to Save and Store Heirloom Garden Seed www.melissaknorris.com

How to save and store heirloom garden seed, especially bean seed is extremely easy. If you've read anything on my website, you know I'm a huge believer in heirloom gardening. Just one of the many benefits of heirloom gardening is your ability to save the seed from year to year, saving you money and making you more self-sustainable. (Check out my podcast Intro to Heirloom Gardening to find out while you'll love them as much as I do)

Our Tarheel green beans have been passed down in my family for over 100 years and I'm so excited that I've been able to pass them along to you guys in my annual spring giveaway.  And I got a little giddy when some of the winners emailed me to say they'd enjoyed them so much they wanted to know how to save the seed.

[Read more…]

Filed Under: Gardening, Homestead-Life, Raising Your Own Food, Skills, Vegetables Tagged With: gardening, heirloom seeds, how to save garden seed, seed saving, Vegetables

  • 1
  • 2
  • Next page
Melissa K. Norris

Follow me:

  • Start Here
  • Courses
  • Academy
  • Contact
Log In

Articles

  • Gardening
  • Homesteading
  • Recipes
  • Lifestyle
  • DIY

Podcast

  • Yearly Planning Without the Overwhelm
  • How to Test Soil Ph & Amend Acidic or Alkaline Soil
  • Unplugging for One Year with Rory Feek
  • The Norris Farmstead: Our 40-Acre Homestead Farm-Stay
  • Pioneering Today Podcast: Homesteading Q & A

Books

  • Everything Worth Preserving
  • The Family Garden Planner
  • Hand Made
  • The Made From Scratch Life

Education

  • Organic Gardening Workshop
  • Home Fruit Preservative Canning e-course
  • Home Canning With Confidence
  • Homemade Bread & Baking Class
  • Natural Homemade Bath and Beauty
  • Pioneering Today Academy


Copyright 2023 - Melissa K. Norris Pioneering Today LLC

  • Privacy Policy
  • Affiliate Disclaimer
  • Terms of Use

Melissa K. Norris and Pioneering Today LLC is a participant in the Amazon Services LLC Associates Program, an affiliate advertising program designed to provide a means for sites to earn advertising fees by advertising and linking to Amazon.com.