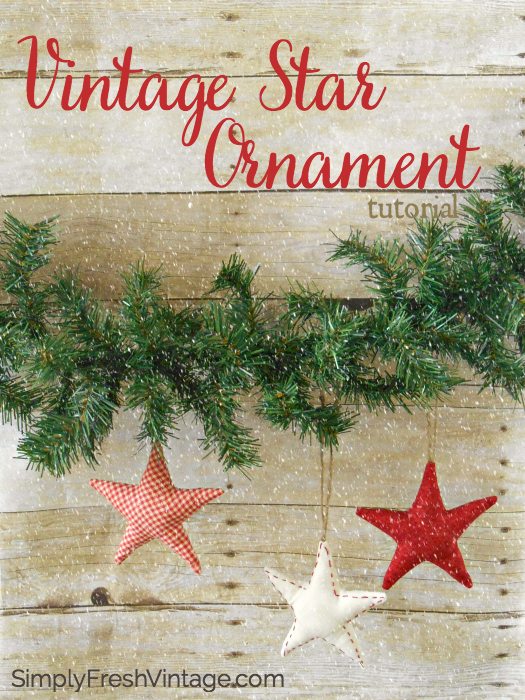
I’m so excited for this tutorial on how to make a homemade vintage star ornament. Am I the only one who gets a little crazy for stars? I’ve got them all over my home. Not only do I keep most of them up year round, but they remind of the star over Bethlehem on the night my Savior Jesus Christ was born.
Any pioneer girl needs some sewing skills… and most need more than I have. I can stitch a hem, mend a tear, and make very simple curtains, and do a ruffle or two by hand, but if clothing my family was left to my hands and a needle and thread, let’s just say we’d be wearing some pretty funny garments. This is an area I want to become better at and when Lani (a much better seamstress than I) said she’d make up this tutorial for us I got all kinds of giddy. Especially when you see her work and the easy step by step photos she included for the needle challenged like me.

Hello!
I’m Lani, and I blog over at Simply Fresh Vintage. I’m honored to be here with you this Holy Season as we prepare our hearts and our homes to celebrate the birth of our Savior, Christ Jesus.
Christmas has always been my favorite time of the year. As a young child, I loved the surprise of Christmas morning. My family had a few holiday traditions, but the one I remember the most happened on Christmas Eve. The week before Christmas was spent putting up a few simple decorations around the house, and making lots of homemade delicacies to pass on to neighbors, friends at church and family. As Christmas Day got closer and closer, the excitement would build. I spent probably way too much time wondering what Santa would bring for Christmas …
A new doll?
Perhaps some roller skates?
Or a pretty new church dress!
A coloring book and a new box of crayons would always be desired.
Ah … the “simple” days.
By Christmas Eve morning I’d usually worked myself into a frenzy, thinking that I wouldn’t get any presents at all because we still had no tree. And if there was no tree, then there couldn’t be any presents, because Santa would have no place to put them. That night I would put on my Christmas jammies, and then settle down to watch the traditional Christmas shows … A Charlie Brown Christmas, Rudolph the Red Nosed Reindeer, Frosty the Snowman. Christmas Eve perfection! I’d eventually get very drowsy and head off to bed.
Christmas morning came, and lo and behold, the magic of Christmas had taken over our living room sometime during the night. There was a big beautiful tree, all lit up and decorated with vintage ornaments and bubble lights, and larger colored light strands. There was a star at the top of the tree and a manger underneath. Presents were tucked carefully in the back and on the sides.
As I got older and started learning to make crafts, Christmas decorating brought on a whole new meaning. One year I was really into beads. I made beaded garlands, beaded snowflakes, beaded “birdcage” ornaments, beaded stars for the windows … just about anything you could think of to make with beads, I probably made it.
As my sewing skills began to improve I began to make a few more complicated items … a tree skirt, a plain runner for the top of the piano, cloth napkins, etc. And then one day, I saw a stuffed ornament. Two pieces of fabric, sewn together, and stuffed with “stuffing.” I knew immediately that I wanted to make one or 100 of them, in a bunch of shapes and sizes. And I did! We had a tree full of stuffed ornaments that year.
On and off through the years, I’ve gone back to making these vintage ornaments, some plain, others very decorated. It’s a timeless pattern, and the possibilities for size, shape, and decoration are endless. I’m so excited to share my time-honored pattern for making Vintage Star Ornaments. I hope you’ll enjoy not only making some for yourself, but passing the tradition on to your children and even grandchildren.
Table of Contents[Hide][Show]
Materials Needed …
2 pieces of fabric per star, 8″-9″ square
Poly Fiberfill
String, yarn, or ribbon
Star Pattern (PDF provided below)
Optional: Embroidery Floss
Notions and Equipment Needed …
Scissors
Needle
Thread
Quilters Ruler
Sewing Machine (you can stitch by hand but it will take longer)
Subscribe to Melissa K. Norris!
Get updates on the latest posts and more from Melissa K. Norris straight to your inbox.
We use your personal data for interest-based advertising, as outlined in our Privacy Notice.
Assembly Directions for One Star …
1. Gather your materials. For this project I made three stars. You can use the same fabric on the front and the back, or mix and match. The directions are for one star.

2. Print the star on heavy cardstock (click on the star pattern below to open a printable PDF ). Cut it out. Trace on the WRONG SIDE of one piece of fabric. Pin the two pieces of fabric, right sides together.
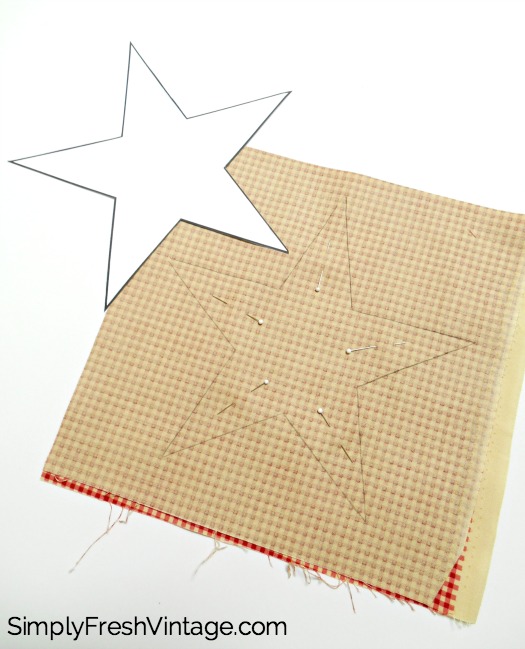
3. Using sharp scissors, cut the star out, both layers of fabric at the same time.

4. In order to identify the intersection points for stitching, using the quilters ruler, line up one edge of the star on the 1/4″ ruler line. Draw s short line both at the inside angle and down at the point.


5. Move the ruler to the next edge of the fabric and repeat step 4.

6. Repeat steps 4 and 5 all the way around the star.
7. Optional Step: If you want to add a line of decorative stitching to the front of the star, unpin the two pieces of fabric, and using 2 or 3 strands of the embroidery floss, stitch about 1/4″ on the inside of the newly drawn lines, using a rocking stitch. Carefully knot it off, then re-pin the star pieces together, making sure that the back of the top is facing you. (You should see the knots from the embroidery floss.)

8. Cut about 10″ from your ribbon, yarn or twine.

9. Fold it in half.
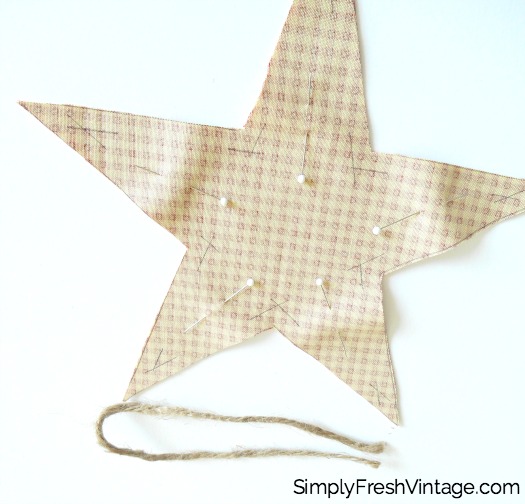
10. Take one pin out, and put the folded string between the two pieces of fabric, with the loop end closest to the center of the star and the ends sticking out of the point about a 1/2″.

11. Carefully squeeze the two ends of the string together, bring the star tip fabric back up, and re-pin, making sure that the strings stay as close to the center of the star tip as possible. When you sew the edges, you don’t want to catch the string on the sides, only at the tip.
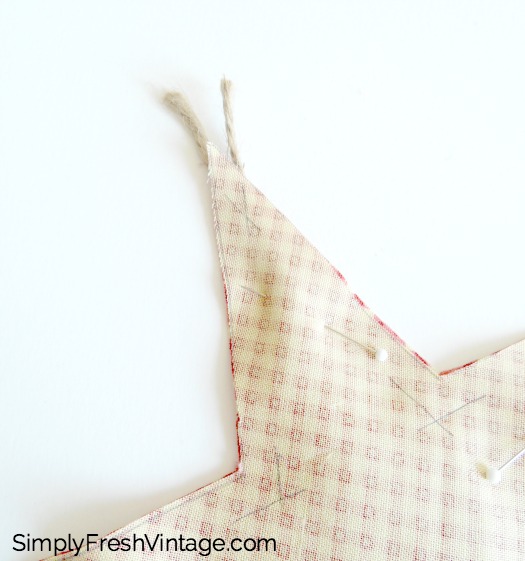
12. Begin sewing on one of the edges opposite the tip with the string, starting with a backstitch close to the tip. Sew with a 1/4″ seam throughout, using your drawn lines to anchor your pivot points. Stop at the intersection with the needle down, turn the star and continue sewing to the next point. Repeat until you get to the edge you started on. Only sew about 1/2″ in, and then backstitch, leaving most of the edge open for turning. Remove the pins.

13. Before turning it inside out, you’ll need to trim the points and clip the inside angles. This will help to make fairly sharp point and nice curves on the inside.
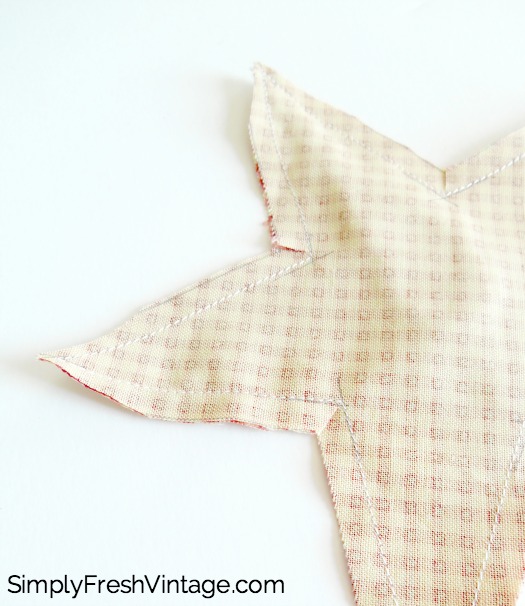
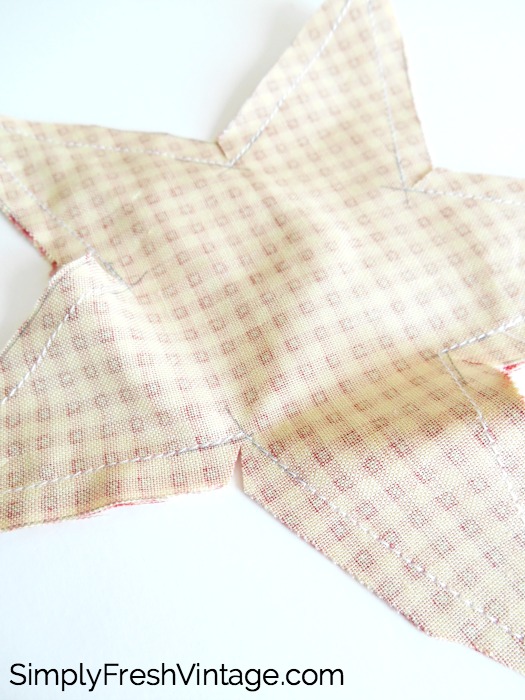
14. The easiest way to turn it inside out is to grab the loop of the string and carefully pull through. Gently push the rest of the points through, and then using a closed pen or pencil, or a similar dull point object, push the tips out being careful not to puncture the fabric. If the star has the embroidery floss stitching, you’ll want to be extra careful not to snag the stitching.

15. It’s time to fill the star with fiberfill. Use the pen/pencil/pointy object from above and push small amounts of fiberfill first into the points and then into the center. Add in enough for the final point.

16. Using needle and thread, close up the opening.

17. Enjoy your new Vintage Star Ornaments!

Use them for gift decorations …
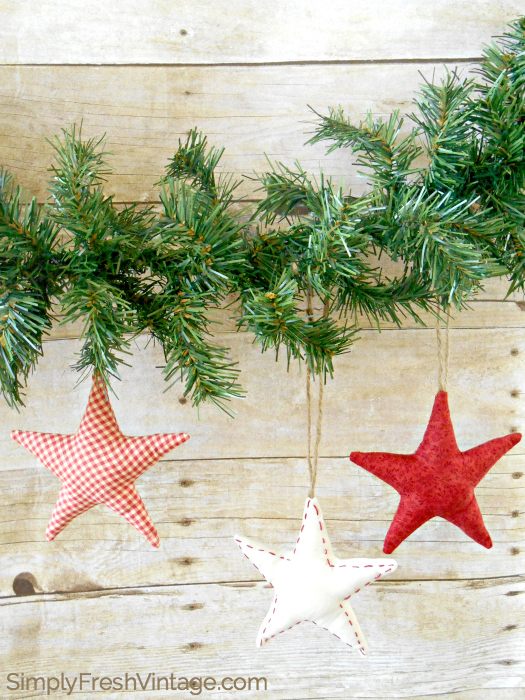
Or hang them from the mantel or on the tree.
Each year I try and find a new decorative craft that I can make at home, usually with my daughters, and sometimes my sons. Yes, we can always go and buy just about any ornament imaginable, but there’s something about crafting together with family and friends, making a mess and turning it all into something beautiful, that reminds me of God’s love for me. So very often I indeed am that mess. Yet each day He finds a way to mold me and make me into a beautiful creation for His glory.
I hope you enjoy making these ornaments as much as I have and that they bring you and your family many happy memories for years to come.
Blog: Simply Fresh Vintage
Follow me on Facebook, Pinterest, Twitter, Instagram

After living in California for almost 50 years, God began to do a new work in our family, bringing us across the country to Virginia. I’d always wanted to start blogging, and when we settled into our new home, that dream became a reality. I love quilting, decorating, and all the DIY projects that come with being a home owner.
I’m a princess of the King of Kings, a helpmeet to a wonderful Godly husband, a mom to three boys and two girls, a mother-in-law to a precious son-in-law, and Nana to two adorable grandsons.


Thank you for sharing these stars. I love Little House on the Prairie. We even do her recipes! so much fun! Merry Christmas!
Clear, concise, simple to follow. Loved it! Any more?
What a wonderfully detailed tutorial. I love that you captured every step in pictures. Sure help people like me when I try to do something like this. They are delightful. Thank you!
[…] Stars & Glitter Snowflakes from Cooke’s Frontier Conifer Cone Ornaments from MomPrepares Fabric Vintage Stars from Melissa K. Norris Borax Crystal Ornaments and Decoupage Ornaments from SchneiderPeeps Blown […]
I made some of these. Thank you for the inspiration <3
Yea!
I love these! I definitely want to make some of these this Christmas!
Andrea,
I know, aren’t they fun? I’m thinking of doing some for year round use, too!