Melissa K. Norris
  • Start Here
  • Podcast
  • Articles
  • Shop
    • Books
    • Classes
    • General Store
  • In Person Workshops
  • Academy
Log In

How to Dry Fresh Herbs at Home 

September 1, 2022 by Melissa Norris 17 Comments

Learning how to dry fresh herbs at home is easy, and there's no replacement or substitute for doing it yourself. Learn the best methods for drying herbs at home in this post!

dried herbs in Mason jar on counter

Growing an herb garden is an excellent place for a beginner gardener to start, and making your spice blends at home is a frugal way to save on your grocery bill.

Why I Love Growing and Cooking With Herbs

When drying your own herbs, you know that they haven't been sitting on the shelf at the grocery store for years, and your food will taste much better because you are using ingredients from your garden. 

Cooking with fresh herbs is incredible. I love adding fresh basil before serving my homemade tomato soup, and dill to this Ukrainian Borscht recipe, or having rosemary, thyme, and sage on hand to make marinated cheese balls. 

[adthrive-in-post-video-player video-id=”EPJiUO15″ upload-date=”2022-08-29T23:33:24.000Z” name=”Secrets to Drying Herbs With This Centuries Old-Method for Stronger Medicinal Properties.mp4″ description=”Learn how to dry fresh herbs at home to use all year long.” player-type=”default” override-embed=”default”]

The depth of flavor is so much more than the dried version. However, if you live in a climate that has cooler winters, then not all of your garden herbs are available year-round. 

So like any true Pioneer, we're preserving our herbs for use during the winter. When cooking with dried herbs, I put the herbs in at the end of the cooking time to maximize the flavor.

If you're looking for more of a fresh herb flavor, try preserving herbs in salt following this homemade celery salt recipe or this recipe for preserving fresh basil.

A pot of basil on a deck.

When to Harvest Herbs

It's crucial to know how to prune and harvest herbs correctly because you want to get the most flavor out of your herbs.

As an herb grows, it has the most intense flavor in the leaves just before it flowers. If you aren't ready to harvest, it's best to clip off the flower buds to keep the plant from putting its energy into the flowers.

The best time of day to harvest herbs is in the early morning. Herbs have the highest concentration of oils in their leaves at this time of day. You want to gather right after the dew has dried but before the sun begins to heat the air and plant.

Basil is the exception to this rule and can be picked later in the morning.

Fresh celery leaves in a colandar.

How to Harvest Herbs

The part of an herb used for cooking is generally the leafy part. I find it best to use scissors and cut off the entire stem to prevent the leaves' oils from rubbing off on your skin. Minimally handling the plant allows oil to retain more in the leaves when needed.

Lightly rinse the herbs to remove any dust or other unseen debris. I'm sure you practice organic gardening at home, so we don't have to worry about any chemicals or pesticides.

Place herbs on paper towels to absorb the excess water and dry completely.

Bundles of fresh herbs laying on a wooden table.

Drying Methods Used to Dry Herbs

There are several ways to dry herbs. The two ways I prefer are the hanging method and using a dehydrator.

  • Dehydrator – This is the method I use most because of our damp weather in the Pacific Northwest. After a ton of research, I purchased my Nesco Square Dehydrator due to its design to hold more food per tray than the circle varieties, and I liked the price point. I've had my Nesco for more than five years and love it. We've dehydrated fruit leather, jerky, candied apples, and herbs. I've run it for two days straight without any problems, and it's extremely quiet. You can also purchase mesh tray liners here.
  • Hanging Method – This method (also known as air drying) requires no special equipment, and anyone can do it. 
  • Freezing – Freezing is an option that some people find retains more flavor. You can add frozen herbs directly to your food when cooking, which works best in foods such as meats and vegetables.
  • Oven Dry – I don't recommend drying fresh herbs in the oven, as most ovens' lowest setting isn't low enough to allow the herbs to dry without burning to a crisp.
Bundles of fresh herbs tied with twine and hanging upside down to dry.

How to Dry Fresh Herbs – Hanging Method

Tying the stems together in this method is critical. Moisture content reduces as the herbs dry, and they shrink together. Another vital part to remember is to hang them upside down. Gravity pulls the essential oil into the leaves, which is the part we want to keep.

Supplies Needed

  • Fresh Herbs – Make sure your herbs are freshly cut with no spots or bruising on the leaves.
  • Twine, String, or Rubber Band – You'll need something to secure the stalks together.
  • Dry Location – A dry location out of direct sunlight with plenty of airflow is necessary for the best drying environment. Pro-Tip: If you don't have a place away from sunlight, use a paper bag to cover the herbs as they dry. Paper bags will also protect the herbs from dust that may settle onto them as they hang to dry. Simply create a hole in the bottom of the bag for the stems to poke through and hang the bag around the herbs.
  • Hook or Nail – This is needed to secure the upside-down bunch of herbs. 

Instructions

  1. Tie the ends of four or five stalks together.
  2. Hang the bunches upside down in a warm, dry area, out of direct sunlight.
  3. Allow herbs to dry until the leaves crumble at your touch.
  4. Remove the leaves from the stems, keeping them as whole as possible (this allows for more flavor when it comes time to use them).
  5. Store the dried leaves in an air-tight container (you know how I love a good Mason jar!).
  6. Label contents of the container.

Note: Moisture content and climate will be factors, and it could take weeks to months for herbs to dry. Just be patient and use the paper bag trick if you're concerned about dust or debris.

Raspberry leaves on a dehydrator tray.

How to Dry Fresh Herbs – Dehydrator Method

Supplies Needed

  • Fresh Herbs – Make sure the herbs are fresh with no spots or bruising on the leaves.
  • Food Dehydrator – Any dehydrator should work. If you have a Nesco like mine, try these Nesco screens. Herbs shrink as they dry, and these screens keep them from falling through the cracks.

Instructions

  1. Place herbs in a single layer on the food dehydrator tray or drying rack, ensuring they aren't touching.
  2. Herbs dry best at 95° F. If you live in an area with high humidity, you may need to increase the temperature slightly, but try to stay as low as possible to maintain as many nutrients as possible.
  3. Dehydrating times for herbs will vary depending on the size of the leaves and the moisture content. Some herbs will dry in 12 to 24 hours, and others may take several days.
  4. Herbs are dry when they crumble at your touch.
  5. Store the dried leaves in an airtight container.
  6. Label contents of the container.

Pro-Tip: Herbs don't transfer flavors when drying, so you can dry them together. I have dehydrated four trays at once with chocolate mint, spearmint, oregano, basil, and thyme.

How to Tell When Herbs Are Dehydrated

Take a leaf between your thumb and pointer finger to test if the herbs are dry. It should crunch and crumble when pressed.

If you're unsure whether herbs are dry, you can take them out of the dehydrator and place them immediately into a ziptop baggie. Seal the bag and watch for any condensation to form on the inside of the bag. If you see any moisture, they're not dry yet.

The smaller the item, the faster it will degrade and lose its flavor. Leave the leaf in its largest form for storage and grind it up before use.

Dried herbs in a mason jar.

How to Store Dried Herbs

After the drying process, it's time to get them packaged in containers and stored on the shelf. It's best to keep dried herbs in a dark, cool, dry place to retain the most flavor and extend the shelf life.

Store herbs in an air-tight container. I prefer glass jars as plastic containers seem to affect the flavor of the herbs over time.

Mason or Weck jars work well for herbs. Make sure to label the contents of each container.

How to Use Dried Herbs

Here are my favorite herb blends to make (including FREE printable labels for the jars!).

Have you dried herbs at home? Share your experiences below! Especially if you have any favorite herb blends to share.

A woman pointing to a basil plant where it's starting to flower.

More Posts About Herbs and Their Uses

  • How to Prune Herbs & Perennials for Maximum Growth
  • Medicinal Kitchen Herbs (6 Herbs You Should Grow)
  • 8 Medicinal Herbs and Their Uses for Growing an Herbal Tea Garden
  • Homemade DIY Bath Salt Recipe Use Herbs or Essential Oils
  • 7 Ways to Use Medicinal Herbs at Home
  • 7 Herbs for Natural Remedies Your Grandparents Used

Filed Under: Dehydrating, DIY Recipes & Tutorials, Food Preservation, Natural Medicine Cabinet Tagged With: dehydrating, DIY recipes & tutorials, gardening, Herbs, Pioneering Today, prepper, preserving the harvest, survival

Homemade DIY Bath Salt Recipe Use Herbs or Essential Oils

December 20, 2018 by Melissa Norris 8 Comments

DIY Bath salt recipe

This homemade bath salt recipe is one of the easiest projects to whip up for gifts, either for yourself or lucky folks on your list. Not only is it frugal and easy, but this is one gift that has therapeutic benefits, score!

Benefits of Bath Salts

Bath salts aren't actually made with salt, but Epsom salts, which looks similar to salt but is large crystals of magnesium sulfate. This is where part of the therapeutic benefit parts comes in.

Our bodies need a proper level of magnesium to function properly. And some studies show magnesium may offer help with insomnia.

Magnesium is one of the most important minerals in our bodies and helps regulate hundreds of enzymes in our bodies. It helps the proper function of our cardiovascular and endocrine systems as well as our brain and neurotransmission. To sum it up, it’s a pretty big deal in keeping us healthy on a whole lot of levels.

An Epsom salt bath can help increase your magnesium levels.

Making homemade bath salts with baking soda is a great way to help soothe irritated skin, a water conditioner, and helps leave skin feeling extra silky.

Learn how to nourish your body with a natural medicine cabinet with items already in your spice and herb cabinet.

Grow your own culinary and medicinal herbs and learn how to easily preserve them to stock your pantry and medicine chest.

Easy guides and recipes to use your herbs in your own:

  • homemade soaps
  • herbal tinctures
  • nourishing lotions and soothing salves

Want more easy homemade recipes all in one place? This recipe and 100+ more are found in my book–> click here Hand Made: the Modern Guide to Made-from-Scratch Living.  <<–


Start at

DIY Bath Salt Recipe

2 cups Epsom salt

½ cup baking soda

Sea salt (optional)

3 to 4 Tablespoons herb of choice (optional)

  1. Mix together the Epsom salt, baking soda, and salt (if using).
  2. Add in herbs and combine until well mixed.
  3. Mix all of this together and store in a clean Mason jar. Add 1 cup to bath water. To help dissolve the salts, pour them under the running water while the bath is drawing.

How to Make Bath Salts for Gifts

The above recipe makes enough for a pint sized jar (2 cup size) which is perfect for gift giving. If you want to make a large number of these up for gifts, simply double, triple or quadruple the recipe and pour into individual jars.

Consider the individual as you pick your herb or essential oil combinations. If someone is sensitive to scents, you can omit it and the baking soda and Epsom salts still make a wonderful homemade bath soak.

This is my favorite part. Personally, I love turning this into a lavender bath salts recipe because lavender essential oil is soothing after a long day, not just to the senses but also to tired muscles.

But I also like to add in the addition of peppermint essential oil for fun Christmas kick and if you've got any type of congestion, this addition is perfect!

Simply add between 10 to 20 drops per 2 cups of bath salts, stir until combined, and gift. You can use a single essential oil or mix and match for different scents or benefits.

Peppermint tends to be a strong oil, so I use less of it when combining it with lavender or vanilla so it doesn't over power the other scents.

I use Plant Therapy for my essential oils because I can get free shipping and order whenever I want, they have KidSafe labels for all essential oils that are safe for use with children (safety is a big deal to me), and they have certified aromatherapists I can ask any questions I may have. Sweet!

Note: Never add essential oils directly to bath water, as they won’t disperse. By adding them to the Epsom salts first, they’re able to dissolve into the water. Otherwise you’ll create an oil slick on top of the water. Always use essential oils with caution, and less is more. Some oils like peppermint, cinnamon, and other warm oils can burn the skin if applied directly without dilution (and some should never be applied to the skin or used in the bath). It's best to use the homemade bath salt with essential oils recipe below following the carrier oil instructions and amounts.

Free Essential Oil Caution Guide– know which oils are photo-sensitive, which aren't safe for children, and if an oil interacts with certain medical conditions. Get your free copy here–> Essential Oil Safety Guide and Chart

DIY Bath Salt Recipe with Essential Oils

Dilution method shared from Dr. Eric Zielinski The Healing Power of Essential Oils

1 cup Epsom salt

1 ounce pure castor oil soap

1 ounce oil- olive, jojoba, or avocado oil

10 drops essential oil (lavender or rosemary are two of my favorites)

food scale

  1. Using a food scale, combine castor oil soap and oil in a glass container.
  2. Add in essential oil. Stir until well mixed, it will turn creamy.
  3. Stir into 1 cup Epsom salt and mix well.
  4. Store in a glass jar and add 1 cup to bath water. Make sure to use hot water to dissolve in bath water.

Note: Do NOT add baking soda when using the essential oils and carrier oils, it will foam and create a mess!

Some people have reported when using the castor oil soap and oil for dilution that it doesn't dissolve all the way in the bathtub. It's likely the water isn't hot enough so an easy solution is to put some water in the tea kettle and bring it to a boil. When you first start to run the bath, pour in your bath salts and pour the hot water from the kettle directly over top, then continue to fill up the tub with water from the tap, adjusting the temperature so you don't burn yourself at the end. I always do this anyways to make sure my bath is hot enough as our poor little hot water tank can't fill up the large soaker tub to my liking anyways.

What are your favorite combinations to use in the homemade DIY bath salt recipe?

More Posts You May Like

  • DIY Herbal Bentonite Clay Face Mask and Scrub
  • How to Make Homemade Lotion Bars
  • Homemade Peppermint Salve for Dry Skin
  • Homemade Soap with Natural Colorants and Tips
  • 3 Ingredient Homemade Lip Balm Recipe
  • 15 Homemade Natural Herbal Bath and Body Gifts
  • How to Host a Holiday Craft Party

Filed Under: DIY Recipes & Tutorials, essential oils, Natural Medicine Cabinet Tagged With: DIY recipes & tutorials, essential oils, Herbs, natural remedies

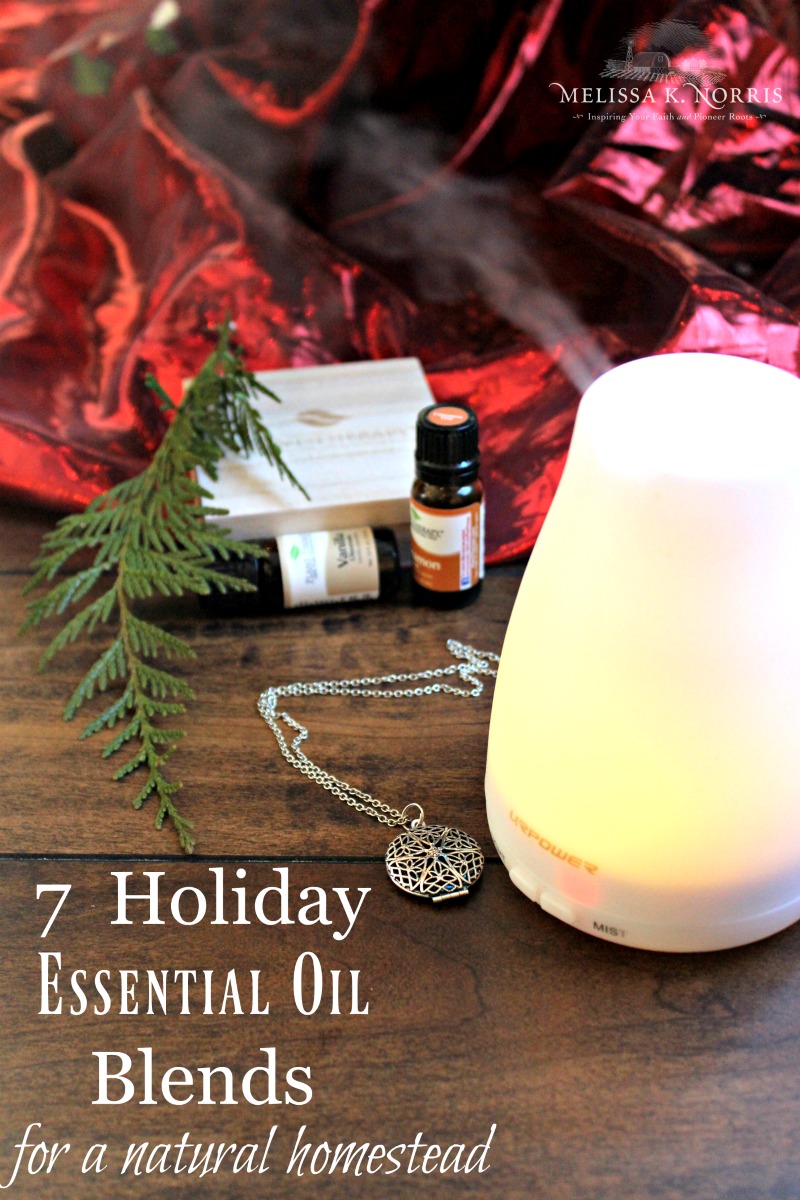
7 Holiday Essential Oil Blends for a Natural Homestead

December 7, 2017 by Melissa Norris 1 Comment

There's little else I can think of than giving someone a gift that truly helps improve their lives. I remember when I first started down the path of choosing more natural products and moving away from synthetics.

A whole new world opened up. Not only did I feel better, because let's be honest, the proof is in the pudding, but I wanted to give the same gift to all of my loved ones. I knew what a difference it was making in my life and this homesteading girl just can't help sharing the good, it's what good folks do, right?!

Whew, so glad we're good folks and agree on that. 

Here's why going the natural route is not only beneficial, but a must!

(we'll also talk about some precautions you need to know going the natural route as well).

  • There are over 84,000 chemicals on the market and only 1% of those have been studied for safety. 
  • What's worse than that, is there are known studies that show these ingredients are cancer causing, neurotoxins, and endocrine and hormone disruptors.
  • Just a few by  name are Phthalates, Proplyene Glycol, and parabens. Many times these are found under the listing “fragrance” on a label, which really tells us nothing. Companies do not have to list the individual ingredients they use in their “fragrance blend.”
  • According to this article, the Environmental Working Group states that 75% of products have phthalates in them under the “fragrance” listing.

I don't know about you, but that's enough to get me changing out the items we use in our home lickety-split.

How to scent your home naturally

While I kicked synthetic to the curb, I still want my home and body to smell nice. I discovered essential oils and quickly dove into using them in our homemade body care products, natural perfume, and diffusing them.

But, even though it's natural, you still need to do due research. Not all essential oils should be used topically or even diffused around young children. For more on this you can read or listen to my story and experience with The Truth About Essential Oils and How to Stay Safe

Free Essential Oil Caution Guide– know which oils are photo-sensitive, which aren't safe for children, and if an oil interacts with certain medical conditions. Get your free copy here–> Essential Oil Safety Guide and Chart

Essential Oil Diffusers

The easiest way to scent your home is with an essential oil diffuser. You place water into the compartment of the diffuser and add a few drops of your essential oil and it uses a cool mist to the air, delivering both the scent and the medicinal aromatherapy components of the oil.

This is the Essential Oil Diffuser I use and it also acts as a humidifier, with a light function (you can turn it on or off), nightlight, programmable on/off cycles and auto shut-off (automatically turns off when the water runs out). I've had mine close to a year and love it.

If you're looking for a bigger diffuser for a really large room, Plant Therapy has this model

Favorite Essential Oil Diffuser Holiday Blends

Get stocked up on your essential oils from Plant Therapy with 10% Off Your $50+ Order!

Use Coupon Code: “10PER” Click here and get all your blends for yourself and as gifts

Christmas Tree
3 drops Fir Needle (this is a KidSafe oil)

3 drops Spruce (also a KidSafe oil)

Christmas Baking

2 drops Sweet Orange

1 drop Cinnamon Bark

2 drops Vanilla Oleoresin

Holiday Spice

2 drops Sweet Orange

1 drop Cinnamon Bark

1 drop Clove

1 drop Spruce

Candy Cane Swirl

1 drop Spearmint

2 drops Peppermint

2 drops Vanilla Oleoresin

Essential Oil Perfume Blends

The below blends are my personal favorite and the amounts are to use in the aromatherapy diffuser jewelry.

You can easily use a roller bottle with the same blends below (in a 10ml rollerbottle this will be approximately 2% dilution) and fill it with your carrier oil of choice.

Vanilla Burst

2  drops Vanilla Love (contains ylang ylang)

1 drop Citrus Burst

Lavender Lime

2 drops Lavender

1 drop Lime

Soothing Sweet

1 drop Lavender

2 crops Vanilla Love

Aromatherapy Diffuser Jewelry

Let it be known, I'm a natural loving homesteading Mama, but I still like to get my girly girl on. The cattle and chickens are quite used to seeing me with rhinestones on the pockets of my jeans while slugging through barn yard.

I've never been much of a perfume wearer, quite frankly, almost every scent gives me a headache (which I now know is probably due to all the synthetic chemicals in it, so I feel fortunate I never wore it much), but I do like to smell pretty.

And sometimes, that means more than just using homemade soap, I want a scent. I love my aromatherapy diffuser lockets, because I can get my pretty on in both the scent and they're very cute. I frequently get comments on them for design alone when I do venture off the homestead.

Here are two great deals and some of my favorite designs!

Aromatherapy Diffuser Locket- Flower Burst Essential Oil Locket in Rose Gold

Stainless Steel Aromatherapy Diffuser Locket- Tree of Life Design

Get stocked up on your essential oils from Plant Therapy with 10% Off Your $50+ Order!

Use Coupon Code: “10PER” Click here and get all your blends for yourself and as gifts

Psst, if you want to learn how to use essential oils and herbs to make your own homemade soaps, beeswax candles in jars, creams, body butters and more, check out the Hand Made Masterclass here while it's still over 50% OFF and FREE shipping.

Filed Under: DIY Recipes & Tutorials, essential oils, Natural Medicine Cabinet Tagged With: DIY recipes & tutorials, essential oils, natural remedies

7 Ways to Use Medicinal Herbs at Home

September 28, 2015 by Melissa Norris 21 Comments

Learning how to use herbs in your home medicine kit is an age-old tradition our forefathers and mothers knew. Seeing a resurgence in folks like you and me who want to preserve these old-time remedies makes my heart warm like a hearthstone near a crackling fire.

7 ways to use medicinal herbs in your natural, preparedness, and survival medicine chest! Great list of herbs and the ways to prepare them for different ailments. Grab this now so you're ready before you need it!

If you missed parts 1 and 2 of this series, you'll want to catch yourself up with 6 Old-Time Natural Remedies that Work and 7 Herbs for Natural Remedies Your Grandparents Used

It's one thing to know which herbs are good ones to start with and work well for different ailments (see posts above), but we need to know the different ways to actually use our herbs once we've identified them.

I am not a medical doctor or professional, this is not meant to treat or diagnose, it is for educational and entertainment purposes only. If you or your loved one is sick, always seek medical care and advice from a trained medical practitioner of your choice. Never use herbs or herbal treatments without first doing research on that herb and its effects by a trusted source.

Resources for Using Medicinal Herbs at Home

No doubt about it you need a good reference guide for knowing how to use which herbs for what, the ways to prepare them, and how to dry fresh herbs at home.

Interested in learning more about herbs and home remedies, especially concerning safety and dosing, be sure to sign up for my free herb class where we'll go into more depth about using herbs medicinally for you and your family.

Learn how to nourish your body with a natural medicine cabinet with items already in your spice and herb cabinet.

Grow your own culinary and medicinal herbs and learn how to easily preserve them to stock your pantry and medicine chest.

Easy guides and recipes to use your herbs in your own:

  • homemade soaps
  • herbal tinctures
  • nourishing lotions and soothing salves
  • tea

Plus our full herbal use medicinal chart. Get your copy of Hand Made: the Modern Guide to Made-from-Scratch Living by clicking here 

Beginner's Herb Guide–> Rosemary Gladstar's Medicinal Herbal Guide

Home Manual–> The Herbal Medicine-Maker's Handbook

7 Ways to Use Medicinal Herbs at Home

1. Herbal Tea. Some herbs are meant to be ingested and brewing a strong tea is a good way to do this, especially for cough and colds as a warm tea will help soothe an irritated throat like little else. Some of our favorite medicinal herbs and those recommended by readers for this method include echinacea, licorice root (7 herbs for natural remedies for the cautions of this herb), ginger, lemon, and sage.

There are a few ways to make your tea, you can use fresh or dried leaves.

How to prepare herbal tea at home 

Fresh leaves: Rinse fresh herb leaves under cold running water and place about three large leaves in the bottom of a cup. Pour hot water over and allow to seep for up to 7  minutes.

Dried leaves: A tea ball (I use this stainless steel tea ball all the time and even have put spices in it when making jams or brines) or infuser works the best when using dried leaves. Fill your tea ball with dried leaves and pour hot water over and allow to steep for about 7 minutes, or to your desired strength.

Many people like a cup of chamomile tea at bedtime.

Flavoring options:

For therapeutic use I'll put some raw honey in my warm tea if I have a cough, otherwise, I prefer not to add sugar, but if it needs some sweetness, then I use a few drops of this Stevia Extract.  I don't detect any bitter or weird after taste and have been using it for over a year now, I even use it when making sauces… shhh, don't tell my kids, they can't tell the difference.

2. Herbal Poultice. This is where you take the leaves (or sometimes root of the plant) and place them into a piece of gauze or muslin, apply to the affected area (feel like I'm at work typing out prescription instructions with that one), and leave it on for the preferred duration of time.

How to Prepare an Herbal Poultice

There are two ways to make a poultice, one is using the leaves and roots raw and the other is heating them.

For the raw poultice: finely chop up the leaves/roots or use your blender and make a puree. Place this into your gauze or muslin. For a case study and more in-depth look at using comfrey for this method go here. 

For a hot poultice: Take the leaves/roots and place them in a saucepan with a double ratio of water to the herb (example 1/4 cup herbs to 1/2 cup water), bring to a simmer, and cook for a couple of minutes. For more information on this method check out how to make an herbal poultice and compress tutorial here.

How long to leave the poultice on- the time will vary depending upon the ailment and the herb, for example, mustard poultice would not be left on for a long period of time due to its hot burning nature, whereas a comfrey poultice might be left on for up to 24 hours. You need to replace your poultice regularly.

You'll want to use gauze or a breathable fabric over your poultice to keep the poultice in place and to help protect your clothing.

3. Infusion or Decoction. An herbal infusion is simply an herbal tea fully matured… instead of allowing the herbs to seep for minutes, you let the tea seep for an hour, putting it on super strength. Confession: I've done this with tea simply because I forgot about it.

A decoction is when you boil the smashed or chopped herb, root, or sometimes bark in water and allow it to boil and seep for some time, so basically, the extended hot water bath version of an infusion.

Dried elderberries in a jar and two small jars of elderberry syrup sitting on a counter.

4. Syrup. I have to say if you have children or picky finicky people in your household, then a syrup will probably be your easiest option as far as compliance goes. Medicinal syrups are shelf-stable and last longer than infusions or decoctions, which means you can make them ahead of time so when you're not feeling up to par, you don't have to deal with making something, it'll be ready to go.

To make the syrup you'll start out making a decoction and then add in your sweetener. Here's how to make elderberry syrup

Echinacea flowers and a tincture bottle sitting on a wooden counter top.

5. Tincture. A tincture is basically making a homemade extract, in fact, that's exactly what it is. You can use either alcohol or apple cider vinegar, though your shelf life is better with alcohol, and less chance of mold. Here's how to make an echinacea tincture (the same principles apply to other fresh herbs)

Tinctures can be taken by themselves, added into syrups or salves and lotions.

6. Salves, balms, creams, and lotions. Many homemade salves, balms, creams and lotions, even lip balms will benefit from the addition of medicinal herbs. Usually this is done by infusing your oil with the herbs of your choice. This is a really simple procedure but takes a bit of planning ahead.

To infuse oil with herbs watch our totally FREE video training with both the traditional method and the fast I need it now method, both are easy click here to make your own herbal infused oil.

Place jar in a sunny windowsill and allow it to seep for 6 to 8 weeks, shaking every few days or so. After 8 weeks, strain herbs and keep infused oil in the recipe of your choice.

Tip: Olive oil works well for this as coconut oil solidifies at 76 degrees. I love to do this with calendula blossoms and it's the base for my wound healing salve recipe.

Another favorite is this homemade peppermint salve for dry skin. 

7. Herbal Steams. Herbal steam not only makes your house smell wonderful while eliminating those fake chemicals in other scented options, but it has therapeutic benefits as well. I enjoy cooking on our wood stove during the winter months and also like to put a kettle of water on to act as a humidifier, but adding some medicinal herbs to the mixture will punch things up even further.

You can use any herbs you like, but for congestion both peppermint and eucalyptus are favorites, however, people who are sensitive to seizures should proceed with caution and peppermint should be used with children under 6 years of age and eucalyptus, not with children under 12 years of age.

Add herbs to a pot of water and allow to lightly simmer. Or, you can add herbs to a heat-proof bowl and pour just simmered hot water over it.

Interested in learning more about herbs and home remedies, especially concerning safety and dosing, be sure to sign up for my free herb class where we'll go into more depth about using herbs medicinally for you and your family.

Other Herbal Posts You May Like

  • Homemade Traditional Fire Cider Recipe & Benefits
  • Herbal Home Remedies for Cold and Flu
  • 7 Natural Cough and Cold Herbal Remedies
  • How to Use Herbs and Natural Remedies At Home
  • How to Make Elderberry Syrup + Additional Add-Ins
  • Herbal Medicinal Tea – How to Make Your Own
  • Alternative Medicine & What to do if Your Medicine Isn’t Available
  • Echinacea Tincture – How To Make It & Use It
  • The Link Between Honeybees & Plant Medicine
  • How to Plan a Medicinal Herb Garden

Filed Under: DIY Recipes & Tutorials, essential oils, Herbal Remedies, Natural Medicine Cabinet Tagged With: DIY recipes & tutorials, Herbal Remedies, Herbs, natural remedies, preparedness, prepper, survival

6 Old-time Natural Remedies That Work

September 22, 2015 by Melissa Norris 26 Comments

Ever wonder if those old-time natural remedies really worked? I love old-fashioned things, but I also know some things we used to do way back when just weren't smart. That's what we're looking at today my friend, the smart things!

Seems everywhere I look, people are turning back to the old ways. There's something to be said from our mother's, grandmother's, great-grandmother's wisdom, or great-great-grandmother (you whippersnapper you).

Want to use natural remedies that actually work? These are 6 old-time cures your grandmother and great-grandparents used that actually work. Grab these now for the next you or a loved one is feeling under the weather.

One of my favorite things is learning about old-fashioned skills I can use in my every day modern life. You, too? Ahh, I love kindred spirits. And because we're kindred spirits you need to make sure you get yourself on this Pioneering Today Free newsletter to get our weekly old-fashioned tips and articles, and our Ultimate Home Food Preservation Guide, putting up food like our great-grandparents!

I bet when you come down with the sniffles or common ailments, your mother or grandmother had a bunch of different remedies she'd recommend. Some of them are plain odd and really have no place accept for the fondness of telling the tale.

My grandmother told my mother quite seriously when she was pregnant with me to never lift her hands above her head or the cord would tangle around the baby's neck. And she seriously meant it. My grandmother was a smart woman, she survived the Great Depression and was widowed twice. She had her last child in her forties. She could squeeze four quarters and a penny out of a dime. But some of the things she was taught about medical things, we now know to not be true.

Resource for Old-Time Ways and Living

One of my absolute favorite old-timey ways is the Foxfire Books! I purchased the first of our set for my husband for Christmas, and they instantly became one of my favorite treasures. Full of pictures and old-fashioned wisdom from the Appalachians, you're going to love them.

This is the edition I have with over 100 page section on herbal remedies–> Fox Fire Book 11

Want 96% Off Herbs & Essential Oils Learning Resource?

This year’s edition of the Herbs and Essential Oils Super Bundle includes 16 ebooks and printables and 10 full eCourses!

These top-quality resources cover everything you need to give you the skills and confidence to start using natural remedies in your home.

You’ll get a complete library to help you:

  • Rebuild your medicine cabinet with natural remedies
  • Create beauty and skincare products without harmful ingredients
  • Treat your digestive complaints, pain, colds, and flus with everything in your medicine cabinet
  • Preserve, harvest, and cook with healing herbsDiscover the cancer-sugar connection and take back control of your health
  • Boost your mood, heat up the romance, and increase mental clarity with essential oil blends
  • Liven up your meals and get major health benefits by using the right herbs
  • and so much more!

Plus, it comes with over $100 worth of bonus offers from companies you’ll love (even essential oil products!).

You sort of need to see it to believe it, but the package includes 26 digital products and it’s worth over $770! check it out here

Special Bonus

I‘m offering an additional bonus to anyone who purchases the Herbs & Essential Oils Bundle through my affiliate link, because I want you to be safe and have the knowledge you need to be successful and get started  building and using a natural medicine cabinet with herbal remedies for cough and cold, skin issues, sleep and calming, and more!

A 2 page quick reference sheet of  herbs listed by their medicinal properties, from anti-inflammatory, insect repelling, anti-viral and many more categories.

To get my bonuses, plus the 26 products (including 16 eBooks & printables and 10 eCourses) in the Herbs & Essential Oils Bundle, you only need to do two things:

1. purchase the bundle here
2. then go to melissaknorris.com/heobonus to claim your bonuses from me.

The combined value of the resources in the bundle is over $770, but you get EVERYTHING for 96% off!

You have to take old-time remedies with a grain of salt and do a bit of investigating before using them. After researching common old-time advice and “cures” this is a list of 6 that have been proven or have evidence that they actually work. This isn't an exhaustive list, but a great place to start. We'll be diving further into herbal medicine and treatments coming up soon!

6 Old-Time Natural Remedies that Work

1.Chicken soup is good for a cold. Grandma knew her stuff on this one. Chicken soup is good for a cold and there's science to prove it, even though us homesteaders knew it before they did, cuz we're cool like that. This article from the New York Times says: “In a study done in 2000 by Dr. Stephen Rennard at the University of Nebraska, lab tests on both homemade and commercial chicken soup with blood samples from volunteers, showed that chicken soup could help reduce upper respiratory symptoms.”

Homemade chicken soup made with traditional bone broth and lots of vegetables is going to be even more beneficial. As we move into cold and flu season, I recommend stocking up on your stock. (You got that little pun, right?) Here's How to Make and Bone Broth & 5 Ways to Preserve It

2. Mustard plaster for chest congestion. My husband's mother and grandmother swore by this one and he still remembers having to wear the stinky mustard plaster. This is one of those that goes both ways. It's actually better for sore muscles and pain because it's a counter irritant (good info here on the actual enzyme), think capsacian cream, and warms the skin.

Note: mustard plaster applied directly to the skin can result in blistering burns! Do not apply it directly to the skin. Here are instructions on how to make a mustard plaster, application and how long to leave it on. 

3. Baking soda for a bee sting. My daughter was stung by a bee a few weeks ago. The sting itself wasn't hurting, but she was itching it like crazy. I mixed up a paste of baking soda and water and applied it directly to the sting. It took away the itching and she was back to playing and running around in no time. This gets a thumbs up as works for me!

Note: If you're allergic to bees or suspect an allergic reaction, Benadryl or Diphenhydramine is always smart, along with a call to a Doctor.

4. Inhaling steam. When your nose is congested and you feel like you can't breath, take a hot shower, fill a sink or pot with hot water and make a tent. Take a towel and cover your head with it while leaning over the hot water, trapping the steam and allowing you to breathe it in. Make sure you use common sense and don't burn yourself. The steam will help loosen up your congestion (sounds much nicer than saying snot, right?) and allow you to cough up the ick easier.

Menthol (derived from the mint family) is often used in humidifiers and as aroma therapy and you can try adding a vaporizer or diffusing the oil to help. However, some small children and others may have sensitivities to peppermint and especially eucalyptus, so it' s not recommended to use this method with infants or small children. Watch for any signs of irritation when using this method of adding in the menthol family to your steam.

5. Honey. A spoonful of sugar helps the medicine go down…. well, actually, if you're using good raw honey, your medicine is in the sugar. A cup of warm honey tea with a bit of lemon doesn't just help warm you up, it actually helps your cough symptom.

Honey is now being (again, us homesteaders were ahead of the curve on this one, because we're cool that way) recommended as a cough suppressant in the medical community instead of over-the-counter products. Is there anything more cool than being able to use your food storage as your medicine cabinet, too?

Here's an article from the MayoClinic that talks about honey being an excellent cough suppressant all on its own.

I prefer local raw honey for all of the benefits it offers. If you can find a local bee keeper or local source, I'd go with that, otherwise look for raw honey at your local co-op or grocery store.

Learn how to make this ginger infused honey for a powerful two for one punch!

Note: Do not give honey to children under 1 years-old due to the risk of botulism. 

6. Ginger for nausea and upset stomach. If you had an upset stomach, there's a good chance your granny might have given you some ginger tea. Turns out, ginger is actually a powerhouse in the medicine cabinet and can be used for not only nausea and upset stomach, but also for headaches, arthritis pain, and cold feet. Check out this article from WebMD on the powers of ginger.

Note: Ginger works well for helping soothe an upset stomach, but if you're on blood thinning medications or have a blood clotting disorder (such as my daughter) you shouldn't use ginger. 

Filed Under: DIY Recipes & Tutorials, Herbal Remedies, Natural Medicine Cabinet Tagged With: DIY recipes & tutorials, Herbal Remedies, natural health, old-fashioned, preparedness

Grow Your Own Food In-Person Worksop

Saturday May 20th

$349

An intimate and hands on workshop

At Norris Farmstead

Click Here to Learn More

Want to grow a year’s worth of food?

Get my FREE planting chart!

Know exactly how many plants per person you need to plant with my easy worksheet and chart!
Melissa K. Norris

Follow me:

  • Start Here
  • Courses
  • Academy
  • Contact
Log In

Articles

  • Gardening
  • Homesteading
  • Recipes
  • Lifestyle
  • DIY

Podcast

  • Orchard Planning to Keep Pests Out (Live Coaching Call)
  • How to Boost Your Immune system (10 Easy Ways)
  • Homesteading With Special Needs Children
  • Seventh-Year Land Sabbath and Bread Baking Tips (Live Coaching Call)
  • Must-Have Pantry Items For Long-Term Storage

Books

  • Everything Worth Preserving
  • The Family Garden Planner
  • Hand Made
  • The Made From Scratch Life

Education

  • Organic Gardening Workshop
  • Home Fruit Preservative Canning e-course
  • Home Canning With Confidence
  • Homemade Bread & Baking Class
  • Natural Homemade Bath and Beauty
  • Pioneering Today Academy


Copyright 2023 - Melissa K. Norris Pioneering Today LLC

  • Privacy Policy
  • Affiliate Disclaimer
  • Terms of Use

Melissa K. Norris and Pioneering Today LLC is a participant in the Amazon Services LLC Associates Program, an affiliate advertising program designed to provide a means for sites to earn advertising fees by advertising and linking to Amazon.com.