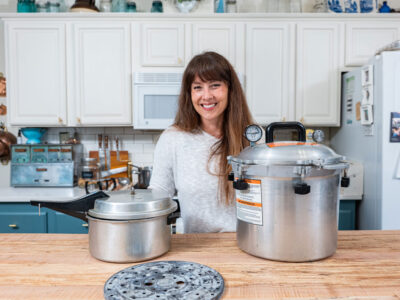
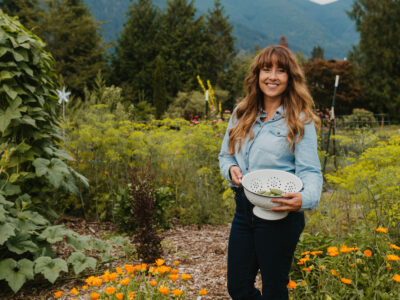
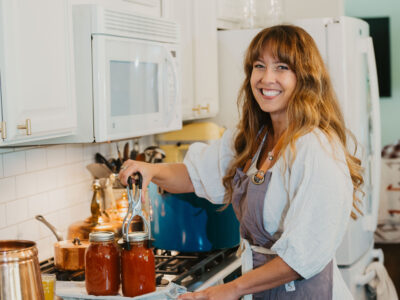
Melissa K. Norris
  • Start Here
  • Podcast
  • Articles
  • Shop
    • Books
    • Classes
    • General Store
  • In Person Workshops
  • Academy
Log In

Scottish Highland Cows: A Unique Cattle Breed

January 24, 2023 by Melissa Norris 22 Comments

Have you ever seen a Scottish Highlander cow? They're so adorable! We are just now learning about these beef and dairy cows from Scotland as we have acquired three Scottish Highlanders of our own to raise, and are borrowing a bull for breeding.

Scottish Highland Cow grazing in a field.

If you're currently researching dairy cows, here are eight things you need to know when keeping a family milk cow and signs to watch for with an expecting cow. Or, if you'd like to know more about raising grass feed beef, you can read more here.

Why I Love Scottish Highlanders

The look of these cows is one of the main reasons why I love them. They have long horns and beautifully colored shaggy long hair. We have our first new herd of Scottish Highlanders that are grazing at The Norris Farmstead.

Honestly, when I knew we were going to open an AirBnB, these furry cows were among my first thought. I don't know about you, but if I had the chance to stay somewhere and look out the window at these adorable cows grazing in the field, I'd book that stay in a heartbeat.

Scottish Highland Cow grazing in a field.

Scottish Highland Cows

Scottish Highland cows are a very unique breed. For starters, they're known to be exceptionally friendly and gentle cows. They originated in Scotland, and their horns can grow up to six feet.

They can thrive in various climates (especially cold climates), and, on average, they live longer than most other cattle, as their life span is between 15 to 20 years.

Because our cows are new to us, even though they're known for their gentle disposition, I still recommend keeping a good distance and being cautious until you know the temperament of each individual animal. As with any breed of animal, there are always outliers, so safety is always first.

Scottish Highland Cow and calf.

Good for Milk

I see the question often asked if you can drink Scottish Highlander milk. Absolutely! They have wonderful milk that's rich in butterfat, protein, and calcium.

Their milk will make incredible butter, yogurt, cheese, etc.

As with any dairy cow, you'll need to breed them and get into a routine of breeding and milking, just as with any dairy cow.

Scottish Highlanders breed at two years, not one and a half, as most other cattle do.

But honestly, have you ever seen a photo of a Scottish Highlander calf? They look like teddy bears! (See the stock image above for cuteness!)

Scottish Highland Cow grazing in a field.

Good for Beef

Scottish Highlanders are known to have pretty lean beef. The meat has a marbling to it, like Wagyu beef, not Angus, because of the inner and outer layers of fur.

They will take a bit longer to get up to full butcher weight, so that's something to consider if you're wanting to raise them for beef cattle (more on this below).

Great Foragers

So let's talk about what good foragers they are, what they eat, and facts about their growth.

Unlike other cattle, these cows are exceptional and much heartier foragers. They will eat blackberry vines, poison ivy, and honeysuckle vines. If they can reach it, they will eat it.

They're great for restoring pastures or wooded areas as well. They'll clean up entire woods that other cattle may not even survive in.

If you have a field or wooded area that needs to be cleared, you could clear acreage while raising food for your table. Talk about a win-win!

Scottish Highland Cow grazing in a field.

Growth Facts

It's important to note that Scottish Highland cows do take longer to grow and get to butcher weight than most beef cows, and they will provide less overall meat than other breeds.

In fact, Scottish Highlanders take an extra year to mature compared to other cattle, so they are ready to butcher in about three years, instead of the average two for other breeds.

Scottish Highland Cow grazing in a field.

What do They Eat?

The beauty of this breed is that they can eat a variety of feed. As mentioned above, they're great foragers. But they also eat grass, hay, straw or cereal grains, barley and wheat, and even turnips and peas.

They eat less food on a daily basis than other cattle. But since they take an extra year to mature, your feed costs are still about the same.

Logo of the Modern Homesteading Conference.

Take a Leap of Faith

Sometimes new projects require you to take a leap of faith. You don't always need to know everything at the onset of a new project, but having an idea of what to expect is wise.

And so we have taken this leap of faith with our three new Scottish Highland cows! I'm excited to continue to share our journey as we discover more about this unique breed.

If you want to discover new homesteading skills, you might want to take a leap of faith yourself and join us at the Modern Homesteading Conference this summer (2023) in North Idaho.

Other Posts You May Enjoy

  • How to Preserve Dairy, Meat & Eggs
  • 8 Things You Need to Know about Keeping a Family Milk Cow
  • Stocking Up on Animal Feed (Buy Now, Save Later)
  • Your Livestock Questions Answered
  • How to Make Real Buttermilk (Cultured Buttermilk Recipe)
  • Fermented Dairy: Why You Should Be Doing This Now
  • How to Make Homemade Yogurt that's Thick and Creamy

Filed Under: Cattle, Dairy Cow, Livestock

Signs To Watch For With An Expecting Cow

January 19, 2023 by Melissa Norris 31 Comments

There are many signs to watch for with an expecting cow. Though this is my first dairy cow, this isn't my first time around cows calving. In this video and blog post, I'll share the signs to watch for with an expecting cow (and some specifics to watch for in dairy cows).

A woman feeling a baby calf kick inside the mama cow.

As many of you know, we took on Clover in 2022 because some friends of ours had taken her on as a favor for another family who had to move out of town.

At the time, we thought Clover was between 8-10 years old. Dairy cows, especially if they've given birth before and have done well, can continue birthing until they're upwards of 20 years old.

As it turns out, we had a vet look at Clover's teeth when she was laboring, and he informed us that she was much older than we originally were told. Now, in hindsight, we would have never had Clover bred back if we knew how old she really was, but this homesteading life doesn't always come with 20/20 vision.

Why You Should Monitor Your Cow

The picture above is of my beautiful dairy cow Clover. She is due soon, and in this photo the baby had just kicked my hand.

Toward the end of a cow's pregnancy, it's important to watch them closely every day and almost every hour once labor is imminent to ensure they have all they need and to catch any dangers that might be looming.

Clover had a difficult pregnancy toward the end, and I'll share more about this in an upcoming podcast. If you're planning to breed your cows, or you already have an expectant cow, here are some signs and dangers to watch for when they are pregnant.

If you haven't yet purchased a milk cow, be sure to check out this post on the eight things to know when keeping a family milk cow.

A dairy cow laying down, eating hay.

Signs Your Cow is Ready to Give Birth

As the cow's due date nears, you'll want to keep a closer watch on them. If their due date is imminent, it's ideal to start checking your cow hourly to see how they are doing.

Here are some signs your cow is ready to give birth:

  • The cow is passing mucus and showing signs of dilation.
  • Your cow is laying down for more extended periods.
  • The cow has a harder time getting up from laying down.
  • Udder development, or sometimes even milk dripping from the teats.
  • Once labor begins you may also hear more vocalization from the cow.
  • Restlessness, sniffing the ground and licking the hind area.
  • Raised tail and softened and swollen vulva.

Be sure your cow has access to plenty of feed and water at all times. And, if you're a softy like me, you can spoil them with some goodies from the garden.

A cow eating Brussel sprout stems.

Dangers Expecting Cows Face

Cows can face multiple dangers during pregnancy, and it's important we're well aware of what to watch for to help keep both the cow and calf safe. If you watch them closely, keep their needs met, and have a great veterinarian on call, you can minimize these dangers quite a bit.

Pinched Nerves

If your cow is laying down for long periods of time or seems to be unable to get up, this could be a sign that the cow has a pinched nerve.

A cow laying down with their front legs propped under them may not be a cause for concern. However, a cow laying down prone needs attention.

As with most mammals in their final days of pregnancy, it could just be that your cow is tired and needs more of a rest, so they're laying down more often than usual. If you suspect a problem, such as nerve issues, you can attempt to help the cow move to a better position and relieve this issue by using a hip clamp.

A hip clamp attaches to the hindquarters of the cow, and you can use a tractor to help hoist them up to their feet.

What is Milk Fever

Milk fever is something only dairy cows are prone to, but it can be life-threatening if not caught immediately.

Milk fever happens when the cow's body creates milk so fast that it depletes calcium in its system. Milk fever is usually a danger seen right after birth. However, sometimes it occurs earlier. Cold ears and nose could be a sign of milk fever, which is a metabolic issue.

Each time you check on your cow, give a cursory check of its ears and nose. If they are warm, this is a good sign; if they are cold, this signifies a potential problem.

Also, watch the cow's front legs as they're standing. If they look wobbly at all, this can also be a sign of milk fever. Or, if your cow is putting its head against the wall of a stall, or a post or tree, this can also indicate weakness in the front legs.

You can supplement with calcium if you suspect milk fever, but do keep in mind that you'll also need to supplement with magnesium so their body can absorb the calcium. It usually takes an hour or so for the supplements to take effect. If you're unsure of how much to give, this is a good time to get a vet involved.

Typically speaking, the older the cow and the more milk they produce, the more at risk they are for milk fever.

A woman scratching her expecting dairy cow.

Preventing Milk Fever

Once a dairy cow has given birth (or at the first signs of labor), you will administer calcium and magnesium to them through either an oral drenching (which is a solution that you squirt down their throat, or a bolus (which is in paste form that the cow swallows, very similar to worming a horse).

You'll then administer this again 12 hours later.

In our experience with Clover, we weren't sure if she was experiencing milk fever, so we treated her preventatively with calcium and magnesium because this treatment won't hurt them, even if they were not experiencing milk fever.

Compartment Syndrome

If your cow is laying down for large portions of time (more than 12 to 18 hours), this may be cause for concern. When cows are down for too long, parts of their body start falling asleep.

This is called Compartment Syndrome. It occurs when the pressure reduces the blood flow to an unhealthy level needed to sustain tissue or cuts it off altogether.

If you suspect your cow is in danger of compartment syndrome, it's important to get them up and moving as soon as possible. Using a hip clamp or calling the vet may be your best option.

Ketosis

Though it's not very common, one thing that can happen to cows is after delivery, they can actually go into Ketosis. This isn't something that's common with grass-fed cows, but it may be a good idea to have a blood ketosis test on hand.

A dairy cow eating alfalfa pellets.

Azure Standard

Since we're talking about meeting your cow's needs during pregnancy, labor and post-delivery, Azure Standard, the sponsor of this video, offers many animal products in addition to their food and pantry products.

I use their organic alfalfa pellets because Clover loves them. But it also helps meet her nutritional needs while pregnant.

Since these pellets are certified organic, this means they are also non-GMO. I like to use this product instead of buying bales of alfalfa from the feed store because, when buying those bales, I am not sure they are non-GMO.

Right now, Azure Standard is offering you a great discount (for first-time customers only) of 10% off your first order of $50 or more with coupon code “Pioneering10”.

A woman standing outside a barn enclosure.

Prolonged Pregnancy & Inducing Labor

With Clover, we started getting very concerned with how much she was laying down, and we knew this wasn't healthy for her long-term. So we called the veterinarian and asked him to come out and induce Clover.

The vet gave her a combination of Dexamethasone and Prolactin, which work together to help induce a cow. He said, usually, within 24 hours of administering these drugs, there will be a calf on the ground.

Because Clover was still laying down, he recommended we get some hip clamps and try to help her get up on her feet to avoid compartmental syndrome.

Breech Delivery

Once Clover was finally in labor, we noticed that the hoof that was coming out wasn't a front hoof, but a back hoof. Upon inspection, we also noticed her calf was not only breech, but also upside down.

Knowing this made Clover's difficult end of pregnancy make much more sense. But now, we knew we were going to need to assist Clover to get her calf out.

She had a little bull calf who popped up on his feet immediately and was in great health. Clover also got up on her feet right away and began eating and drinking, and the calf began nursing.

A profile of a cow.

Clover's Story

This is where the story gets tough. To hear about what transpired the last few hours of Clover's life, listen to the podcast attached to this post.

Be forewarned that it's very emotional as this is still extremely raw, but sometimes I think that's what we need to know and understand. This homesteading life is tough and is filled with hard decisions.

But I wanted to share Clover's story in hopes that someone hears it one day and it helps them through a difficult situation.

Image of a baby bull calf nursing from a bottle.

More Tips

  • All cows in an enclosure need about a foot of head space around their head. This is so they have room to move around and get up from the laying position. Expecting cows especially need this because they rock back and forth a little further than normal to help get themselves up from laying down. Be sure your cow has adequate space to turn around as well (unless there is an entrance and exit on each side of the enclosure).
  • As I mentioned, you can use a hip clamp if cows are lying on their stomachs but cannot get up themselves. This is a large clamp with hooks placed onto the cow's hip and then hooked to a tractor. The tractor can then pull to help get the cow up.
  • Be sure your cow has plenty of water and food at all times. Pregnancy is very taxing on animals, so we want to make sure to keep their nutrition at optimum levels.
  • If you're still unsure if all is well, you can get bloodwork done and have a full metabolic panel run. We did this for Clover the day the vet came out to induce her and it gave us great peace of mind to know we weren't facing any underlying issues (such as milk fever or something else).
  • Always have colostrum on hand because you'll never know if you need it. You can buy it at the feed store, and it's just a good failsafe to have “just in case.” In our case, it turned out to be a great thing we had it to keep the bull calf healthy and strong.
  • Find connections with those who understand what you're going through. If you're looking for somewhere to do this, check out the info about the Modern Homesteading Conference below.
Speaker list of the modern homesteading conference.

Modern Homesteading Conference

The Modern Homesteading Conference is a two-day event held in the Pacific Northwest. There will be presentations and lectures from experienced homesteaders, with tracts for those new to homesteading as well as topics for those who have been on the path longer.

You'll bypass years of mistakes by learning from our expert speakers to create a productive homestead and find your kind of people all at the same place. If you’ve ever felt alone on this journey, you need to attend! Learn more about the Modern Homesteading Conference here.

Other Posts You May Enjoy

  • 101 Everything You Need To Know – Dairy Cows
  • Your Livestock Questions Answered
  • Fermented Dairy
  • Planning Our Farmstead Homestead

Transcript
Email Download New Tab

Hey, Pioneers. Welcome to episode number 374. Today's podcast I am going to be sharing with you the rest of Clover's birth story. And in hope that you will one, be able to glean information from this post to assist you with your own milk cow, or in your future endeavors if a milk cow is something that you ever plan on bringing into the homestead. Honestly, it's the things that I wish I had known about having a milk cow. And the difference between the milk cow and our beef cattle, specifically talking about their health needs and especially surrounding their births. Because they are vastly different in a lot of ways that having been raised on a cattle farm.

And having a herd of beef cattle of our own for 20 years, my husband and I, I was not prepared for the very vast differences between the dairy cow versus the beef cow. So, I want to share all of that with you, and I also want to share with you the realities of this homestead life. Even somebody who is raised as a homesteader, I'm a fifth generation homesteader, third generation cattle keeper, farmer, there's still hard times and there's still times when things go honestly drastically the opposite of what you would want.

And I just think that people need to know that side of homesteading too, so that we're painting a realistic picture and one that you don't feel like a failure. Because if you homestead long enough with livestock, I can guarantee that at some point you are going to face a situation like this, not necessarily maybe with a cow in birth, but if you have livestock, you are going to face times when they are going to require medical help. And even though you have done everything right, they may still die. And I just think it's something that we need to have a really honest conversation about. And I tried to record this podcast episode quite honestly for you earlier. And I am just going to be really honest. This is going to be a hard podcast for me to record because I still have a hard time talking about this without crying.

So, if you have caught any of my earlier episodes in regards to our milk cow journey, I talked in episode number 372, which was our part four of the Q&A and episode 370, which was livestock questions answered. I talked about our milk cow, Clover, and I've got even some previous episodes back when we first got Clover as well. In the blog post that accompanies today's episode, I'll have links to all of that if you want to go back and listen to that part of the story. And to access that, you'll go to melissaknorris.com/374, that's just the number 374, melissaknorris.com/374, because this is episode number 374. And we'll also have a link to the YouTube video that I did with Clover, and that was a video that we shot when she was beginning to go into labor and that video was taken three days before Clover actually died.

I'm not going to talk a whole lot about that because I want to get into the other parts, the rest of her story. And I'm going to try to do it without having to stop and pause and cry so that I can actually get it out. So, thank you for just bearing with me through this episode. First off, just a little bit of a encapsulation in case you haven't seen that video that I'm referencing, an article that has been up on the website that you can go and check out that went live this Wednesday if you're listening to this episode when it releases on Friday. But Clover had, the last two weeks of her pregnancy she had been struggling. She would lay down, and of course, when you are largely pregnant, it's normal that they will lay down. But she would lay down, and we had a couple of episodes where she was down for 24 hours and then she would get back up and she would be up for a couple of days and then she would go back down and we kind of just felt like, "Hey, she's just preparing. She's getting ready to go into labor. She was an older cow, so this is just her normal."

I had been in contact with our vet when she went down. We had had some different conversations and they had been coaching me through with Clover particularly, things to do. So, we were very much in contact with our vet and making sure we were doing the very best for Clover based upon what her symptoms were and what was going on, what was presenting itself. She went down again on a Monday, but she was showing a lot of signs of actually going into labor. Her vulva was very swollen and showing signs of dilation. She had a lot of mucus coming out, which all of these are signs that she would have been going into labor. And when a cow births, at least most of ours, they do so, like they're laying down.

So, she had been laying down and I kept going out thinking I'm going to see her in active labor any time now, because of the signs that she was presenting. Well, we went into day two and she had been down and had not gotten up. She was alert, she was up on her sternum, meaning she was upright, not laying down prone, and she was eating food, she was drinking, she was doing really well. I was checking her ears and her nose because with dairy cows, this is where the difference between a dairy cow and a beef cow when they begin to go into labor and have their babies where everything just gets really different. Dairy cows, when they have their babies, they start producing a ton of, well, first is colostrum, but then they bag up and they produce a lot of milk. But because they've not been producing milk the last at least two months of pregnancy, and Clover actually we dried her up when she was five months along, which meant the last four months she wasn't producing any milk.

When they begin to bag up and their body goes back into producing a large amount of milk, they get something that we call milk fever. And that is where the calcium in their body all goes to creating that milk and it depletes their body of their calcium levels, and it can deplete it to such a degree that they can actually die from it. It's a very serious thing. Some of the ways that you can notice that this is happening is if their nose and their ears are cold, that is a sign. If their front legs start to get really wobbly or they kind of are staggering. Sometimes that when they're standing in a stall, they'll push their head against the wall or a post or something like that. All of those can be varying signs that they are beginning to experience calcium depletion and you need to give them calcium.

Now, in addition to just giving them extra calcium, they need to have enough magnesium on board so that they can actually absorb the calcium. Because if their magnesium levels are low at the same time the calcium levels are low, you can give them all the calcium you want, but they're not going to be able to absorb it and then it's not going to do any good. So that's kind of just like the skinny on milk fever. And it's very common with dairy cows, especially high production dairy cows, meaning they produce a lot of milk. And Clover was half Jersey, half Holstein. And she was a very large producer when at once-a-day milking, which you can go and listen to that story. When we got her, she was already at once-a-day milking and she produced almost four gallons of milk at a once-a-day milking at five months into her lactation, meaning it had been five months since she had birthed the calf. And at once-a-day milking she was giving us almost four gallons of milk a day, which is really high production.

We knew that she would be at risk for milk fever, and usually the older the cow is the higher their risk level for milk fever. So again, nothing we have ever worried about. With our beef cattle, that's not something that's very, I've never even heard of it with beef cattle. I didn't even know what milk fever was until I started looking into dairy cows and started hearing people talk about milk fever. I'm like, "What is milk fever?" That's what it is.

Typically what you will do with a cow, a dairy cow is as soon as they give birth you are going to give them an oral drenching, which is liquid form that you just basically put down the back of their throat and they swallow. And that will be a mixture of calcium. It can either be straight calcium or it can be calcium that has some magnesium and potassium in it to help with better absorption, if those other levels are low. You can also do it in bolus form. So this is something that you'll get, they call it a baller gun, you're not shooting them. If you've ever wormed a horse, it's very similar to that. You basically have this big, hard paste that goes in a gun that allows you to position it on the back of their tongue so that they don't spit it out and you put it down their throat and then you hold their nose up in the air so that they're forced to swallow it.

When you're doing oral calcium, you really can't overdose a cow. If you're doing it in the vein, which usually only vets do, you can. And if they get too much calcium, then you actually can stop their heart and you can kill them that way, but not in oral. So just preface it there. But there's two different ways to give it orally, and that is in a liquid form with drenching, or in a paste form or a bolus, excuse me, form that you're putting down the back of their throat. Still ends up in the stomach. And you do that at birth of the calf. You can even do it 24 hours beforehand to get some of that higher levels of calcium on hand. But most people will do it at least at birth and then 12 hours later. Because they can need more than just that one dose. And it's usually depleted within 12 hours or been absorbed. And so you do it again at 12 hours. That's kind of standard dairy cow practice for when they give birth and making sure that you're just on top of trying to eliminate anything like milk fever.

Now, in very rare instances they could develop milk fever before birth, but it's very, very rare. That was actually, when Clover kept going down and then getting back up, that was what we were monitoring and talking it to our vet about like, "Could this be milk fever?" And she didn't really exhibit any of those signs that I mentioned, cold ears, cold nose, et cetera. But we did give her a dose of the calcium, just to be on the safe side, and it didn't really seem to affect anything one way or the other when she was kind of having those issues. So we were pretty sure that that wasn't it, but it's not going to hurt anything to give him that one dose of the calcium, just in case that it wasn't, before she had the baby.

So by that, the third morning when she still had not delivered the baby but had been down with all the sides of being in labor but not actually birthing the calf, I could feel the calf. And you can actually see that on the video. It was really fun. We were filming and I was examining her and the calf kicked my hand and it was a really fun moment. But I called the vet because I'm like, "Hey, this is how long she's been down. These are the symptoms, but she's not actually producing an in hard labor. She's not contracting hard. I can't feel the uterus contracting. I need you to come out and induce her." So vet came out, got here at 3:30 in the afternoon on Wednesday, and we did dexamethasone and prolaxan. So dexamethasone is a steroid and it's an anti-inflammatory. And then the pro relaxant, those two work together to get her into labor. So that's how you induce a cow.

And he said, "Usually within giving them the dose of this, you'll have a calf on the ground in 24 hours." So he said, "Because she's been down for a couple of days, I really want to see her on her feet because she probably won't calf until tomorrow. Do you know anybody that has a hip clamp?" We had tried to get Clover up when she had went down with using some straps and our tractor. But we weren't able to get her up because we could only get the straps under her front legs and chest area. It's dangerous when you're trying to lift a cow with straps when they're really largely pregnant and with their utter already starting to fill up with milk to get between their utter and their hind legs. And she was just in a position that we weren't able to do that with a tractor in order to lift her up.

Hip clamps go on the outside of the cow and they basically hook underneath those hip bones on the outside, it's a clamp, and then you tighten it down and you hook it to a tractor and you just help them lift up their back end. Because normally they can lift their front end, but they just need extra help on that back end. So, you are just helping them to their feet. And then as soon as they're standing, you remove the hip clamps and that's what you do. Because if a cow is down for too long, they can develop compartmental syndrome and that's where blood flow has been caught off from certain areas for too long. It falls asleep. If it's been asleep for too long, you can have tissue damage, so on and so forth. So it's really not good for the cow to be down.

However, in the position that Clover was down, because she was up on her sternum and everything like ... And if a cow's going to be down, she was in the best position to be down in, I guess is where I'm going with that. When the vet was here inducer, we also did some blood work and had him do a full metabolic panel just to make sure that we weren't missing anything. He went back and said, "I'll call you with her metabolic results and the lab results within a couple of hours." Takes our vet an hour to get back to their office because we're so far out. "I'm going to run all of this as soon as I get back and I'm going to call and let you know where the results are." I said, "Okay, great, that sounds phenomenal."

I was able to contact a local dairy that actually just came into our area and got licensed as a raw milk dairy and they lived about 20 minutes from us in September. I was thrilled to find out that there was another raw milk dairy and that she had a hip clamp. I actually reached out to all of our other ranching and farmer cattle friends in the area, and none of them have that. And mainly because beef cattle just don't go down like that very often. Not to say they don't ever go down, but you don't usually need hip clamps that much for a beef operation. But it's more common with dairy cows. Dairy cows are just way more fragile, just truth, they're much more fragile than the beef cattle.

One of the other things that we had when the vet came is I told him, "I don't actually know how old she is. When we first said that we were going to take Clover, the people that we got her from had only had her for a few months themselves." So she had kind of went from a situation where her owners had to leave the state very unexpectedly and they ended up taking her on as a kind of in an emergency situation. They'd only had her for a few months and they weren't in a position where they needed or wanted to keep a milk cow.

When we were getting her, like I said, they had gotten her rather quickly, and so they had very limited data on her as well. I said, "How old is she?" And they said, "Well, I think she's eight." I'm like, "Okay." And then when we went to pick her up and actually get her with the horse trailer, they said, "Well, we think she's 10." I'm like, "I don't know how old she was." You could tell that she was older. But we got her and got her on a minerals and supplements and really good feed, and she looked really great, look phenomenal. I figured that this would probably be her last calf, that we would just have breed her. She would have this calf, we would milk her through this lactation and then we would end up retiring her. And I was really hopeful that the calf that she had would be a heifer, a girl, so that our next milk calf would be Clover's and we'd be able to raise it from a baby and all of that.

Well, when the vet came, you can't look at a cow's teeth and know their exact age like you can with a horse, but you can look at their teeth and get a pretty good idea. And so I told him, "We don't really know how old she is. We were told that maybe around 10." So he looked at her teeth and he's like, "This cow was far from 10." So we don't actually know how old Clover was, but she was much older than 10. And I'm saying this because had I known how much harder birthing is on dairy cattle, we would have never bred her at that age. Now a lot of family milk cows people say up to 20 years if they've been taken care of and not pushed to mass production like you would see in a regular, large conventional dairy, that they can breed and have calves on and still be milking up to 20 years of age.

And I've seen that with our beef cattle. My dad has had some older cows that still produced really good calves. It wasn't hard on them and they were having babies up to 20 years of age. However, I would not breed a milk cow that old and we would not have had Clover bred back if we had known her true age. That's kind of less than number one is I would not get a milk cow that was really old, unless I knew we were only going to milk her through that milking. And when she dried up that that was going to be it. I wouldn't take the risk and the chance having went through what we've just went through.

The other thing is, our beef cattle have had calves in winter, went through pregnancy and winter. Now, ideally your cows are calving in spring and or summer so that the calves are established. It's not super hard weather on them, super cold, because baby calves can get pneumonia if it's really bad weather. And in the dead of winter it is harder on all animals. They're using more of their energy in order to stay warm than they would obviously in the spring and in the summer.

But that being said, we have definitely had our beef cattle and we run a Hereford Angus mix, a little bit of [inaudible 00:19:22]. My dad had full heifers, a little bit of Red Angus. So we've had some different beef cattle breeds and they have all been fine being pregnant through winter and even birthing in winter months. So we try to have the majority of them bread so that they are not calving in the middle of winter. That being said, if I would have realized the difference on a dairy cow and the way that they calved and their health, not only would we not have bred her back, but if we had chosen to have her bred back, we would have waited and have her bred in the summer so that she would have calved at the end of spring.

Nine months gestation is a cow's pregnancy, so we probably would've had her bread in July or August so that she would have been having the calf as you move into summer when there was a lot of fresh green grass coming on, no bad weather, et cetera. That was not the way that this went down. The vet called me back and I called my friend who had hip clamps and she said, "We'll come up at about 5:30 after I get done with milking here. And I'll bring the hip clamps, we'll show you how to put them on," because we never used them before. "And we'll get her up and we'll leave the hip clamps with you because you might have to use them a few times until she has the calf." And I'm like, "Okay, great. That will be phenomenal."

I went in the house to cook dinner and the vet called me and said, "Hey, we got the metabolic panel back on her. All of her levels are great, except she's a little bit low in potassium, but none of that is the cause of why she's down. So we're not dealing with milk fever or some other metabolic issue." And I'm like, "Okay, great. That is relief. Good to know. Fantastic." My friend comes, it's like probably about six o'clock in the evening, and it's dark at that time here where we live now, and with the hip clamps. And so we all put on our headlamps and go out into the field and my husband fired up the tractor so we had the headlights from the tractor. And we go out because we're just going to lift her up thinking she's not going to be into full labor until the next day. And when we get out there, there is a hoof coming out, girlfriend is in full on labor.

I'm like, "Oh wow, that was fast." Even the vet missed that she was actually that far into labor. She's been laboring all day today. We look and upon further inspection that hoof and back leg that's out, it's a hind leg, which means baby is breach and that's not a good thing. And then as we reach in to feel the leg, we also discovered not only is the calf breach, it's also upside down, which explains why poor Clover was in labor for so long and also why she was having so many issues because of the position that the baby was in, breach and upside down. Thankfully my friend was here because we had to help Clover and we had to pull the calf.

Now, our 20 plus years of beef cattle and my husband and I, we have never had to pull a calf. Our beef cattle have always delivered the calves fine, we've never had to pull. My dad had a much larger herd when I was growing up. My dad had a herd of about 130 head of cattle. My husband Clay and I, we run with our acreage, well before we got the farm down the road, which will now be able to increase our herd size. But prior to that, we keep three cows that are calving every year, but that makes our herd size about nine because we're butchering two to three a year and then you're keeping the babies until they're two, and then you're breeding back the moms. So the math, over 20 years, that amount of cows, we've never had a pulling. My dad when I was little because he had such a larger herd. Every now and then we would have to pull one, which I watched, but I had never actually done before.

I've seen the process, I've been there, understand what it entails, but I was a kid, and so my dad was pulling the calf and I would sometimes have to help but not fully doing it myself. Just so that you know, how often do you actually have to assist and pull a calf and breeds? That's been our experience. But having to assist dairy cows, they have more narrow hips. It's just their confirmation. You normally have to assist a dairy cow much more often than you do beef cattle. We got the baby out and a little bull calf. It wasn't my heifer that I was hoping for, but he was in phenomenal shape, which is not always the case with a breach, been in labor that long and upside down.

So he was fine, got him up on his feet almost immediately. And then we used the hip clamps and we got Clover up. And once she was up baby nursed. I was able to milk out some of the colostrum and then put it in a bottle for the baby. And she went over and ate. She walked over, drank water. I mean, she was up on her feet and I'm like, "Hallelujah. She just needed to get this calf out. All is fine." We ended up drenching her with the calcium, magnesium and potassium liquid, because one, she didn't show low on her metabolic panel when they had done the lab a couple hours earlier, but as more milk came in, she could begin to deplete her calcium. But we also knew she was low on potassium, so we wanted to give the drench just to be on the safe site. So we drenched her with that. And like I said, everybody was up. Baby had nursed, she was walking around eating. Everything looked great, and I was so happy.

And so we went in, I checked on her again that night before we went to bed. It was like nine o'clock at night, 9:30. Everybody was still up. Baby was with her right at her side. All was good. And so the next morning I still was kind of nervous. I'm like, "Okay, I'm going to have to give her another calcium bolus in the morning. I want to make sure it's 12 hours apart." And so I went out, it was six o'clock in the morning, still dark, full dark here at that time, had my head lamp on, went out, baby was by mom, but Clover was down again. She was laying down and I'm like, "She can't get up again." I didn't know at what time in the middle of the night she had went back down. And so I made a bottle of colostrum we had on hand for the baby, which I always recommend, regardless, because you just never know.

Have some colostrum on hand. You can buy it at the feed store. If you have cows and they're going to calve, regardless if they're beef for dairy, have a bottle and a bag of colostrum on hand. So, fed that to the baby to make sure that he got what he needed. And then my husband had already left for work and I wasn't sure that I could put the hip clamps on and operate the tractor to lift her all by myself with the way that she was positioned where our feeder was. And she'd gotten herself next to a large stump. I called my friend who had the dairy and said, "Hey, here's what happened. Can you come up and help me get Clover back on her feet?" And she's like, "Absolutely, I'm milking. We'll be there in a couple hours." I'm like, "Okay, that should be fine."

And also, Clover had passed her placenta, which is another thing you want to make sure, she had passed the placenta. So I know that she had gotten that out, so we weren't dealing with any issues there. I went and got her some, made sure she had water, brought her water because she couldn't get up, brought her feed, checked all the things, and she was doing good. She was upright on her sternum, calling the baby if he got too far away. I'm like, "Okay, we're going to get her up in a couple hours. It's all going to be okay." I came back in the house and was kind of getting things ready. And I looked out the window and Clover had went from laying up on her sternum to being laying prone flat on her side. And I called my husband in a panic and I was sobbing.

And I said, "She's laying down flat, something's really going wrong. She's taking a turn for the worst." And he's like, "It's okay. It's okay." And my friend's name is Aspen from Peachy Keen Farms. "She's on her way, it's going to be okay." And I'm like, "Okay." And I just got this, I don't even know how to explain it. If you've ever had animals, maybe this would make sense. But I was just like, "You are not going down, Clover. You still have fight in you. No, no, I'm not accepting this." And so I went in the house because Clover girl after my own heart man, she is ruled by her stomach. And I got some of the alfalfa pellets because she loves those. And I took our black strap molasses that I also get from Asher Standard along with the alfalfa pellets. And I put them in a tub and I just drizzled the molasses all over those alfalfa pellets and went out there, put it in front of her so that she could smell it.

And I could see she was smelling it and she kind of reached her nose a little bit further to it. I'm like, "Okay, she's got a desire here." And so it was like that supernatural strength that you read about when moms lift things up off their kids or their babies. And I got underneath her neck and her head and her front shoulder in a squat, and I just pushed her up onto her sternum. I'm like, "You are not laying down like this, no." And she, with my help doing that, she was able to get up on her sternum so that she was still laying down but upright, right and could get on her knees. And that beautiful cow just started going to town on that alfalfa molasses. And I'm like, "Okay, you're eating."

She started drinking water and I'm like, "Okay, it's going to be okay. She just exhausted herself trying to get up on her own." My friend got there shortly after that with the hip clamps and we put the hip clamps on and tried to get her up, but she wasn't able to stand. And you can't leave them in the hip clamps. It's not like a sling. They're used to aid to get them up on their feet, but as soon as they're on their feet you need to take those hip clamps off. So, she couldn't stand fully on her own with the hip clamps so we could get her up. But she couldn't stay standing, so we put her right back down, because we didn't want to stress her system that way.

And my friend had brought a blood ketosis kit because that's something else dairy cows can get is they can go into ketosis. Which would be very odd for Clover because we are not a grain ... She doesn't get fed. None of our cows do. We don't feed a lot of grain. They're not like on corn silage, they are grass fed, but you just never know, like we should check. We checked her for ketosis. She did not have ketosis. We gave her another calcium, magnesium, potassium bolus just to be on the safe side. And she ate all of the alfalfa pellets with the molasses, drank a bunch of water, and we just kind of kept massaging her legs and anything that we could reach just to try to keep blood flow and stimulate her, brought the calf over to her. She was calling for him and we're like, "Okay, let's try and lift her again."

We tried to lift her again and it worked. She got on her feet, baby was able to nurse again. I was able to milk a little bit out of her other quarters, and then we put that in a bottle and fed it to the baby because at this point I'm starting to get worried about mastitis. Because when she was laying down, there was no way the calf could reach any of her nipples and she wasn't getting milked out all the way. He wasn't able to nurse. And so I was also worried about mastitis because she has had mastitis in the past. So I was really relieved. I'm like, "Okay, she's back up on her feet." And so my friend said, "I'm just going to leave the hip clamps here. You may over the next few days, just anytime she lays down, you're just going to have to use the hip clamps to get her up till she can build back her strength, fully get ... There could have been some pinched nerves, some damage done with the way the baby was in breach. So just kind of expect this, expect her to go down and that you're going to have to get her back up and it's just going to be a process for the next few days."

I'm like, "Okay, no problem." I decided I needed to go and get some more, just in case she was down and couldn't get her up, I needed to get some more colostrum for the baby. Because for the first 24 hours, ideally they get two gallons of colostrum. And he had only gotten, from what I could tell, that I'd milked out and put in the bottle and he couldn't have gotten a whole lot more When he was nursing, he'd only gotten from Clover a quart, and then he'd had half a gallon of the colostrum. And so I'm like, I got to go get more colostrum and some supplies. So she was up on her feet again, walking all the way across the field to the feeder, to the water. I'm like, "It's all good, we're good." I ran to town, which took me about an hour and a half, and by the time I got back home, she was down again.

And so I'm like, "This is okay. I know how to do this." I put the hip clamps on by myself with the tractor, got her back up on her feet, and I'm like, "This is just what we're going to do. I'm just going to have to keep getting her up and it's going to be okay." And so that time I got her up on her feet and that was the last time I could get her up. I got her on her feet and she started walking, but I could tell that she wasn't walking normal. And her front feet literally just went out from underneath her. It wasn't that she tripped, it wasn't that she was trying to lay down. They literally weren't working. And so she went down and that's when I realized then, there's something more serious wrong here. This is not just her being weak, literally her legs aren't working and it's not milk fever, which can be a sign, she's had all of the doses and everything.

We've done metabolic panels. That's not what's going on here. There's something else wrong. And so I couldn't get her up and I called the vet and he said, "Just give her some time, give her some more food, let her rest. And every four hours, I want you to try to get her up with the hip clamps. Give her time in between but try to keep getting her up." I'm like, "Okay, no problem." This was late afternoon again. And so all the way up and through the night we would go out even once my husband got home and we just kept trying to lift her, giving her all the food, giving her molasses in the water, just everything that we could. And we were not ever able to get her back up. In fact, every time we would go to lift her, she was doing less and less, less. Just by the end she was just hanging. There was no strength left. And so after 24 hours of that, I called the vet and I'm like, "You need to come out. It's getting worse."

And so they were in surgery that day and they couldn't get out until later. And so they said, "We'll be out as soon as we're out, done with surgery, we'll be out your way." I'm like, "Okay." And so I just kept going out there and she stopped calling to the baby. And I knew once she stopped calling to him, because all prior to that she would just call him. Anytime he got away from her, she would call him back. She was a good mama. And then the vet came and he came out and assessed her. And we went over all of her history, all of the lab work that we had done. And he said that they'd actually been in consultation with some of the other vets because what her body condition looked like, she was thin, but she had went thin, gotten really thin in a week's time, drastically. If I hadn't have known what she was a week prior to her giving birth, her body conditioning score, I wouldn't have thought it was the same cow.

And I had been feeding her, she had been eating, and the vet said by her metabolic panel, he's like, "With all of her levels, they were spot on. They were exactly where they should be and she wasn't showing" ... They can look at ... Your body and a animal's body, if they don't have enough nutrition, you start to consume muscle. If there's not enough nutrition, your body will break down muscle to feed itself. And so you can measure that in the bloodstream. And he said, "With as skinny as she is, we should have seen massive metabolization of her muscles. And that's not happening on her blood panel. And all of her levels are really good." He said, "I honestly think that she might have cancer because her body condition and everything that's happening to her is not matching. I can see her feed, I see your other cattle, I can see what's happening in her blood panels and it doesn't match." And he said, "You have done everything that you could. There's nothing I can suggest to you that you haven't done and that we haven't done. You have done everything."

And we were talking, and Clover just laid her head over on her side, curled into a ball. And I just knew she was done. And I knew that I was trying everything to keep her there for my heart, but she was ready to go. And so the vet put her to sleep. And we buried her in our back pasture. And I've had some responses, because I've been sharing this in my email newsletter and on social media a little bit. So have you have been following me along there, thank you to everybody for your kind words and just your thoughts. The outpouring from the community, and part of me feels silly. I know I'm literally sobbing in your ear right now over a milk cow.

But there's a bond that you have with a milk cow that I've never been able to have with beef cattle. Because I've always known from the time I was a little girl that we were raising them for meat. And you don't become attached. It doesn't mean that you don't care about them. I am still sad on butcher day. When it's butcher day and we're butchering our beef, even though that's what they're raised for and I know it, and it's been my entire life. I'm 42 years old and I've always been a part of the process. I am grateful for it. But it doesn't mean you're like, butcher day is not joyous.

And the longer I do this, I sometimes feel like the emotional part gets harder. And I think a lot of times people think that as farmers and ranchers and even homesteaders that, you're just callous and hardhearted. But this is hard. But I allowed myself to bond with Clover because she was my milk cow. I mean, you're intimately involved with a milk cow. I mean, you're squeezing their udders every single day. I mean, you're touching them, you're talking them, you're with them. It's a completely different experience than beef cattle or anything I've had with our pigs and chickens and all the other types of livestock. And I thought that we had a lot more years with Clover and no, you don't ever know with livestock. But I didn't realize that she was that old. And so I envisioned like eight years with her or so because I thought she was eight when we said we were going to take her and thought average lifespan at least another eight years.

But I had said so if you listen to that episode back that my husband and I had said that Clover, when she was done being a milk cow, that she would retire on the farm, meaning we would keep her until she passed away. We were not going to butcher her for hamburger or something like that, which is what some people do with their milk cow. So there was no judgment there, but we just knew Clover, specifically that was our plan for her. I just didn't think that we would be burying her that soon.

But I did get a comment and I wanted to address it on here though. I don't know that the person who left the comment listens to the podcast or not, but they wanted to know why we didn't butcher Clover and why we let her go to waste. And I would like to think that they were well-intentioned, that they didn't mean to be what felt like cruel. And one of the reasons is when our butchers here, and I know a lot of you are experiencing this, there's a shortage of butchers across the whole U.S. anyhow. And our butchers are two to three years out. We have our butcher appointment on the calendar with our local butchers for two years from now, and they're starting to book up three years out. I couldn't just call the butcher and say, "Hey, I need you to come butcher this cow today." There is no way that they could fit us in.

Secondly, we don't need any more beef. Our freezers, because we have harvested our beef for the year, are full. I literally don't have any spot for beef. Second, I don't know that I could have eaten her, even if all of those other things played out that there was a butcher and that I had the space for the meat. Because I had allowed myself to attach to her in that way.

Does that make me a poor homesteader, a poor farmer? I don't know. I'm all for being practical. And I know that some people do butcher their milk cows and eat them. And I don't have a problem with that. And they are using that animal full circle. And I think that is fine just for me in my emotional state, I don't know because I didn't need to eat her. We had plenty of our other meat. And in order to butcher one, it was dark and I don't have a space to do that. And I wasn't going to do it in the dark. We're not set up for it. I don't have any of the things. We don't have, temperatures fluctuate here. So there would be no aging of the meat. I don't have a grinder, a big grinder like that. I don't have anywhere to butcher a cow.

My kitchen's not big enough. I mean, cows are big. And I just was not in an emotional spot after we had been nursing her ... At that point it had been in a week. And for the past almost two days, I had been trying to get her up every four hours. I was exhausted emotionally and physically. And it was just not something that we wanted to do to be honest. And then the other reason is after talking to the vet, not knowing if she had cancer, he's like, "I really think that there's something else at play here because none of this is adding up. I think that there's something we don't know about, either cancer or some type of internal damage that we're just not able to assess." And so I'm not going to consume an animal that I don't know what's wrong with them. Like that to me just seems kind of foolish when we didn't need the meat. It wasn't a dire situation where we were hungry. Those are the reasons that we chose to bury Clover on our property and not harvest her for the meat.

And I wanted to share all this because I know a lot of you have been invested in this story. And I wanted to share the full circle what had happened. And also for anybody else who may be like I was and didn't quite realize all of those things. If you're looking at a cow to get as a milk cow or you have a milk cow, I wish I had known all of the things about when to breed her, when not to breed her, to expect just all of the things that I laid out here. I wish I had known those sooner. I hope that that helps someone not go through what we did. But also to know, even if you do everything right, which I mean the vet said we did everything, but it didn't feel like it shouldn't make it.

That you're going to have hard times when you're homesteading and in life in general. But to walk it anyways. To walk it anyways, because it is worth it. This way of life and the hard times, there's been so much good that's come out of it. We became really good friends with Aspen who has the Peachy Keen farms that I was telling you about, the raw dairy. And if I did not had to reach out for hip clamps, I mean maybe I would have met her later, I hope so, but I don't know. I may have helped some of you. And Clover, we only had her a short time. I didn't even have her a full year. But what was amazing is once we got her, there were people on our road who've lived here for 20 years. I've lived here my entire life. And I knew who they were in passing. I knew their name and what house they lived in because we're really rural and small, but I didn't know them.

And once they found out we had a milk cow, they came down, introduced their selves, and we started talking and we became friends. And with multiple people, not just one. And so I know that she had a lot of reasons for us having her, even though it was a short time. That there was a lot of good, and I don't regret it. I do wish we got her sooner. I wish I had had more time. But I also want to share with you that dealing with this, and obviously I'm still dealing with it, believe it or not, I'm actually doing a lot better than I was. But I have reached out to some of my now very real close friends in real life. Most of them don't live here near me. But I've been able to reach out to them because we have become friends in the homesteading online community. And that's transferred to real life friends.

And it's really drawn hope to, and I already knew it, but more so the importance of community. We need people. You need people, and you need people who understand homesteading and understand this life and understand this walk. Because most people would not understand why on earth I am so upset about losing a cow. And being able to rely on the people who knew. I mean, honest to goodness, I called Anne of all trades who's been on the podcast and you've heard me talk about before. And just literally sat on the phone with her and cried. And that's the people we need. We need to be able to work through it. Like her and I even talked out the whole week leading up to it because I kept thinking I missed something. Like surely I missed something. Like there was something I could have did that I didn't do. And we walked through the whole thing and she's like, you didn't miss anything.

But you need people that have that knowledge and that understand, and that can stand by you when it's hard. I encourage you to reach out to people in the homesteading community. And if you're able to go to an in-person homesteading event, I highly encourage you to do so. Because I've been able to forge those deeper relationships with other homesteaders. We first met online, but I was able to meet them in person and to take it to the next level. And those were the people that I reached out to, obviously, aside from my husband and the kids, but those were the people that I reached out to during this time. And it just really cemented for me how important community and relationships are. So if you are in the West area, and I mean like west of the Rockies, and even if you're not, no matter where you're at, I just would invite you to get a ticket and come to the Modern Homesteading conference in Idaho this summer.

It's June 30th and July 1st. Many of those people, [inaudible 00:49:59] trades, Katie Milhorn, she is the co-founder with me in Orange Milhorn Farms. I mean, I was on the phone with Katie sending her pictures and minute by minute updates and asking her for advice. But these people are going to be there. And it's not just the speakers and presenters because there's obviously a lot to learn about this way of life, and I learned from them too. But it's finding other people who are walking this path and could come alongside you and help you when you need it, but also so that you can be there to help them when they need it. Because we really do need that. And that can be an amazing place to find those people and to be able to forge those relationships along with the knowledge. So you can find out more about the event at modernhomesetting.com.

And I just want to thank you. Thank you for being here. So many of you sent such wonderful prayers and words of encouragement, and I couldn't respond back to every person individually, but I read every comment. And I read every email that came through. So thank you for that. I want you to know that it meant a lot, and I promise the next episodes will be more uplifting. But thank you if you've listened this far. Blessings and mason jars for now.

Scroll back to top

Sign up to receive email updates

Enter your name and email address below and I'll send you periodic updates about the podcast.

powered by

Filed Under: Cattle, Dairy Cow, Homestead-Life, Livestock, Raising Your Own Food

Gardening in January (Garden Tasks by Month)

January 10, 2023 by Melissa Norris 12 Comments

Fresh vegetables from the garden in the middle of January? Sound too good to be true? We've had snow and single-digit temperatures, but I'm still harvesting some crops without a greenhouse, row cover, or even hoop house! If that's not something to get excited about, I don't know what it is.

A woman harvesting Brussel sprouts in a winter garden.

Remember back in the fall when we protected the potatoes and carrots with a heavy layer of mulch? Those vegetables have been waiting comfortably in the ground for me to come through and harvest them as I need them!

Sometimes a little planning goes a long way in maintaining the garden well into the winter months so that it continues to provide for your family.

My monthly gardening feature shows you all I do in my garden month-by-month! If you've missed any of the previous months, you can check them out below.

We're still in some of the coldest months of the year (with more cold temps in our future) here in the Pacific Northwest, so it's not quite time to be starting our seeds indoors.

Now is the time to be getting those seeds ordered for this year (or to top off next year's supply, if you're like me).

But one of my favorite things about this time of year is that I'm still harvesting root crops from the garden that have been “root cellaring” since fall.

A colander with Brussel sprouts and carrots harvested from the garden.

Tasks for the Garden in January

  • If you planted Brussels sprouts back in May as I did, you may be enjoying them fresh even now! Unfortunately, the variety I planted didn't grow as large as I typically like, I think it had to do with the cold spring, so they're a bit on the small side. But I can still harvest quite a lot of them, and the rest will go to the cows! Even though we had multiple days in single-digit temperatures, we did have snow before the real cold came, so it acted like an insulator for the Brussels sprouts nicely. I love to harvest them and then roast them with bacon.
  • Next, I harvested some of my carrots. I should have put more straw over them, as much of it washed away with the fall rain. But we're always learning, right? Next year I'll remember I need to add a thicker layer of straw to avoid carrots being frozen. Well-insulated carrots also pull up much easier. As long as your carrots didn't freeze, they're perfectly good to eat. Pro Tip: you can feed cows and chickens the frozen carrots you can't eat.
  • Now is the perfect time to plan for what you will be planting soon. I have a seed-starting guide that will give you great instructions and ideas depending on what you want to grow this season. I also have a free worksheet for how much to plant per person.

Gardening Tasks by Month

  • March
  • April
  • May
  • June
  • July
  • August
  • September
  • October
  • November
The book, The Family Garden Plan on a wooden table.

More Posts You May Enjoy

  • The Family Garden Plan
  • The Family Garden Planner
  • Biggest Gardening Planning Mistakes
  • Ultimate Seed Starting Guide
  • Planning and Preserving Q & A With Melissa

Filed Under: Gardening, Gardening by Month, Raising Your Own Food, Vegetables

Proper Canning Headspace (Is it Important?)

January 3, 2023 by Melissa Norris 2 Comments

What's the best thing to do when you're canning and realize you don't have enough product to fill the last jar? Here are my solutions to make sure you end up with a safe home-canned product that will be safe for you and your family.

three canned jars, two of green beans and one of cherries, and an empty jar lying on its side and a canning lid on a white surface

Home canning is a very simple and straightforward process, but there are definitely some rules you need to follow. You can read my post on whether or not the USDA canning safety rules really need to be followed here and how to know if a canning recipe is safe here.

You may have also wondered what causes canning lids to buckle (and how to avoid it), what causes siphoning in jars, or maybe you're looking for a complete guide to home food preservation and what to do if you can't find canning supplies.

No matter where you are in your canning journey, be sure to bookmark these 129+ canning recipes and then go order my brand new book, Everything Worth Preserving, which is 400+ pages of preserving recipes and how to preserve everything from the garden in an easy to follow A-Z book.

Everything Worth Preserving Book Cover.

Why I Love This Process

Canning does take work, but it's great to have fresh tomato sauce and jars of excellent home-canned food in your pantry or cellar to use whenever you need it. So I definitely don't want any of it to spoil.

This is where the importance of headspace comes in. Most canning recipes will give you a headspace amount for proper canning of that specific food. But if you don't have enough food to completely fill a jar, what do you do? Do you toss it out? Stick it in the refrigerator? Can it anyway?

Keep reading to learn how to properly and safely can food, even if you're a little shy on reaching the required headspace.

home canned jars of tomato sauce on counter with ripe tomatoes

Why is Headspace So Important?

As I mentioned before, proper headspace is necessary so your canned food processes correctly to avoid spoilage. Improper headspace inhibits the ability of the jar to exhaust air correctly.

It also inhibits the ability of the contents to come up to the correct temperature inside the jar during processing. This can lead to issues with the jars sealing properly and you really don't want to go to all the trouble of canning your home-grown food, only to have it not seal correctly or spoil.

A headspace measuring tool measuring a jar of pears.

How Much Headspace Do I Need For Canning?

Canning requires a certain amount of headspace in your jar. This is the space from the rim of the jar to the top of the food or liquid in the jar.

The headspace is different for each type of food, whether meats or vegetables or even fruits, so check your recipe carefully. It will tell you the proper headspace to use.

You can measure this accurately with a headspace tool.

A woman ladling apple pie filling into a mason jar.

How Full Should Jars Be When Canning?

The best way to fill your jars is with a funnel placed on your jar and then use a ladle. The jar should be filled up to the headspace the recipe requires.

So, for example, what is one inch of headspace in a canning jar? Measure it with your headspace tool at the one-inch mark, then fill your jar up to this point.

A headspace measuring tool has increments of 1/4-inch. As you can see in the photo above, these canned pears are being filled to the 1/2-inch mark.

two canned jars of cherries. one opened with a spoon in it, and four cherries - all on a wooden surface

Not Enough Food Left to Can?

If you find that you have canned all your food and end up with one last jar that's not quite full enough, what do you do?

To reach the correct headspace, you have several options:

  1. Use up the leftovers – The first option is to not can it at all. Instead, add a lid and put it in the refrigerator and just make a note to use it soon.
  2. Let it cool, then freeze it – If you have plenty of freezer space, this is another great option. Freezing is a great preservation method, but most pass it over due to a lack of space. However, if it's just one small portion, this won't take up much space at all. Pro Tip: You may not want to use regular mouth pint jars, though. They tend to crack when frozen. Use wide-mouth jars or even silicone storage containers instead.
  3. Add boiling water – If your headspace is only off by a bit (half an inch or less), top it off with boiling water. I use this method often and always have a kettle of boiling water handy on canning days, just in case. The water will dilute the recipe, depending on what is in the jar. In most cases, though, just a little water won't change it too much.
A woman's hand measuring the head space in a mason jar filled with apple pie filling.

Don't Alter Headspace

Do not alter headspace! It can be tempting to just can the jar of food anyway, even if you haven't met the required headspace. Do not do this!

If you can't use any of the following options above, still stay away from the temptation to change the headspace. It is vitally important for the health and safety of the food that you follow each recipe's headspace instructions.

If you're looking for more guidance when it comes to canning, be sure to check out my online course, Home Canning with Confidence, or my shorter course, Home Fruit Preservation Canning e-Course.

More Posts You May Enjoy

  • Does Pressure Canning Ruin Bone Broth?
  • Canned Tomato Sauce Recipe
  • A Complete Guide to Home Food Preservation
  • Canning in Electric Pressure Cookers & Other Pressure Canning Questions
  • How to Store Home Canned Food Safely (Jar Stacking & Canning Rings)
  • Canning Problems and Solutions: Siphoning (Liquid Loss in Jars)
  • Pressure Canning Like a Pro
  • What You Don't Know About USDA Canning Rules
  • 10+ Easy Home Canning Recipes

Filed Under: Food Preservation, Food Preservation - Canning, Pressure Canning, Water Bath

Easy Winter Bouquet (DIY Holiday Bouquet)

December 20, 2022 by Melissa Norris 2 Comments

In the dead of winter, there aren't a lot of options for making a colorful flower bouquet here in the Pacific Northwest. That's why I was thrilled to learn how to take evergreen cuttings along with other bushes to create a beautiful and festive winter bouquet, perfect for adding that special touch to the home during the holidays (perfect for the Thanksgiving or Christmas table).

An evergreen bouquet in a wide mouth mason jar on a table by the window.

I've shared before how to make a beautiful old-fashioned Christmas wreath, an easy holiday stovetop potpourri that will scent your home of evergreen, and even an evergreen Christmas swag.

But I haven't shared yet how to make a lovely winter bouquet. It's perfect for the holidays and even makes a sweet gift.

A woman arranging an evergreen bouquet in a Mason jar.

Why I Love Winter Bouquets

When there aren't a lot of colors coming in from the summer flower gardens, it can be a dreary time of year. But knowing how to collect and create beautiful winter or holiday bouquets brings that fresh-cut flower feel into your homes, along with the wonderful smell of evergreen branches.

A few years ago, my husband and I finally caved and bought an artificial Christmas tree (I'll never live that one down after giving my mom a hard time for so many years!). But I miss having that Christmas tree smell in the house during the holidays.

Knowing how to make winter bouquets brings the outdoor beauty indoors and that Christmas tree smell I've been missing all these years.

Up close shot of a green bush.

How to Assemble a Winter Bouquet

Making an evergreen or holiday bouquet couldn't be easier. And one of the best parts is it's usually free! That is if you have evergreen branches at your disposal.

Because I live in the Pacific Northwest, I realize I have ample materials at my fingertips, especially because I don't even need to leave my property. If you're in the same boat, simply walk around your property (or take a quick drive to the neighbor's house and ask for permission to grab some of their foliage) and snip some evergreen branches, berries, and other plants to build your bouquet.

If you don't live in an area where evergreens are prevalent, you may be able to visit a florist or flower farm to see if you can simply purchase the materials to assemble your own.

What is Winter Greenery?

It's pretty easy to spot winter greenery, just look out the window and see what's green during the winter months! They'll be things like cedar, fir, blue spruce, and other evergreen trees.

Other items such as pinecones, branches, stems, and bare trees can also work in a winter bouquet.

A woman cutting holly berries.

Supplies Needed

Everything you need to build a beautiful holiday bouquet is as follows:

  • Snips – I love my Felco pruning snips that I purchased this year. They really have helped save my hands from soreness. But any snips will do. Scissors may not be strong enough depending on how large of branches you're trying to harvest.
  • Vase or Mason Jar – You know my love of Mason jars, so I simply use a wide-mouth Mason jar for my vase. I do recommend choosing something with a wider opening so you can have a nice full bouquet at the end. Pro Tip: I recommend filling your vase with water before assembling your bouquet!
  • Evergreen Cuttings – I like a combination of cedar and other greenery. Cedar tends to hold onto its needles longer and brings that lovely Christmas tree scent. But use whatever you have access to. I also cut some laurel branches, sprigs from boxwood, and even some branches from an Oregon grape.
  • Colorful Add-Ins – This is where your winter bouquet becomes unique to what's around you. I was able to harvest some Oregon grape for color (it has green and red leaves), what we call snowberries (I don't think that's actually what they're called), as well as some red berries, which I was unable to identify. Berries will add great pops of color, but if you can't find any, a few sprigs of artificial berries would also work. And think outside the box; harvest some winter grasses for a nice tan accent color, maybe some pretty birch tree branches for a pop of white. The options are as endless as your imagination.
A woman arranging an evergreen bouquet in a Mason jar.

Step-by-Step Winter Bouquet Assembly

There are no strict rules when it comes to assembling a bouquet. If you listened to my podcast interview with Beth from Crowley house on growing flowers for business or pleasure, she's actually the one who inspired me to take what I have access to and create something beautiful for my business.

Now, anyone who comes to stay at the Norris Farmstead will have a beautiful bouquet to welcome them, no matter what time of year it is.

  1. The first step is to go out and cut all your winter branches, berries, and other materials.
  2. Arrange by type, this will just help the assembling process go faster.
  3. Start with your base (for me this was my cedar cuttings), generally your larger cuttings. Add them in and distribute them evenly to create a nice base that's very full.
  4. Then start adding in some of the different greenery accent pieces for varied textures.
  5. At this point, your vase should be quite full. The last step is to add in your pops of color.
  6. And finally, once your winter bouquet is complete, you can add any decorative items you'd like. A bow on the vase, maybe a Christmas ornament tucked inside, whatever you have laying around!
A close up shot of an evergreen bouquet.

And that's it! Now that you know just how simple it is to make a winter bouquet, try making all kinds of different arrangements like this winter garland arrangement for the hearth at the Norris Farmstead.

A woman standing by a fireplace mantle with a holiday garland on top.

For the winter garland, I did three separate bouquets and grouped them together in the basket. Check the water level every few days and top off as needed.

More Posts You May Enjoy

  • Surviving Winter Without Power
  • 5 Secrets to a Homemade Stress-Free Christmas
  • DIY Farmhouse Burlap Christmas Ornament
  • 5 Historical Christmas Foods
  • How to Cook On a Wood Stove
  • Stovetop Christmas Potpourri
  • How to Make an Old-Fashioned Evergreen Wreath

Filed Under: Crafts, Frugal Living, Homestead-Life

1930s Chocolate Gravy Recipe

December 13, 2022 by Melissa Norris 25 Comments

It's easy to make this homemade chocolate gravy recipe, and pouring it over homemade flaky buttermilk biscuits, pancakes, or waffles makes for a wonderful treat anytime of year.

Up close image of a biscuit covered with chocolate gravy.

Chocolate gravy can be made with ingredients you probably already have on hand. And don't be fooled by the title, it's not as sweet as the name implies.

Once you make this recipe and serve it to your family, you'll be coming back to it time and time again.

A grandfather, mother and daughter sitting around a Christmas tree.

Why I Love This Recipe

There were times during my Dad's childhood when they didn't have enough money for Christmas gifts. But my grandmother would serve this dish as an exceptional and rare treat. Dad said when you walked down the stairs and saw the chocolate gravy you knew it was going to be a good day. She would have this chocolate gravy recipe with homemade biscuits ready for breakfast on Christmas morning.

I'm sad that I never got my grandma's exact chocolate gravy recipe, but I did find a recipe in an old 1930s cookbook for thin chocolate pudding. So my friend and I took that recipe and reformulated it into what my dad described.

The book Hand Made on a kitchen counter next to other kitchen gadgets.

If you have my book Hand Made, you can find the recipe for Chocolate Gravy on page 196. Or, just scroll down to the recipe card below and you'll also see an option to print the recipe.

Azure Standard

There are certain pantry staples that I'm never without, many of which make up the ingredients for this chocolate gravy recipe. I've been buying my cocoa powder and A2/A2 milk powder (among other things) from Azure Standard for a few years now.

Azure happens to be the sponsor of the video in this post. They have the best prices I can find on so many organic bulk items, and I know I'll be getting great quality.

Right now, Azure has a promotion going for first-time customers. If you purchase a minimum of $50, you can use my code “Pioneering10” and receive 10% off your entire Azure Standard order.

A bag of cocoa powder from Azure Standard.

Can I Make This Recipe Ahead of Time?

You can make chocolate gravy ahead of time and store it in the refrigerator until ready to use (see reheating instructions below). Chocolate gravy will only last two or three days in the refrigerator, and honestly, it's really the best when eaten fresh.

But if you're looking to shave a few minutes off your breakfast prep, you can make it ahead.

How to Store Chocolate Gravy

Chocolate gravy can be stored in the refrigerator for two or three days. As I said, it really does taste best when eaten fresh. But making a large batch ahead of time is an option.

How to Reheat Chocolate Gravy

Reheat chocolate gravy in a pot on the stove over medium-low heat. Continually stir and whisk (once it's thin enough) to keep from scorching the gravy.

You may need to thin it with some additional milk, as the gravy tends to thicken when cooled.

A pot of melted butter being whisked on the stove.

Tools Needed

  • Whisk – A whisk is a must for making this gravy lump-free and super smooth (the way all good gravy should be!).
  • Measuring Cups & Spoons – Though you could probably eyeball this recipe, it's really best when you use exact measurements.
  • Sauce Pot – A medium size pot works well. If you're doubling or tripling the batch, you'll want a larger pot.
  • Kettle – I like to use a kettle so my water is hot and ready to go when I need it, but a pot on the stove works for boiling water as well.
A woman in the kitchen with ingredients for chocolate gravy in front of her.

Ingredients Needed

There are just a few simple ingredients you will need. Most of us already have these items in our cupboards, but if not, Azure Standard is a great place to get these high-quality ingredients.

  • Boiling Water – You need to work fast when making this recipe, so make sure your water is boiling before you begin.
  • Butter – Butter makes this chocolate gravy have a smooth, rich, velvety texture (and keeps it from being too sweet). I use Azure Standard European Butter.
  • Sugar – I prefer Azure Standard Organic Cane Sugar.
  • Salt – Fine salt can be used. Pro Tip: Cut the salt in half if your butter is salted.
  • Cocoa Powder – I took some from my 5-pound bag of cocoa from Azure Standard.
  • Milk – You can use raw milk, regular milk or even A2/A2 Whole Milk Powder from Azure Standard.
  • Vanilla – Don't skip the vanilla! It adds such great flavor. Here is my homemade vanilla extract recipe.
  • Flaky Buttermilk Biscuits – You can use my recipe here for flaky buttermilk biscuits. Or check out these buckwheat pancakes from the 1920s, or my DIY pancake mix to have on hand for quick and easy breakfasts.

How To Make Chocolate Gravy

Now onto the fun part, how to make your yummy chocolate gravy. The steps are straightforward, and the key is to keep stirring so as not to scorch or burn anything in your saucepan.

A pot of melted butter being whisked on the stove.

1. Melt the butter in a saucepan over medium heat.

A pot of melted butter with flour being stirred on the stove.

2. Whisk in the flour and continue whisking until it browns just a little.

3. Add sugar and salt. Stir it quickly so it doesn't burn or scorch.

A pot on the stove with cocoa powder being poured in.

4. Add cocoa powder and stir.

5. Add the boiling water and whisk continually until smooth.

6. Add the milk and whisk again.

A pot of chocolate gravy on the stove being whisked.

7. Let the sauce get hot, but don't let it boil (unlike pudding). Keep whisking until it just starts to thicken. When you feel it getting thicker, or see just a few bubbles, remove it from the heat.

A woman adding vanilla extract to a pot of chocolate gravy.

8. Add the vanilla and stir to combine.

9. Let it cool just a bit (sauce will continue to thicken as it cools).

10. Pour the chocolate gravy over the top of the biscuit, pancakes, waffles, or eat by the spoonful. Enjoy!

Chocolate gravy being spooned over a flaky buttermilk biscuit.

Did you make this recipe? Snap a photo and tag me on social media @melissaknorris. I'd LOVE to see your chocolate gravy! Then be sure to rate this recipe by clicking the stars in the recipe card below!

A woman taking a bite of something.
Up close image of a biscuit covered with chocolate gravy.

Chocolate Gravy

Melissa K Norris
A thin chocolate pudding that can be poured over biscuits for a breakfast treat.
4.39 from 18 votes
Print Recipe Pin Recipe
Prep Time 5 mins
Cook Time 8 mins
Total Time 13 mins
Course Breakfast, Condiment, Dessert
Cuisine American
Servings 8
Calories 130 kcal

Ingredients
  

  • 1/4 cup butter
  • 1 Tablespoon flour
  • 1/2 cup sugar
  • 1/2 teaspoon salt
  • 1/2 cup cocoa powder
  • 3/4 cup boiling water
  • 1 cup milk
  • 1/2 teaspoon vanilla extract

Instructions
 

  • Melt the butter in a saucepan over medium heat.
  • Whisk in the flour and continue whisking until it browns just a little.
  • Add sugar and salt. Stir it quickly so it doesn't burn or scorch.
  • Add cocoa powder and stir.
  • Add the boiling water and whisk continually until smooth.
  • Add the milk and whisk again.
  • Let the sauce get hot, but don't let it boil (unlike pudding). Keep whisking until it just starts to thicken. When you feel it getting thicker, or see just a few bubbles, remove it from the heat.
  • Add the vanilla and stir to combine.
  • Let it cool just a bit (sauce will continue to thicken as it cools).
  • Pour the chocolate gravy over the top of the biscuit, pancakes, waffles, or eat by the spoonful. Enjoy!

Notes

  • You can use my recipe here for flaky buttermilk biscuits. Or check out these buckwheat pancakes from the 1920s, or my DIY pancake mix to have on hand for quick and easy breakfasts.
  • Chocolate gravy can be stored in the refrigerator for two or three days. As I said, it really does taste best when eaten fresh. But making a large batch ahead of time is an option.
  • Reheat chocolate gravy in a pot on the stove over medium-low heat. Continually stir and whisk (once it's thin enough) to keep from scortching the gravy. You may need to thin it with some additional milk, as the gravy tends to thicken when cooled.

Nutrition

Serving: 2tbspCalories: 130kcalCarbohydrates: 17gProtein: 2gFat: 8gSaturated Fat: 5gPolyunsaturated Fat: 0.3gMonounsaturated Fat: 2gTrans Fat: 0.2gCholesterol: 19mgSodium: 204mgPotassium: 129mgFiber: 2gSugar: 14gVitamin A: 227IUCalcium: 46mgIron: 1mg
Keyword Chocolate Gravy, Chocolate Gravy Recipe, Thick Chocolate Sauce
Tried this recipe?Let us know how it was!

Other Posts You May Enjoy

  • How To Make Biscuits – Sour Cream Biscuit Recipe From 1940
  • Homemade Hot Cocoa Mix
  • 5 Historical Christmas Foods From 100 Years Ago or More
  • Christmas Stovetop Potpourri
  • How to an Make An Old-Fashioned Evergreen Christmas Wreath

Filed Under: Breakfast, Dessert, Recipes, Vintage

Weston Tomato Press (+ Tomato Sauce Recipe)

November 29, 2022 by Melissa Norris 14 Comments

My absolute favorite new kitchen appliance to make tomato sauce and strain juice is the Weston Roma Tomato Press. It's not electric but simply a hand-cranked machine to make the sauce. It separates the skins and seeds for you and is a game-changer when it comes to canned tomato sauce.

A Weston tomato press pressing tomatoes.

Why I Love This Method

You may or may not know I was previously a roasted tomato sauce snob and would only make my tomato sauce following my roasted tomato sauce recipe. Though it's a little more hands-on work, it's incredibly delicious, and I like to stock my pantry with both options for different recipes.

And let me tell ya, if you've never had homemade tomato sauce made from vine-ripened tomatoes, then you've never had tomato sauce before. All else is an imitation, my friend.

Be sure also to grab my quick and easy homemade tomato soup recipe that you can make with your jars of homemade tomato sauce.

This tomato press method is fantastic because I can toss all my garden fresh tomatoes into the freezer and keep them there until I'm ready to whip up a large batch. This is also one of my favorite hacks for not heating up the kitchen during those hot summer months.

And if you're still bringing in green tomatoes from the garden (to save them from the frost), learn how to ripen green tomatoes indoors for fresh eating through the winter months.

A woman pressing tomatoes through a Weston tomato press.

What Does a Tomato Press Do?

This tomato press, or tomato food mill, will take off the skins and remove the seeds from your tomatoes, and leave you with only the juice. This juice can then be reduced and made into tomato sauce which can be canned for future use.

Use this machine when you have a bunch of tomatoes and need to crank through making tomato sauce quickly.

This blog post and video is sponsored by Lehman's. If you've never shopped Lehman's let me tell ya, you're in for a treat! Go see everything they have to offer, then be sure to search “Weston Tomato Press”and grab your new favorite kitchen tool!

A woman spinning a tomato press.

Reasons For Using A Tomato Press

There are many great reasons for using a tomato press. Some are safety-related, and some are just preferential.

  • Saves Time – Using a tomato press saves time. It's much easier to use a press than to take the time to blanch all of your tomatoes and individually peel the skins, then core them and remove the seeds.
  • Safer – As for safety, removing tomato skins before canning is essential because the skins contain more bacteria than the rest of the tomato.
  • Better Texture – Some people remove the skins because they do not like the texture in their tomato sauce.
A woman in the kitchen with bags of frozen tomatoes.

Common Questions About Tomato Presses

  • Can you put raw tomatoes through a food mill? YES! This makes it so much easier to make tomato sauce. No peeling, coring or removing of seeds is needed.
  • Do I need to peel tomatoes before using the food mill? No! Great news, right? Simply put your room temperature or thawed tomatoes into the press, skin and all.
    Pro Tip: if you are freezing or dehydrating tomatoes, you can leave the skins on.
Tomato sauce being boiled and reduced on a stove.

How to Make Tomato Sauce

Here is a great way to use your tomato press by making homemade tomato sauce.

Tools Needed To Make Tomato Sauce

  • Weston Tomato Press – As I mentioned, this method is so much faster than my previous method for making tomato sauce. If you don't have a tomato press, be sure to check out this tomato sauce recipe, but honestly, just go grab yourself a Weston tomato press, and you can thank me later!
  • Two Large Mixing Bowls – this is to quickly transfer the sauce from the press into the stock pot, so it immediately gets heated.
  • Spatula – to help get the sauce off the press.
  • Canning Jars and Lids– I use ForJars pint-size canning lids (be sure to use code “Modern10” at checkout for 10% off) because they work great.
  • Funnel – this helps pour the sauce from the stock pot into the canning jars with less mess.
  • Ladle – for spooning the sauce into the canning jars.
  • Apron – making tomato sauce can be quite messy, so I always use an apron. Pro-Tip: Use a linen apron. The dirt, food, and liquid don't penetrate the fibers as much as they do with cotton aprons. Linen also absorbs water and dries faster.
    You can purchase my Aprons or my new “Everything Worth Preserving” flour sack towels on my website in the General Store.
  • Large Stock Pot – this is to simmer the sauce before putting it in the canning jars.
  • Canning Method Tools – you can use a water bath, steam, or pressure canner for your tomatoes.
A woman's hands adding lemon juice to canning jars.

Ingredients Needed To Make Tomato Sauce

  • 1-gallon fresh or frozen tomatoes – if using fresh tomatoes, quarter them. If using frozen tomatoes, be sure they're completely thawed before putting them through the tomato press. You can use as many tomatoes as you want. Just scale the recipe up or down.
  • Bottled lemon juice from concentrate – do not use fresh lemon juice.
  • Salt – this is optional and only for flavor. I use Redmond Real Salt.
A woman adding frozen roma tomatoes to a Weston tomato press.
Juice from a tomato press draining into a bowl.
A woman spinning a tomato press.

How To Use a Tomato Press for Tomato Sauce

I'm not listing the step-by-step canning method for this tomato sauce recipe. If you'd like to know exactly how to process your jars, visit this tomato sauce canning tutorial. I specify headspace, canning times, and more in that post.

  1. Clamp your tomato press nice and tight to the counter. It does have a suction cup, but depending on your counter surface type, it may not hold as tightly as it would if using the clamp.
  2. Place the two large mixing bowls on each end of the press. One will catch the tomato liquid, and one will catch the seeds, pulp, and skins.
  3. Place the stock pot onto your stove and heat on low to medium heat.
  4. Fill the large-capacity hopper halfway full of your tomatoes.
    Pro Tip: Don't put any liquid from the thawed frozen bag of tomatoes into the hopper. You want the least amount of liquid possible for a better tomato sauce.
  5. Use the stomper tool to push the tomatoes through the hopper while you turn the crank.
  6. Scrape the rest of the pulp into the liquid bowl using a spatula.
  7. Pour the liquid into the stock pot to get it heated immediately.
  8. Take the leftover peels, skins, and seeds and put them through the hopper a second time. This liquid will be thicker and more flavorful. If you want to, you can repeat this a third time.
    Pro Tip: You can also freeze dry and/or dehydrate the leftover peels, skins, and seeds and grind them up into a finer powder to put in sauces, stews, or chilis later on.
  9. Bring the stock pot to a simmer for about an hour or two or until the thickness has been reduced to at least half of what it originally was. A third of a reduction is also fine.
  10. Have your canning jars ready to go. They should be washed with hot soapy water and still warm. You want to jar your tomato sauce while the jars are warm and not cold.
  11. Have your canner ready to go as well.
  12. Turn off the heat of the stock pot.
  13. Fill each pint jar with 1 Tablespoon of bottled lemon juice from concentrate. You can also add 1/2 teaspoon salt, but it's optional (it's just for flavor).
    Pro Tip: I add the lemon juice and salt to every jar before pouring my sauce in. This way, I make sure I don't miss any jars.
  14. Place your funnel on the jar and ladle the tomato sauce into it.
  15. Place the lid on the jar and tighten to fingertip tight.
  16. Continue with your chosen canning method.
A canning jar being filled with tomato sauce.
A woman's hand screwing on a canning lid.
A woman placing jars of tomato sauce into a steam canner.

Can I Use A Tomato Press for Apples?

You can also use your tomato press for apples. The press comes with a stainless steel screen for tomatoes and apples. Other accessories are available such as the pumpkin screen, a salsa screen, the berries screen, and a grape screen.

So the next time you have lots of tomatoes, little time, or want to make some great tomato sauce, get out your new favorite tool, the Weston Tomato Press and see how quickly you can get your jars canned and onto the shelves.

And then enjoy using them for other recipes and wonderful meals together.

Jars of home canned tomato sauce on counter with ripe paste tomatoes and wicker basket

More Posts You May Enjoy

  • How to Prune Tomato Plants for a Better Harvest
  • 10 Tomato Growing Tips for a Disease-Free Harvest
  • Preventing & Treating Early Blight of Tomato & Potato Plants
  • Slow Cooker or Instant Pot Cabbage Rolls Recipe
  • Homemade Barbecue Sauce Recipe
  • 129+ Best Canning Recipes to Put Up This Year
  • Canning Problems and Solutions: Siphoning (Liquid Loss in Jars)
  • Pressure Canning FAQs


Filed Under: Canning Recipes, Canning Recipes, Food Preservation, Food Preservation - Canning, Pressure Canning, Recipes, Water Bath

Storing Green Tomatoes for Fresh Eating

November 22, 2022 by Melissa Norris 3 Comments

Guess what? I'm storing green tomatoes to continue ripening for fresh eating well into the winter months. How do you store green tomatoes to ripen them? Here is my super simple and easy old-time process for storing green tomatoes from your garden.

Green and partially ripened tomatoes stored in a basket.

Why I Love This Method

There's nothing worse than putting all your long days of work and hard efforts into growing a garden only to lose a large portion of your crop when that first killing frost comes.

When it comes to tomatoes, you can actually store green tomatoes using this method and enjoy them well into the long winter months.

And these tomatoes can be used for all sorts of recipes. Who doesn't love homemade tomato soup made from fresh tomatoes? Grab my tomato soup recipe here (good with fresh or canned tomatoes). As well as some of my favorite canned tomato recipes here.

Everything Worth Preserving

Looking for tomato recipes? This book is it! Not only do I cover the nine different methods for home food preservation, but I also share all of my step-by-step tutorials, recipes, and easy-to-use charts.

Learn everything you need to know about cold storage (aka freezer), water bath/steam canning, pressure canning, dehydrating, fermenting, freeze-drying, root cellar, infusion, and salt/curing in the new book, Everything Worth Preserving.

Preserve food for a healthy well-stocked pantry & peace of mind, all in one resource.

In this book, you can search for any produce from A-Z (such as tomatoes) and get a list of all the ways to preserve that item, plus recipes! Grab your copy and all of your pre-order goodies here.

Yellow cherry tomatoes growing on the vine.

Tomato Facts & Definitions

  • Tomatoes are technically a fruit.
  • Chlorophyll is what keeps the tomatoes green.
  • Lycopene is what you see as they ripen and change color.
  • The “Blush Phase” is what I call them when they first show signs of color change.
  • Tomatoes do not have to be on the vine to continue ripening.
  • The “Break Point” is the term used to define those tomatoes that are just starting to blush.
  • If the tomatoes are green or have some color change, they will continue to ripen into full color even after being picked.

Is There a Way to Store Green Tomatoes?

YES! The key is to get them at the right time and know how to store them
before the first deep killing freeze.

What is the best way to preserve fresh green tomatoes? There are two ways, the first one being to uproot the whole plant, and the second is to pick the remaining tomatoes, whether ripe or completely green.

Uproot the Whole Tomato Plant

You can rip up or “uproot” the whole tomato plant instead of picking the remaining tomatoes.

You can then hang these plants upside down in the garage, root cellar or even inside. You just need to be sure they're stored where they won't freeze.

Woman pruning tomatoes in a high tunnel.

Pick All of the Remaining Tomatoes

The second way to preserve your tomatoes is to pick all remaining tomatoes regardless of the color. They can be green, blush, or almost ripened. One of my favorite varieties that I grew this year was a Black Strawberry Tomato from Baker Creek.

If you can, harvest them with stems on the end. This way, the tomato stem prevents it from opening up to oxygen. These tomatoes won't break down as quickly as the others.

Then you can arrange them so they can be stored indoors. Keep reading for how to arrange and store them.

How Do You Store Green Tomatoes?

After you have picked all of your remaining tomatoes, make sure there are no cracks and no partial decaying. Also, check for any partial rot starting in small holes that have been penetrated.

If you have tomatoes with these characteristics, set them aside and use them soon, but do not store them with the other tomatoes.

Storing Green Tomatoes

  1. Sort the picked tomatoes – You'll want to sort your tomatoes into three groups. I find using a colander for this helpful. The three groups are:
    • Completely green tomatoes
    • Blush or partially ripened tomatoes
    • Most ripened or almost ready-to-use tomatoes
  2. Wire basket or crate – It doesn't matter what you store your tomatoes in. It just needs to be breathable. If your basket has holes where your tomatoes might fall through, you can place a paper bag or piece of cardboard into it.
  3. Layer – At most, you only want two layers when adding your tomatoes to the basket. This prevents pressure points from causing rot and makes it easier to see the ripened tomatoes when you want to use them.
    • Place the completely green tomatoes on the bottom layer.
    • Place the blush or partially ripened tomatoes on the second layer in a group on one side.
    • Place the most ripened or almost ready-to-use tomatoes on the second layer in a group on the other side.
  4. Store – Choose from the storage methods below.
  5. Check on them frequently – You'll want to check on your tomatoes often to ensure they don't rot, and use the ones that have ripened the most so they don't damage the unripened ones.
Green and partially ripened tomatoes stored in a basket.

Frequently Asked Questions

How do you store green tomatoes to ripen them?

Store your wire basket of sorted tomatoes at room temperature (65°F to 75°F is the sweet spot) in a back pantry or other indoor room. The good news is they do not need daylight exposure to keep ripening.

You may be wondering how long green tomatoes last once picked. You can store your tomatoes for weeks or even months.

How do I keep my tomatoes fresh for a long time?

How long tomatoes take to ripen depends on each tomato and how ripe each one was when it was picked. Even if their color has changed slightly, they will still ripen off the vine and have great flavor.

It also depends on how you store them for how quickly they'll ripen. If you want your tomatoes to last a long time, then follow the method above.

If you want your tomatoes to ripen quickly, then keep reading.

How to ripen tomatoes quickly?

The trick for getting tomatoes to ripen quickly is to trap the ethylene gas. Some people will layer their wire basket or crate with newspaper and even wrap each tomato individually. The wrapping is said to get them to ripen faster because the newspaper will trap the ethylene gas.

Also, individually wrapping them will prevent one bad tomato from spoiling the rest. You could even try placing a banana in with your tomatoes to get them to ripen even faster!

basket of ripe heirlom tomatoes

Fresh Tomatoes for Months

Now that you have your tomatoes picked before the first freeze and tucked into storage, enjoy eating fresh tomatoes well into the winter months.

And especially try some of my canning recipes for soups, salsa, or even fermented green tomatoes. My fresh fermented salsa recipe is an excellent use for your tomatoes. There are so many wonderful uses for these “fruits” as your tomato season ends!

And also, check out my video and blog post on how to harvest and store potatoes without a root cellar.

Jars of home canned tomato sauce on counter with ripe paste tomatoes and wicker basket

More Posts You May Enjoy

  • Weston Tomato Press (+ Tomato Sauce Recipe)
  • Raise a Year's Worth of Tomatoes
  • Best Canned Tomato Sauce Recipe
  • 129+ Best Canning Recipes to Put Up This Year
  • Gardening in November
  • How to Preserve Zucchini (plus my favorite fresh zucchini recipe)
  • 10 Methods of Food Preservation at Home

Filed Under: Food Preservation - Other, Gardening, Raising Your Own Food, Vegetables

Gardening in November (Garden Tasks by Month)

November 15, 2022 by Melissa Norris 7 Comments

This month it's gardening in November! Though there's not much growing in the garden anymore, there's still plenty to be done, including cleanup and preparations for next year's garden. This is my monthly gardening feature, where I show you everything I'm doing in the garden month-by-month!

A garden in winter with much of it dead, and a mountain with snow top peaks in the background.

We've come to the end of the growing season, which means now it's time to make sure all our crops are properly cured and stored for the winter. Though there are still a few things we're harvesting from the garden, the growing is done and winter is here.

Continue reading this post for everything I'm doing in the garden in November, plus be sure to catch our other gardening-by-month posts here.

Brussels sprouts growing in the garden.

Tasks for the Garden in November

  • Harvest the remainder of the crops that need to be picked before a hard frost.
  • Leave the cold-weather crops like Brussels sprouts until they go through a hard frost/freeze (their flavor is improved greatly after a freeze). Enjoy harvesting off these crops for up to 6 weeks into the winter (depending on overnight lows). Pro Tip: Don't leave Brussels sprouts in the garden too long, as too many hard freezes and thaws can turn them mushy. Learn more about growing Brussels sprouts for maximum harvest here.
  • If you grew a lot of kale, you can keep them in the garden for now. They won't continue to grow, but you can use the garden like a refrigerator and only harvest what you need when you need it. Learn more about using the garden as cold storage here.
  • Clean out the garden from last year's crops that had any disease or insect damage. If they were healthy plants, you can leave them in the ground to decompose over the winter. Learn more about winter garden preparation here.
  • Carefully inspect the vines and crops still in the garden. Anything that's still on the vine, if you've experienced a freeze, won't continue to ripen or grow, so go ahead and harvest them now. If you haven't experienced a killing frost, leave them on the vine to continue ripening.
  • If you have chickens, you can allow them to free-range in the garden during the day to help clear vegetation and aerate and fertilize the soil. Learn more about using chickens in the garden here. Also, during the winter months, if you're experiencing really cold temperatures, be sure to harvest your eggs early in the day, so they don't freeze and crack.
  • For any garden harvest that you brought inside, be sure to allow them to dry and cure completely before putting them into storage. This includes winter squash and any seeds you might be saving for next year's garden. Learn how to save and store garden seeds here.
  • If you harvested any pie pumpkins this year, you'll also want to be sure to make my husband's grandma's from-scratch pumpkin roll recipe.

Gardening Tasks by Month

  • March
  • April
  • May
  • June
  • July
  • August
  • September
  • October
  • January

More Posts You May Enjoy

  • How to Preserve Zucchini (plus my favorite fresh zucchini recipe)
  • 10 Methods of Food Preservation at Home
  • How to Make Celery Salt (Preserve Celery)
  • New Gardening Techniques & Varieties to Grow in 2022
  • Soil Remediation – How to Fix Tainted Soil
  • Wood Chips for Garden Mulch (Beneficial or Not?)
  • Science-Based Companion Planting Strategies for a Healthier Garden
  • How to Grow a Large-Scale Garden Without Acreage

Filed Under: Gardening, Gardening by Month, Homestead-Life, Raising Your Own Food

  • 1
  • 2
  • 3
  • …
  • 38
  • Next page
Melissa K. Norris

Follow me:

  • Start Here
  • Courses
  • Academy
  • Contact
Log In

Articles

  • Gardening
  • Homesteading
  • Recipes
  • Lifestyle
  • DIY

Podcast

  • Time-Saving Tips when Cooking From Scratch
  • How to Test Soil pH & Amend Acidic or Alkaline Soil
  • Yearly Planning Without the Overwhelm
  • Unplugging for One Year with Rory Feek
  • The Norris Farmstead: Our 40-Acre Homestead Farm-Stay

Books

  • Everything Worth Preserving
  • The Family Garden Planner
  • Hand Made
  • The Made From Scratch Life

Education

  • Organic Gardening Workshop
  • Home Fruit Preservative Canning e-course
  • Home Canning With Confidence
  • Homemade Bread & Baking Class
  • Natural Homemade Bath and Beauty
  • Pioneering Today Academy


Copyright 2023 - Melissa K. Norris Pioneering Today LLC

  • Privacy Policy
  • Affiliate Disclaimer
  • Terms of Use

Melissa K. Norris and Pioneering Today LLC is a participant in the Amazon Services LLC Associates Program, an affiliate advertising program designed to provide a means for sites to earn advertising fees by advertising and linking to Amazon.com.