Melissa K. Norris
  • Start Here
  • Podcast
  • Articles
  • Shop
    • Books
    • Classes
    • General Store
  • In Person Workshops
  • Academy
Log In

Easy Blackberry Jam Recipe Low Sugar with Canning Instructions

August 23, 2017 by Melissa Norris 38 Comments

This no-sugar blackberry jam recipe, that's low sugar and high on taste is something no home should be without. Especially when I share how you can make this without any sugar.

Yes, no added sugar, just one secret ingredient to replace all those white granules, and it can be grown on your homestead if you so desire. Am I the only one who gets excited about this stuff?

blackberry jam recipe

Blackberries signify the end of summer in our neck of the woods. It is definitely a bitter/sweet goodbye. We love them. LOVE them. They make the most incredible jam. Ever. Syrup? Oh yeah. Pie Filling? Winner! Even humbly flash frozen, they are a favorite.

And dumplings, oh yes, dumplings are not only for your chicken dishes, but they're also delightful with berries and you can use this 1940's recipe for Blueberry Dumplings  (swap out the blueberries for blackberries) better be happening at your house soon. It’s a sad day when the last of them go down. August is an eternity when you’re in December.

If you can get a hold of fresh-picked, summer-ending blackberries (I’d even make it with some good organic frozen berries too!) I encourage you to try this jam, you will not regret it.

Tip: Frozen berries that are thawed release their juice easier than fresh berries. Which is a plus during the busy hot harvest months. If you're pressed for time, freeze your berries until things calm down.

Melissa

The first time I heard of adding grape juice in place of all that white sugar in traditional summer jam recipes? I was, to say the least, pretty skeptical. However, I was willing to try, if it got rid of some of that sugar load!

Surprisingly, we noticed immediately how much more of the ‘fruit’ we tasted. (Amazing what happens when you don’t add a 5 lb bag of white sugar!) Now sometimes, I will toss in a 1/4 C of organic sugar here. It is totally optional, it just adds a hint of sweetness. If you prefer a more tart jam, leave this out. Either way– it is delicious. The best part, even if you don't have a ton of berries you can make this small batch of blackberry jam!

Resources 

Grab our FREE simply sweet custom Blackberry Jam Canning Labels for easy pantry shopping (our favorite kind of shopping) and quick gift giving!

Ever have a failed batch of jam or jelly? Nothing is more frustrating than having runny syrup when what you really want is a spreadable jam or jelly. Grab my free Jam & Jelly Troubleshooting Guide here  and learn my easy tips for a sure set… p.s. there's a bonus involved.

Blackberry Jam Recipe Low Sugar

After 24 hours, check seals, remove bands, wipe down the jars, label lids and put them on the pantry shelf. (You did grab our incredibly cute custom free jam labels, right?)

This jam is a very special treat! Beautiful on the shelf and a very appreciated gift! Capture a little summertime in a jar with this easy blackberry jam recipe!

Other Low Sugar Jam Recipes

Spicy Peach Jam Recipe Low Sugar and No Pectin

No Sugar Strawberry Jam Recipe

Apple Pie Jam Low Sugar Recipe

Strawberry Jam Recipe without Pectin and Low Sugar

Easy Blackberry Jam Recipe Low Sugar with Canning Instructions

MelissaKNorris
Easy blackberry jam recipe with no added sugar
3.87 from 15 votes
Print Recipe Pin Recipe
Prep Time 15 mins
Cook Time 20 mins
Total Time 35 mins
Course Appetizer, fruit
Cuisine American
Servings 2 pints

Ingredients
  

  • 3 Cups Freshly picked and washed berries or frozen and thawed
  • 1 box of No Sugar PectinNote from Melissa: the only store bought pectin I use is Pomona's Pectin, it's a natural pectin without added sugar or GMO ingredients and allows you to make no sugar added jams and jellies. You won't need to use the whole box when using Pomona's, just follow the instructions that come with it
  • 1/4 cup lemon juice if using sweet blackberries
  • 1 Cup Grape Juice from concentrate You can use any juice from concentrate you like for different flavor profiles

Instructions
 

  • Wash jars in hot soapy water, rinse right before filling with hot water. Prepare your water bath canner, place rack inside and fill with water so jars are completley covered by at 1 inch. Turn the heat to medium so water is 180 degrees F when you put jars filled with jam in the canner.
  • You’ll want to use a large stainless or enamelware pot for cooking up your jam, and put it on low heat. Add in your clean/washed berries, I slightly crush mine with a potato masher. Optional.
  • Turn heat up to medium. Dump in grape juice. If using Pomona's pectin, add 2 teaspoons calcium water and stir until combined.
  • Add powdered pectin (2 teaspoons pectin powder from Pomona's pectin) then use an immersion blender to make sure pectin is fully dissolved and mixed in with juice and berries. Bring to a boil.
  • Ladle the jam into jars to 1/4 inch headspace, remove air bubbles and add more jam if needed to stay at the 1/4 inch headspace, make sure jar rims are wiped clean, put lid in place, fasten the ring down and set in the canner rack. Repeat.
  • Bring water to a full boil in canner and then process for 15 minutes. When my timer goes off, I turn off the burner and remove the lid for 5 minutes or so. Then carefully (with a jar lifter) remove jars and set them on a towel to cool for 24 hours
  • After 24 hours, check seals, remove bands, wipe down the jars, label lids and put them on the pantry shelf.

Notes

*this will yield on average 2 pints (4 cups) of finished jam. 
Keyword blackberry jam recipe
Tried this recipe?Let us know how it was!
Jar of blackberry jam sitting on a table with blackberries in the background. Text overlay says, "No Sugar Blackberry Jam"

Filed Under: Canning Recipes, Food Preservation, Food Preservation - Canning, Fruit, Jam and Jelly, Recipes, Water Bath Tagged With: fruit, Home food preservation, jam, jelly, More Canning, preserving, water bath

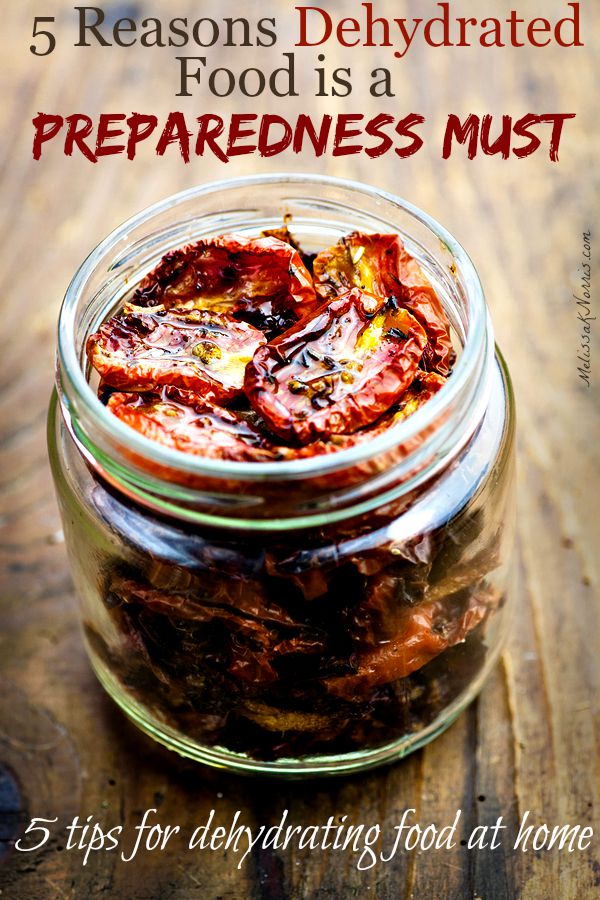
5 Reasons Dehydrated Food is a Preparedness Must & 5 Tips for Dehydrating at Home

September 20, 2015 by Melissa Norris 14 Comments

Want to be prepared with food storage that is portable and doesn't take up much space? Learn how to dehydrate food at home (awesome free guide that covers dehydrating everything, did you know you could dehydrate liquid at home?) Grab this now!

Dehydrating food is an excellent way to preserve your food, build your own pantry, cut down on your food bill, and up your preparedness level. In fact, dehydrating could be called the prepper and survivalists' top food preservation mode.

Benefits of Dehydrated Food for Storage

Removing the moisture from food allows it to store indefinitely in proper conditions, making it a preferable choice for the preparedness-minded individual. Smoking is another form of dehydrating food and creates delicious meats and cheeses, as well as preserving them. Learn how to smoke cheese at home here.

Dehydrating allows you to harvest your food in season and preserve it for year-round eating. From foraging to harvesting from your garden, or even purchasing food in season, dehydrating lets you build your own food supply for year-round use. Note: Dehydrating or freezing is the only safe way to preserve wild mushrooms as canning is not recommended for wild mushrooms.

One of the beauties of dehydrating food is its portability and ease of storage. When all of the moisture is removed from the food, it shrinks up considerably. This is done either through salt or the movement of cold or hot air through the food. Because organisms that cause food spoilage need moisture to grow, dehydrating them makes the food a perfect candidate for long-term food storage. Plus, unlike a freezer, dehydrated food requires no electricity to maintain its stability.

Check out this, when dehydrated, one pound of fresh apples becomes just two ounces. Each food will vary on how much it shrinks down, but you can see why dehydrated food quickly becomes essential when you’re on the go or for bug-out bags. Some dehydrated foods need water for reconstitution, but many items can be eaten as is, which is ideal in emergency situations.

Fruit leather, strawberries, grapes, blueberries, apples, peaches, pears, bananas, pineapple, and zucchini chips are all easily eaten without reconstitution or the need to soak in water. Plus, they’re quite delicious and packed with nutrients.

While I love home canned food for many reasons, you can’t beat dehydrated food for the ease of carrying or storage. From meals on the go, to hiking and camping, in your emergency bag or extended times in the wilderness, you can pack much more dehydrated food than any other form. Dehydrated food requires no refrigeration and very little storage space. It can easily fit in backpacks, purses, or pockets.

Resources for Dehydrating Food at Home

Drying food is one of the old traditional methods of food preservation known to man. In hot climates, food can be dehydrated simply by laying it out in the sun on a screen or rack. A solar Sun Oven (which I'm so grateful Sun Oven sent to me in exchange for my review, because I was skeptical of it working in the Pacific Northwest where sun isn't something we have a lot of, but it has quickly become my new favorite toy) is also an off-grid dehydrator!

Off-grid dehydrator–> Solar Sun Oven and Preparedness Accessories 

Frugal dehydrator–> Nesco Dehydrator It's 42% off at the time of this posting!! I purchased this dehydrator two years ago when my garage sale one bit the dust and have been very happy with it.

I'm never buying another dehydrator again–> Excalibur Dehydrator

5 Tips for How to Dehydrate Food at Home

For optimal long-term storage, dehydrated foods should be stored in a dark cool area in an airtight or vacuum-sealed container. Pantry shelves or cupboards work well, but under beds or anywhere out of direct light is fine.

The foods you can dehydrate are limitless, from fresh fruit, vegetables, herbs, to meat, and even liquid. You can make your own soup mixes, fruit leather, jerky, beans, onion and garlic powders, powdered cultures, to powdered eggs.

Canning tomatoes? Save the skins you'd normally discard and dehydrate them, then grind up into a tomato powder for use later in sauces and soups.

There are many options for dehydrating your food from hanging meat on racks next to a warm outdoor fire for smoking, to racks indoors next to your wood stove, and in your oven if it goes down to 150 degrees. You can dry herbs by hanging them upside down in bunches in a dry warm area for about a week.

When dehydrating your food, the biggest tip is to chop or slice all of your food as close to the same size as possible. The more uniform, the more they’ll dry at the same rate. An easy way to do this is to use a mandolin. Another option is a food chopper for items that need to be chopped or minced instead of sliced.

Want to be prepared with food storage that is portable and doesn't take up much space? Learn how to dehydrate food at home (awesome free guide that covers dehydrating everything, did you know you could dehydrate liquid at home?) Grab this now!

Think about how you want to use the food before drying. If you’re drying apples, do you want apple rings to eat as snacks, or wedges to use in pies and desserts, or chunks to add to oatmeal? You might decide to dry some in all forms, but thinking it out ahead of time will be key.

Place your food on the dehydrator trays. Make sure none of the food is touching one another. You want the air to be able to circulate all the way around each piece. Fruits don’t put off much odor, so you can dry different fruits at the same time.

Strong odor items like onions and garlic should be dried by themselves or you’ll have onion flavored strawberries. Some folks will put their dehydrator outside or in the garage when drying onions and garlic if the smell is too strong.

Select the appropriate setting on your dehydrator. Be sure to check on the food periodically throughout the drying time. You’ll want to rotate trays, especially if one tray is drying faster than the others.

Use the manual times as a guideline as the time it takes to dry your food will vary upon your climate, how thick you cut the food, and how much water it had in it, to begin with. For storage purposes, you can’t over-dry your food. The drier, the longer it will store. Some people prefer their fruit to be dry but still flexible, while others prefer it on the crisper side.

Once your food is dried to your liking, you’ll want to package it. You can place them in Mason jars and use a vacuum sealer attachment to make them air-tight. You can use mylar or vacuum sealer bags. Another option is to double bag Ziploc bags and squeeze as much air out as possible. Be sure to always mark your containers with the date for proper food rotation in your pantry.

Learn how to dehydrate fruit at home to save money and build up your food storage. This simple tip will cut hours off your dehydrating time. Grab this now to preserve the summer berry and fruit harvest.

To reconstitute vegetables, soak them for 10 minutes to 2 hours, but no longer, as they can start to spoil if soaked too long. They’ll return to an almost fresh state and cook as you would regularly.

Want to save hours and days of drying time when dehydrating berries? Here's our complete tutorial on How to Dehydrate Berries the Easy Way. 

Filed Under: Dehydrating, Food Preservation, Homestead-Life, Preparedness/Survival Tagged With: dehydrating, Home food preservation, preparedness, prepper, survival

Grow Your Own Food In-Person Worksop

Saturday May 20th

$349

An intimate and hands on workshop

At Norris Farmstead

Click Here to Learn More

Want to grow a year’s worth of food?

Get my FREE planting chart!

Know exactly how many plants per person you need to plant with my easy worksheet and chart!
Melissa K. Norris

Follow me:

  • Start Here
  • Courses
  • Academy
  • Contact
Log In

Articles

  • Gardening
  • Homesteading
  • Recipes
  • Lifestyle
  • DIY

Podcast

  • Orchard Planning to Keep Pests Out (Live Coaching Call)
  • How to Boost Your Immune system (10 Easy Ways)
  • Homesteading With Special Needs Children
  • Seventh-Year Land Sabbath and Bread Baking Tips (Live Coaching Call)
  • Must-Have Pantry Items For Long-Term Storage

Books

  • Everything Worth Preserving
  • The Family Garden Planner
  • Hand Made
  • The Made From Scratch Life

Education

  • Organic Gardening Workshop
  • Home Fruit Preservative Canning e-course
  • Home Canning With Confidence
  • Homemade Bread & Baking Class
  • Natural Homemade Bath and Beauty
  • Pioneering Today Academy


Copyright 2023 - Melissa K. Norris Pioneering Today LLC

  • Privacy Policy
  • Affiliate Disclaimer
  • Terms of Use

Melissa K. Norris and Pioneering Today LLC is a participant in the Amazon Services LLC Associates Program, an affiliate advertising program designed to provide a means for sites to earn advertising fees by advertising and linking to Amazon.com.