Melissa K. Norris
  • Start Here
  • Podcast
  • Articles
  • Shop
    • Books
    • Classes
    • General Store
  • In Person Workshops
  • Academy
Log In

12 Ways to Preserve Apples at Home

October 28, 2021 by Melissa Norris 42 Comments

Learn all the fantastic ways to preserve apples at home, including fresh storage, freezing, canning, dehydrating, and more! Here are my favorite 12 ways to preserve apples at home.

Red apples in a wooden crate with more crates stacked behind it.

We've all heard the saying an apple a day keeps the doctor away, but my apples don't grow all year round. My goal is to put up as much food as possible when it's in season to keep our food bill down by increasing our food storage.

It's apple season ya'll (When I get excited a little bit of southern kicks in, it's just how I roll) and I happen to have almost 75 pounds of apples sitting in my kitchen waiting to be preserved into something glorious.

Preserving apples in jars (and having multiple ways to do so) makes my Mason jar loving heart very happy. You ready?

What Can I Do With a Lot of Apples?

Learning how to preserve apples at home is a great, frugal skill to undertake. Anytime you can either harvest, or even buy, food when it's in season, you're getting it at the lowest cost, and when you can learn how to preserve it for the full year – without using icky ingredients – it's a major score!

While most folks think of making applesauce (and applesauce is delicious), there are many more ways to preserve those apples for use all year long. I’m going to share with you how to make apple preserves, apple pie filling, dehydrated cinnamon apples, apple pectin, apple cider vinegar, and more!

Apples in a wooden barrel.

What Are the Best Apples to Preserve?

There are so many varieties of apples, it can be difficult to choose. When canning, preserving or freezing apples, it is best to pick a crisp, firm variety that is both sweet and tart.

The most popular varieties are:

  • Jonagold
  • Braeburn
  • McIntosh
  • Golden Delicious
  • Pink Lady

You can even combine apples of different varieties to create a unique, dynamic flavor.

How to Preserve Apples

My top 11 ways (plus a BONUS) to preserve apples are:

  1. Apple Pie Filling
  2. Dehydrated Apples
  3. Homemade Apple Cider Vinegar
  4. Apple Butter
  5. Homemade Apple Pie Jam
  6. Apple Jelly
  7. Homemade Pectin
  8. Apple Fruit Leather
  9. Storing Fresh Apples (for Long-Term)
  10. Canned Apple Sauce
  11. Freezing Apples
  12. BONUS: Homemade Apple Cider

Apple Pie Filling

Canning apples for pie when I'm short on time (or when apple prices are sky-high) is one of my favorite home-canned apple items to have in the pantry.

Is there anything better than lovely jars of home-canned apple pie filling? Yes, there is, diving headfirst into said jar with a spoon… or no spoon.

Ever notice how apple prices go up during the holidays? Preserving apple pie filling ahead of time saves so much time when I'm busy with Thanksgiving and Christmas. I can bake a homemade pie by just popping open a jar of this filling and pulling out the best flaky pie crust from the freezer…

Here's how to safely can apple apples for pie with my Homemade Apple Pie Filling Tutorial and Recipe.

Homemade dehydrated apple chips with cinnamon sticks and two whole apples sitting on a wooden countertop.

Dehydrated Apple Chips

Want to know how to preserve apple slices? My favorite way is to make cinnamon apple chips. Apples lend themselves well to dehydrating and they're a great addition to a hike or to take on the go for a quick snack.

Simply peel and slice your apples, taking care to cut them relatively the same size and thickness for even drying. The beauty of preserving your apples this way is the cinnamon gives them a brown color so no need to worry about spraying them with lemon juice or citric acid to keep them from browning.

Place prepared apple slices in a container with a lid or a plastic ziptop bag. Sprinkle 1 to 2 Tablespoons of ground cinnamon on top (or to taste), close the container, and shake to evenly coat the apple slices.

Place on dehydrator trays, taking care to leave space around each apple slice for proper airflow. (I've had this dehydrator for years now and feel you can fit more on these square trays.) Set dehydrator to 135 degrees F and dehydrate until fully dry.

Depending upon how thick you cut your apples and the water content, this can be anywhere from 6 to 24 hours, it's best to check on them after 6 hours, then every hour until completely dry. 

How Do You Know When Apples Are Completely Dry?

The best way to determine if your apples are fully dry is by weight. Weigh your empty trays and then weigh your trays when they are full of prepared fruit. Subtract the empty tray weight from the full tray weight to find the weight of your prepared fruit.

Follow this ratio: 20 pounds of prepared apples should dry to 6.5 pounds. Put dehydrated cinnamon apple slices in a sealed container and enjoy!

For long-term food storage, use an oxygen absorber or a vacuum seal attachment on a Mason jar and store in a cool dark area of your home.

A bowl of homemade apple cider vinegar with the mother next to whole apples.

Homemade Apple Cider Vinegar

Did you know you can make homemade apple cider vinegar? Yep, and the bonus is it will be fermented with “the Mother”, just like the good stuff from the grocery store!

The perk of learning how to make homemade fruit vinegar (with any kind of fruit) is that you generally can use the fruit scraps. So for apple cider, you can use the skins and apple cores to make something from a byproduct that may have ended up in the compost pile.

You won't believe how incredibly easy it is. Check out this tutorial with photos and a video on how to make raw apple cider vinegar.

Then put that ACV to work in recipes (like this amazing old-fashioned vinegar pie), catching fruit flies, and for delicious and tangy salad dressings.

Two jars of homemade apple butter in swing-top jars with tags. Sliced and whole apples and cinnamon sticks surround the jars.

Apple Butter

Fruit butter, how I love you. You're thick and spread so nicely on homemade buttermilk biscuits and pancakes.

This recipe uses a special ingredient for a delightful flavor… get your homemade apple butter recipe right here, complete with canning instructions for long-term storage.

Homemade Apple Pie Jam (Low-Sugar Recipe)

Oh yes, apple pie in a mason jar ready to smear on your favorite biscuit, sandwich, cornbread, in between cakes… or, let's be honest, just by the spoonful!

Learn how to make easy apple pie jam.

Apple Jelly in a jar with spoon. Apples, cinnamon sticks and star anise around it.

Apple Jelly

Apple jelly not only looks pretty in jars (especially as gifts around the holidays), but it also only uses two ingredients to make! I'm a fan of simplicity and the fewer ingredients the better.

Check out this great apple jelly recipe and tutorial from my girl Laurie over at Common Sense Homesteading.

A woman crouched down next to an established fruit tree with mountains in the background.

Homemade Apple Pectin

Did you know apples are high in pectin? In fact, my grandmother never used store-bought pectin, she just grated a green apple into her jam or jelly. But you can make and can or freeze apple pectin for use in all your jam and jelly recipes.

Apple fruit leather rolled up and piled on a white plate.

Homemade Fruit Leather

Have you checked out the ingredients in store-bought fruit leather? Yeah, not happening in my house. This one has only 3 ingredients (are you noticing a theme?) and is easy and straightforward to make.

Here's how to make apple and cinnamon fruit leather. But if you're looking for that store-bought thick and chewy consistency (rather than the oftentimes tough and even crispy fruit leather), check out my friend Carolyn's tip (from Homesteading Family) on making homemade fruit leather with a secret ingredient!

Red apples in a wooden crate with more crates stacked behind it.

Storing Fresh Apples (Long-Term Storage)

Apples are one of the cool fruits that can be stored for a long time with very little effort. Have you ever heard the saying one bad apple spoiled the barrel? It's true, and it dates back to when people used root cellars a lot more than they do today.

There are many tips for storing apples for long-term storage. This post by Living Homegrown discusses which varieties store best, how to harvest apples so they last the longest (and which apples should be eaten sooner), and she even covers how to store apples if you don't have a root cellar (she's speaking my language here!).

Here's the low down on storing apples for long-term storage.

Homemade applesauce in a swing top jar with apples around it.

Homemade Applesauce (Plus Canning Instructions)

My tip for applesauce is to not bother cutting or peeling beforehand. I steam my apples whole and then put them through the sieve to catch the seeds and peelings. Easy peasy and a lot less work.

Though Lauren over at Tastes Better From Scratch uses a different method, her tutorial is spot on for learning how to can applesauce.

Freezing Apples

It is handy to have fresh frozen apple slices on hand, especially around the holidays. Freezing apple slices allows you to store apples in the freezer until you are ready to bake them into a delicious apple pie, or maybe a cobbler. 

First wash, peel, and core your apples. Then cut the apples into slices that are relatively the same size and thickness. 

Blanching the apples will preserve the quality and allow you to keep your apples in the freezer for up to a year.

To blanch apples, bring a large pot of water to a boil and prepare a large bowl with cold water plus 1 to 2 cups of ice. Put the apple slices in the boiling water for two minutes. Immediately transfer the apples to the ice water to cool completely. 

When you remove the apple slices from the cold water, let them drain. Line a baking sheet with parchment paper or a Silpat mat and arrange the apple slices on it so that they are not touching. Let them freeze for several hours or overnight in a single layer. 

In the morning, take the apples and seal them in freezer bags. Keep them in the freezer until you are ready to bake with them.

Hot apple cider in a glass with apples and cinnamon around it.

Hot Apple Cider

Bonus! Don't you love a bonus? I do. Like when you put on a pair of pants you haven't worn in a long time and not only do they still fit but you find a $20 in the pocket!

How could I have forgotten to add this one with the original 11? I blame it on the 12 jars of tomato sauce I made and canned today, but really, homemade apple cider is a must. Would someone please bring me a cup and we'll toast to the loveliness of fall and apples?

How do you preserve apples at home?

Canned pumpkin in quart sized Mason jars with a large pumpkin in the background.

More Posts You May Enjoy

  • 8 Ways to Preserve Pumpkins
  • How to Can Rhubarb – 3 Ways to Preserve Rhubarb
  • Pumpkin Applesauce Muffin Recipe with Maple Glaze
  • 8 Tips for Seasonal Living – Homestead Fall Preserving
  • How to Cure Onions for Storage
  • Leather Britches Green Beans (200-Year-Old Preservation Method)
  • 10 Tips for Storing Vegetables Long Term without a Root Cellar
  • 9 Things To Do Now for Ongoing COVID Realities
  • 9 Ways to Preserve Food at Home
  • How to Preserve Meat, Eggs & Dairy

Apple Preserving & Use (Mini Cookbook)

Just put your name and email below and I'll shoot it straight to your inbox! ???

Filed Under: Canning Recipes, Dehydrating, Fermenting, Food Preservation, Food Preservation - Canning, Food Preservation - Other, Fruit, Jam and Jelly, Recipes, Water Bath Tagged With: apples, food preservation, food storage, fruit, fruit jam and jelly, homemade, jam, jelly, pressure canning, water bath

Canned Apple Pie Filling Recipe & Tutorial

October 20, 2020 by Melissa Norris 161 Comments

A homemade apple pie is such a labor of love, but if you have this canned apple pie filling recipe sitting on your pantry shelf, you can have apple pie any day of the week in much less time than from scratch. The reason? All the labor-intensive work is done! Apples are peeled, cored, and sliced, the sauce is thickened and, as long as you have a pie crust ready to go, it's just minutes away from popping into the oven.

Jars of home canned apple pie filling sitting on a counter next to apples, cinnamon sticks and other spices.

I'm a sucker for pie season. Truth be told, I really don't think about pie much unless it's cold outside (OK, maybe I do think about my homemade hand pies – AKA pop tarts – when it's not cold!). There's something about the changing of the weather, the falling leaves, the heavy fog that rolls through the property. It all just beckons a pie baking in the oven.

Am I the only one who thinks this?

That's not to say I don't bake pies year-round, or at least I didn't used to until I started canning my own pie filling.

Learning how to can apple pie filling means you never have to buy apples out of season, when they cost an arm and a leg, and it also means you can have pie whenever you want. Which makes it one of my favorite pantry staples.

Nothing says fall like a good crisp apple. I love the way an apple fits perfectly in the palm of my hand. The way they perfume the air, promising delectable delights. And it means I get to can up a new batch of homemade apple pie filling in my pressure canner.

My father-in-law adores apple pie and it's my responsibility privilege to provide the apple pies for Thanksgiving and Christmas dinner.

My favorite apple in pies and applesauce is the Gravenstein. I planted my own a couple of years back, so it's only producing enough for fresh eating. Thankfully, my parents have an ancient one in their field.

Why I Love This Recipe

  • Quick: If all I have to do is whip up a batch of my grandma's pie crust, which truly is the flakiest and most delicious pie crust recipe you'll ever try, then making a homemade apple pie is quick and simple. (Have you ever tried baking pie crust with home rendered lard you made yourself using my foolproof method? You'll never go back!)
  • Makes a great gift: Having a jar of apple pie filling sitting on the pantry shelf is not only a gift to yourself, but it makes a great Christmas or hostess gift. It's like a hug in a jar, just sitting there waiting for the right time to be opened and enjoyed!
  • You know all the ingredients: Sure, you could go buy a can of apple pie filling at the grocery store, but there's something about knowing that all the ingredients used in your food are healthy and the highest quality available.
  • Store it for up to a year: While fresh apples won't last an entire year, this canned apple pie filling will have no problem sitting on the shelf for a year. Actually, if you follow proper canning protocol, this would likely store longer than a year, but because you'll want to can up fresh with your apple harvest next year, only can how much you'll need for the year and for gifting.
Hands peeling an apple with a bowl filled with chopped apples next to it.

Best Apples for Apple Pie

I always get asked what the best kind of apples are for apple pie and, the truth is, it totally depends on your taste! Some people swear by Granny Smith apples, but I actually like my apple pie a bit sweeter, so I prefer a Gravenstein apple. This is a very old variety of apple.

Because my Gravenstein apple tree isn't very big, I don't usually get enough to make pies, so I'm using Honey Crisp. I also like to use Gala and Fuji, but the trick is harvesting them when they're ripe and still very firm.

You can always adjust the sugar content to your taste and the sweetness of your apples.

Picture of an apple hanging from a branch with sunshine streaming through the background. Text overlay says "5 Tips to Starting an Orchard and Growing Fruit on Your Homestead".

Harvesting the Right Apples

It's important to choose the right apples just at the peak of ripeness. If you're harvesting your apples or picking them from an orchard, you'll know the apples are ripe when a few apples have already fallen to the ground.

The other trick is if you grab an apple that's still on the tree and start twisting it, if it pops off within a couple of twists it's ripe. You don't want to harvest apples too early because they won't have their best flavor, but if you harvest them too late, they won't store as well and you'll be having to work around soft spots and other blemishes.

Likewise, when you get your apples inside and all rinsed off, you want to go through them and pick the very best looking apples.

Save the bruised apples for apple sauce, homemade apple pie jam, apple butter, raw apple cider vinegar, or these other 11 ways to preserve apples at home. But for apple pie, you want those slices beautiful!

Ingredients needed to make apple pie filling.

Cornstarch or ClearJell?

My original apple pie filling recipe used cornstarch, but the cornstarch does break down after time, and is no longer approved for canning due to safety issues. The jars I use for Christmas baking were fine, but by the time I hit spring, they were a mushy runny mess.  They still worked, but the crusts were a bit soggy in the pies.

I've now been using ClearJell® both because it's the only approved canning thickener and because it truly does create a superior end product! Plus, there's too much precious time and work to waste on a recipe that's not safe and doesn't hold up.

Want a canned apple pie filling recipe without ClearJell? Simply omit the ClearJell (follow instructions in the notes of the recipe if not using ClearJell due to headspace difference) and instead, when you open the jar to bake your pie , add a thickener of your choice to the pie filling just as if you were using fresh apples, bake, and enjoy!

Sliced apples in lemon water.

Preparing the Apples

Before you begin peeling and slicing your apples, have a large bowl filled with water and some lemon juice. This will keep the apples from turning brown.

There's nothing wrong with brown apples and it won't affect the flavor, it's just that they'll look prettier in your jars once you've canned them if they don't oxidize.

Peeling and coring the apples is much easier when using a hand cranked apple peeler and corer , but I actually prefer to hand peel and hand slice my apples because the hand-cranked kitchen gadget I have actually slices the apples too thin for apple pie.

In fact, I used to can my filling this way, but in my experience, the apples broke down too much and resulted in a mushy apple pie filling (no one wants mushy apples in their apple pie!). So save the peeler and corer for those apples that'll be turned into applesauce (and then used in these homemade pumpkin applesauce muffins!

Trust me, it's worth the extra work to do it by hand.

A woman dumping apples into a pot of boiling water on the stove.

Blanching Apples

Blanching your apples is an important step because apples have a lot of oxygen in them. When you can your apple pie filling, that air will want to escape and you'll end up with siphoning of your jars which can lead to seal failure.

Also, your apples will shrink as that oxygen escapes during the canning process so you'll have jars that aren't full. I've done both raw pack apple pie filling and hot pack apple pie filling, the hot pack method, though it takes an extra step, is worth every bit of effort.

Blanch your apples, six cups at a time, in boiling water for one minute. Once they're done you can remove them with a slotted spoon to a large bowl.

If you're blanching your apples in batches, you'll want to keep the apples warm, so place a lid over the bowl (or place a cookie sheet over the top like I do!).

Mason jars filled with apple pie filling sitting in a steam canner.

Prepare Your Canner

Most canners can only fit up to 7 quart jars at a time, but I usually like to can about 4 quarts at a time. This allows me to have enough filling for four pies, but it doesn't take up too much of my day.

While you're blanching your apples, go ahead and bring the water in your canner up to 180 degrees F. This is a hot-pack recipe, so you want all your ingredients and supplies hot when you start canning

Prepare Your Jars

Wide mouth quart jars work best for this recipe, but narrow mouth can be used as well.

Wash your jars with warm soapy water, then either keep them in a sink filled with hot water or if you're using a steam canner like I am, place them on the rack above the hot water to keep them warm.

Apple pie filling in a large pot.

Canned Apple Pie Filling Recipe

(Adapted from Ball Complete Book of Home Preserving )

  1. With your prepared and blanched apples keeping warm in a bowl, add 3 & 3/4 cups water to a large stainless steel pot.
A woman removing blanched apples from a large pot on the stove.

2. Add in the sugar, spices, and ClearJel® and bring to a boil over medium-high heat (don't use a hard boil). Stirring constantly, cook until it thickens and bubbles. Add lemon juice and boil for 1 minute more, constantly stirring.

Apple pie filling in a large pot.

3. Remove from heat and fold in apples. Ladle apple pie filling into warm prepared jars, a canning funnel makes this way easier, let me tell you.

A woman ladling apple pie filling into a mason jar.

4. Leave 1-inch headspace, run a spatula down the inside of the jars to remove air bubbles. Wipe rim with a damp clean towel. Center lid and screw bands down until tight.

A woman's hand measuring the head space in a mason jar filled with apple pie filling.

5. Place jars filled with apple pie filling in a hot water bath for 25 minutes.

Mason jars filled with apple pie filling sitting in a steam canner.

6. Turn off the heat, remove the lid, and let sit for 5 minutes.

7. Using a jar lifter, carefully remove hot jars to a towel and allow it to cool without moving overnight.

A jar lifter setting a jar of canned apple pie filling onto the counter.

8. Remove bands, check seals, wipe down outside of the jar, and store in the pantry, out of direct sunlight for up to 1 year.

Altitude adjustment: If you're 1,000 to 3,000 feet above sea level, increase processing time by 5 minutes (30 minutes total), 3,001 to 6,000 feet above sea level, increase processing time by 10 minutes (35 minutes total).

Apple Preserving & Use Mini Cookbook

Just put your name and email below and I'll shoot it straight to your inbox! ???

I have to confess, I licked the side of the syrup pot before washing. We have to taste test right? It was soooo good.

How to Bake Your Pie

When ready to bake your pie, pour one-quart apple pie filling into an 8 or 9-inch pie plate lined with pie pastry (don't forget to use my grandmother's flaky pastry recipe that takes less than 15 minutes to make).

Arrange the top crust over the pie filling and cut slits for steam to escape. Crimp the edges, and bake at 400 degrees F for 50 minutes.

Alternately, this filling works great for a homemade apple crisp! Just use your favorite crumble recipe and bake!

A jar of canned apple pie filling sitting in a cast iron skillet.

Apple Pie Filling FAQs

Can You Pressure Can Apple Pie Filling?

No. I used to pressure can my apple pie filling, but without being able to find an approved tested time for pressure canning, I only water bath process my pie filling now for safety.

Why Didn't My Recipe Make 4 Quarts?

Each apple variety (and even within the same variety) has a different water content, so once you've blanched your apples, you may end up with fewer apples. You haven't done anything wrong, this is just the way it goes when preserving your own food.

Can I Adjust the Sugar?

Yes, the sugar in this recipe is for flavor only and does not affect the canning process. You can scale the sugar up or down according to your preference

How do I Adjust for Altitude?

If you're 1,000 to 3,000 feet above sea level, increase processing time by 5 minutes (30 minutes total), 3,001 to 6,000 feet above sea level, increase processing time by 10 minutes (35 minutes total). All other steps remain the same.

Other Preserving Recipes:

  • Low Sugar Apple Pie Jam
  • How to Can Apple Butter
  • 11 Ways to Preserve Apples at Home
  • How to Make Raw Organic Apple Scrap Cider Vinegar
  • How to Can Pears the EASY Way
Jars of home canned apple pie filling sitting on a counter next to apples, cinnamon sticks and other spices.

Canned Apple Pie Filling

Melissa Norris
Follow this easy apple pie filling recipe and can it at home to have it ready and waiting on your shelf for a quick dessert anytime of the year.
3.97 from 99 votes
Print Recipe Pin Recipe
Prep Time 20 mins
Cook Time 25 mins
Course Dessert
Cuisine American
Servings 4 Quarts
Calories 753 kcal

Ingredients
  

  • 12 cups apples peeled, cored, and sliced
  • 2 3/4 cups raw sugar
  • 3/4 cup Clear Jel. See notes if omitting
  • 1 teaspoon cinnamon
  • 1/2 teaspoon nutmeg
  • 1/2 teaspoon ginger
  • 3 3/4 cups water
  • 1/2 cup lemon juice

Instructions
 

  • Place peeled, cored, and sliced apples in boiling water for 1 minute, working 6 cups of apples at a time.
  • Remove apples with a slotted spoon and place in a bowl. Cover to keep warm.
  • In a large stainless steel pot, combing sugar, ClearJel®, spices, and water. Bring to a boil over medium-high heat (don't use a hard boil), stirring constantly, and cook until it thickens and bubbles.
  • Add lemon juice and boil for 1 minute more, constantly stirring.
  • Remove from heat and fold in apples.
  • Ladle apple pie filling into warm prepared jars. Wide mouth jars work best for this recipe, but narrow can be used.
  • Leave 1 inch headspace, run a spatula down the inside of the jars to remove air bubbles.
  • Wipe rim with a damp clean towel. Center lid and screw bands down until tight.
  • Place jars filled with apple pie filling in  a hot water bath for 25 minutes.
  • Turn off heat, remove lid, and let sit for 5 minutes.
  • Using a jar lifter, carefully remove hot jars to a towel and allow to cool without moving over night.
  • The next day, check seals, remove bands, wipe down outside of jar and store in out the pantry of direct sunlight for up to 1 year.

Video

Notes

Altitude adjustment: If you're 1,000 to 3,000 feet above sea level, increase processing time by 5 minutes (30 minutes total), 3,001 to 6,000 feet above sea level, increase processing time by 10 minutes (35 minutes total).
Processing instructions WITHOUT ClearJel: To make this without ClearJel, omit, and fill jars to a 1/2 inch headspace and process for 30 minutes in a steam canner or hot water bath. At baking time, drain 1/3 cup of the liquid from the jar into a small saucepan, whisk in 3 Tablespoons cornstarch until combined. Add rest of jar and bring to a boil over medium-high heat. Simmer for 1 minute. 

Nutrition

Calories: 753kcalCarbohydrates: 192gProtein: 1gFat: 1gSaturated Fat: 1gSodium: 19mgPotassium: 473mgFiber: 9gSugar: 176gVitamin A: 203IUVitamin C: 29mgCalcium: 51mgIron: 1mg
Keyword apple pie filling, how to can apple pie filling
Tried this recipe?Let us know how it was!

Filed Under: Food Preservation, Food Preservation - Canning, Fruit, Jam and Jelly Tagged With: apple harvest, apple pie filling, fruit jam and jelly, homebaked, homesteading, how to can apple pie filling, how to can apples, preserving apples

Apple Pie Jam Low Sugar Recipe

October 11, 2016 by Melissa Norris 52 Comments

This apple pie jam recipe is seriously the next best thing to apple pie filling. Except, dare I say it, maybe better because one can smear it on just about anything and not have to wait for said apple pie to bake? Okay, dare accepted, I said it.Seriously, apple pie jam is my new… jam.

I first came across this ball apple pie jam recipe in the Ball Complete Book of Home Canning but you guys, 9 cups of sugar to 6 cups of apples, we don't have to be a math major but that is just wrong. There should never be more sugar than fruit, really, there should never be as much sugar as fruit either.

Good news, I did the alterations and now you can have your apple pie jam and eat it too, without the loads of sugar. (And while we're on the subject, here is a Strawberry Jam without the sugar too.)

One of the beautiful things about Pomona's Pectin (and no, they've never paid me a dime or sent me free product, but if they're reading this, I'm totally game) is it doesn't require copious amounts of sugar to set like traditional pectin. It also doesn't have a lot of questionable ingredients like many brands that are derived from highly GMO crops. Pomona's website states it's made from dried citrus peels, not corn or apples, and is GMO free.

My other favorite part, I can do multiple batches of jam from one box of pectin and I can make them low sugar or sugar free (yep, totally true) because Pomona Pectin uses calcium water to get the set, not sugar.

How to Make Apple Pie Jam 

Homemade apple pie jam low sugar style, the perfect way to preserve your apples. This is one of the best jams, all the flavor of apple pie without the bake time!

Peel, core, and chop up 8 cup of apples. I prefer to use a sweet apple so I don't need to add as much sugar. My favorite apple for baking and cooking is a Gravenstein and that's what you see featured here. Place it in a big old stainless steel pot and add 8 Tablespoons bottled lemon juice and 1 cup water. Bring to a boil and cook for 10 minutes until apples are soft.

Add 4 teaspoons of calcium water (comes in the Pomona Pectin and activates the pectin). Boil for 1 more minute.Homemade apple pie jam low sugar style, the perfect way to preserve your apples. This is one of the best jams, all the flavor of apple pie without the bake time! This is one canning recipe you've got to grabAdd your spices and the sugar mixed with the powdered pectin. Return to a boil and stir constantly (because burnt sugar is so not wanted here) for 2 minutes. You'll see and feel the mixture start to thicken up. Take it off the heat.Homemade apple pie jam low sugar style, the perfect way to preserve your apples. This is one of the best jams, all the flavor of apple pie without the bake time! This is one canning recipe you've got to grab

Pour into clean canning jars to a 1/4 inch headspace. Remove air bubbles and add more jam if needed to keep the headspace.

Place in a water bath canner, making sure the water level is 1 inch above the surface of the jars and process jars for 10 minutes. Remember, don't start your time until the water is at a full boil.

Turn off heat and remove the canner lid, after 5 minutes remove jars to a towel covered counter top and let cool. Check seals after 24 hours, remove bands and wipe down the surface of the jars and store in the pantry.

While I've already made 4 batches of this darling (if you're on my Christmas list, maybe only make 1 batch as I've got ya covered) I still have quarts of this true home canned apple pie filling recipe because a girl can never have too many Mason jars filled with food on her shelf… or too many apple pies, right?

Options for Apple Pie Jam Canning Recipe

You can use 3/4 cup of finely chopped dried cranberries. Add them with the calcium water and spices.Homemade apple pie jam low sugar style, the perfect way to preserve your apples. This is one of the best jams, all the flavor of apple pie without the bake time! This is one canning recipe you've got to grab

Apple Pie Jam Low Sugar Recipe

Melissa Norris
This easy apple pie jam recipe is delicious and low sugar, so the apple flavor and spices shine
4.37 from 11 votes
Print Recipe Pin Recipe
Prep Time 20 mins
Cook Time 10 mins
Servings 3 pints

Ingredients
  

  • 8 cups peeled chopped, and cored apples
  • ¾ cup dried cranberries optional
  • 8 tablespoons bottled lemon juice
  • 1 cup water
  • 4 teaspoons calcium water
  • 4 teaspoons powder pectin
  • 1 teaspoon cinnamon
  • ½ teaspoon nutmeg
  • 2 cups sugar

Instructions
 

  • Peel, core, and chop up 8 cup of apples. I prefer to use a sweet apple so I don't need to add as much sugar. My favorite apple for baking and cooking is a Gravenstein and that's what you see featured here.
  • Place it in a big old stainless steel pot and add 8 Tablespoons bottled lemon juice and 1 cup water. Bring to a boil and cook for 10 minutes until apples are soft.
  • Add 4 teaspoons of calcium water (comes in the Pomona Pectin and activates the pectin). Boil for 1 more minute.
  • Add your spices and the sugar mixed with the powdered pectin. Return to a boil and stir constantly (because burnt sugar is so not wanted here) for 2 minutes. You'll see and feel the mixture start to thicken up. Take it off the heat.
  • Pour into clean canning jars to a ¼ inch headspace. Remove air bubbles and add more jam if needed to keep the headspace. Place in a water bath canner, making sure the water level is 1 inch above the surface of the jars and process jars for 10 minutes. Remember, don't start your time until the water is at a full boil.
  • Turn off heat and remove the canner lid, after 5 minutes remove jars to a towel covered counter top and let cool. Check seals after 24 hours, remove bands and wipe down the surface of the jars and store in the pantry.
  • You can use ¾ cup of finely chopped dried cranberries. Add them with the calcium water and spices.
Keyword apple pie jam recipe, low sugar apple pie jam
Tried this recipe?Let us know how it was!

Filed Under: Canning Recipes, Food Preservation, Food Preservation - Canning, Fruit, Jam and Jelly, Recipes, Water Bath Tagged With: canning recipes, food preservation, fruit jam and jelly, jam, More Canning, water bath

Sweet and Spicy Plum Sauce Canning Recipe

August 12, 2015 by Melissa Norris 22 Comments

This plum sauce recipe is the perfect sweet and spicy recipe to can up for all year eating. Easy step by step tutorial, easy, even if you're new to canning.

This easy sweet and spicy plum sauce recipe is what you make when your sweet neighbors show up with a box of beautiful yellow plums. Or, it's the recipe you print out and deliver with the plums you might be gifting to someone else because you have a plethora. Or… okay, you get the point, however you got your plums, this is the sauce to make.

It would be delicious with purple plums, but it works especially well with yellow plums, because I've found (maybe it's just my misfortune) that the yellow plums around here don't have as much flavor as the purple plums. But, I refuse to let any produce go to waste, so this sauce is the one for me right now. Plus, my son has developed a strong craving for any type of sweet and spicy sauce on chicken, and we need to keep those growing boys fed, right? Well, the already grown ones, too.

Resources for Sweet and Spicy Plum Sauce

Food processor– this little beauty literally shaves hours off of prep time when canning. Not to mention all other forms of chopping, slicing, grating, and nut butter making. You can try a blender, but beings we don't want it totally pureed, I highly recommend one of these, one of the best Christmas gifts I ever received.

Ball Book of Complete Canning– Whenever I'm on the hunt for a new canning recipe, this is one of the first places I turn.

Water Bath Canner– Can you believe I still borrow my mother's? Yep, I totally need to get one of my own, because I realized I'd “given it back” to her and had to run and down and get it with five minutes left on the cooking time of the sauce.

How to Make Sweet and Spicy Plum Sauce

This plum sauce recipe is the perfect sweet and spicy recipe to can up for all year eating. Easy step by step tutorial, easy, even if you're new to canning.

Begin with rinsing off your plums. We need 10 cups worth of pitted (this was the longest part of the whole recipe) and finely diced plums. I just used my fingers and squished the pit out, as these were very ripe. I'm sure there's a less messy way to do it, but sometimes, our hands really are the best tool.

This plum sauce recipe is the perfect sweet and spicy recipe to can up for all year eating. Easy step by step tutorial, easy, even if you're new to canning.

After you've got your plums prepped, diced (whirled in the food processor which makes it kind of runny) and measured, dump the rest of the ingredients in a heavy bottom stock pot. Using a thick bottomed (yes, that phrase made me giggle, too) keeps your sauce from scorching. Put all the rest of the ingredients, minus the plums, in and bring to a boil.

Add your plums and return to a simmer. Let simmer for 1 hour and about 40 minutes, until sauce has reduced and thickened up some. You can see the line in the above photo of when I started the plum sauce and when it was done reducing at the end of the time. 

Ladle your sauce into clean Mason jars to a 1/2 inch headspace.  Take a spatula or butter knife and run around the inside of the jar to remove air bubbles. Wipe rim of jar with clean damp towel. Place on lids and tighten down bands to finger tip tight.

Process in a hot water bath for 20 minutes. Make sure water covers the jars by at least an inch. Begin processing time when water comes to a full boil. When done, remove canner from heat and remove lid. Allow to cool for 5 to 10 minutes before using a jar lifter to remove the jars. Place jars on a towel folded in thirds in a draft free area and allow undisturbed for at least 12 hours. Check to make sure jars sealed and then wipe down jar and store in a dark cool pantry shelf until consuming!

The recipe yielded 6 cups for me, though the original said 4….

Grab your free copy of the Ultimate Home Food Preservation Guide

Recipe adapted from Ball Book of Complete Canning

Sweet and Spicy Plum Sauce Canning Recipe

MelissaKNorris adapted from Ball Book of Complete Canning
3.78 from 9 votes
Print Recipe Pin Recipe
Prep Time 30 mins
Cook Time 2 hrs
Total Time 2 hrs 30 mins
Servings 6 cups

Ingredients
  

  • 2 cups lightly packed brown sugar
  • 1 cup organic evaporated cane juice
  • 1 cup apple cider vinegar
  • 3/4 cup finely chopped onion I used walla walla sweet
  • 2 Tablespoons finely chopped jalapeno peppers I left the seeds in for some heat
  • 2 Tablespoons mustard seeds
  • 1 Tablespoon canning salt
  • 2 cloves finely chopped garlic
  • 1 Tablespoons finely chopped gingerroot
  • 10 cups finely chopped pitted plums

Instructions
 

  • After you've got your plums prepped, diced (whirled in the food processor which makes it kind of runny) and measured, dump the rest of the ingredients in a heavy bottom stock pot. Using a thick bottomed (yes, that phrase made me giggle, too) keeps your sauce from scorching. Put all the rest of the ingredients, minus the plums, in and bring to a boil. Stir often, sugar scorches easily.
  • Add your plums and return to a simmer. Let simmer for 1 hour and about 40 minutes, stirring every now and then, until sauce has reduced and thickened up some. You can see the line in the above photo of when I started the plum sauce and when it was done reducing at the end of the time.
  • Ladle your sauce into clean Mason jars to a 1/2 inch headspace. Process in a hot water bath for 20 minutes.
Tried this recipe?Let us know how it was!

Filed Under: Canning Recipes, Food Preservation, Food Preservation - Canning, Fruit, Jam and Jelly, Recipes, Water Bath Tagged With: canning recipe, fruit jam and jelly, home canning, More Canning, plum sauce, water bath

10+ Easy Home Canning Recipes

June 4, 2014 by Melissa Norris 9 Comments

10+ easy home canning recipes. Perfect to take advantage of coming summer harvests to stock y our pantry and build your home food storage. Which is your favorite?

Am I the only one always on the hunt for awesome canning recipes? I've rounded up my favorite 10+ easy home canning recipes for you. I have a love affair with canning. Seriously, wholesome food, ready to go meals with just a pop of the lid, food storage in case of emergency or financial crisis, frugal (as in most of the time free except for the cost of the lid with our garden), and fun. What's not to love?

Yep, I said it, fun. I know it's some work, but I truly enjoy it. I'm gonna let you in on a secret, I sometimes turn on the light in our pantry and gaze at my rows of home canned goodies because I think they're pretty. You don't do the same thing? No judgement, folks, no judgement.

[Read more…]

Filed Under: Canning Recipes, Food Preservation, Food Preservation - Canning, Fruit, Jam and Jelly, Pickles, Pressure Canning, Recipes, Water Bath Tagged With: fruit jam and jelly, pickles, pressure canning, water bath

Red Pepper Garlic Jelly Recipe

October 30, 2013 by Melissa Norris 7 Comments

This Easy Red Pepper Jelly recipe is my favorite savory jelly recipe. There's nothing like a bit of sweet heat and this homemade red pepper garlic jelly recipe delivers both. May through November is jam and jelly making season at our house. I can't remember the last time I've purchased jam or jelly in the store, it's been years for sure.

Around the holidays there is nothing better than pulling out jars of homemade goodness to share with guests. Plus, the work is already done so it makes for fast serving during a normally busy time of year.

This Red Pepper Jelly is perfect on top of a brick of cream cheese with crackers for an easy appetizer or an excellent glaze for meatballs and chicken. Or smeared on toast. Pretty much anyway you can think of, it's good!

Red Pepper Jelly Recipe, easy delicious appetizer over cream cheese or the perfect glaze for meatballs or chicken

How to Make Red Pepper Jelly 

1 cup minced red bell pepper

1/4 cup deveined and minced jalapenos (or pepper of your choice)

5 cloves finely chopped garlic

1 and 1/3 cups vinegar

2 and 1/3 cups sugar or 1 and ½ cups honey (I use raw organic evaporated cane juice)

1 and ½ teaspoons pectin powder (I only use Pomona’s Pectin, read more about how it works, what it is, and why I love it here.)

2 teaspoons calcium water (comes with One 1 oz Pomona's Universal Pectin)

Prepare hot water bath canner and begin to warm water. Wash and rinse jars in hot soapy water right before filling with hot jelly so the glass is warm.

Place peppers, garlic, and vinegar in a sauce pan. Add calcium water and stir well. Measure ½ cup of sugar into a bowl with pectin and combine.

Bring sauce pan contents to a boil. Add pectin-sugar and stir vigorously for 2 minutes. Add remaining sugar and stir until dissolved. Return to a boil and remove from heat.

Fill warm jars with red pepper garlic jelly within a ¼ inch from the top. Wipe rims clean and put on lids and bands.

Place jars in a hot water bath and process for 10 minutes. Allow to cool on a towel in a draft free area for 24 hours. Check seals and store in a cool dark place. If any jars have not sealed, put in fridge and use within 3 weeks.

Note: Because Pomonas Pectin uses calcium water instead of sugar for the set, you may double or triple this recipe, but make sure you don't alter the ratio of ingredients in anyway.

My favorite recipes using garlic jelly are pairing pouring it over a brick of cream cheese and then making these homemade crackers in 5 minutes as the cracker to dip into it with.

Red Pepper Jelly Recipe, easy delicious appetizer over cream cheese or the perfect glaze for meatballs or chicken

What's some of your favorite holiday recipes? Do you make savory jellies?

Red Pepper Garlic Jelly Recipe

MelissaKNorris
Easy red pepper jelly with pops of garlic for the perfect savory and sweet canning recipe
5 from 3 votes
Print Recipe Pin Recipe
Prep Time 10 mins
Cook Time 14 mins
Total Time 24 mins
Course Condiment

Ingredients
  

  • 1 cup minced red bell pepper
  • 1/4 cup deveined and minced jalapenos or pepper of your choice
  • 5 cloves finely chopped garlic
  • 1 1/3 cups vinegar
  • 2 1/3 cups sugar or 1 ½ cups honey I use raw organic evaporated cane juice
  • 1 ½ teaspoons pectin powder I only use Pomona’s Pectin, read more about how it works, what it is, and why I love it here.
  • 2 teaspoons calcium water comes with One 1 oz Pomona's Universal Pectin

Instructions
 

  • Prepare hot water bath canner and begin to warm water. Wash and rinse jars in hot soapy water right before filling with hot jelly so the glass is warm.
  • Place peppers, garlic, and vinegar in a sauce pan. Add calcium water and stir well. Measure ½ cup of sugar into a bowl with pectin and combine.
  • Bring sauce pan contents to a boil. Add pectin-sugar and stir vigorously for 2 minutes. Add remaining sugar and stir until dissolved. Return to a boil and remove from heat.
  • Fill warm jars with red pepper garlic jelly within a ¼ inch from the top. Wipe rims clean and put on lids and bands.
  • Place jars in a hot water bath and process for 10 minutes. Allow to cool on a towel in a draft free area for 24 hours. Check seals and store in a cool dark place. If any jars have not sealed, put in fridge and use within 3 weeks.
Keyword red pepper jelly
Tried this recipe?Let us know how it was!

Want more savory canning recipes for putting up the harvest? Yes, the answer is always yes.

Try our Spicy Peach Jam Low Sugar & No Store Bought Pectin here

Will you be trying this red pepper garlic jelly? Does anyone else think it looks Christmas in a jar?


Filed Under: Canning Recipes, Food Preservation, Food Preservation - Canning, Fruit, Jam and Jelly, Recipes, Water Bath Tagged With: canning recipes, fruit jam and jelly, holiday baking, Pioneering Today, processed replacements, Red Pepper Garlic Jelly, water bath

How to Make Low Sugar Grape Vanilla Jelly

October 23, 2013 by Melissa Norris 13 Comments

Easy low sugar grape vanilla jelly. Perfect way to put those grapes to use, plus, you get a bonus of vanilla sugar when you're done. Grab this now and get your grape jelly on.

One of the best things about the changing seasons is the new fresh fruits and vegetables that come with them. While we're wrapping up most of the fresh produce for winter around here, I still have grapes to harvest.

We grow two kinds of grapes on our arbor. One is called Interlaken and ripens early in the season. It's a white seedless grape that doesn't get too sweet, but doesn't leave you puckering from the tartness. The other one is called Niagara. It's a cross between Concord and Cassidy grapes, leaving a yellow grape with tiny seeds. I'm not sure if it's our shorter growing season, but even after letting a light frost hit it, they're not very sweet. This makes them a perfect candidate for jelly!

[Read more…]

Filed Under: Canning Recipes, Food Preservation, Food Preservation - Canning, Fruit, Jam and Jelly, Recipes, Water Bath Tagged With: fruit jam and jelly, grape vanilla jelly, jam making, jelly making, More Canning, preserving the harvest, water bath

Pioneering Today-How to Can Peach Salsa

September 4, 2013 by Melissa Norris 17 Comments

How to can fresh peach salsa www.melissaknorris.com Pioneering Today

My father's favorite fruit is peaches, specifically, peach pie. In an effort to make homemade Christmas gifts, I decided to can up some peach pie filling for part of his Christmas gifts. I ended up with one and half boxes of peaches, so after canning seven jars of the peach pie filling, I still had quite a bit left over.

We ate peaches fresh, peaches cooked on the grill with a honey cinnamon glaze (oh so good), peach fruit leather, peach and mint smoothies, and I still had peaches. So I decided to make up a batch of peach salsa. Tomatoes and I have a love hate relationship. I love to eat and cook with them, but they hate to grow in my Pacific Northwest garden, or maybe it's just my garden, not the Pacific Northwest. Some of my neighbors grow gorgeous tomatoes, and while I can grow almost everything else, tomatoes are my one true woe.

[Read more…]

Filed Under: Canning Recipes, Food Preservation, Food Preservation - Canning, Fruit, Jam and Jelly, Recipes, Water Bath Tagged With: fruit jam and jelly, how to can, More Canning, peach salsa, Pioneering Today, water bath, waterbath canning

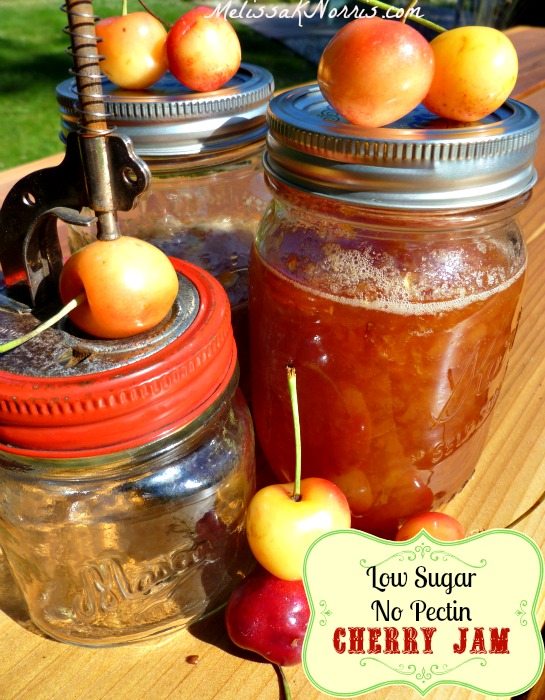
Pioneering Today-Low Sugar No Pectin Cherry Jam

July 5, 2013 by Melissa Norris 17 Comments

While cherries are one of our favorites to eat fresh, you know this pioneer mamma had to put some up into preserves. My low sugar no pectin cherry jam recipe is the way jam should be. High on flavor instead of bucket fulls of sugar.

Want an old-fashioned cherry jam recipe without buckets of sugar and no store bought pectin? Grab this recipe now on how to can low sugar cherry jam like the pioneers did

I had the pleasure of hosting a canning party with another mom and we knocked out two batches of jam and two runs of canned cherries. Not bad considering there were five kids running in and out and we did it in five hours.

We used Rainier cherries, which are considered a sweet cherry. They're actually a cross between a Van and a Bing cherry. Whenever you pick cherries, be sure to leave the stem on, until just ready to use. Once you remove the stem, you allow oxygen into the cherry and it will turn brown and break down faster.

[Read more…]

Filed Under: Canning Recipes, Food Preservation, Food Preservation - Canning, Fruit, Jam and Jelly, Recipes, Water Bath Tagged With: cherry jam, fruit jam and jelly, jam, More Canning, Pioneering Today, preserves, water bath

  • 1
  • 2
  • Next page

Grow Your Own Food In-Person Worksop

Saturday May 20th

$349

An intimate and hands on workshop

At Norris Farmstead

Click Here to Learn More

Want to grow a year’s worth of food?

Get my FREE planting chart!

Know exactly how many plants per person you need to plant with my easy worksheet and chart!
Melissa K. Norris

Follow me:

  • Start Here
  • Courses
  • Academy
  • Contact
Log In

Articles

  • Gardening
  • Homesteading
  • Recipes
  • Lifestyle
  • DIY

Podcast

  • Orchard Planning to Keep Pests Out (Live Coaching Call)
  • How to Boost Your Immune system (10 Easy Ways)
  • Homesteading With Special Needs Children
  • Seventh-Year Land Sabbath and Bread Baking Tips (Live Coaching Call)
  • Must-Have Pantry Items For Long-Term Storage

Books

  • Everything Worth Preserving
  • The Family Garden Planner
  • Hand Made
  • The Made From Scratch Life

Education

  • Organic Gardening Workshop
  • Home Fruit Preservative Canning e-course
  • Home Canning With Confidence
  • Homemade Bread & Baking Class
  • Natural Homemade Bath and Beauty
  • Pioneering Today Academy


Copyright 2023 - Melissa K. Norris Pioneering Today LLC

  • Privacy Policy
  • Affiliate Disclaimer
  • Terms of Use

Melissa K. Norris and Pioneering Today LLC is a participant in the Amazon Services LLC Associates Program, an affiliate advertising program designed to provide a means for sites to earn advertising fees by advertising and linking to Amazon.com.